


Paper Crafts
Easy To Make Origami Paper Plane Craft Tutorial For Kids

This guide shows you how to make an origami paper plane. It’s easy to do and fun for children of all ages. You just need a few folds to make it.
You have been making paper airplanes for a long now. Flying them in class, school hallways, in your house, and in the open air. They land on the floor, in gardens, and sometimes on someone’s head. Sometimes, you use them to send messages. But those were simple paper planes with little definition, this tutorial brings to you a complex and finely defined plane which looks exactly like the real one. You can use colorful sheets to make them and fly them around the house.
How To Make Origami Paper Plane For Kids
Read More: How To Make Sunflower Clock Craft Using Paper
Materials Required
- A Blue Sheet Of Paper
- A Pair Of Scissors
Procedure
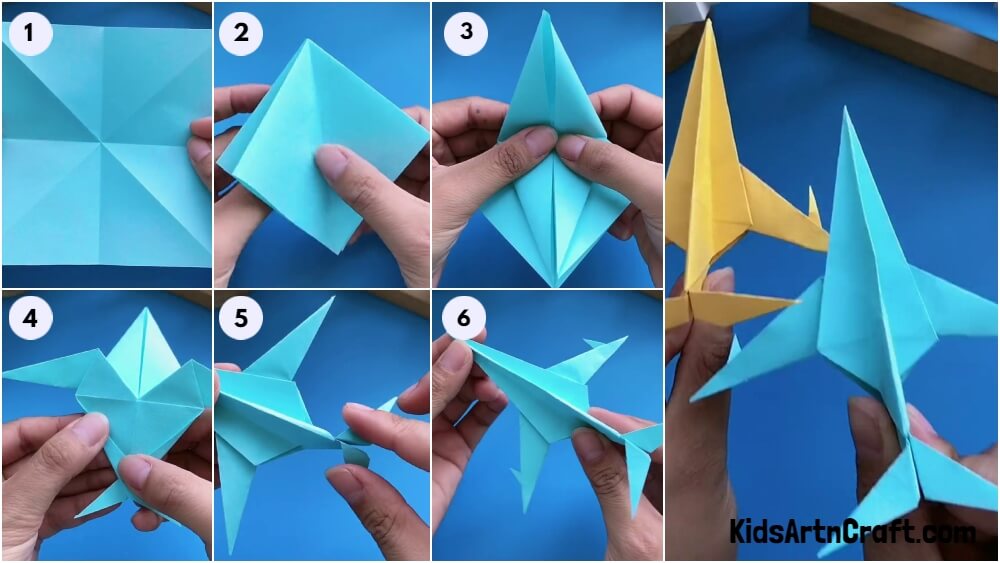
Step 1: Taking a Blue Sheet Of Paper
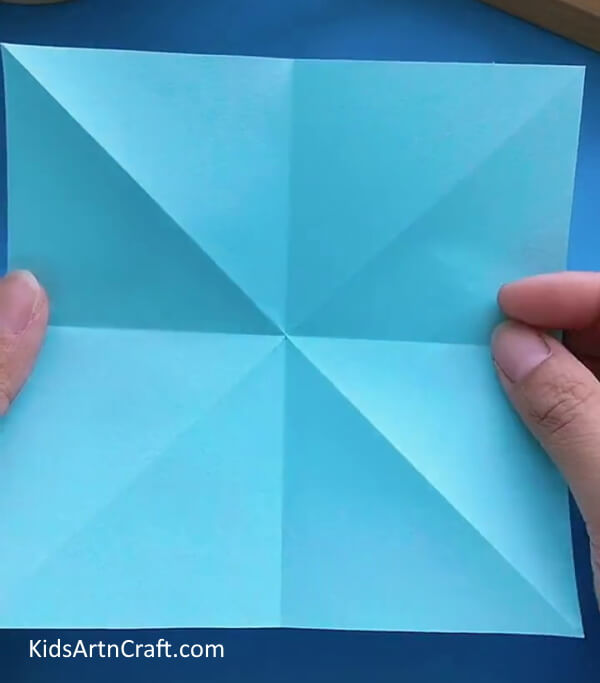
Take a sheet of paper and make a fold to the square sheet from the bottom side to the top side, creating the shape of a rectangle. Now, make another fold to this rectangle from the left side to the right creating the shape of a square again. Finally, make a fold to this smaller square from one corner to the opposite making the shape of a triangle. After completing the folding, open the sheet right back to its original shape. This will make prominent marks on this sheet which we will be needing later.
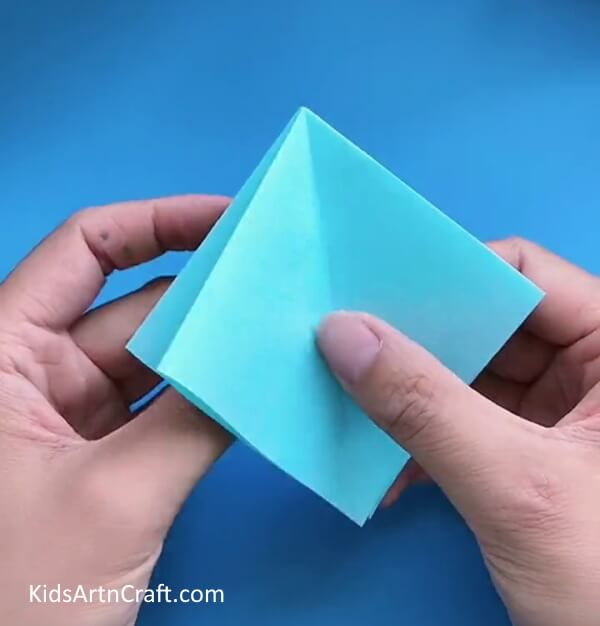
Step 2: Connecting Two Corners

Place the sheet on the table in the shape of a rhombus and pick two opposite corners on horizontal sides, connect them together at the bottom corner, and with your index finger press at the center of the page and the sides of the fold as well.
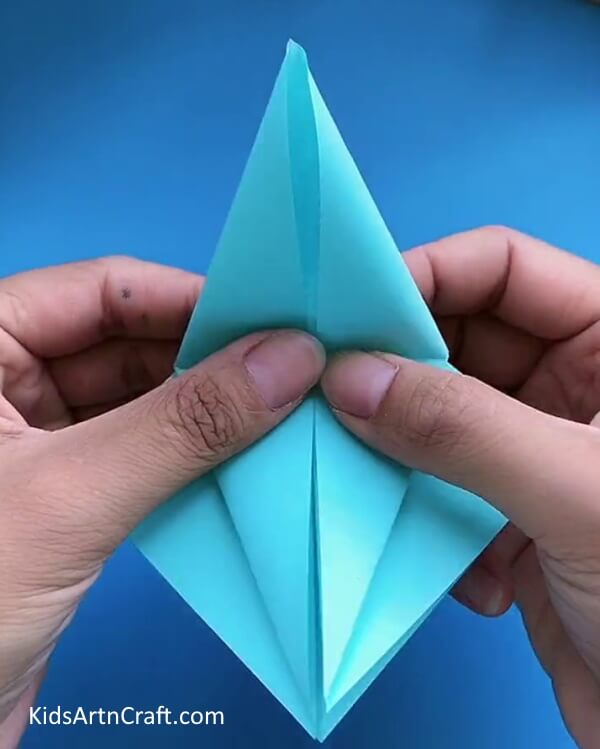
Step 3: Making The Square Shape
Flatten the top surface of this folded sheet and press its sides to carve a sharp square shape out, as shown in the picture below.
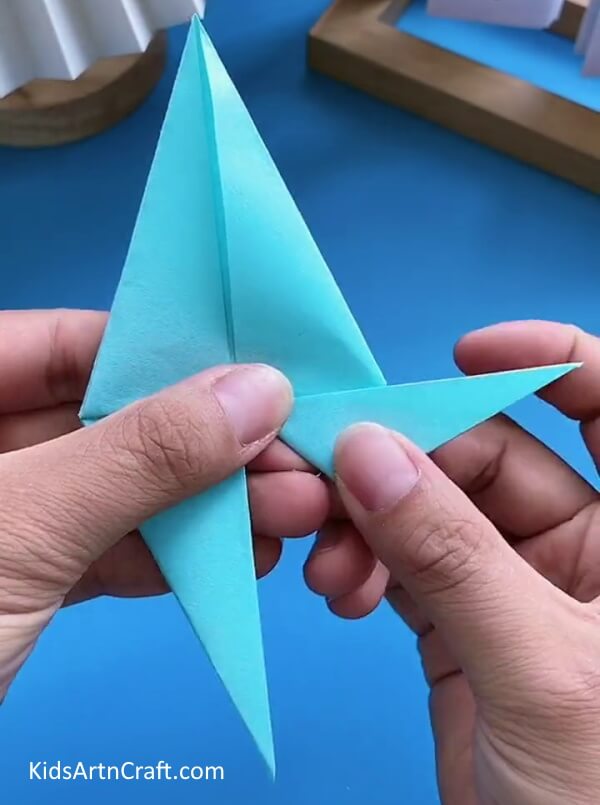
Step 4: Making Many Intricate Folds
Take the open-ended side of the square and fold one side of the corner halfway through the square. Do the same to the other side of the same corner. Only fold the top page layer. Now, turn the square around and make similar two folds but this time with all the page layers left. Unfold the two folds you just made. Only the two not all four. Start widening the pocket at the open ends of the side you unfolded, it will leave you with two flaps. Make two folds on both corner sides starting from the bottom flap of the pocket right up to the top flap, opening the pocket entirely, as shown in the picture below.
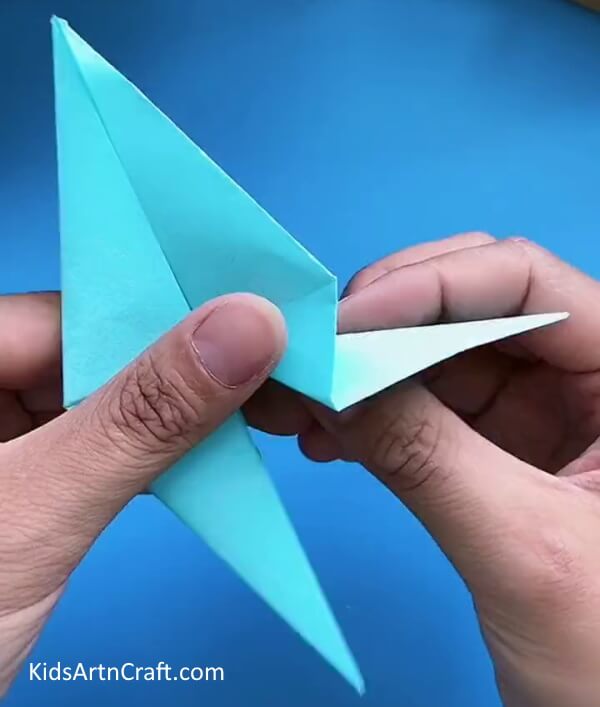
Step 5: Working On The Other Side
Turn the sheet around and repeat the process on this side as well. Press the sheet to lock the shape properly. Take the two pointed ends at the bottom and fold them horizontally. They should create a V shape between them. See the picture below for reference.
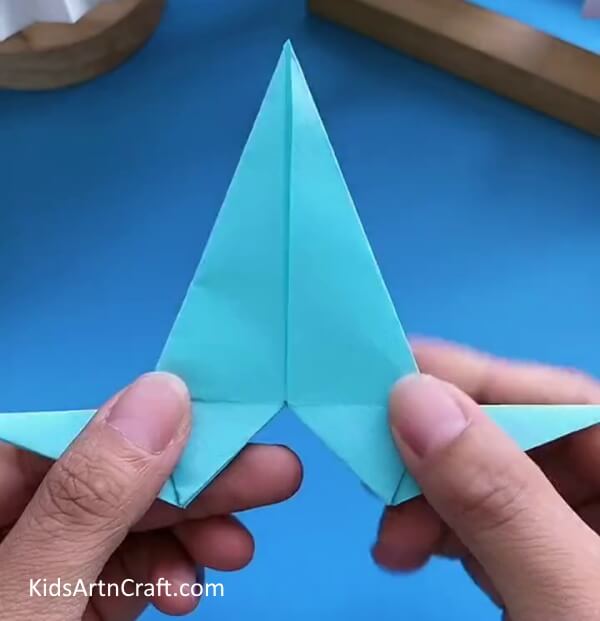
Step 6: Shaping Them Further
Open both the folds you made in the previous step and press on the mark in the mid-section of this open fold as shown in the picture below. This shall make the fold appear like airplane wings.
Step 7: Making Both Wings
Repeat the process on the other open fold as well. This completes the process of making wings.
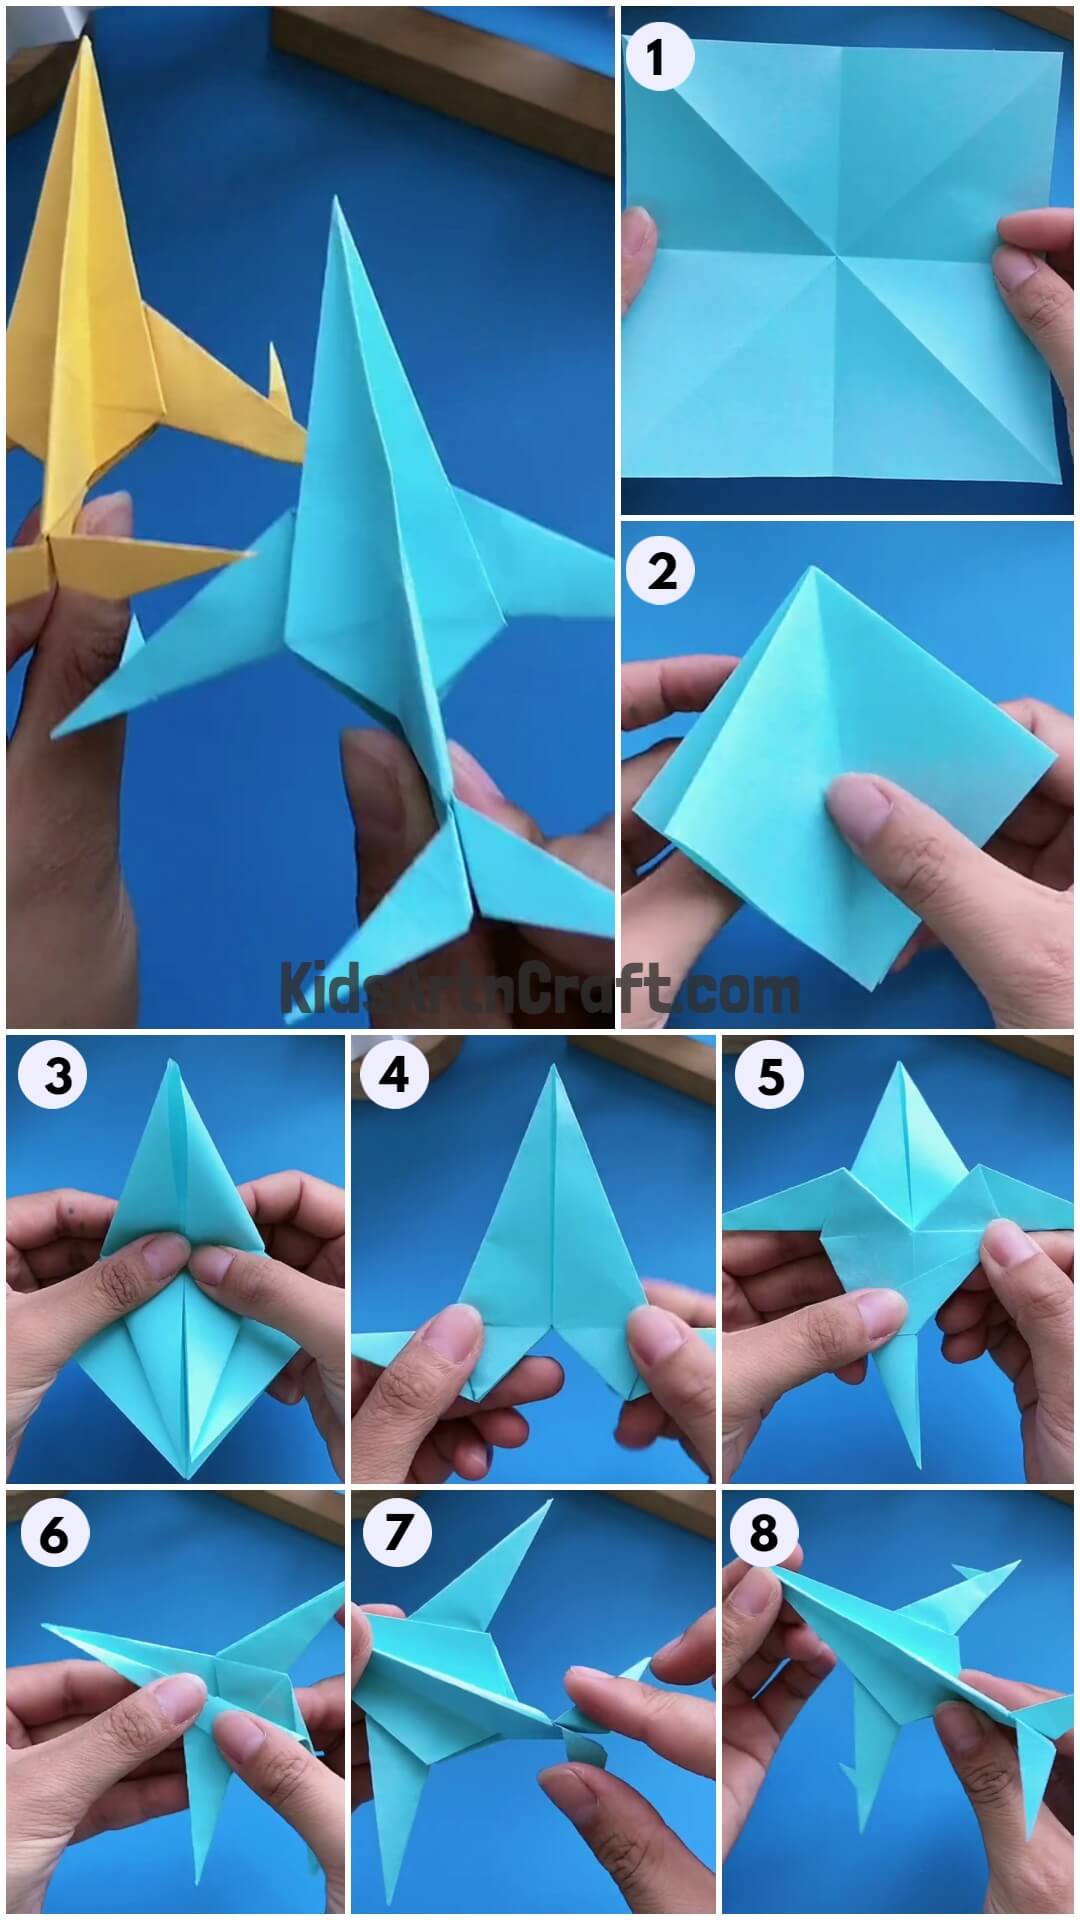
Step 8: Opening The Flaps
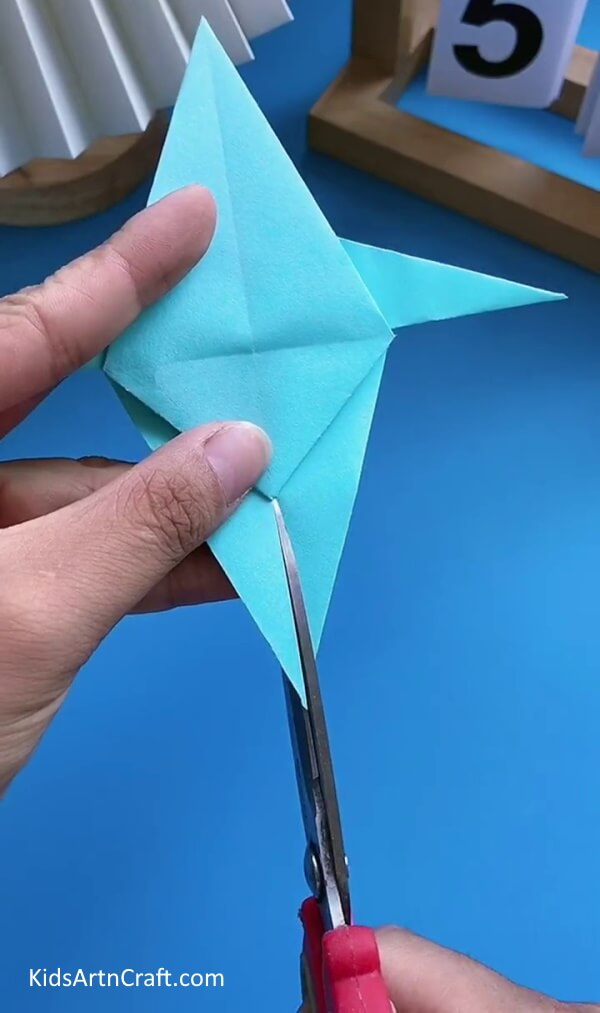
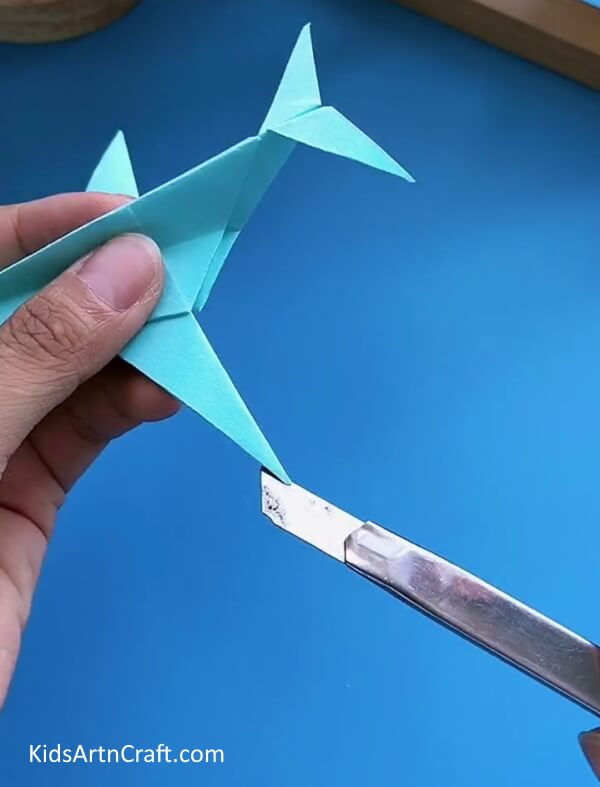
Look at the entire shape. Can you see two pointed flaps? Open them creating a triangle on each side of the wings. Flatten the wings, making them lie on the surface of the flap. Press the mark in the mid-section of the shape again making a fold from side to side. Press on the outer surface of the wings to make it stand. To do that make a fold to the sheet attached and to the surface of the wing right next to it. The small piece that you folded has a side connected to it on the right, make a small inner fold to that as well. Press the wing down in a lying position to flatten it. Turn the shape around and repeat the process on the other wing as well. This time make the inner fold on the right side, making a very pointed end. Open all the folds you made in this step, not messing with marks, and by taking a pair of scissors, make a cut at the bottom pointed corner, as shown in the picture below.
Step 9: Fixing The Cut Sides

Fold the freshly cut piece inwardly on horizontal lines as shown in the image below.
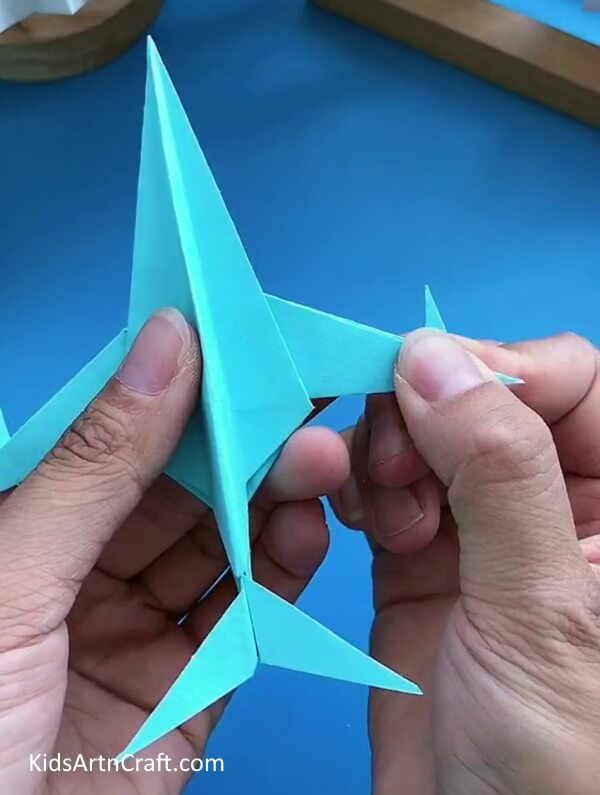
Step 10: Repeating The Process
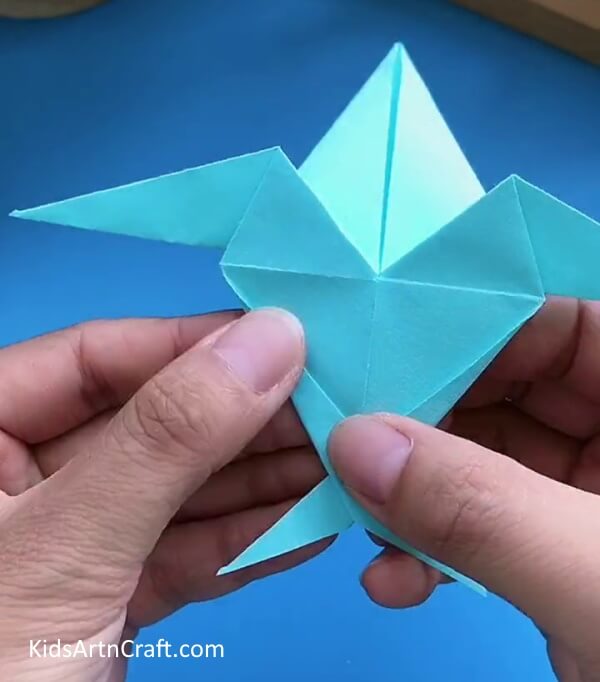
Do the same to the other side as well. Twist both wings once to make them stand parallel to each other in an upward position. This shall form the tail of the plane.
Step 11: Working On The Sides
Fold the shape back in the middle and turn it sideways. Press down to seal the shape.
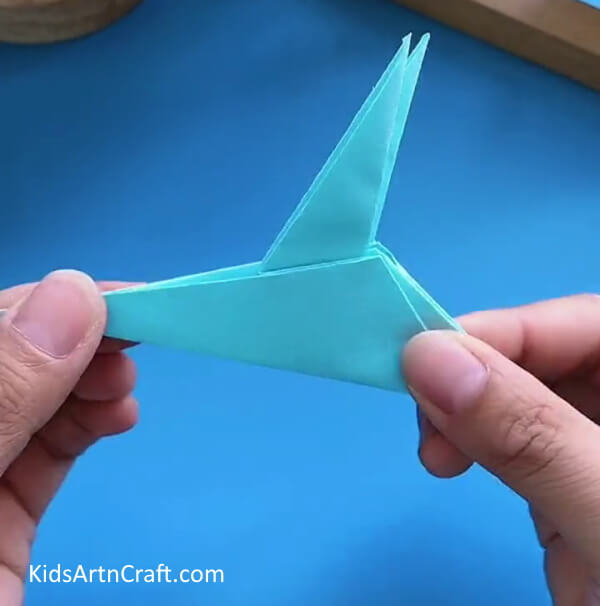
Step 12: Flattening The Wings

Flatten the wings again along with the sides towards the pointed corner. To seal the shape, fold them back making them stand upright. Both the wings should face each other after the completion of this step as shown in the picture below.
Step 13: Final Flattening
Flatten the wings completely this time, making them as straight as a blade. Flatten the standing ends of the tail as well. Refer to the image below for a clear picture.
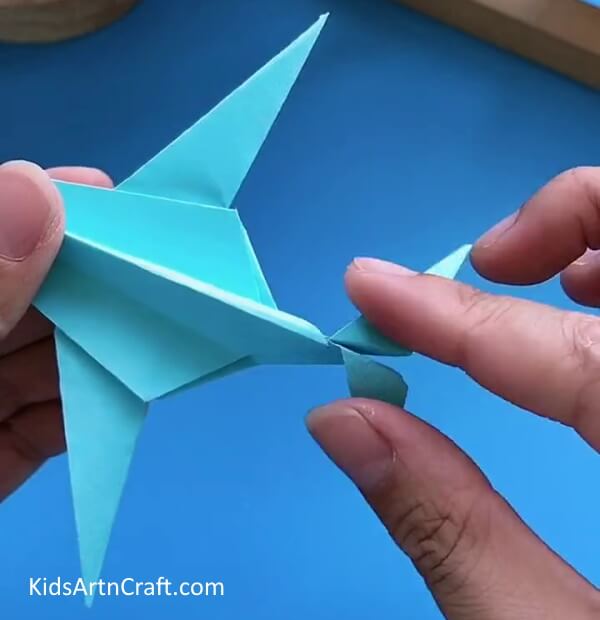
Step 14: Adding Finish To The Wings
With the help of scissors make an incision on the end of the wings right in the middle.
Step 15: Folding The Ends
Take the bottom cut end of this wing and fold it. It should poke out of the wing as shown in the picture below.
Step 16: Completing Both The Wings
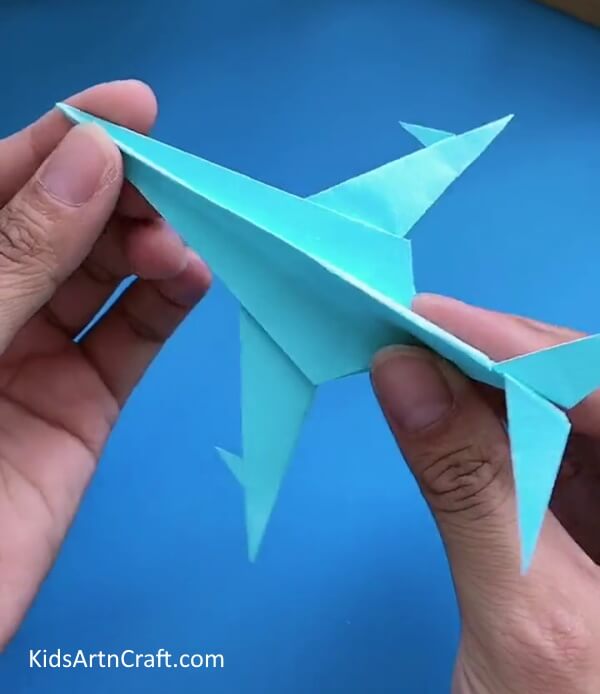
Repeat the previous step on the other wing as well.
Finally Done!

There it is, your better than the original, airplane. You can make many such airplanes in different colors.
This completes today’s long and complicated tutorial. We learned the importance of folding and how it changes the shape of an object in different ways even if done multiple times in a similar fashion. You can use these planes to decorate your room or you can make many of them and compete with your friends in an aircraft race or battle. It’s purely a toy you created through art. It is inexpensive and will furnish your skill in many ways. Keep practicing and working hard and you will surely soar to the heights of your dreams one day. Good luck!
Follow us on Youtube for art and craft tutorials and much more.
More Articles from Kids Art & Craft
- How to Make Paper Flower Craft With Paper Cup
- DIY Paper Flower Craft – Step-By-Step Tutorial
- Colorful Fish Paper Craft To Make With Kids
- Paper Lollipop Craft – Learn to Make Origami Paper Candy with Step-By-Step Tutorial
- Easy Way To Make Paper Stress Relief Flower Craft


