Paper Crafts
How to Make Paper Pumpkin Craft Step by Step Tutorial

Make a beautiful paper pumpkin craft with this easy step-by-step tutorial! Learn how to make this autumn craft with just a few simple materials and be ready to add some autumn flair to your home décor.
This article will show you how to make a fun paper pumpkin craft with just a few simple steps. It’s a great activity for kids and adults alike, and it’s a great way to get creative and add a little bit of Halloween spirit to your home. Follow along to learn how to make your own paper pumpkin!
Pumpkin reminds us of Halloween when it is used as decoration. Let’s make a Paper Pumpkin Craft with a few things like bits of orange paper craft, glue, clay, and some other colored craft papers. This is for an age group from 7 to 10. Let’s begin
Paper Pumpkin Craft step-by-step tutorial

Read More: Summer Paper Fan Step-by-Step Tutorial for Kids
Materials Required
- Craft Paper (Orange, black, and green)
- Glue Stick
- Black Cardboard
- White and Green Clay
- Double-sided Tape
- Green Ribbon
Procedure
Step 1: Starting With Tearing up a Craft Paper Into Pieces


Let’s begin with tearing up the orange craft sheet into bits of paper in order to paste a Pumpkin.
Step 2: Tearing Them As Shown
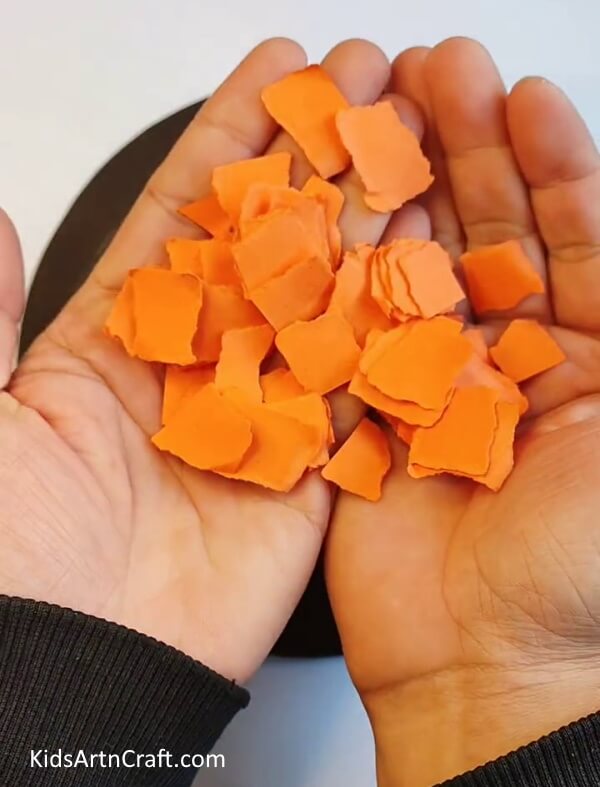

After tearing up the orange craft paper into pieces, you will get something like this as in the picture.
Step 3: Drawing a Pumpkin Outline on a Black Cardboard
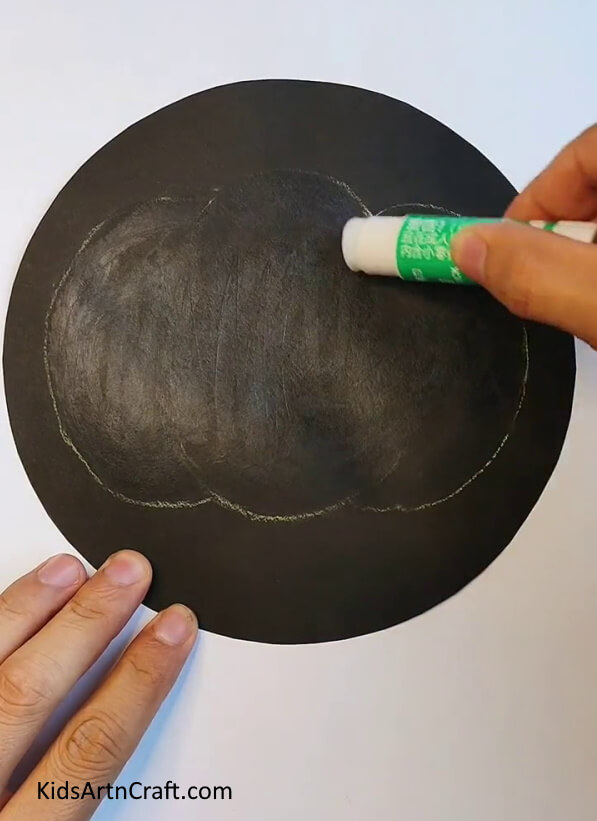

Crab a Black Cardboard or black Craft paper, and draw the outline of a Pumpkin on it, just as shown in the picture. And apply glue inside the outline using a glue stick.
Step 4: Starting a Sticking the Bits of Paper Inside the Pumpkin Outline
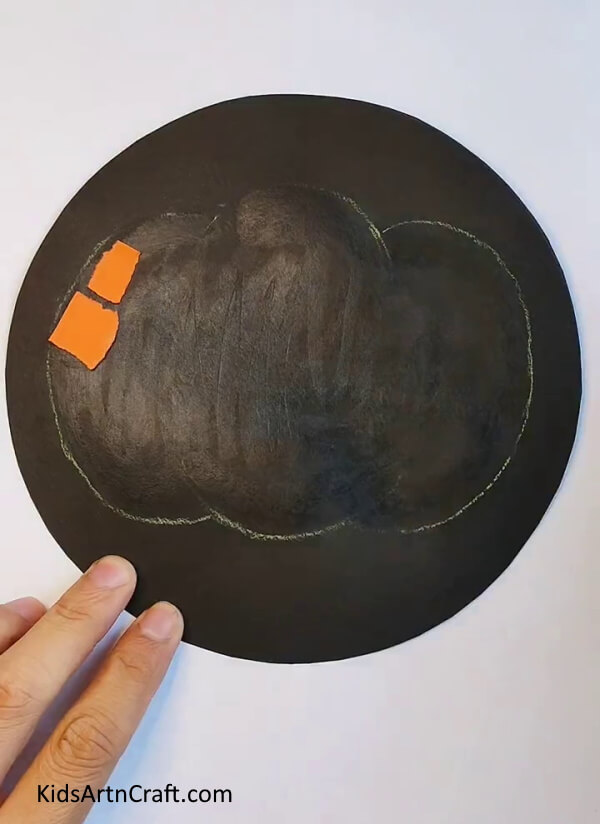

Before the glue dries, start sticking the orange bits of paper inside the Pumpkin outline and make sure to let little space between each piece of paper.
Step 5: Sticking it all Inside the Outline
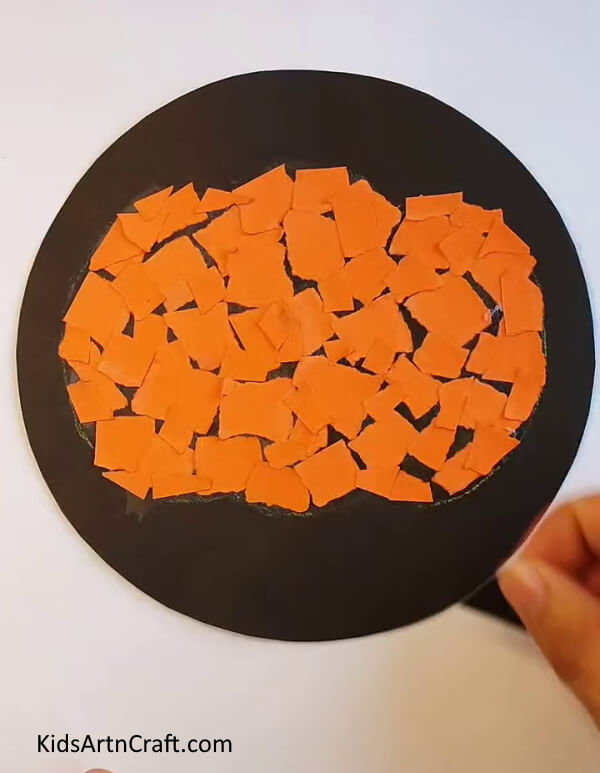

Stick all bits inside the outline Pumpkin until you get something like this as shown in the picture.
Step 6: Sticking a Black Craft Paper as Eyes
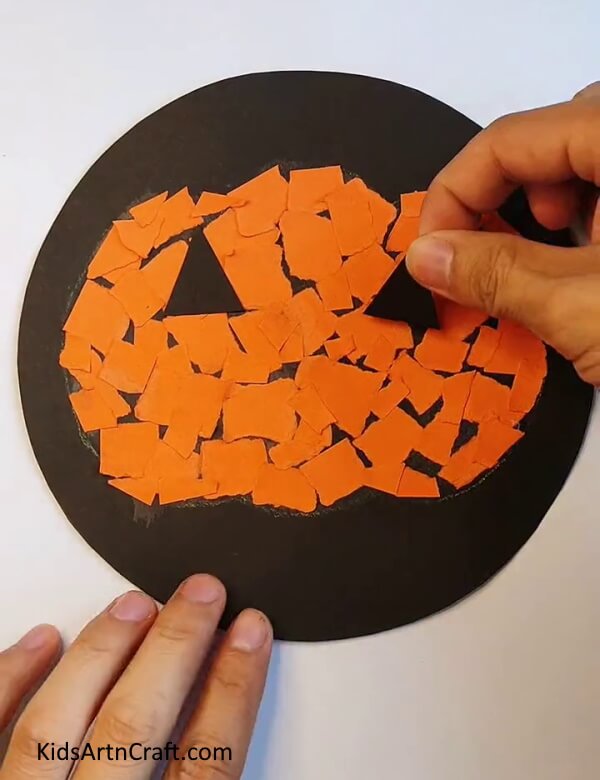

Take a black Craft paper and cut it into two small triangles. Glue it and paste it on the Pumpkin as eyes, shown in the picture.
Step 7: Sticking a Black Craft Paper as Mouth
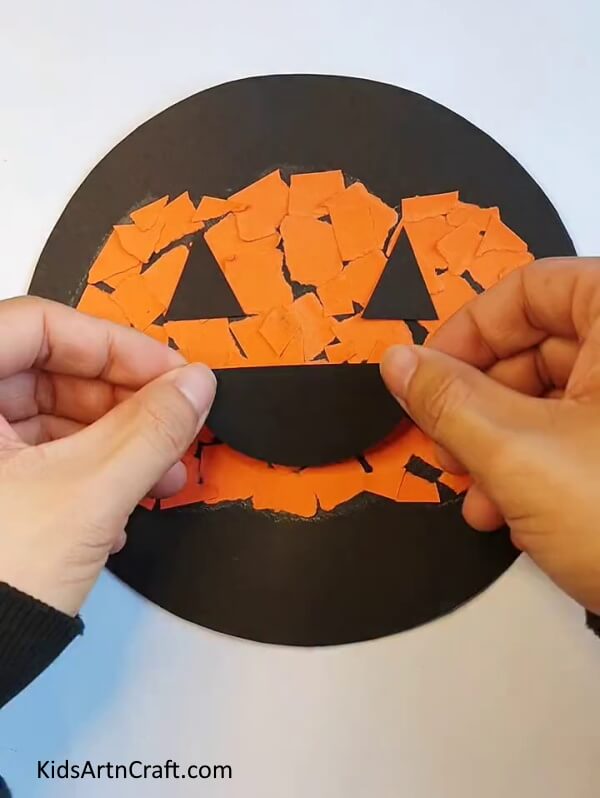

After sticking the eyes, take the same craft paper and cut it into a semi-circle, and stick it with a glue stick, under the eyes as in the picture.
Step 8: Gluing Some Clay As Teeth 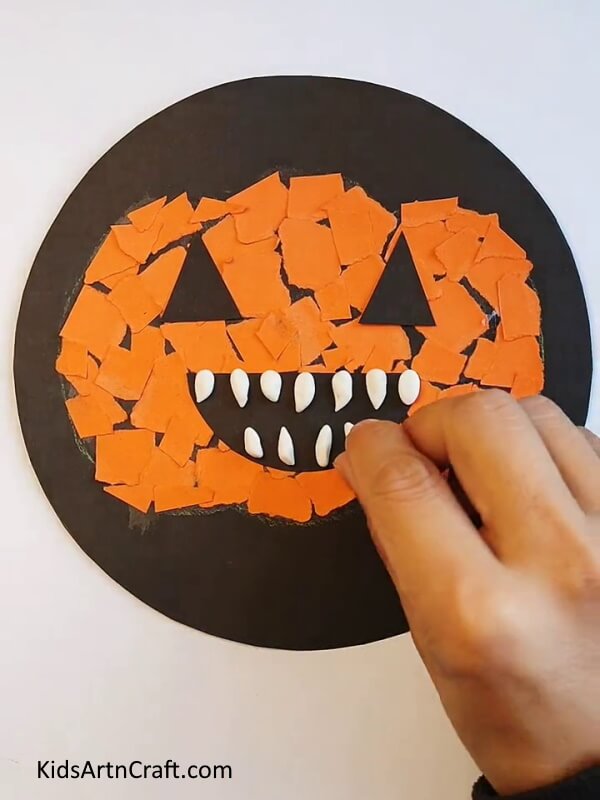

Roll white clay into tiny 10-12 different shapes as shown in the picture. And stick them in your mouth to enhance the Halloween effect.
Step 9: Sticking Tape on the Top Middle of the Pumpkin
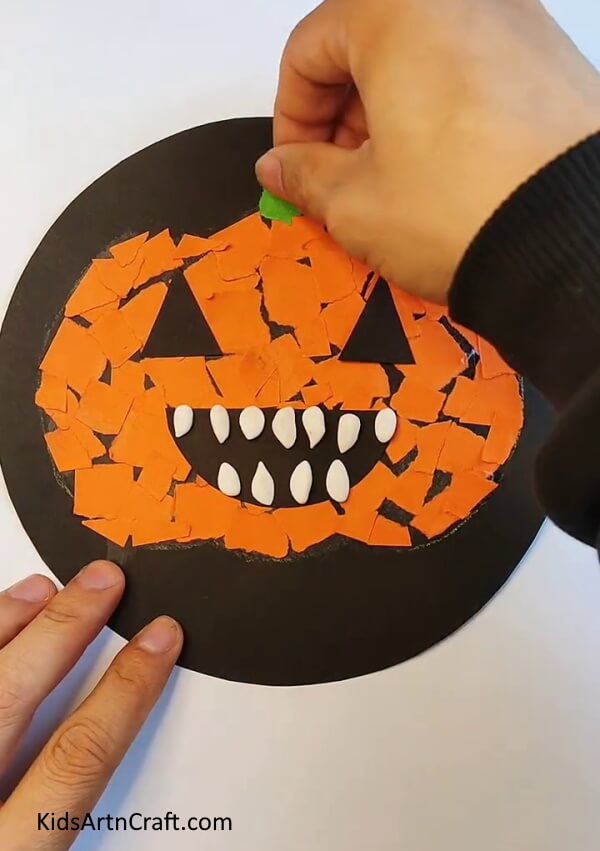

Stick a double-sided tape on top of the Pumpkin and peel it that cover.
Step 10: Sticking a Ribbon on the Top of the Double-sided Tape
Stick a double-sided tape on top of the ribbon, and stick another Double sided tape on it and make sure it’s firmly stuck.
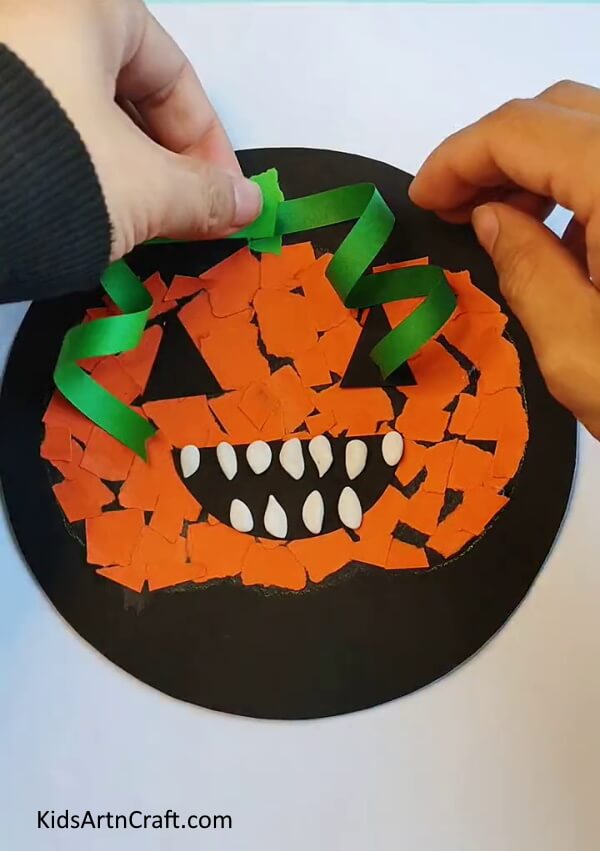
Step 11: Creating Two Leaves and Stick them on Double Sided Tape


After peeling off the strip of paper from the second double tape. Make two leave made out of green craft paper. And stick them on the second double-sided tape.
Step 12: Making Tiny Balls Out of Clay and Stick them on the Rest of the Board
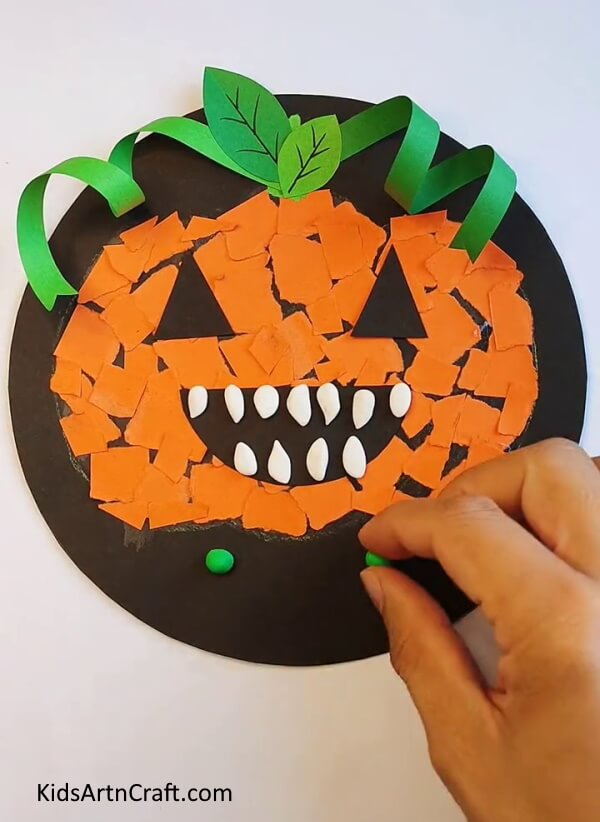

To finish it up, make tiny balls out of green clay and stick them with glue on the blackboard. Make some room between each bead.
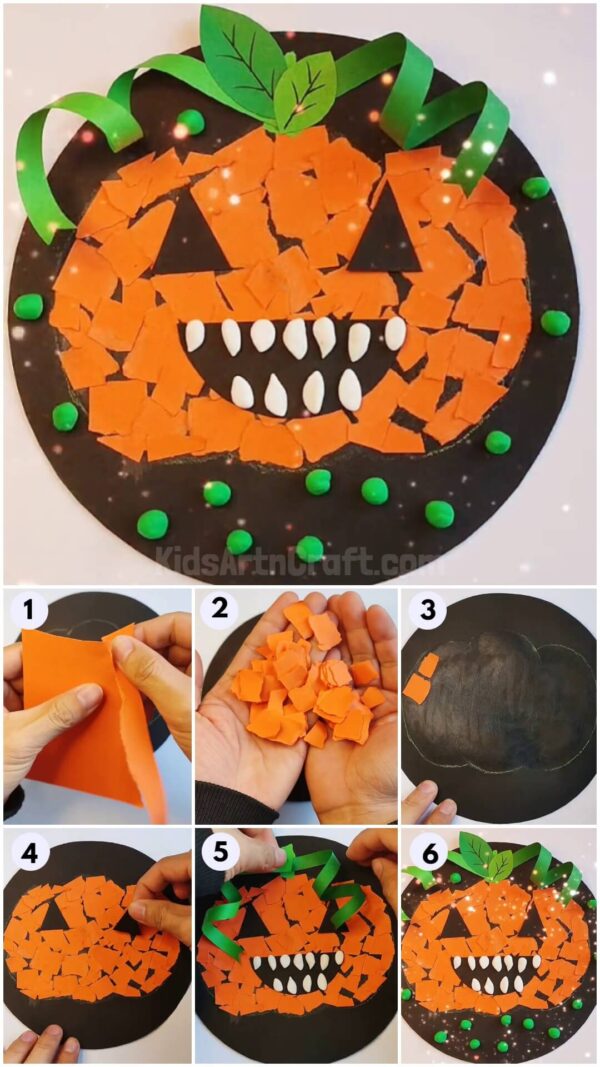
Final Image: Here is Your Paper Pumpkin Craft
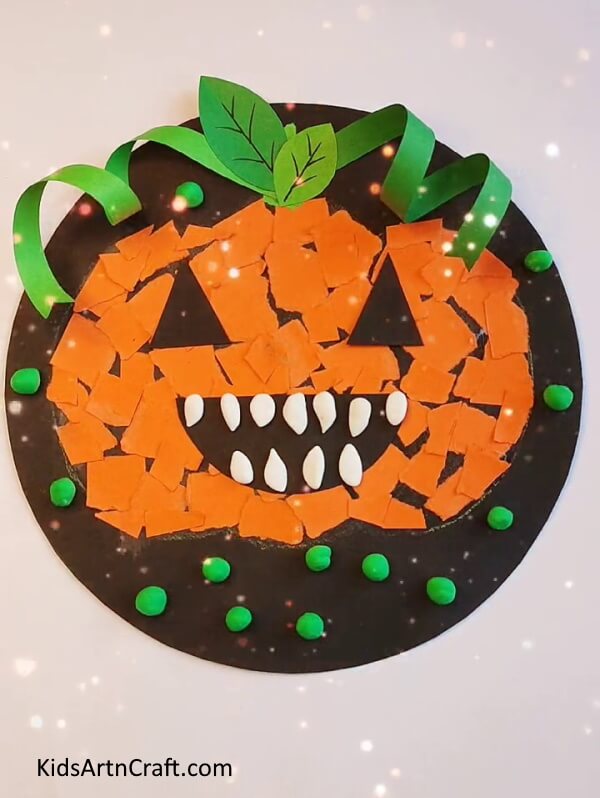
Here is your finished look of The Halloween-inspired Paper Pumpkin Craft step-by-step tutorial.
Hope you enjoyed making this craft as much as we did share. Do share your reviews in the comment section below. Don’t forget to check out other craft tutorials on our page.
Thank you for visiting our website
Follow us on Youtube for art and craft tutorials and much more.
More Articles from Kids Art & Craft
- Paper Airplane Origami Step-by-Step Tutorial For Kids
- Paper Snowflake Pattern Step-by-Step Tutorial
- How to Make Easy Paper Snowflakes Tutorial
- Simple Tiger Paper Craft Step-by-Step Tutorial
- How to Make Easy Paper Fish Craft For Kids