Clay Crafts
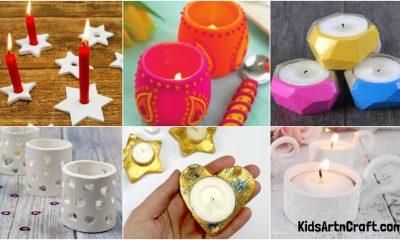
Polymer Clay Decoration Crafts For Home

Explore creative polymer clay decoration crafts for home! DIY unique, stylish, and personalized decor pieces to enhance your space with handmade charm and elegance.
Looking for some fun and creative ideas to decorate your home with polymer clay? Check out these great ideas! With a little bit of imagination and some polymer clay, you can create all kinds of unique and beautiful decorations for your home. From vases and sculptures to jewelry and home decor, there are endless possibilities for what you can create. So get creative and start crafting!
Adorable Polymer Clay Craft Ideas For Home Decor
 Read More: Ways To Display Feathers For Home Decor
Adorable Clay Wall Hanging Craft Idea

Image Source/Tutorial: Alice & Lois
Wall hanging is different in every aspect and this idea is also different as for this we are using polymer clay. Follow the instructions and make this brilliant wall-hanging craft. Start by taking out clay with a clay knife and flatten it using a roller. Then use cookie cutters to make circles and small circles through your hand. Then take paper clips and poke holes around the edges of clay pieces. After this place clay pieces in the baking tray and bake them by following the instructions in the package. Then, take them out and leave them to cool down, after they have cooled, start placing them together with jump rings, and at its end place tassels. With this step, your craft is complete, now you can proudly hang it on the wall. Make more hanging wall crafts using this same method and you can also apply different methods.
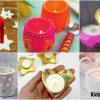
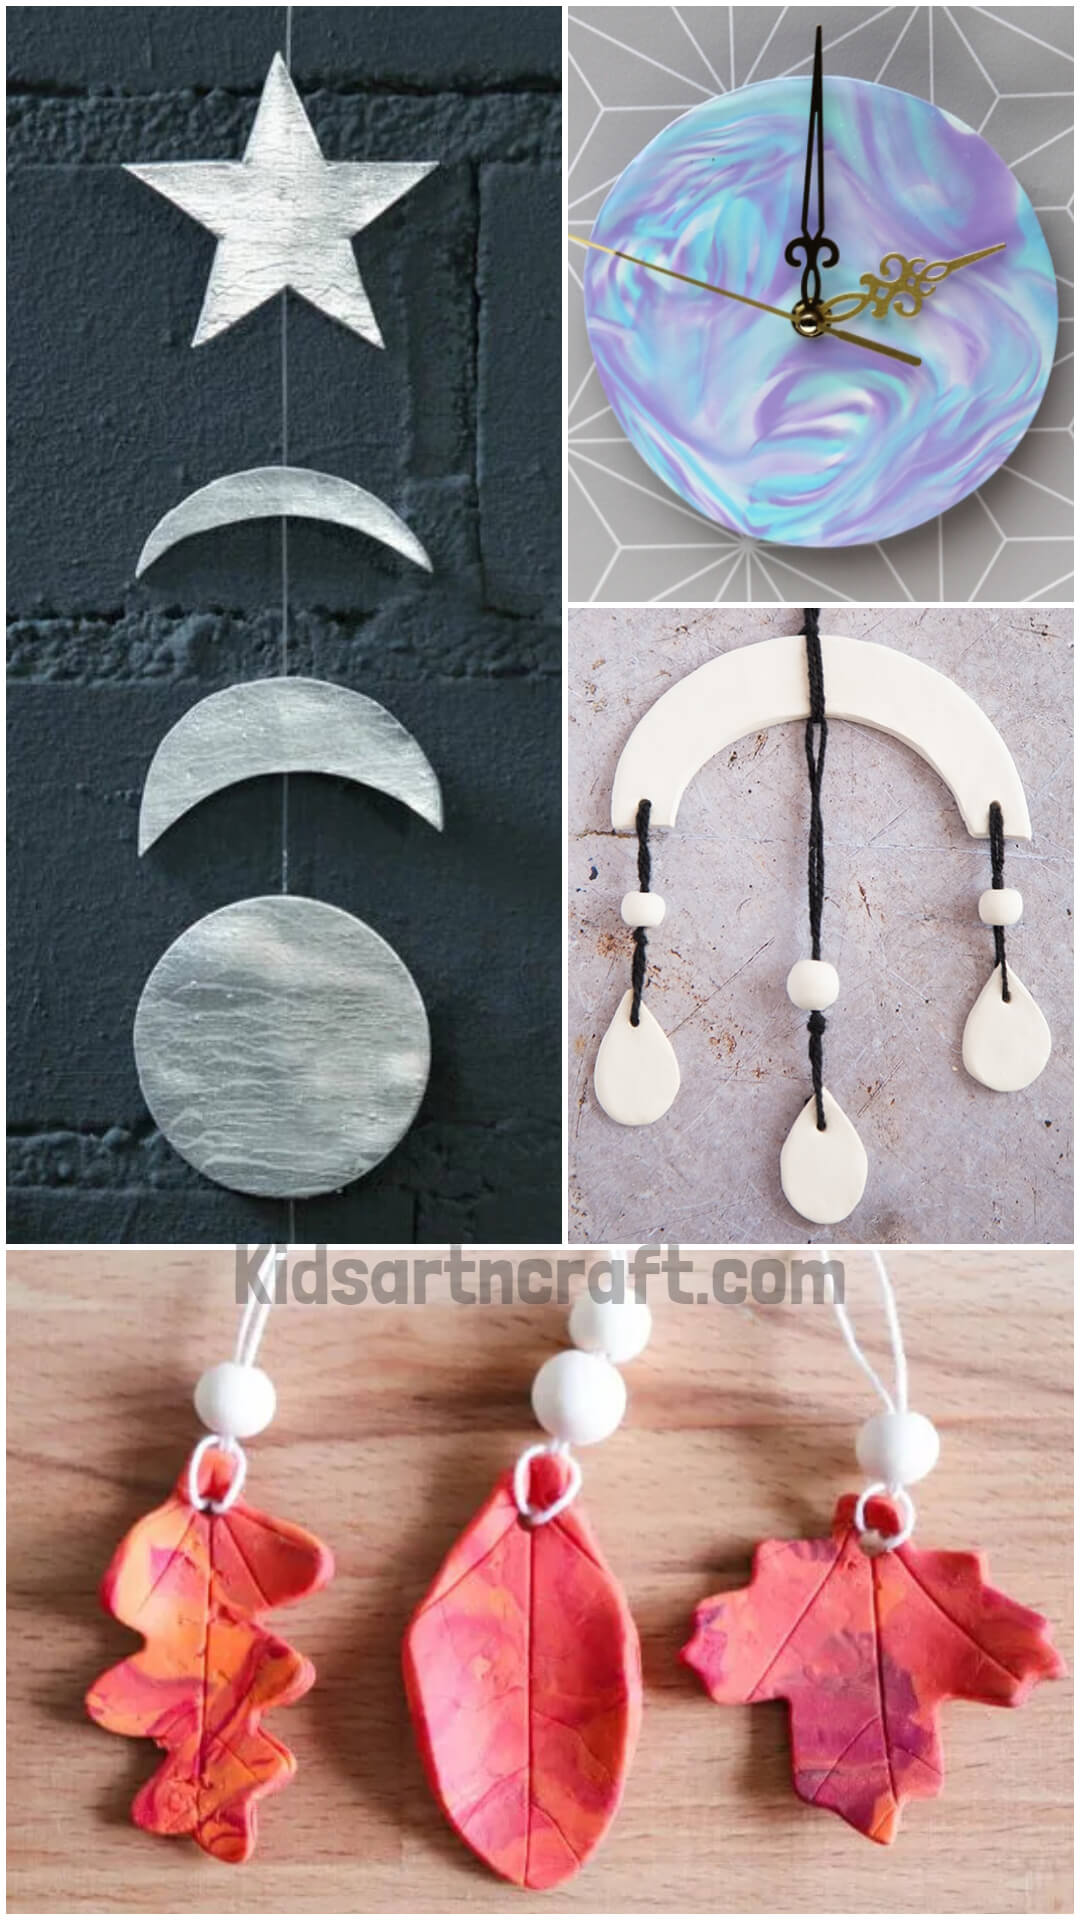
Adorable Polymer Clay Clock Crafting Idea
Image Source/Tutorial: Gathering Beauty
Decorate your wall with a unique clock made with polymer clay and see how it would work on your wall. Start by taking four different colors of clay and then roll them into four different sausages. Now, join these sausages into one and roll them together. Now twist and fold it multiple times until you get the marbled look in your clay. When you see it, you will get the marbled look in the center, now fold it from the center and use a roller to flatten it. Then use a big plate to trace a circle and then take it, use a straw or rolling pin to make a hole in the center. After that, place it on the baking tray and bake it for thirty minutes or follow the instructions written on the package. Then take it out and leave it to cool down, after it cooled, place clock mechanisms through the hole in the center. You can also run it by placing a battery in the back. With this step, your craft is complete, hang your watch on the wall which will give a unique look and attract everyone who sees it.
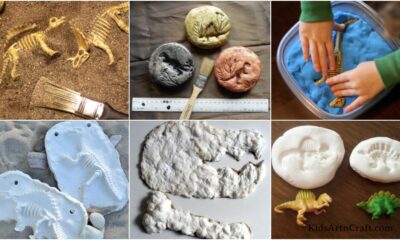
Adorable Moon Garland Idea With Polymer Clay
People love watching the night sky which is filled with stars and the moon. Make your stars and moon using polymer clay and metallic silver color. Follow the steps for this craft activity. Start with taking a grey polymer clay and flatten it using a roller. Then take a clay machine place a silver metal sheet on it and run it through the clay machine. You will have a silver clay sheet. For the moon shape use a round object and trace it through the clay sheet. For the stars and half-moon, take out their printables and trace them on the clay sheet. After cutting out the clay pieces, place them in the baking tray, bake them for thirty minutes, and then leave them to cool down. After this, varnish them using a paintbrush and then join them using a nylon cord by first placing clay strip paper, and joining it with super glue, leaving some space between them. With this step, your craft is now complete, hang this garland on the wall and showcase your creativity to others.
DIY Beautiful Clay Crystals Craft Idea
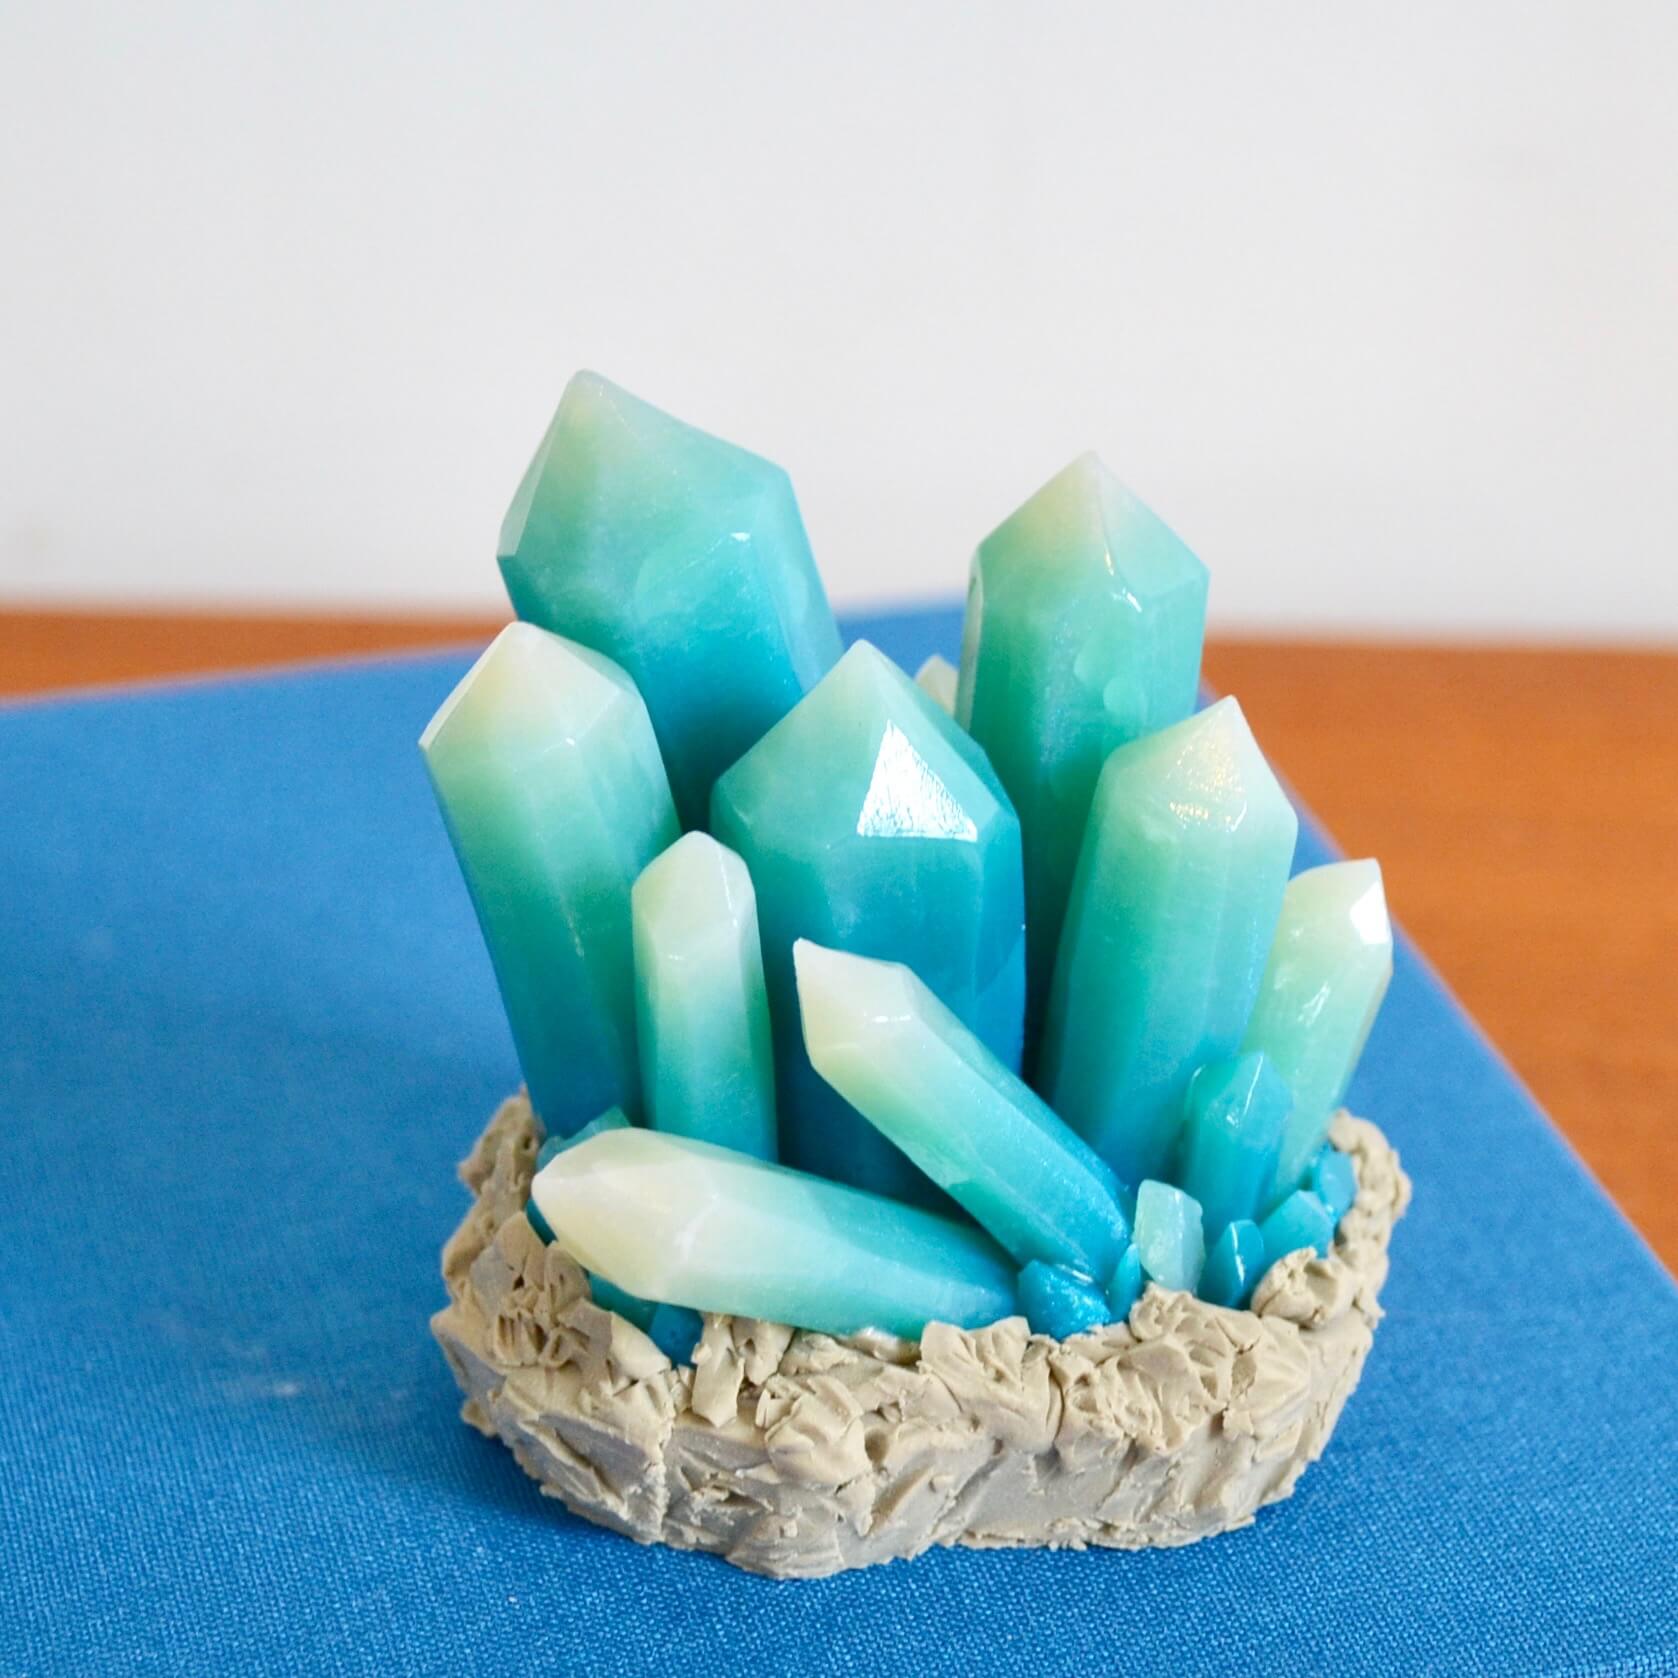
Image Source/Tutorial: Life Of Making
Crystals look amazing, they are seriously a nice piece of nature, but you can also make your crystals using polymer clay. Follow these simple steps to achieve in making your crystal. Start with taking translucent white and peacock blue color clay. Roll them into a ball, then use a roller to flatten them. After that, place them upon each other diagonally cut them, and roll them with each other. After that use a pasta machine to prevent them widening. With this, you will have a perfect blend of both colors. Then, use a ruler to make them into a rectangle shape and roll them into a cylindrical shape. After that, use a ruler or a knife to remove the extra edges from the cylindrical roll. Use a knife to form a pointing shape on the top, this will slowly form a crystal shape. Make more crystal shapes using this method and then join them using super glue. Then make its base by mixing a block of concrete and a block of latte which will give a big piece of pancake. Cut out the extra edges of the rock, and place your crystal on it, paste the extra cuttings of crystal and rock on the craft piece. Place it on the baking tray and bake it. After you bake it and it cooled down use gloss glaze on the crystals, with that your craft is complete.
Lovely Table Clock Project Using Polymer Clay
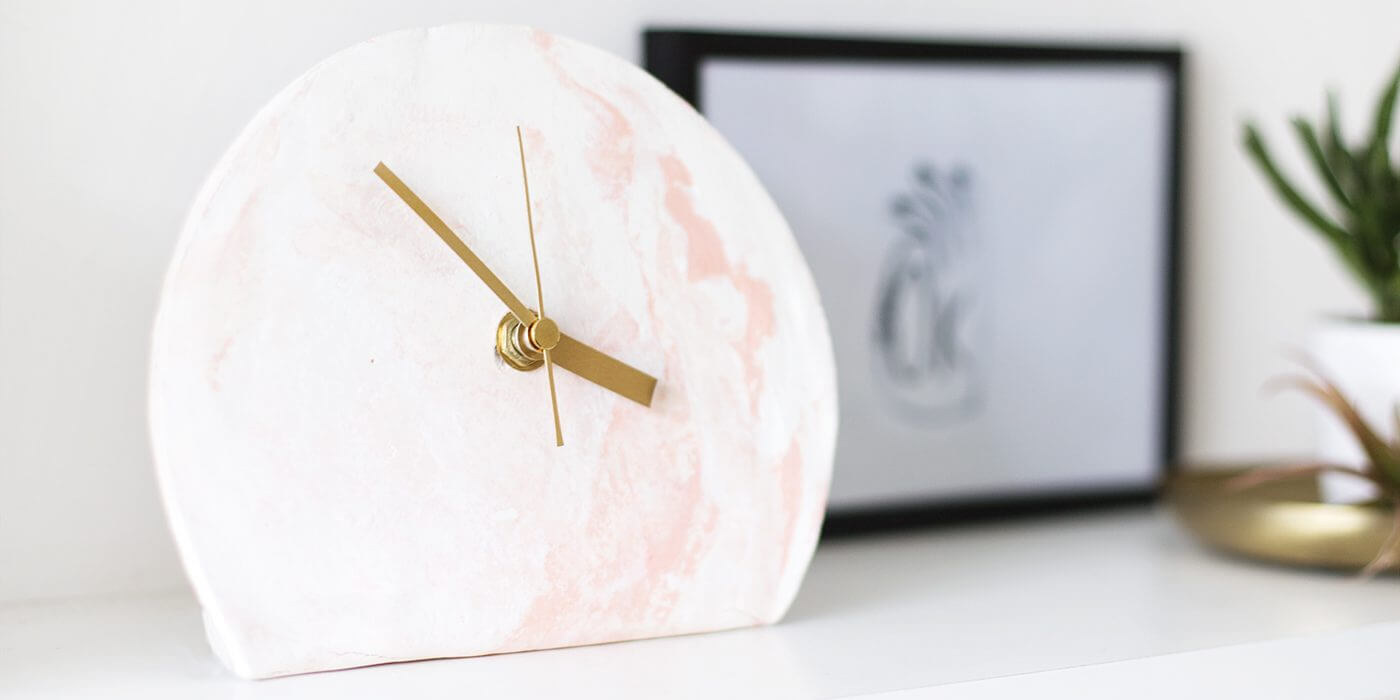
Image Source/Tutorial: The Lovely Drawer
We buy simple table clocks which have no design and they are plain and simple, so why not make a unique clock using polymer clay? Start by taking out peach and white colored clay and then separately roll them making sausage rolls. After that, join both clay colors together and mold them to make one color. To give the marbled look, mold and fold them multiple times until they get the color. Cut it into a semi-circular shape and make a hole in the middle, then place it in a baking tray and bake it according to the instructions. After you bake it, leave it to cool down. With that cooled down, place clock mechanisms, and to work it like a working clock place a battery. Now your craft is complete, place it on your table, and look how lovely she will be on the table, attracting everyone’s attention. This simple DIY craft activity with simple supplies and crafts will greatly improve the home decor.
Read More: Diwali Thali Decoration for Aarti- Creative & Unique Ideas
DIY Easy-Peasy Air Dry Wall Hanging Clay Craft Idea
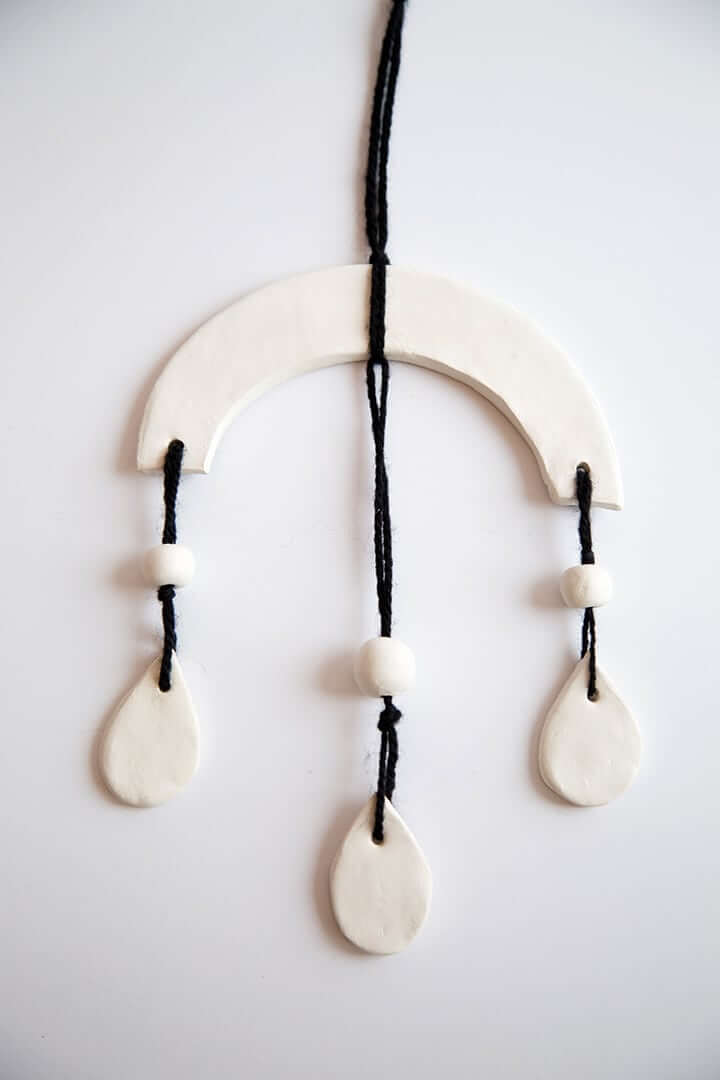
Image Source/Tutorial: Alice & Lois
Make this amazing wall-hanging clay thread by following simple instructions. For this activity, we are using air-dry clay as they are to work with and they are also versatile. Start by taking out a roll of clay using a clay knife and placing it on the parchment paper. Use a roller to flatten its shape, then use a big and small plate to make cuts using the knife, making our arch. Then use small leaves to make our small clay shapes, and use more clay to make balls like beads. Now take out these shapes, use a skewer to poke holes in them, and leave them to dry for a full day. After they have dried, rub sandpaper on the clay pieces and then use black yarn to tie the pieces. Use a needle to place yarn from all the clay pieces and in between them place your clay beads. With your yarn placed, your craft will be complete. This is a simple DIY craft activity that can be done using simple supplies and you will get good results.
Cute & Adorable Animal Wall Hanging Craft Idea Using Polymer Clay
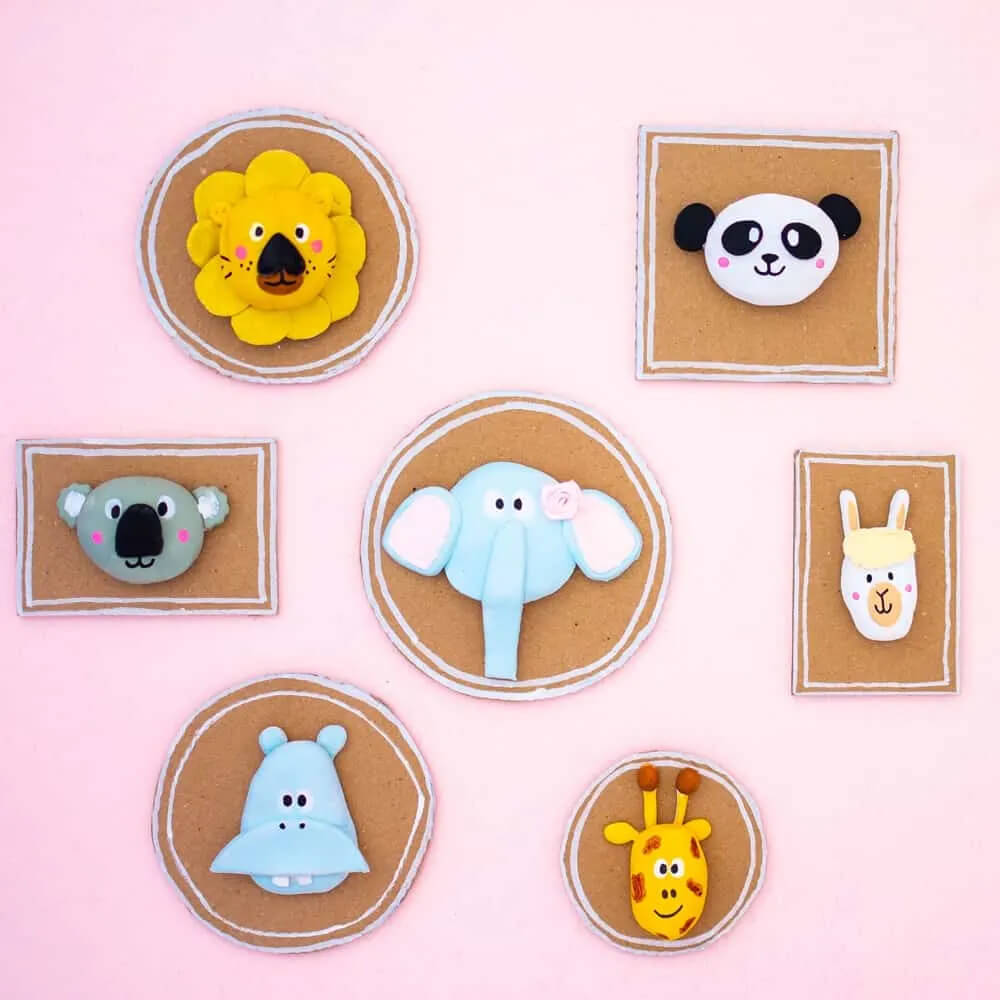
Decorate your wall with cute animal figure frames using polymer clay. Make them by following simple instructions. Start by taking out polymer clay and forming shapes like eyes and nose and their heads, then join their body parts to make our animals. After you made all the animals, place them in the baking tray and bake them by following the instructions on the clay package. After you bake them, leave them to cool down with that done, use acrylic color and paintbrush to paint your animal figures and leave them to dry. In the meantime, take a piece of cardboard, cut it into small circles, and make your frames. The paint will dry within a day, and then, paste your animal figures on the frame using a glue gun. After the glue has dried, paste your animal figures on your wall. Kids will love this animal craft and you can also hang them in your kid’s room where they love to see it every day.
DIY 3-D Minimal Wall Art Idea With Polymer Clay
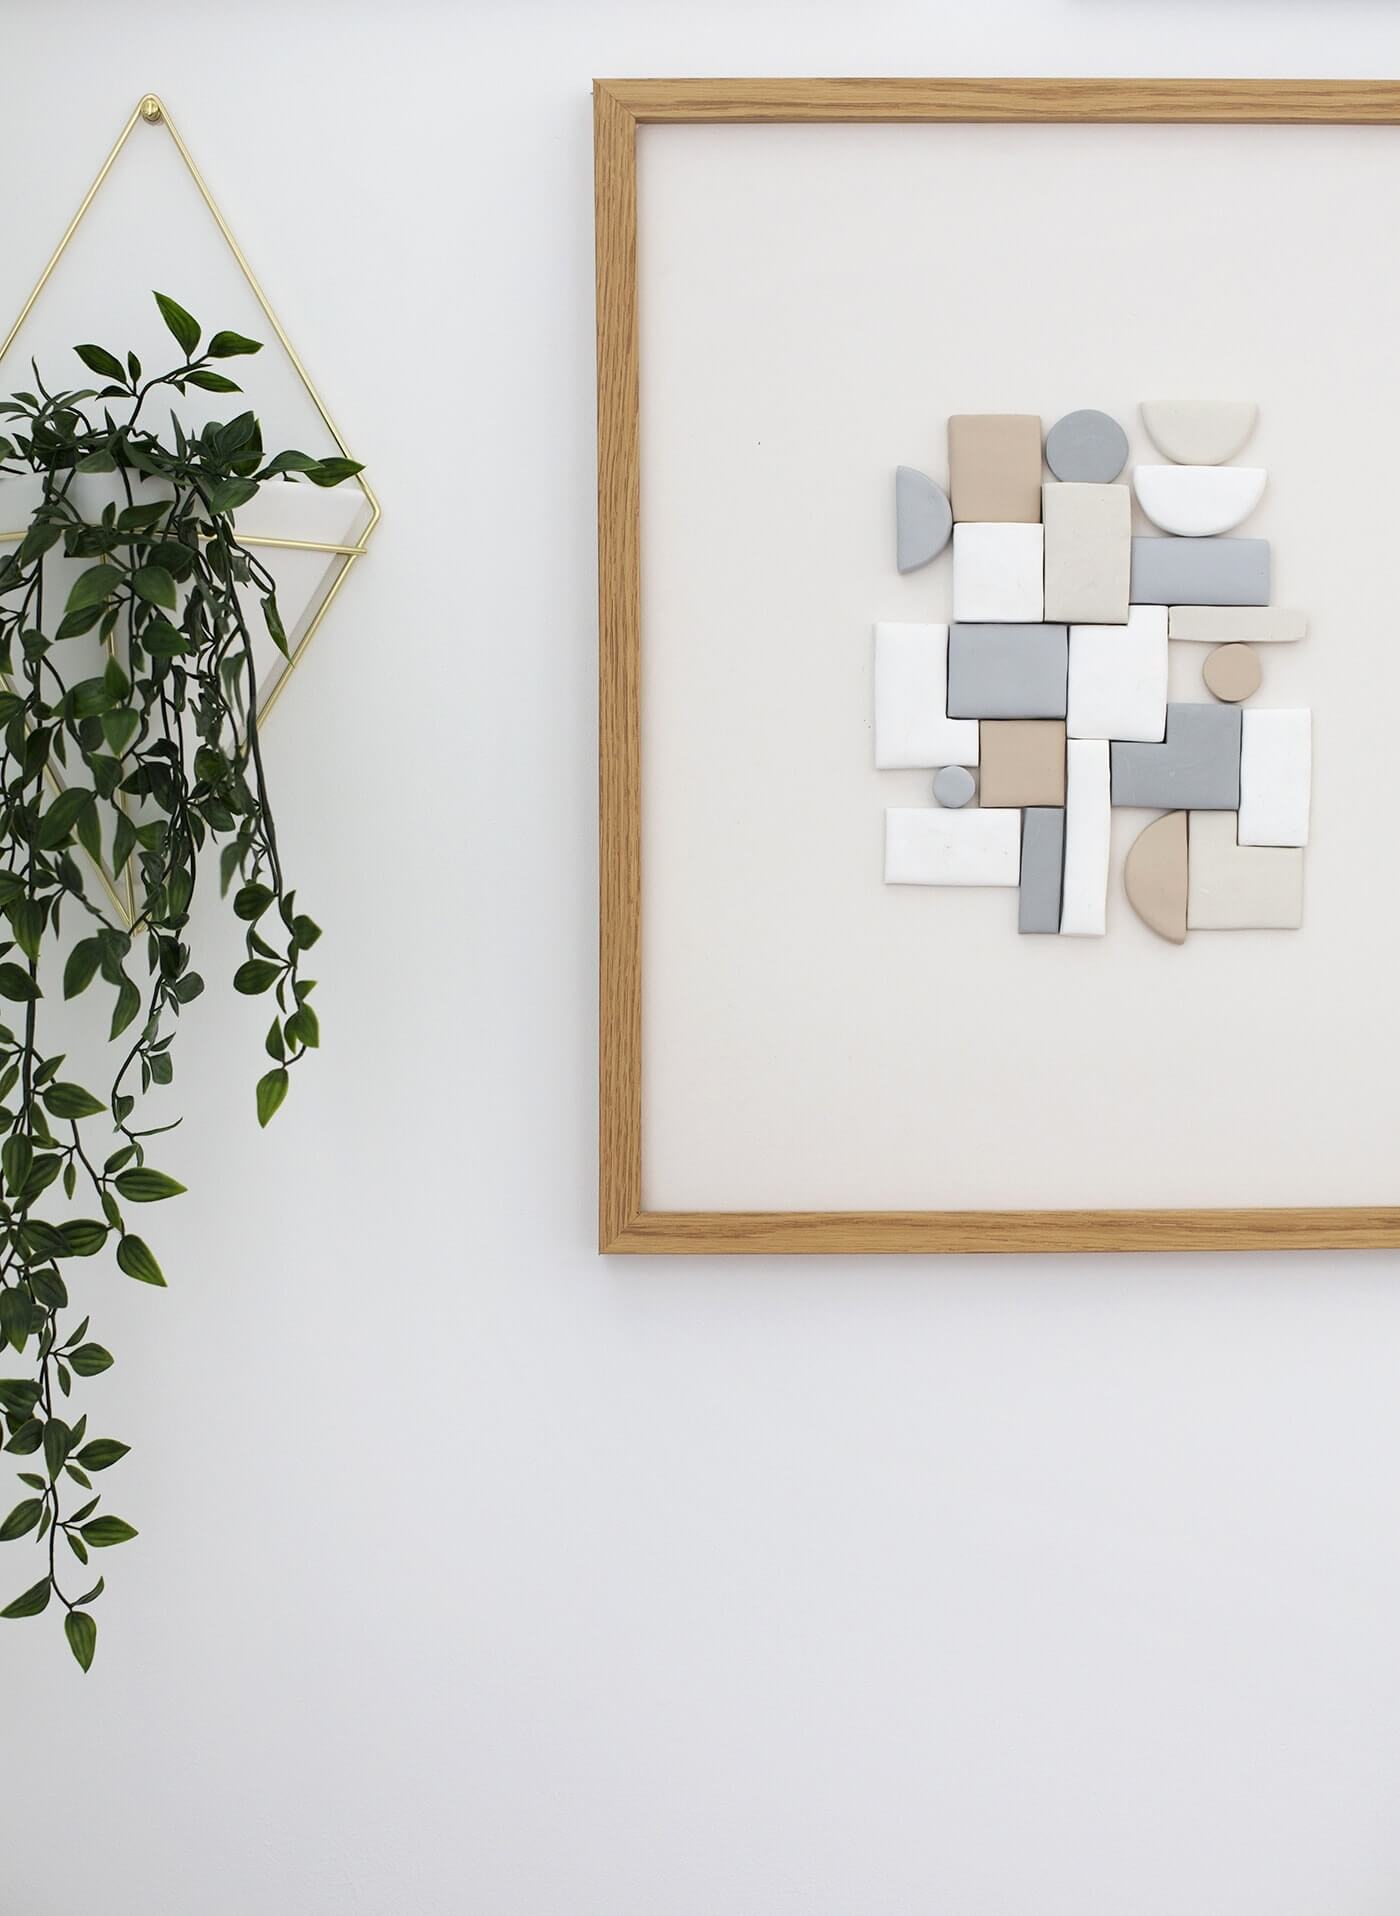
Image Source/Tutorial: The Lovely Drawer
A unique frame with different shapes of polymer clay hanging on the wall will build a unique look and attract good attention. Make this unique frame with simple instructions. Start by removing glass from your frame and use it to measure for the artboard using a craft knife. Then take your clay, use white color clay, and add light-toned clay in them. Mix the colored clay well and then use your hands to form shapes, make its ball, and remove unnecessary edges using a craft knife. After that form different shapes in sizes and shapes and place them in a baking tray to bake them according to instructions. After you bake them, leave them to cool down. After this process, practice beforehand how you wanna position your clay shapes. Finally, use super glue to paste clay shapes in your desired position on the artboard, and after the glue dries, hang your clay frame on the wall. Show your minimalistic art by making this clay craft.
Let’s Make An Awesome Wall-Hanging Photo Frame Craft With Polymer Clay.
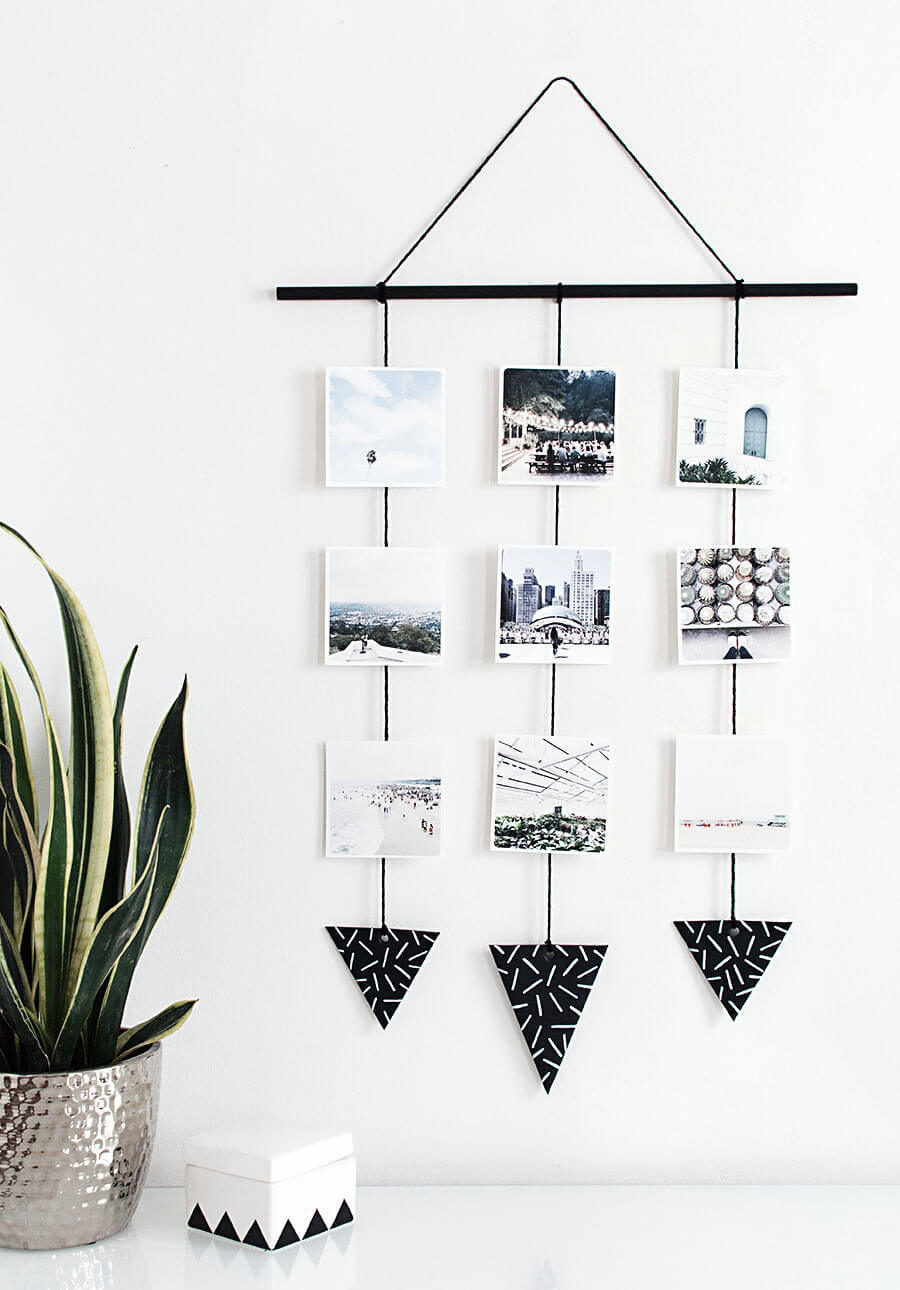
Image Source/Tutorial: Homey O Homy
For home decoration, photo hanging also works great as you hang the pictures with your loved ones, and many pictures related to your life events. So instead of hanging as normal frames why not use polymer clay to make this more interesting? Follow these simple instructions for this. Start by taking a wooden dowel, painting it black, and then after it dried, place the yarn on both ends tie the knot, and then hot glue it. Take cardstock paper and through it cut a proper triangle. Take black clay, flatten it using a roller on parchment paper, and then use the triangle paper, and trace it on clay to make proper triangle clay. Poke holes in it and then place it for baking by following instructions. After they have cooled down, use a white Sharpie to make designs on it. Now, take your printed photos and paste them on yarn using washi tape and at yarn’s end tie your clay pieces. With this step, your craft is complete, you can place it on your walls and showcase your amazing idea.
Beautiful Wall Hanging Craft Idea Using Clay & Beads

Image Source/Tutorial: A Pretty Fix
Polymer clay craft can be best used in making flower petals, leaves, and simple circles and triangles as the clay is very flexible to work with. Make your hanging craft using polymer clay and make different shapes for hanging craft. Start by taking out clay using a clay knife, then roll it in your hand making it a ball. Now, place your clay on wax paper and use a roller to turn it into a flat circle. Make your circles by pressing a cookie cutter on it and then use a toothpick to hole between two ends. After making the circles, make your triangles and half-moons using the same method. After making all the shapes, place them in a baking tray, to bake them in the oven, before placing them read the instructions as to how to bake them. In the meantime, take your wooden beads and paint them with acrylic color, leave them for an hour. After you have baked clay, leave them to cool down. With this process done, place your clay pieces into twine and place your wooden beads. Tie the end of the twine string and your craft will be complete.
Read More: Recycled Toilet Paper Roll Christmas Tree Craft Idea
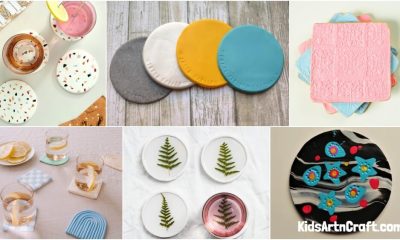
Easy to Make Leaf-Shaped Polymer Clay Ornament Craft Idea
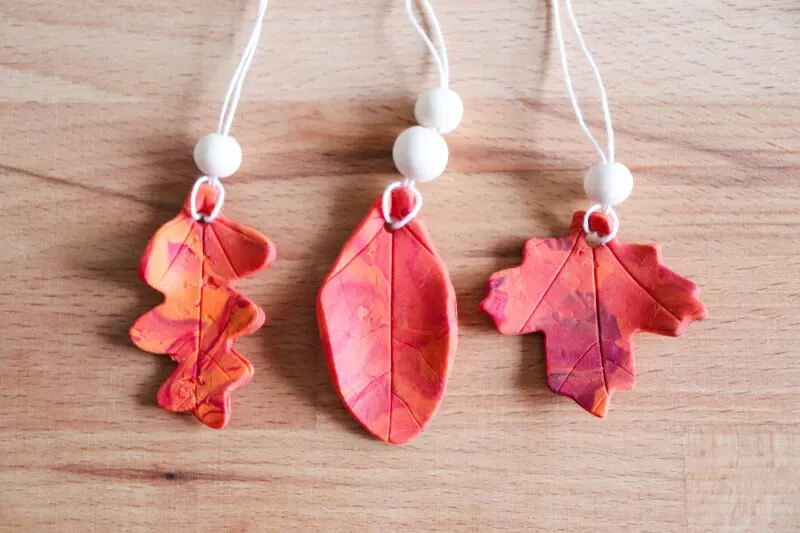
Image Source/Tutorial: Homemade Heather
Polymer clay is best suited for leaf making as they are flexible and can be used to make different shapes. Make different shapes of leaves using polymer clay. Start by taking out polymer clay of red, orange, and green colors. Mix the different clay colors into each other making a single ball. Place the clay ball on parchment paper and use a roller to make a thick circle, then use a leaf-shaped cookie cutter to shape the clay into leaves. Now take a real leaf, place it upon our clay leaves, and trace its pattern on it. After making the patterns, make a small hole using a rolling pin and place the clay pieces in baking foil to bake them in the oven. Bake them by reading and following the instructions on the clay box. After they come out, leave them to cool down. With this process done, take jute twine, fill it with wooden beads, and tie it to clay leaves. This craft idea is very simple to work and only requires simple cost materials, a great DIY project that you can work on.
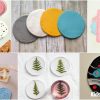
Joyful Boho Clay Wall Hanging Craft Idea
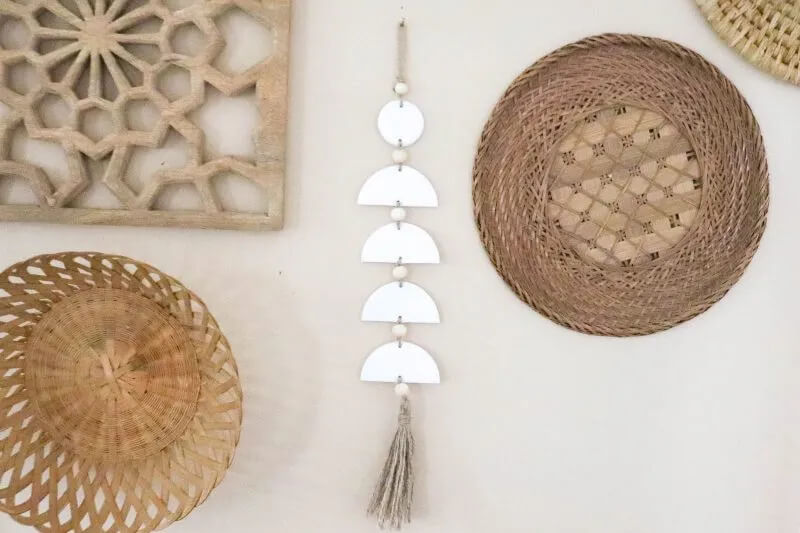
Image Source/Tutorial: Homemade Heather
Boho clay craft that tries to infuse different patterns and colors from nature is a unique clay craft that we can also use to make our hanging craft. For this craft, we will use white polymer clay. Start by taking white polymer clay, placing it on parchment paper, and using a roller to make a thick circle. Then use cookie cutters to form two large circles and one small circle and cut the large circles in half. Then, use a rolling pin to poke holes to the top and bottom and they should be in the center. Now, place your clay pieces in baking foil and bake them following the instructions on the clay package. After they come out, leave them to cool down, and finally, use hemp to string these clay pieces and decorate them more by placing beads in between, tying a knot, in the end, to keep the pieces in place. Now, you can hang this boho clay craft on the wall which will be great for home decor.
Beautiful Pansies Craft Idea For Home Decor Using Polymer Clay
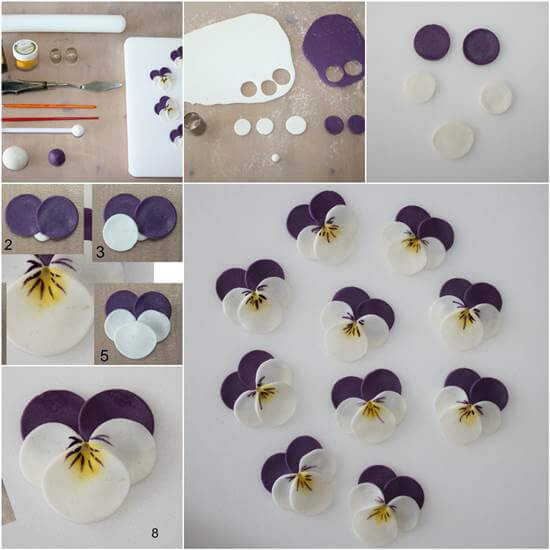
Image Source/Tutorial: I Creative Ideas
Pansies are great-looking flowers with beautiful fragrances and good-looking petals. You can grow pansies in your garden which will be a good look and you can also use them in wall decoration by making them using polymer clay which is best for this purpose. Start by taking out white and purple polymer clay and then flatten them using a roller. After that, use small cutters to form circles from the clay and place these circles on a foam pad. Now start forming the flowers by first a white clay as pollen, then placing purple circles, and on top of it place white petals. Then, use a handwork tool round bar to press a hole in the middle of the petals where we will use a paintbrush to place yellow embossing powder and then use a palette knife to place strips of violet dyes around yellow powder. Now leave them to dry, after they have dried, your flower petals will be in shape and now you can make more flower petals using this method. Paste these petals on the wall which will bring great charm to home decor.
Adorable 3-D Animal Head Wall Decor Idea With Polymer Clay
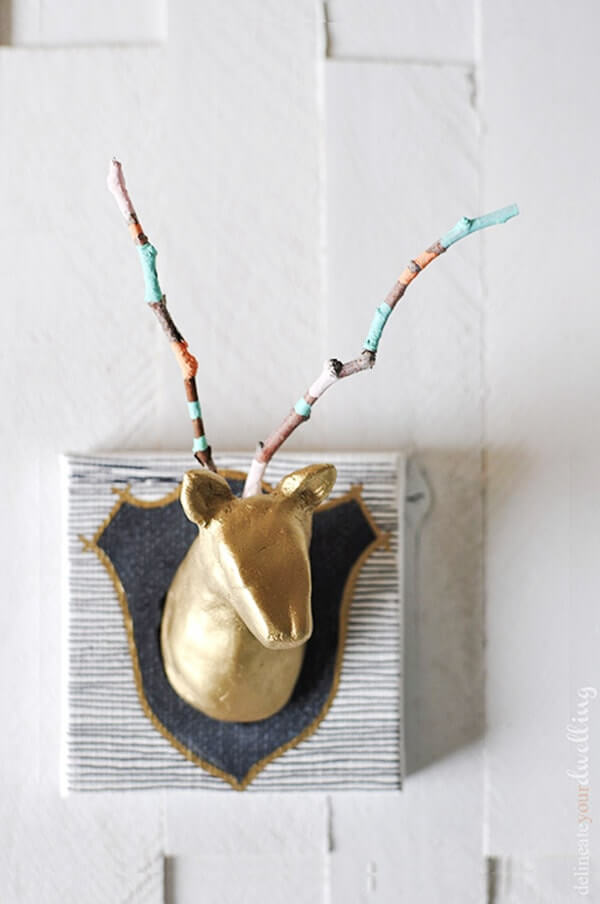
Image Source/Tutorial: Delineate Your Dwellings
Use your clay in a great way to decorate your home walls by making animal heads using polymer clay. Follow these simple steps to make your 3D shape animal figureheads. Begin by taking out thick clay, To make the right figures, take out a photo of the animal from the internet. For the deer shape, make his neck in the log shape. After making the figures, leave them to dry for more than one day, in the meantime, decorate the mini canvas where you will stick the figures, make the mount design on it, and paint it using chalkboard paint. Use a thin Sharpie to give a final touch and then outline it with gold paint. After the clay has dried, give it a coat of spray paint, leave it to dry, and make antlers of deer by taking two twigs and coloring them with acrylic paint, leaving these twigs also to dry. Finally, use hot glue to paste an animal figure on the canvas and paste a deer antler behind its ears through hot glue. Finally, use Velcro command strips to stick the canvas on the wall. With this step, your craft is complete, use polymer clay to make more animal heads and decorate your home walls using this method.
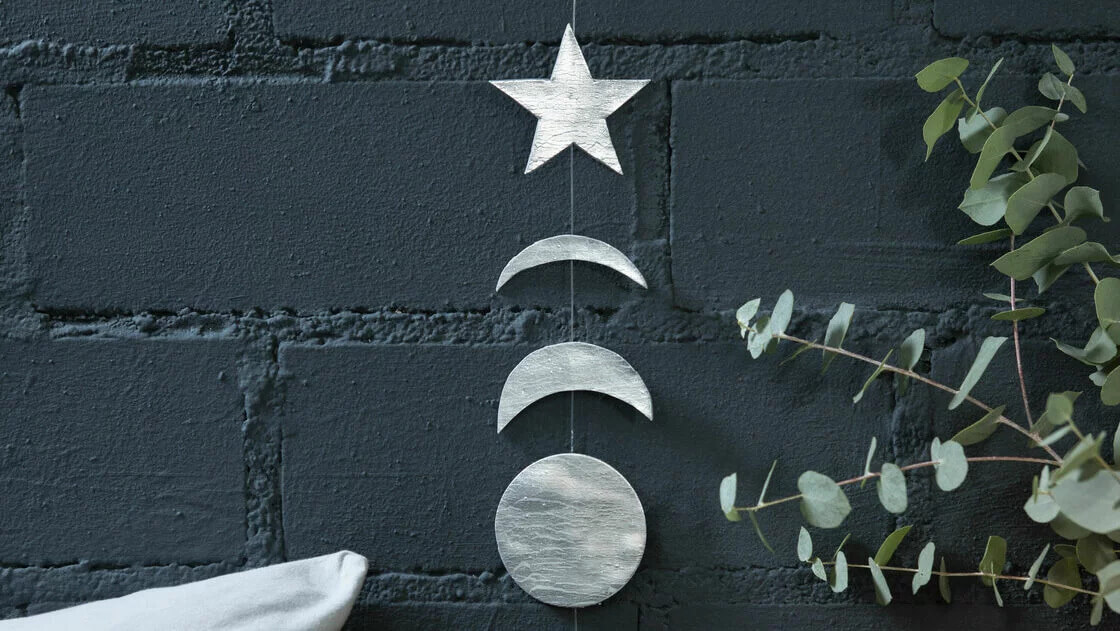
Beautiful Moon Phase Clay Wall Hanging Idea
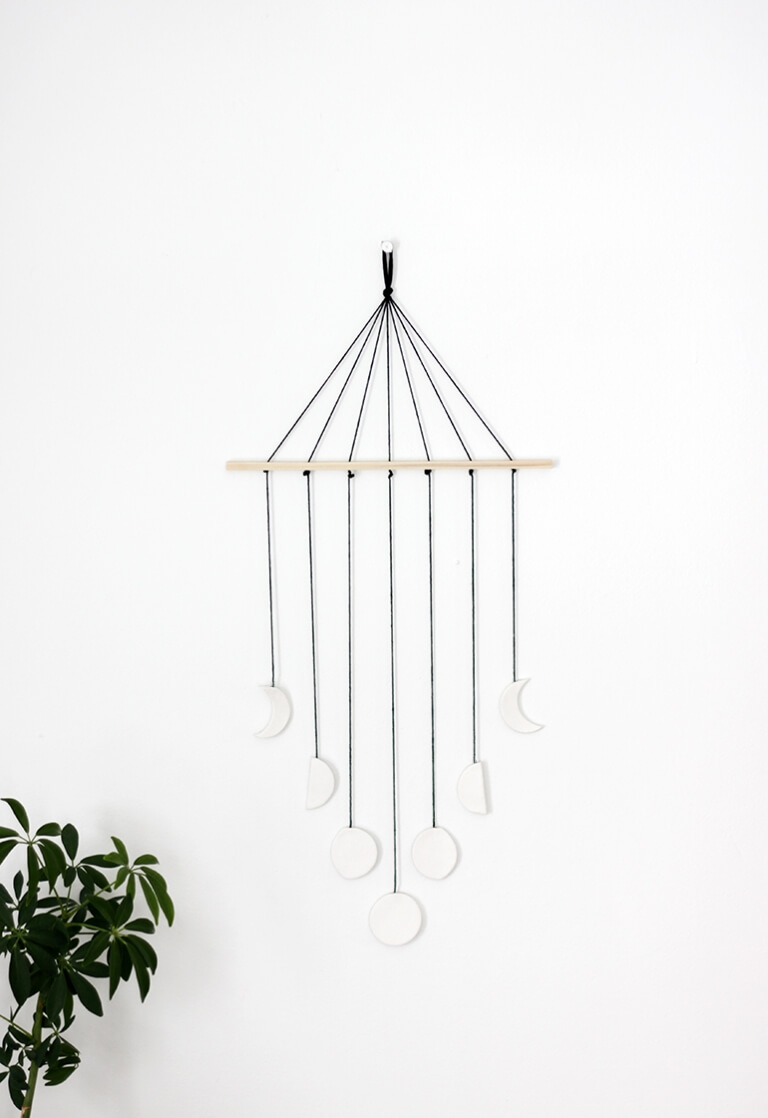
Image Source/Tutorial: The Merry Thought
We all love the moon and its beautiful phases through which shines the night sky. So why not turn it into a wall-hanging idea? Use air-dry clay and turn your moon phases into a wall-hanging craft. Start by taking out thick clay and using a cookie cutter to make seven circles. Now to make moon phases, use a knife to make the shapes, then use your finger to flatten the edges, and then use a skewer to make a hole at the top where we place our string. Now leave these clay pieces to dry, take a dowel, and drill seven holes in it from where we will place the string. Now take three strings and another long string, cut the three strings, fold and cut them, then attach them with our long string, make a loop then tie a knot on the top which will be our hanging part. Now place your strings down the dowel and tie strings below the dowel which will support and hang them well, and trim them in a V shape. Finally, once your pieces are dried, attach them by gluing them to the strings. Once the glue has dried, you can hang your moon clay pieces which will be a great part of home decor.
Common FAQs Related to Polymer Clay Decoration Crafts For Home
What happens if you leave polymer clay too long?
If you leave polymer clay too long, it will become hard and brittle. This is because the clay contains molecules that are constantly moving and interacting with each other. When the clay is left for a long period these molecules will slowly start to break down, resulting in a hard and brittle material.
What happens if you leave polymer clay out overnight?
If you leave polymer clay out overnight, it will become hard and brittle. This is because the clay will absorb moisture from the air, which will cause it to dry out.
What does polymer clay not stick to?
Polymer clay does not stick to most surfaces, making it ideal for a variety of crafting projects. However, there are a few things that it will not stick to, including glass, metal, and some plastics. If you are unsure whether a surface will work with polymer clay, it is always best to test a small area first.
Can polymer clay be made at home?
Yes, polymer clay can be made at home with a few simple ingredients. The most important ingredient is a plasticizer, which can be found in many household products. Other ingredients include clay, cornstarch, and mineral oil. With these ingredients, you can create a variety of colors and textures of polymer clay.
Is polymer clay easily breakable?
Polymer clay is a modeling material that is available in craft stores. It is easily breakable but can be joined together with a clay adhesive.
Can you touch polymer clay?
Yes, you can touch polymer clay. Touching and manipulating the clay is one of the best ways to get a feel for its pliability and potential. Of course, your hands will get dirty in the process, but that’s all part of the fun! Just make sure to wash them thoroughly afterward.
Does polymer clay need water?
No, polymer clay does not need water. If you add water to polymer clay, it will ruin the clay. So, if you’re working with polymer clay, be sure to keep it away from any water sources.
What is the best condition for polymer clay?
Polymer clay is an incredibly versatile medium that can be used to create a wide variety of objects and sculptures. However, to get the best results from your clay, it is important to ensure that it is in the ideal condition. The best condition for polymer clay is to have it nice and moist. This means that the clay is pliable and easy to work with. If the clay is too dry, it will be brittle and difficult to shape. Conversely, if the clay is too wet, it will be sticky and hard to work with. Therefore, it is important to find the perfect balance between these two extremes.
Follow us on YouTube for art and craft tutorials and much more.
More Articles from Kids Art & Craft
- Christmas Decoration Craft With Buttons
- Popsicle Sticks Animal Crafts For Kids
- Large Feather Wall Art Decor Ideas
- Feather Wall Hanging Ideas For Decor
- DIY Feather Garland Ideas To Add To Your Home