


Drawing
How To Make Tree From Hand Outline Step by Step Tutorial

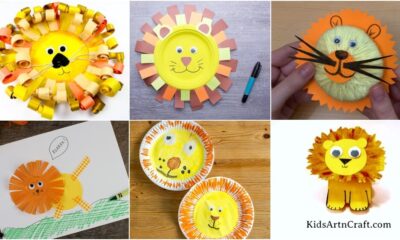
Learn how to make a beautiful tree from a hand outline in this easy-to-follow step-by-step tutorial. All you need is a piece of paper, a pencil, and some colored markers! Perfect for a fun and creative project for all ages.
When we were toddlers, we always used to make our handprint outline and it was so much fun. We used to make different things from our handprint outline and we learned so many things from this fun activity. So, today is your chance to have the same fun which we experienced by making a tree from your handprint outline. Let’s get started!
To make this fun creativity, bring all your materials to the table and follow these teeny tiny steps.
DIY Tree From Hand Outline Step-by-Step Tutorial
Read More: DIY Paper Tree Crafts for Kids Easy Tutorial
Materials Required
- White Craft Paper
- Handprint Of A Toddler
- Different Color Markers/Sketch Pens
Procedure
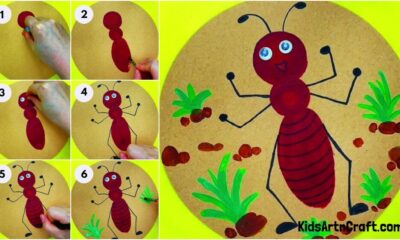
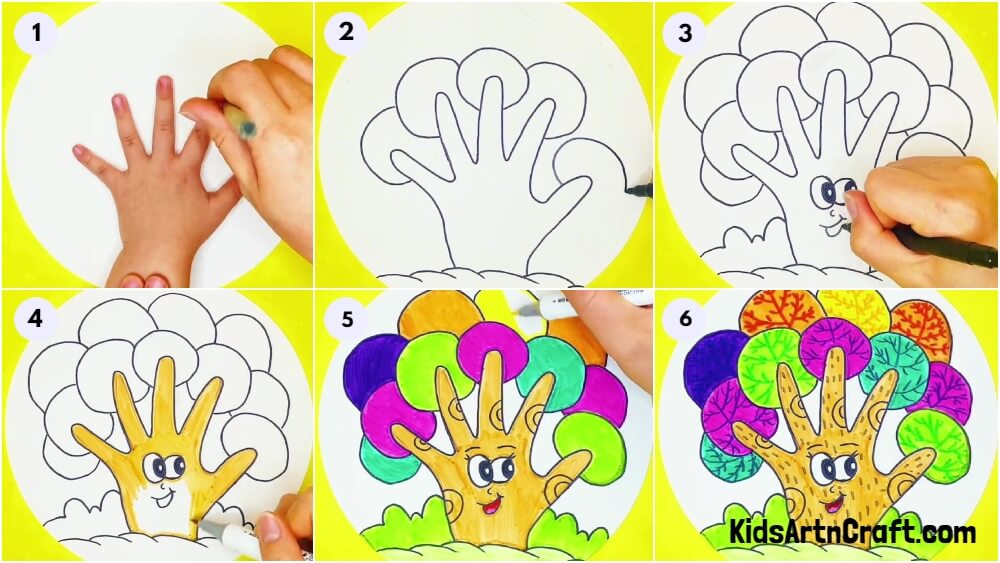
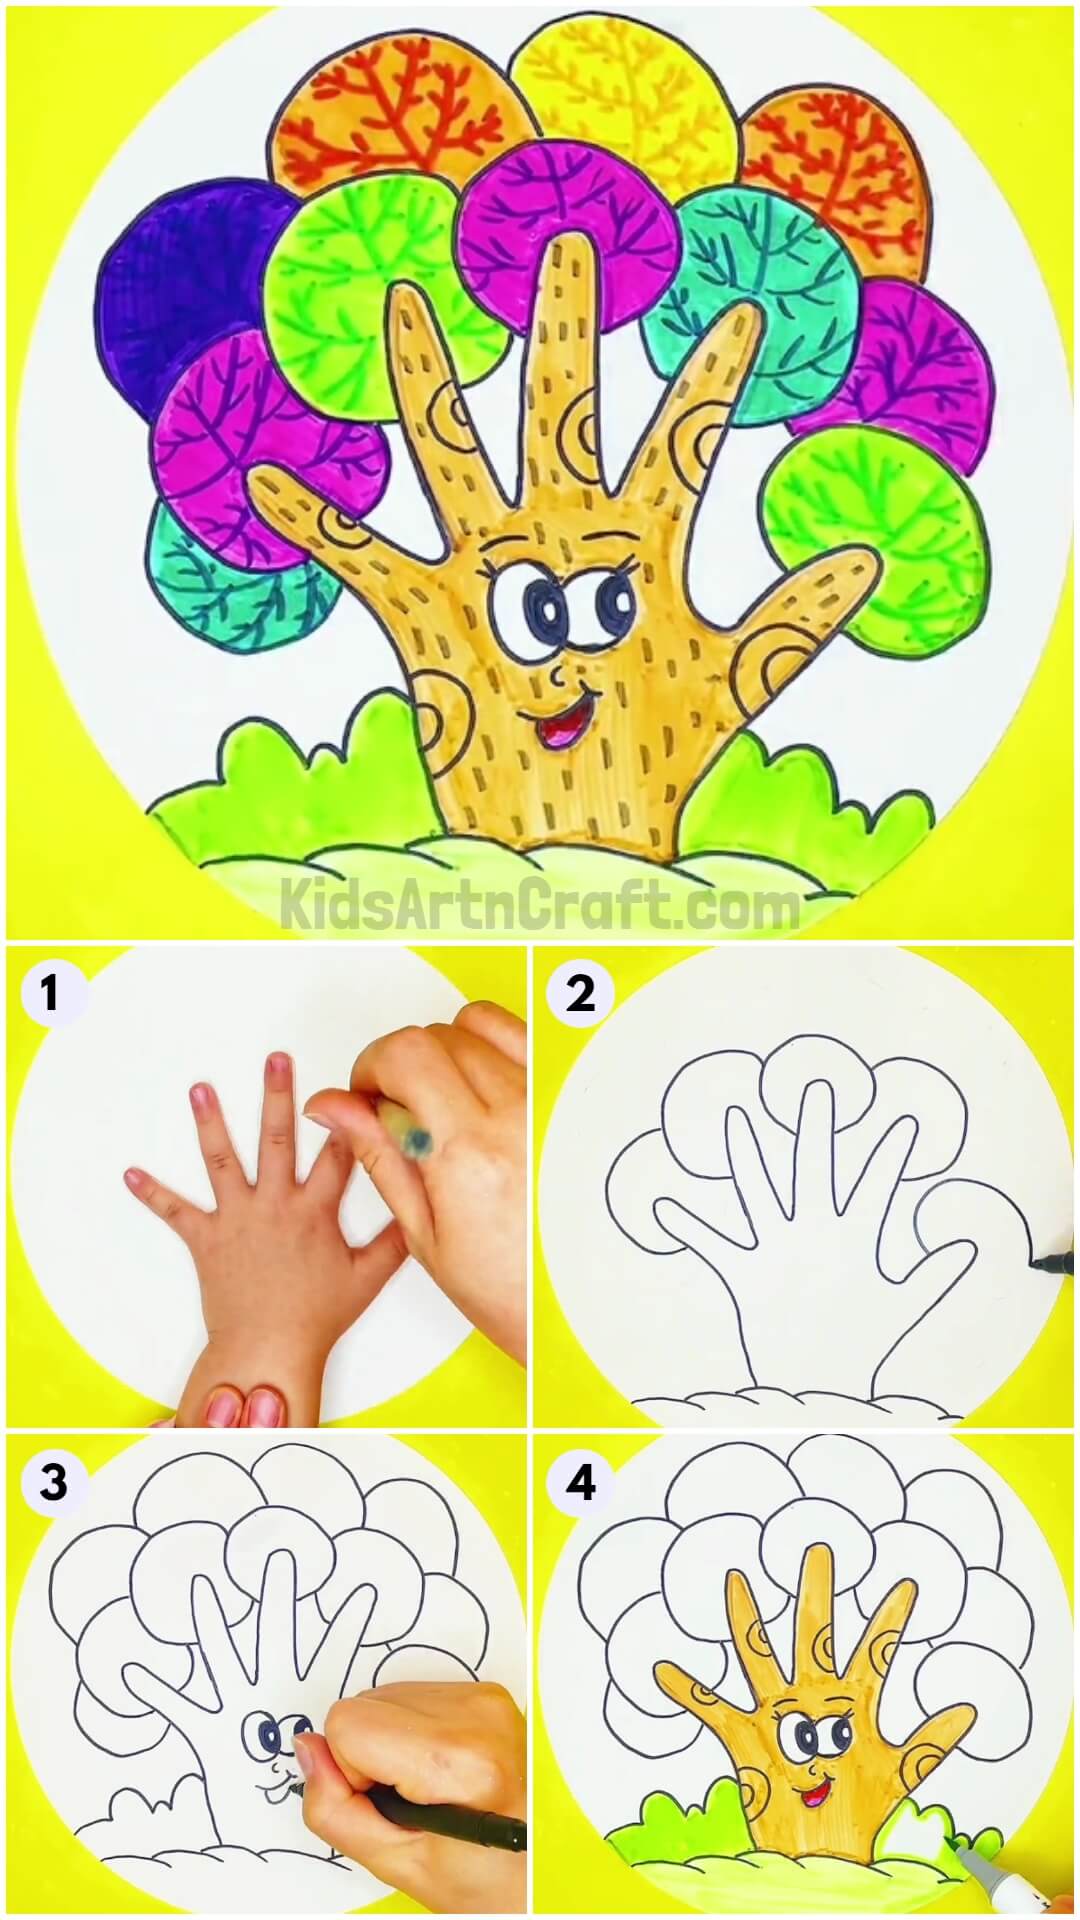
Step 1: Making A Handprint Outline From A Toddler’s Hand
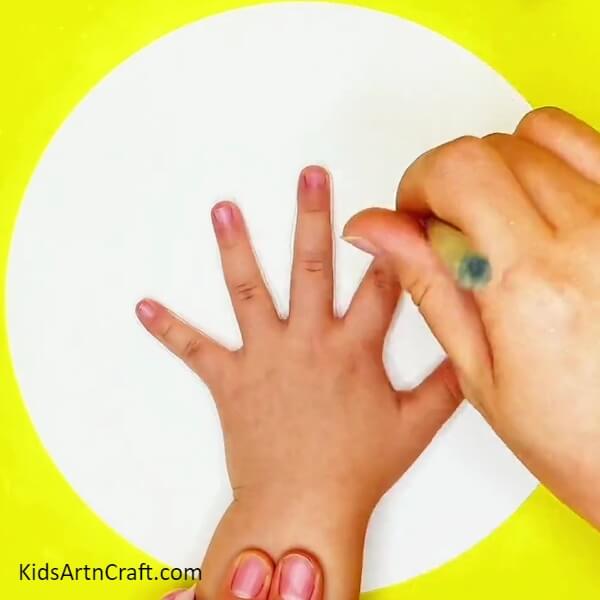
Your first step is to take a white colored craft paper. The white colored craft paper should be in a circle shape.
Then, after taking a circular white-colored craft paper, take a toddler’s hand and place it in the middle of the white-colored craft paper. After placing a toddler’s hand in the middle of the white-colored craft paper, take a dark blue marker/sketch pen and make the handprint outline of the toddler’s hand on the white-colored craft paper.
Step 2: Making Circles Around Your Fingers With A Blue Marker/sketch Pen
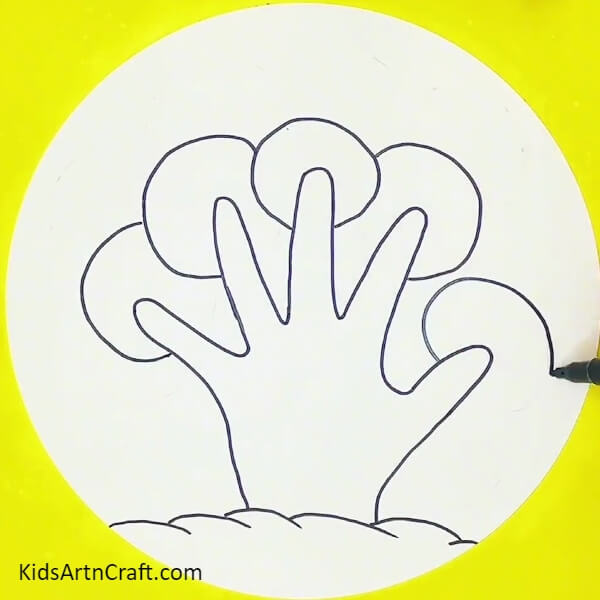
Now, with the help of some dark blue marker/sketch pen from which you made the handprint outline of the toddler’s hand, make circles around the fingers. Make circles around all five fingers with the help of a dark blue marker/sketch pen. You have to make a total of eleven circles around the fingers as shown in the picture below.
Step 3: Making Grasses With Dark Blue Marker/sketch Pen
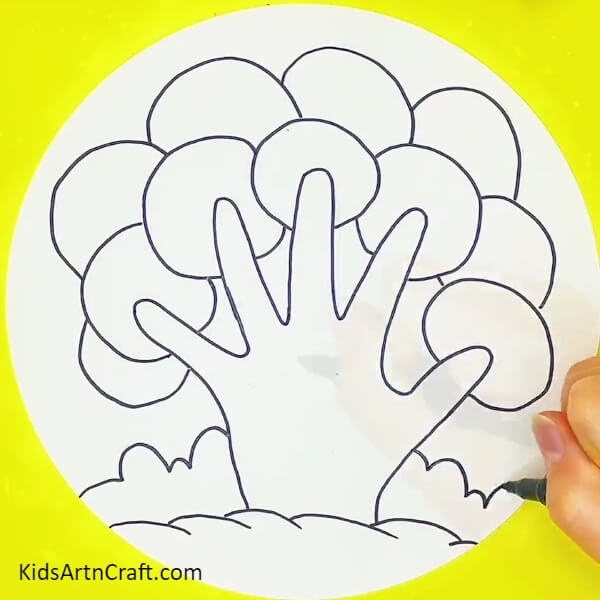
With the same dark blue marker/sketch pen, make the land and the grasses. First, make land from the bottom of the handprint outline with the help of a dark blue marker/sketch pen. Then, make grasses around the handprint outline with the help of a dark blue marker/sketch pen.
Step 4: Making Features With Dark Blue Marker/sketch Pen
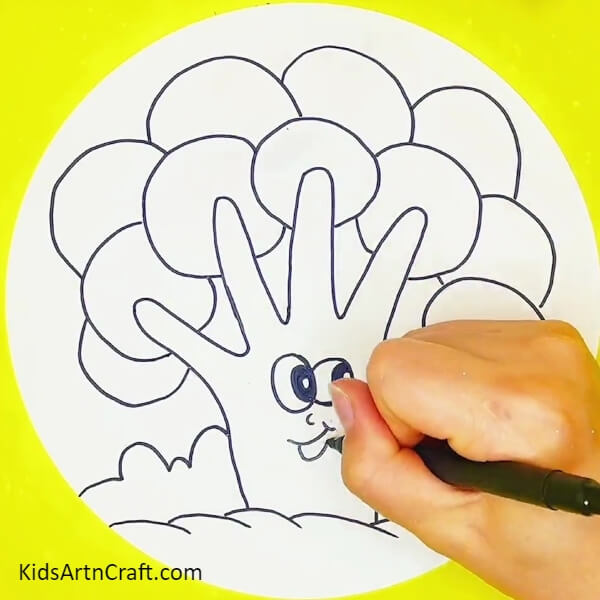
Now, with the help of the same dark blue marker/sketch pen, make features of the handprint outline which you made from the toddler’s hand. To make the features, you have to draw eyes, nose, and mouth with the help of a dark blue marker/sketch pen.
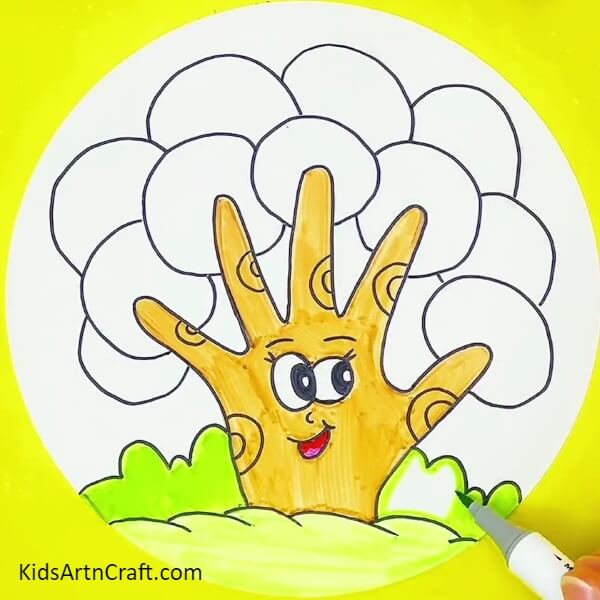
Step 5: Filling The Color In Your Hands With A Yellow Marker/sketch Pen
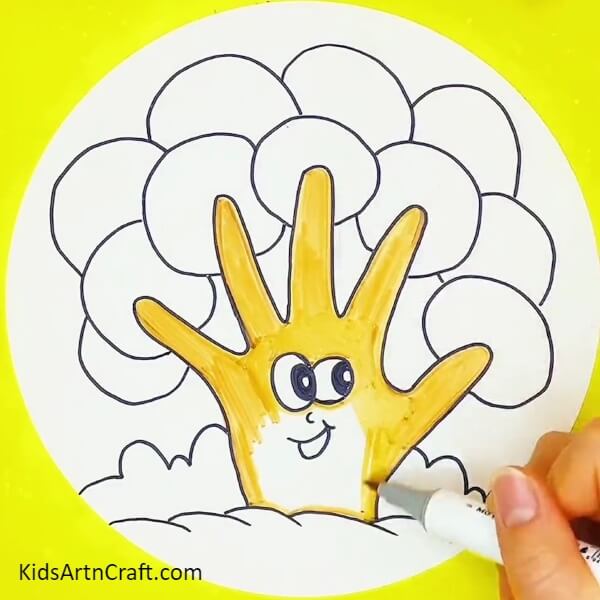
Take a yellow marker/sketch pen. After taking a yellow marker/sketch pen, fill color in the handprint outline which you made from the toddler’s hand. Fill in colour with the help of a yellow marker/sketch pen.
Step 6: Making Designs With A Black Marker/sketch Pen
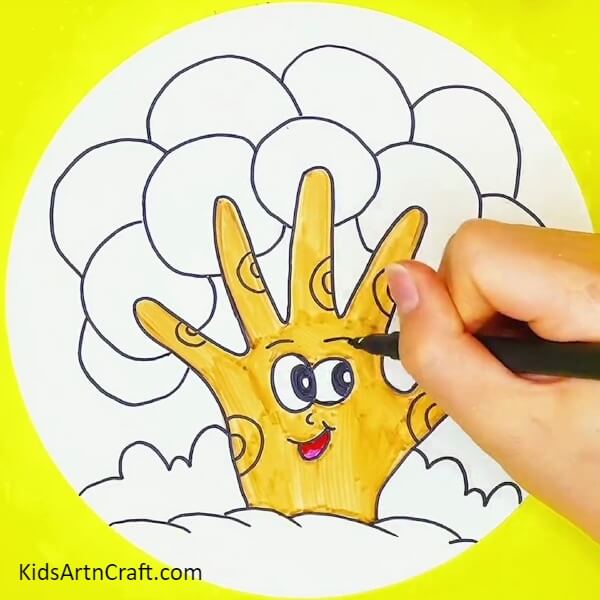
Now, take a black marker/sketch pen. After taking a black marker/sketch pen, make designs for the handprint outline which you made from the toddler’s hand. You have to make designs from a black marker/sketch pen. Designs such as semicircles in all five fingers and on the palm side. Then, with the help of a black marker/sketch pen make eyebrows, just above the eyes which you made in the above step.
After making eyebrows with a black marker/sketch pen. Take a red marker/sketch pen and a pink marker/sketch pen and fill the color inside the mouth indicating it as a tongue as shown in the picture.
Step 7: Filling Color In Grasses And Land
Firstly, take a light green marker/sketch pen and fill the color in the land area which you made with the help of a light green marker/sketch pen. Remember to take the lightest shade of green to fill the color in the land area.
After filling the color in the land area with a light green marker/sketch pen. Take a little darker shade of green than the previous one which you used to fill in the land area. After taking a darker shade of green marker/sketch pen, fill the color in the grass area with the help of darker shade of green marker/sketch pen than the previous green marker/sketch pen.
Step 8: Filling Different Colors In Circles With Different Markers/sketch Pens
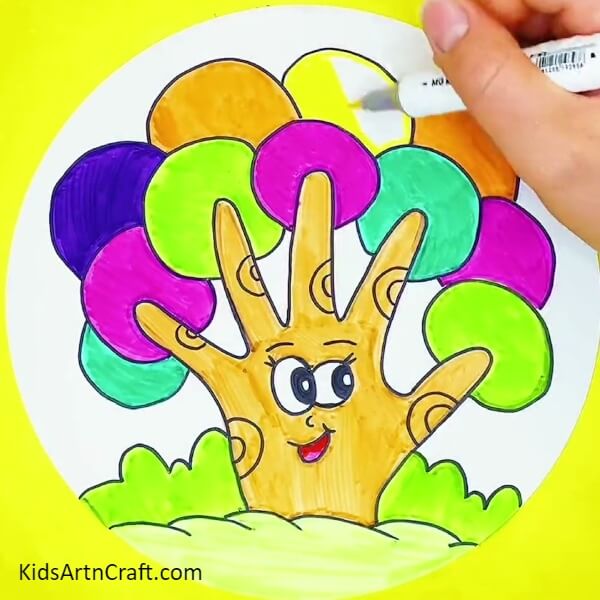
Now, take the different colors of markers/sketch pens and start filling colors in the circles. You have to fill in different colors in each circle. There is a total of eleven circles so, you can fill eleven different colors of your choice with the help of different markers/sketch pens or you can even refer to the picture for colour coordination.
Step 9: Making Veins In The Circles With Different Markers/sketch Pens
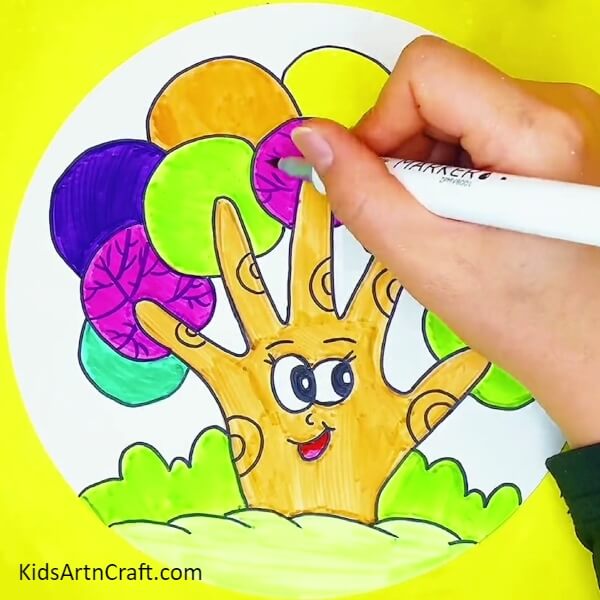
Take the different colors of markers/sketch pens and after taking different colors of markers/sketch pens, make veins in each of the colored circles. You have to make veins with the help of colors according to the markers/sketch pens colors you have filled in the circles so that both the circle color and the vein color contrast with each other.
Your Artwork Is Ready!
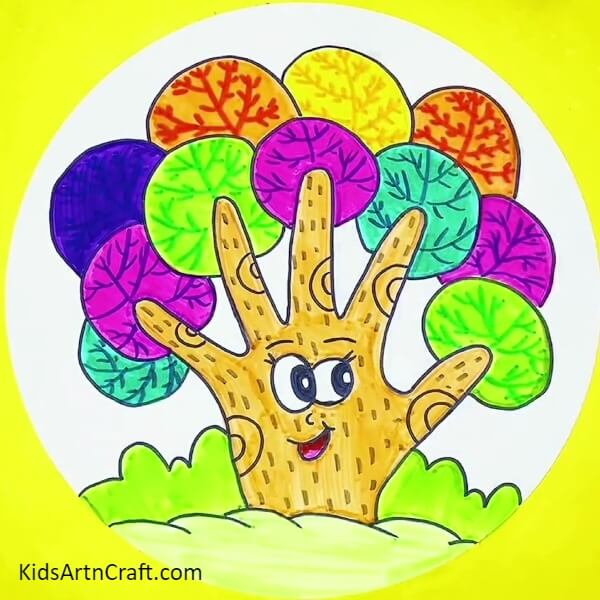
Finally, your unique tree is ready and is made from a toddler’s hand. This is really an easy and unique craft that anyone can do, especially kids. Kids can learn many things from this art such as how to properly fill color in a drawing, and unique art techniques and they can also learn about color theory which is really important for them in day-to-day life.
Did you ever imagine that you could make a tree with just your handprint outline? No, right! This is the perfect opportunity for you to learn something new and unique. So, what are you waiting for, go and grab your materials and follow the simple steps to make your own creative tree.
Follow us on Youtube for art and craft tutorials and much more.
More Articles from Kids Art & Craft
- Step-by-Step Drawing Tricks Video Tutorial for Beginners
- Easy Drawing Tricks Video Tutorial for Kids
- Mushroom Drawing Step by Step Tutorial For Kids
- Beautiful Tree Painting Using Leaf Impression Step-by-step Tutorial For Kids
- How to Learn 3D Drawing on Paper Video Tutorial for Kids