Paper Crafts
DIY Woven Paper Fish Step by Step Tutorial for kids

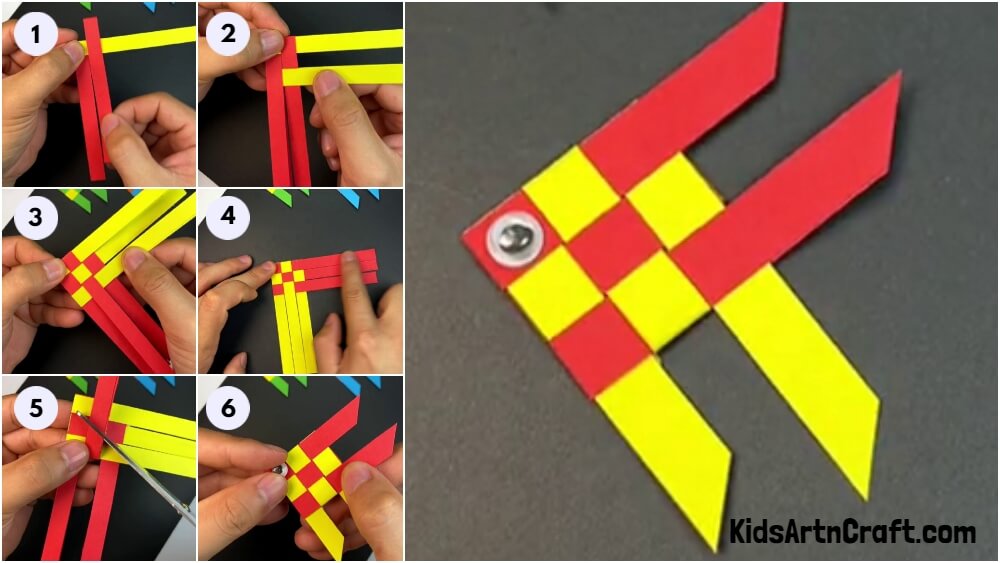
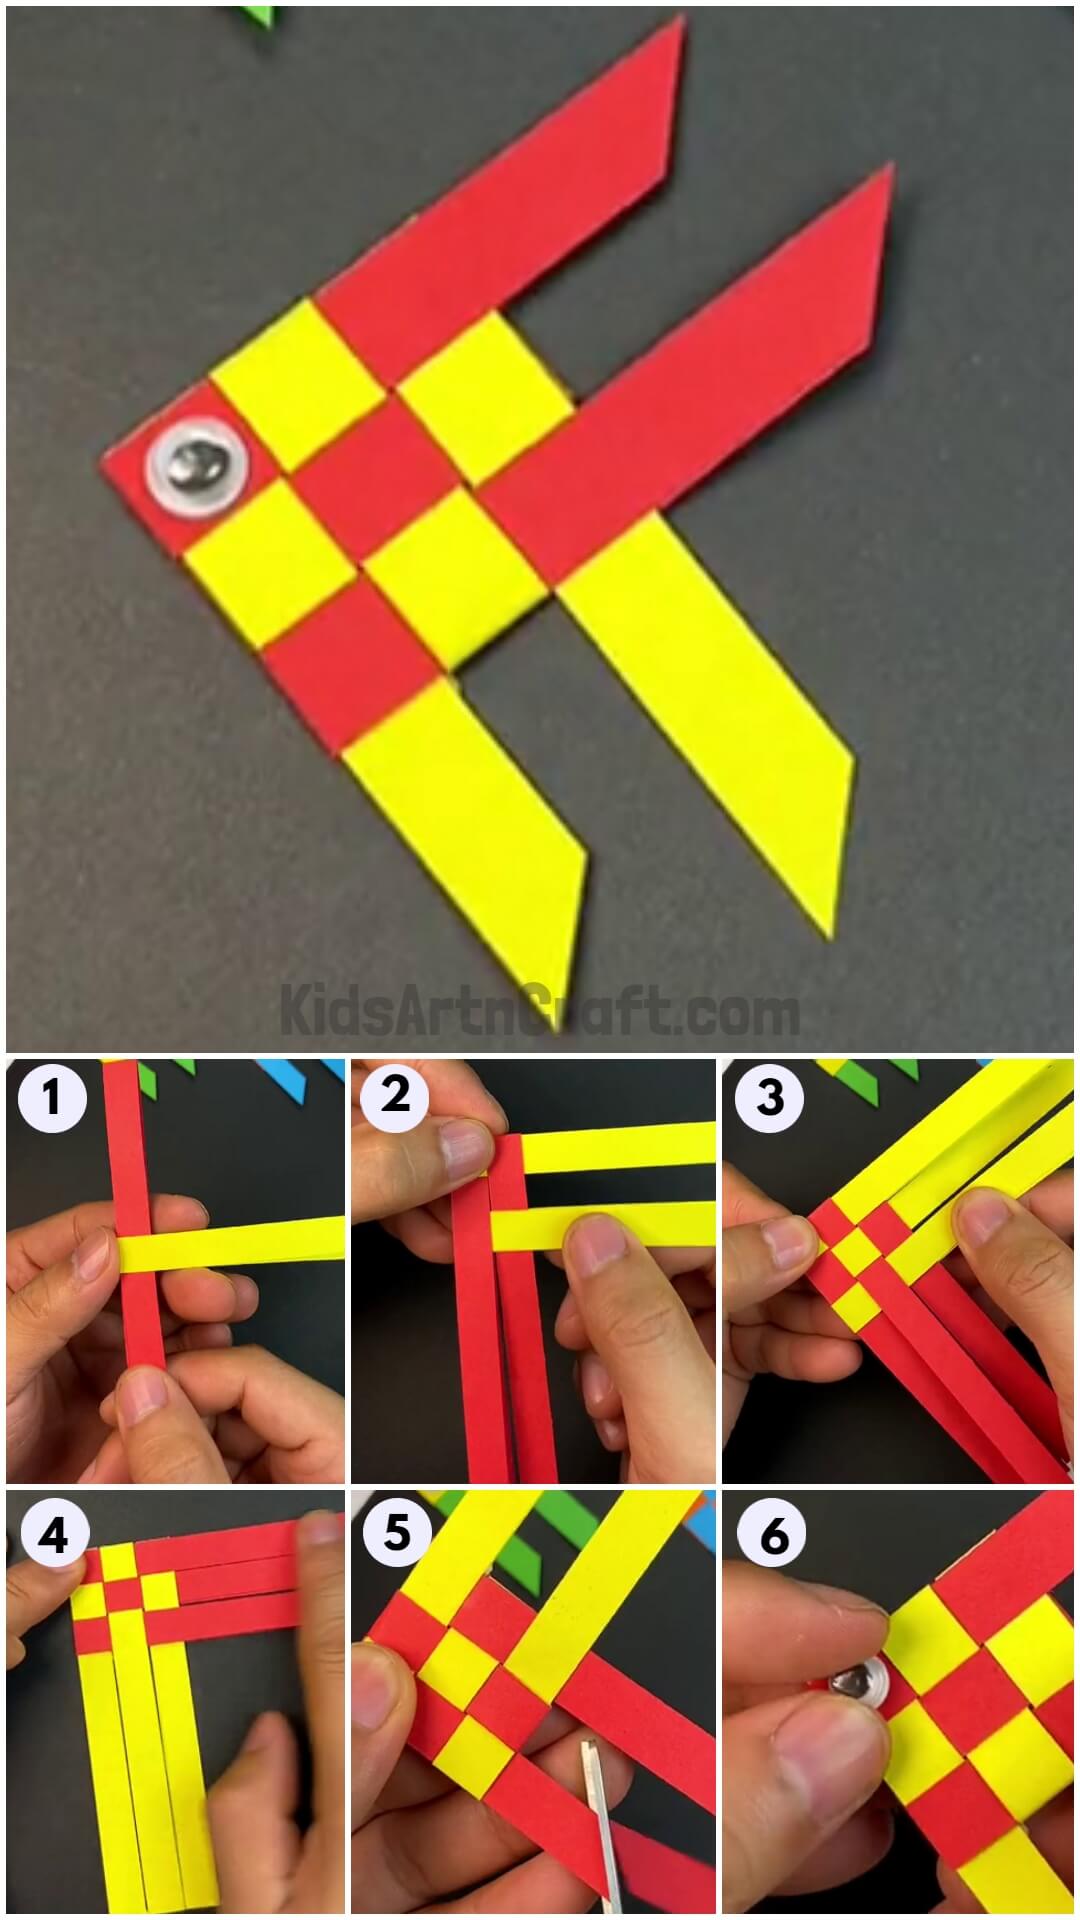
This guide will teach you how to make a fun and easy fish craft with your kids using materials you have at home. You and your children will have a blast making this vibrant and imaginative paper fish! A perfect activity for a rainy day or a fun summer project!
You have all drawn a fish art or made created craft inspired by it at least once in your lifetime but definitely not the way we are going to teach you today. Its an intricate method similar to the process involved in making a woven basket. You will be using paper strips inter woven to achieve the desired fish shape. Its a very unique way of exploring art and craft. With some sheets of paper you can create this craft. So, collect all the material required and let’s get started.
DIY Woven Paper Fish Craft For Kids
Read More: Easy Paper Octopus Craft Tutorial for Kids
Materials Required
- A red and a yellow sheet of paper
- A pair of scissors
- A single googly eye
- A glue stick
Procedure
Step 1: Working On The Sheets Of Paper
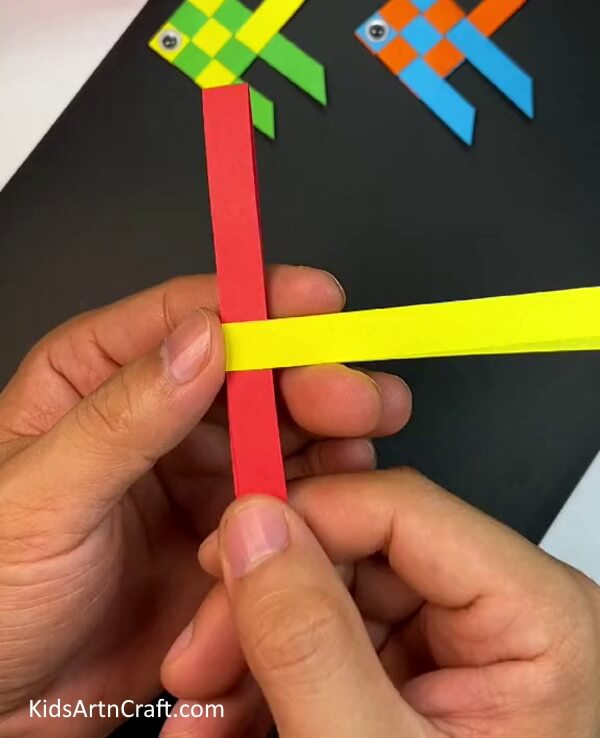
Take a red sheet of paper and cut three thin and long strips out of it. Now, take a yellow sheet of paper and cut it into three similar long and thin strips. Fold all the six strips into halves. You now have long folded strips in two different colours. Finally, put the red strip through the folded side of the yellow strip. The red strip should be places vertically and the yellow strip, horizontally as shown in the picture below. Take this yellow strip up to the top of the red strip. Remember to keep the bottom layer of the red strip free.
Step 2: Putting The Red Red Strip On The Yellow One
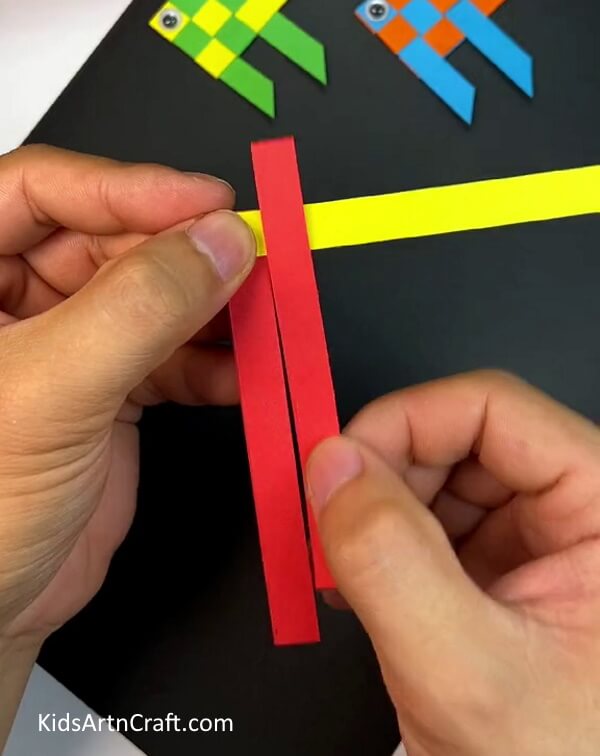
Take another red strip and fit the fold in the middle on the horizontal yellow strip, right next to the vertical red strip. Both the red strips should be aligned next to each other vertically. Remember to only pass it through the top layer of the yellow strip leaving the other layer free. See the picture below for reference.
Step 3: Passing The Other Yellow Strip
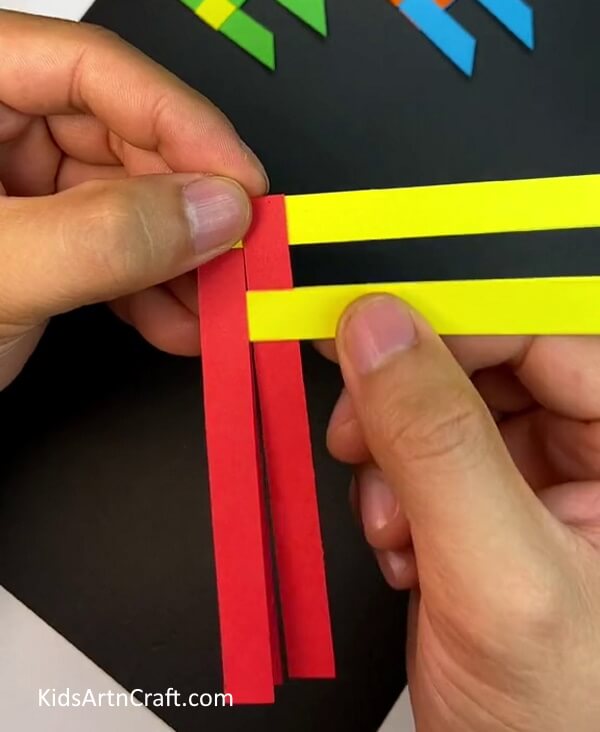
Take another yellow strip and pass it through the bottom layer of the first red strip and over the top layer of the second red strip. See the picture below for reference.
Step 4: Passing the last red strip
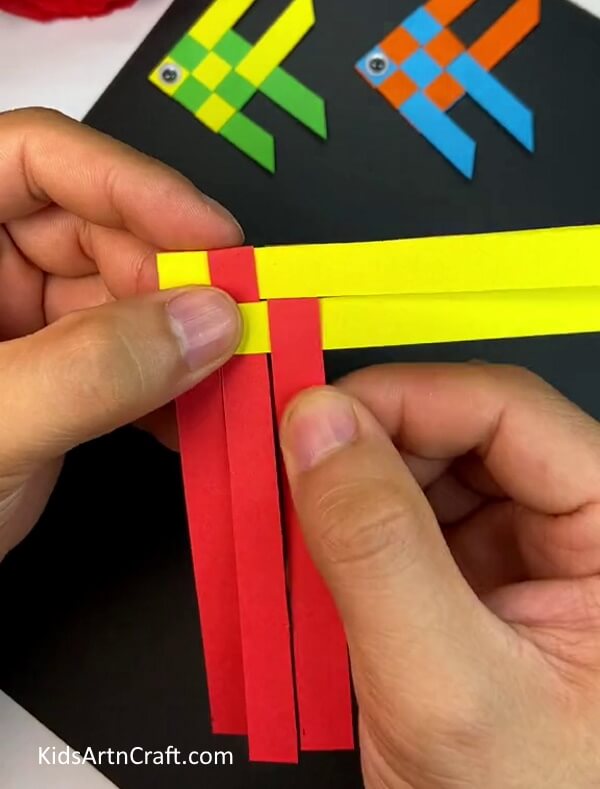
Take the last red strip and pass it through the bottom layer of the horizontal yellow strip at the top and over the yellow strip at the bottom. See the picture below for reference.
Step 5: Passing The Last Yellow Strip
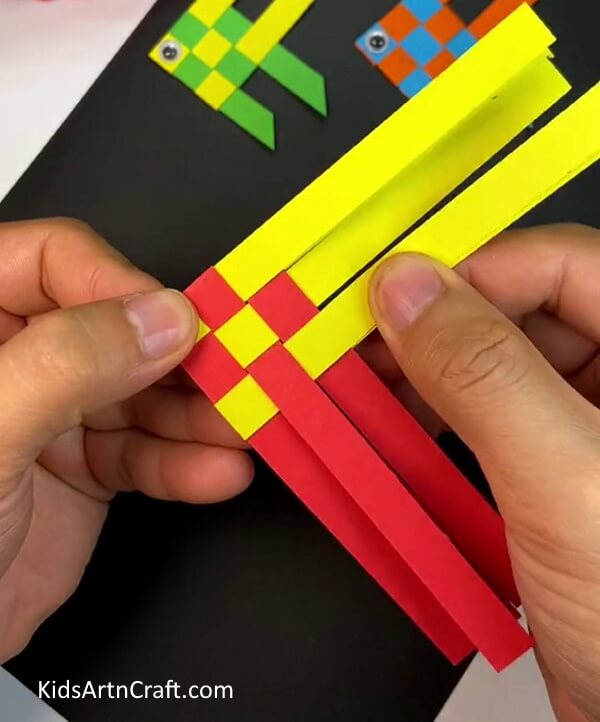
Take the last yellow strip and pass it through the top layer of the first red strip and then through the bottom layer of the next red strip and finally through the top layer of the last red strip. See the picture below for reference.
Step 6: Turning The Woven Strips Around
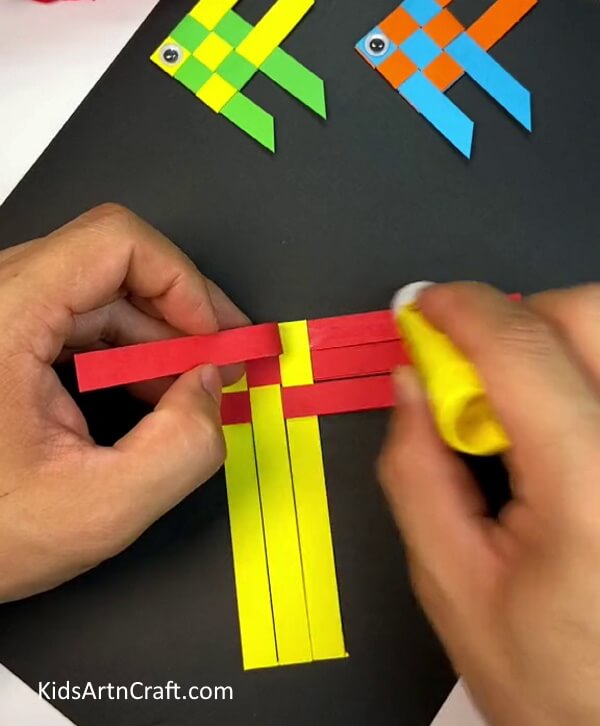
Turn the strips around and picking the top layer of the red first red strip apply some glue at the bottom layer of the same red strip and paste the top layer on the bottom one.
Step 7: Repeating The Process On All The Red Strips
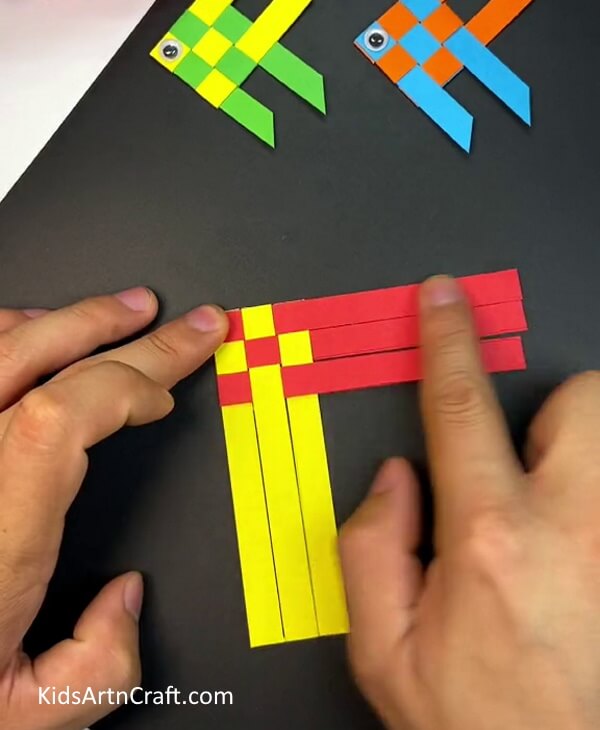
Paste the two layers of all the red strips together. Press down on the strips to seal them properly. See the picture below for reference.
Step 8: Folding The Red Strip In The Middle
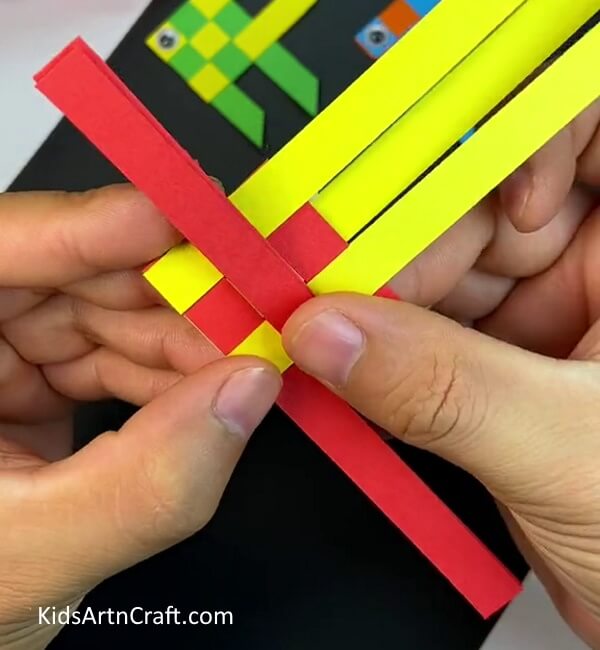
Taking the shape into your hand, turn the shape around again and fold the red strip in the middle on top of the woven shape as shown in the picture below.
Step 9: Trimming The Ends Of The Strip
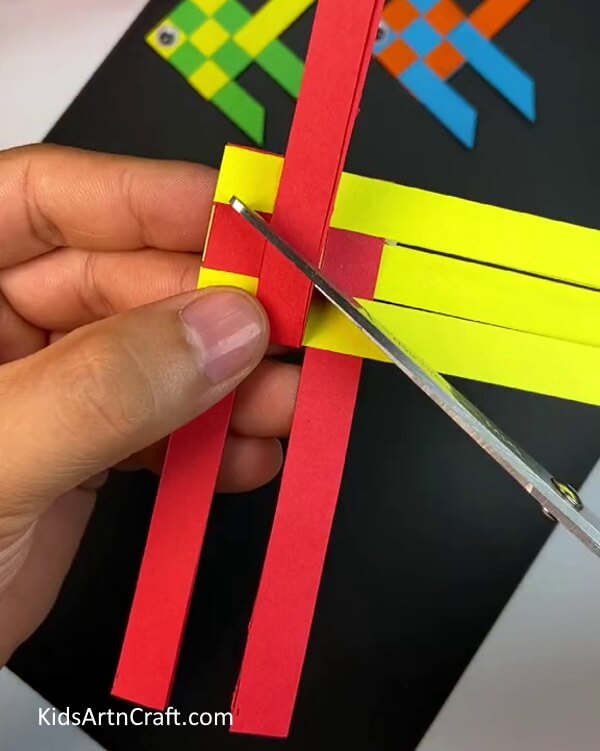
Cut this folded red strip a little above the fold made. Cut the strip in a way, making the ends slanted. See the picture below for reference. Finally, paste this end on the back of the woven shape.
Step 10: Trimming The Ends Of The Other Two Red Strips
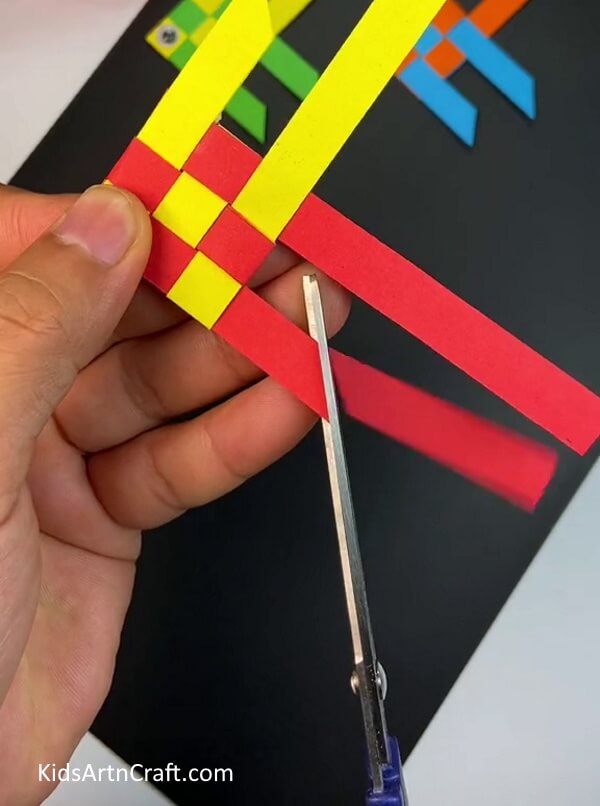
Trim the other two red strips into halves using the same slated cut. See the picture below for reference.
Step 11: Trimming The Ends Of The Yellow Strips
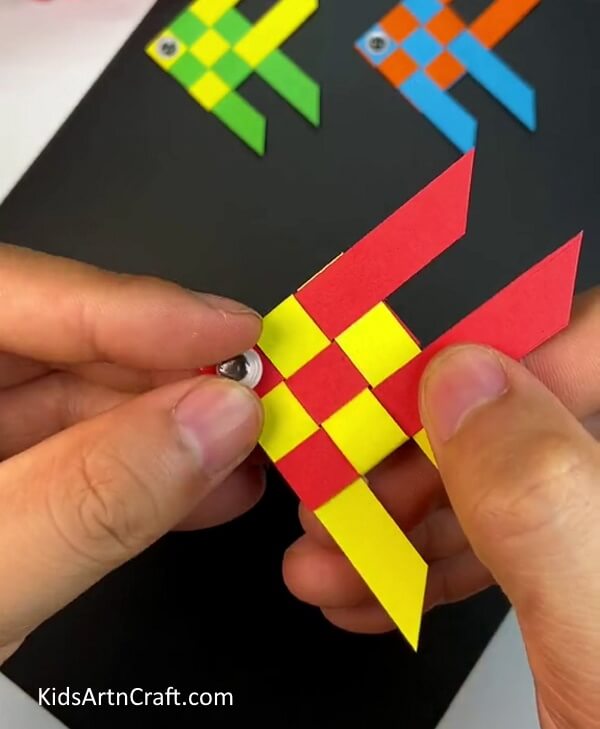
Fold the yellow strip at the back of the woven shape and trim it a little above the fold following a slanted cut and paste it on the same surface. Finally, trim the rest of the two yellow strips into halves using same slanted cuts as shown in the picture below. The shape now has a woven boxed structure of alternate colours.
Hurray !!Your Woven Paper Fish Is Ready!!
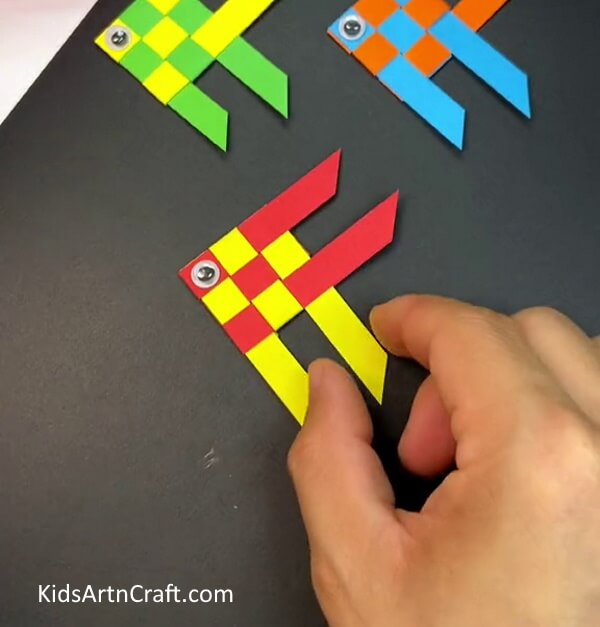
Take the googly eye and paste it in the middle of the red box at the top corner. See the picture below for reference.
Our unique fish craft tutorial has come to an end and you learned great strip weaving skills which can probe to be very useful in creating craft. You can hang it on the walls of your room of next to the window of your room. You can even hang it in your car as well. Follow the tutorials for more such interesting skills and keep inventing new ideas to add originality to your craft. Also, keep practicing the techniques you learn in these tutorials and keep up the good work. Good luck
Some More Fish Craft Tutorial
Hand Crafted Paper Fish For Little Ones
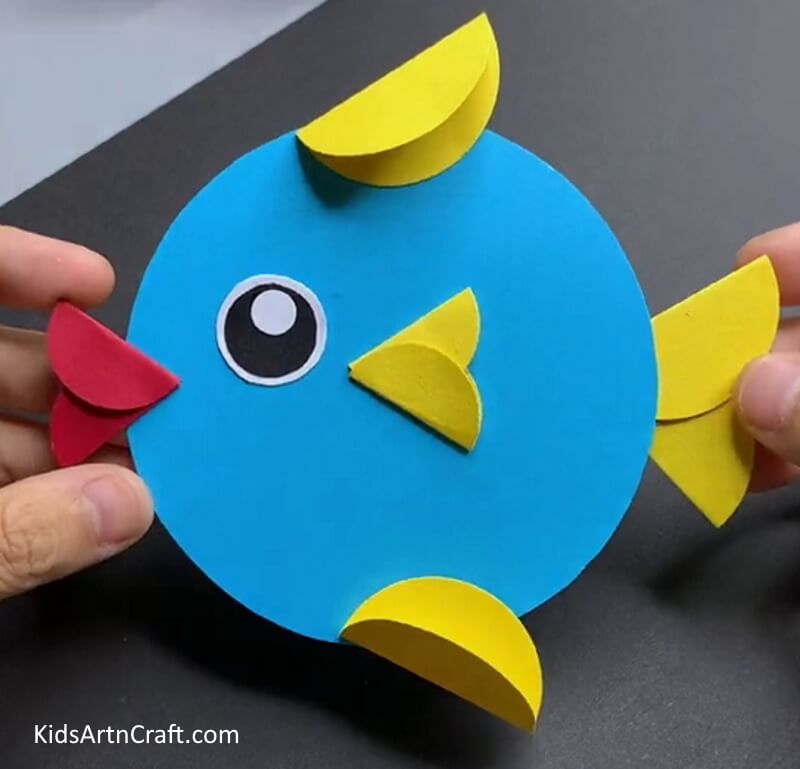
Image Source/Tutorial: Kids Art& Craft
This lovely hand-crafted paper fish is perfect for young children. It is an enjoyable and crafty activity for them to make and enjoy. It is also a great decoration in any room.
Fish Craft Idea Using Leaf For Kids
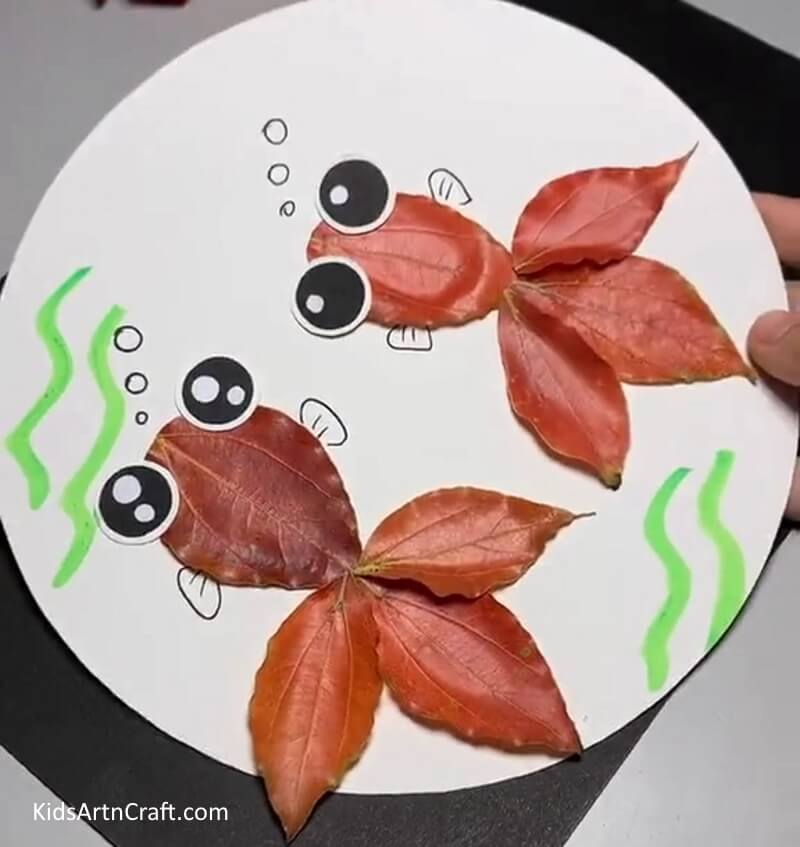
Image Source/Tutorial: Kids Art & Craft
This fun and simple craft is great for kids of all ages. Using a leaf and some other materials, they can create a beautiful fish to hang on their wall. This craft is sure to bring a smile to their face and add a splash of color to any room.
Easy Fish Craft Using Handprint For Kids
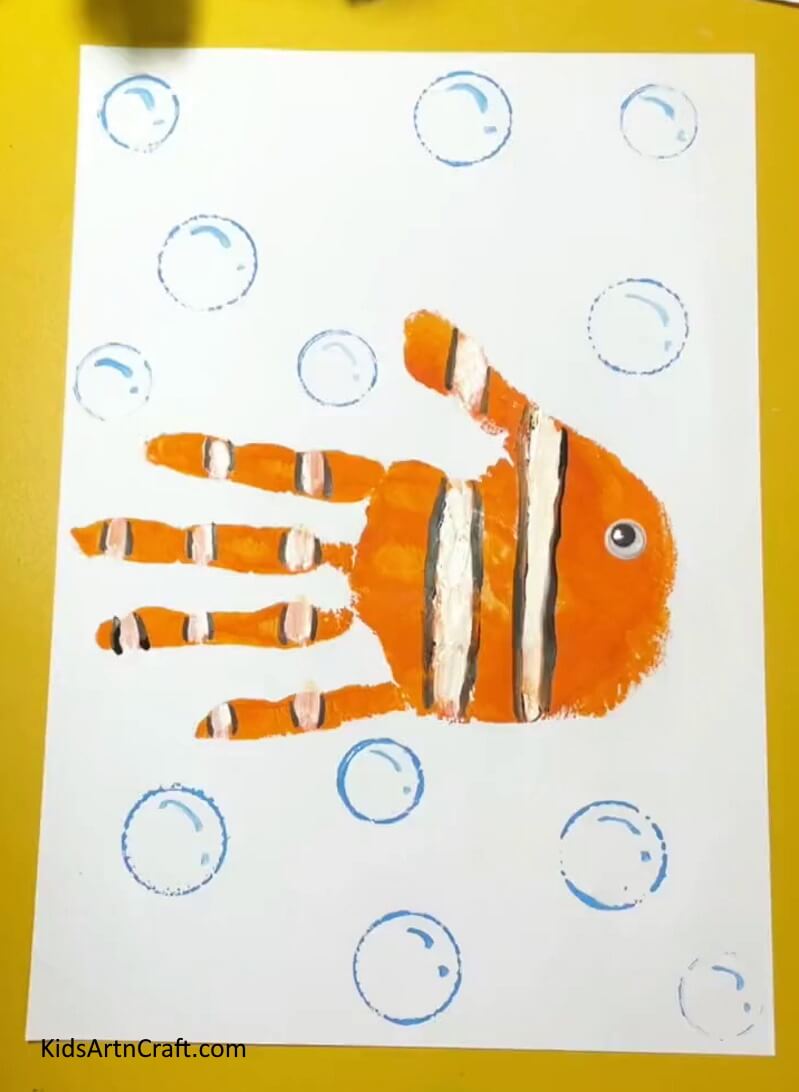
Image Source/Tutorial: Kids Art & Craft
This easy fish craft is perfect for kids to make! It uses a handprint as the fish’s body and a few other basic materials. The result is a cute and simple craft that will bring a smile to any child’s face!
Crafting A Fish Craft Out Of Paper Cups For Children
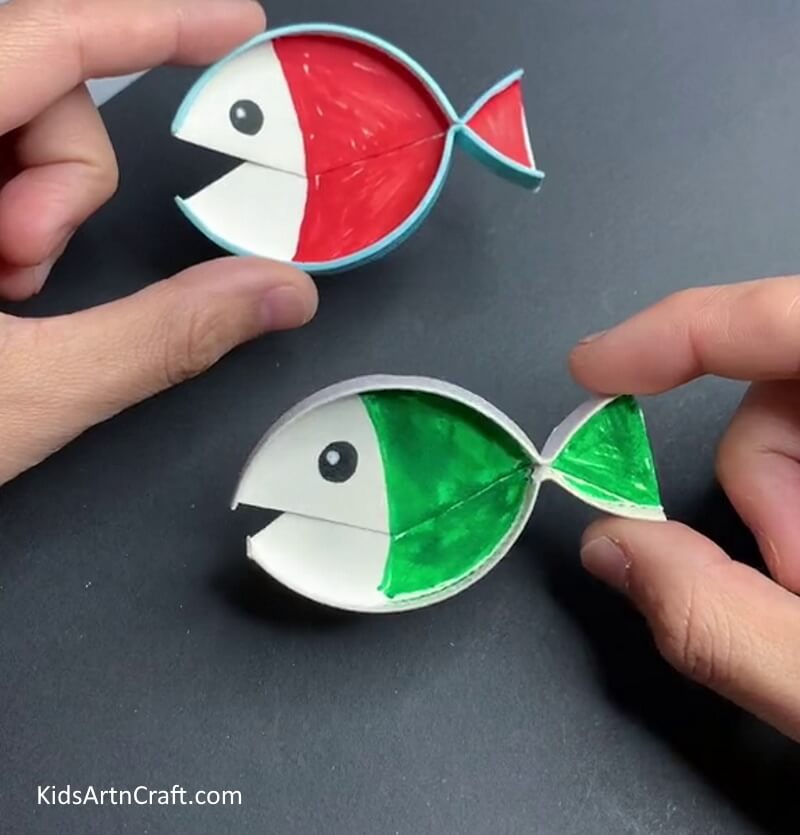
Image Source/Tutorial: Kids Art & Craft
Crafting with paper cups makes a fun and easy activity for children. A simple and fun way to make a fish craft out of paper cups is to use paint, glue, and other art supplies. With a few simple steps, kids can create a unique and fun fish craft that they can proudly display in their room.
Follow us on Youtube for art and craft tutorials and much more.
More Articles from Kids Art & Craft
- Dr. Seuss Math Activities & Games For Classroom
- Handmade Gift Ideas for Teachers
- Glory Lily Coloring Pages For Kids – Free Printables
- Snake Paper Plate Crafts for Kids
- Burlap decor ideas


