Kids Activities
How to Make a Paper Flamingo


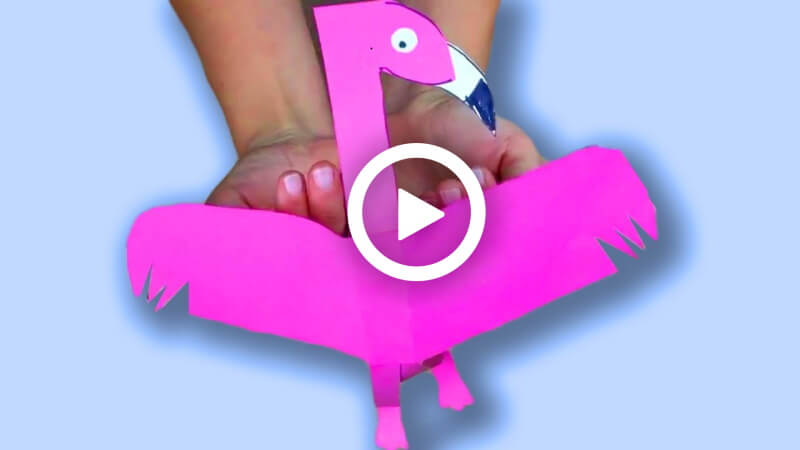
Hello guys! Let’s make a very interesting craft bird today. You must be thinking what it might be! Don’t get confused, as it’s going to reveal. Today you’re going to learn to make a paper flamingo. Amazing right! But the most interesting thing about the craft will be its moving wings. Flamingos are a kind of bird we are all fascinated by.
These birds’ bright pink shades can be beautiful and interesting at the same time. You might be shocked to know that these bright pink colours are from their foods. There are a total of six of these species. They built their house with mud. They are so unique in every sense and very different from other birds.
How to Make a Paper Flamingo
Materials:
- A big pink coloured rectangle of paper.
- A white paper.
- A black marker pen.
- A glue stick.
- Scissors.
Procedure:
- Take a big pink coloured rectangle of paper, and place it horizontally on your desk.
- Fold the paper from the top to the middle by making a middle fold line.
- Cut the folds outside the parts with scissors.
- Take the long piece, fold it from both sides, leaving space in the middle.
- Fold one side from the middle to the corner, then the other side by leaving a space between the previous fold line and the corner to leave a pop-up part in the middle.
- Fold the sides together; the sides should be the same.
- Cut the corner of the non-folded side like a flamingo’s feather with scissors.
- Open the shape, and the flamingo’s wings will be ready.
- Take the rest piece from the cut pink page, cut out a long, straight piece from it with scissors.
- Fold the long piece in half.
- Grab a pencil and draw a flamingo’s big neck and face in it.
- Cut out the drawn part with scissors.
- Take a white piece of paper, place it between both sides of the tip of the mouth of the flamingo.
- Grab a black marker pen, draw a flamingo’s beak and cover the tip of the beak with black.
- Cut out the beak.
- Open the flamingo’s neck- face piece sides, attach glue over one side and attach the beak and both sides with the glue stick.
- The flamingo’s neck-face piece will be ready.
- Draw a small eye with an eyeball on the white paper and cut it out.
- Attach the eye on the flamingo’s face.
- Turn it over.
- Attach the piece to the middle pop-up part of the flamingo’s wings with the glue stick.
- Cut out two small rectangle shapes from the pink paper with scissors.
- Roll the pieces like a ring.
- Attach the pieces in the middle of both sides of the back of the wings with the glue stick.
- Put your fingers on them and try to move them.
- Take a long, straight paper strip by cutting from the pink paper with scissors.
- Cut the piece in half with scissors.
- Attach the pieces in the middle of the flamingo’s back with the glue stick.
- Cut out two feet of the same size from it with scissors.
- Attach the pieces under the legs of the flamingo with a glue stick.
- Fold the part a little.
- Your cute flamingo will be ready!
Look how amazing it looks! The best part is the moving wings. Hurry up, grab your stationery and let’s make a cute paper flamingo.