Kids Activities
How to Make a Paper Giraffe

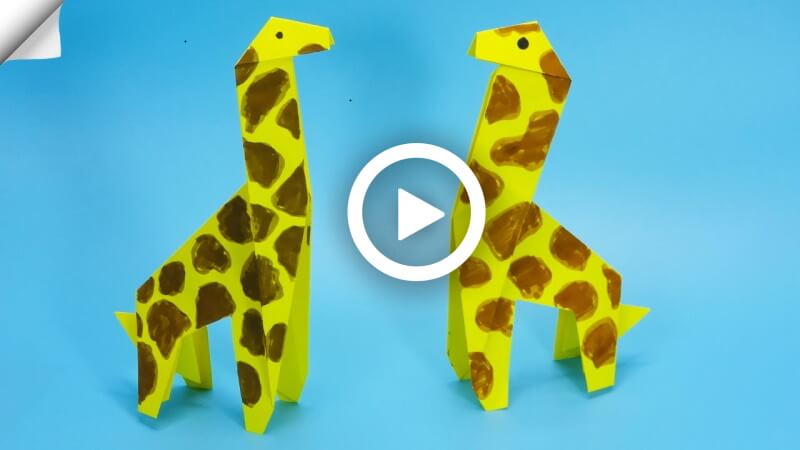
There must be many who love giraffes. Kids are always looking for these interesting animals whenever they visit zoos. The very long height and throat of the creature make the kids fascinated. So, they will find great joy by making them. These origami giraffes resemble their seen griffes and they will be so happy to play with them. Then without wasting more time grab your stationaries and Let’s make a cute origami giraffe! Ready to play!
How to Make a Paper Giraffe
Materials:
- A 20*20 c.m, color paper.
- A scissor.
- Coloring markers or colors. ( pastel or water)
- A black marker.
Procedure:
- Take a 20*20 c.m. paper, place it like a diamond shape on the desk then fold the paper sidewise in a triangle shape. There should be a fold line exactly in the middle of it.
- Fold the sides of the paper into the middle fold line from the top, It will make a triangle shape sidewise. Then fold both sides one over another. It will make an arrow-like shape.
- Fold the top of the page from left to right like an arrow. Then unfold it, It will make an arrow shape fold line under the page, follow these fold lines and make an arrow shape from left to right.
- Roll the upper part of this arrow a little from right to left. Then fold the edge of that arrow a little from left to right. It will look like the face of the paper giraffe.
- Fold the part under the face from left to right straightly. It will make the long throat of your giraffe.
- Unfold the face and throat part, and fold the stringent throat line under the paper-like previously. Then roll the face folds of it conversely like the previous fold, Just put the little edge fold under the paper.
- Fold the right edge of the paper in two big and little triangle shapes rolling-wise. Then unfold the shapes and fold the same by turning the portion. Unfold them and there some triangle shape fold line should be made, Follow that line and put the folds under it. It will look like a small tail.
- Take a scissor and cut the center for making the legs of your giraffe. Cut them in a straightforward manner. The front leg should be larger than the back.
- Take the coloring markers or colors and make the round strips over and under your giraffe. That will make it more identical to your known giraffes.
- Take a black marker pen, draw its eye, highlight the piece, and give a final touch.
Your Giraffe is ready to move! Make these cute things and make your world more creative. kids will love them and they will be very curious about making them. learn them by these easy steps and help them to be more creative. They can make their own origami animal collection by making them. They can also make them for decorating their room and stuff. So hurry up and make your own cute giraffes!
Read More:
- How to decorate a Party with Paper Crafts
- How to Make an Explosion Box – DIY Paper Crafts
- Interesting and Easy Paper Card Ideas for Kids
- DIY How to make Paper Plate Party Hats
- How to Make Paper Birthday Hat – Step by Step Instructions


