Fall & Autumn
Creative Aeroplane Fall Leaves Craft For Beginners

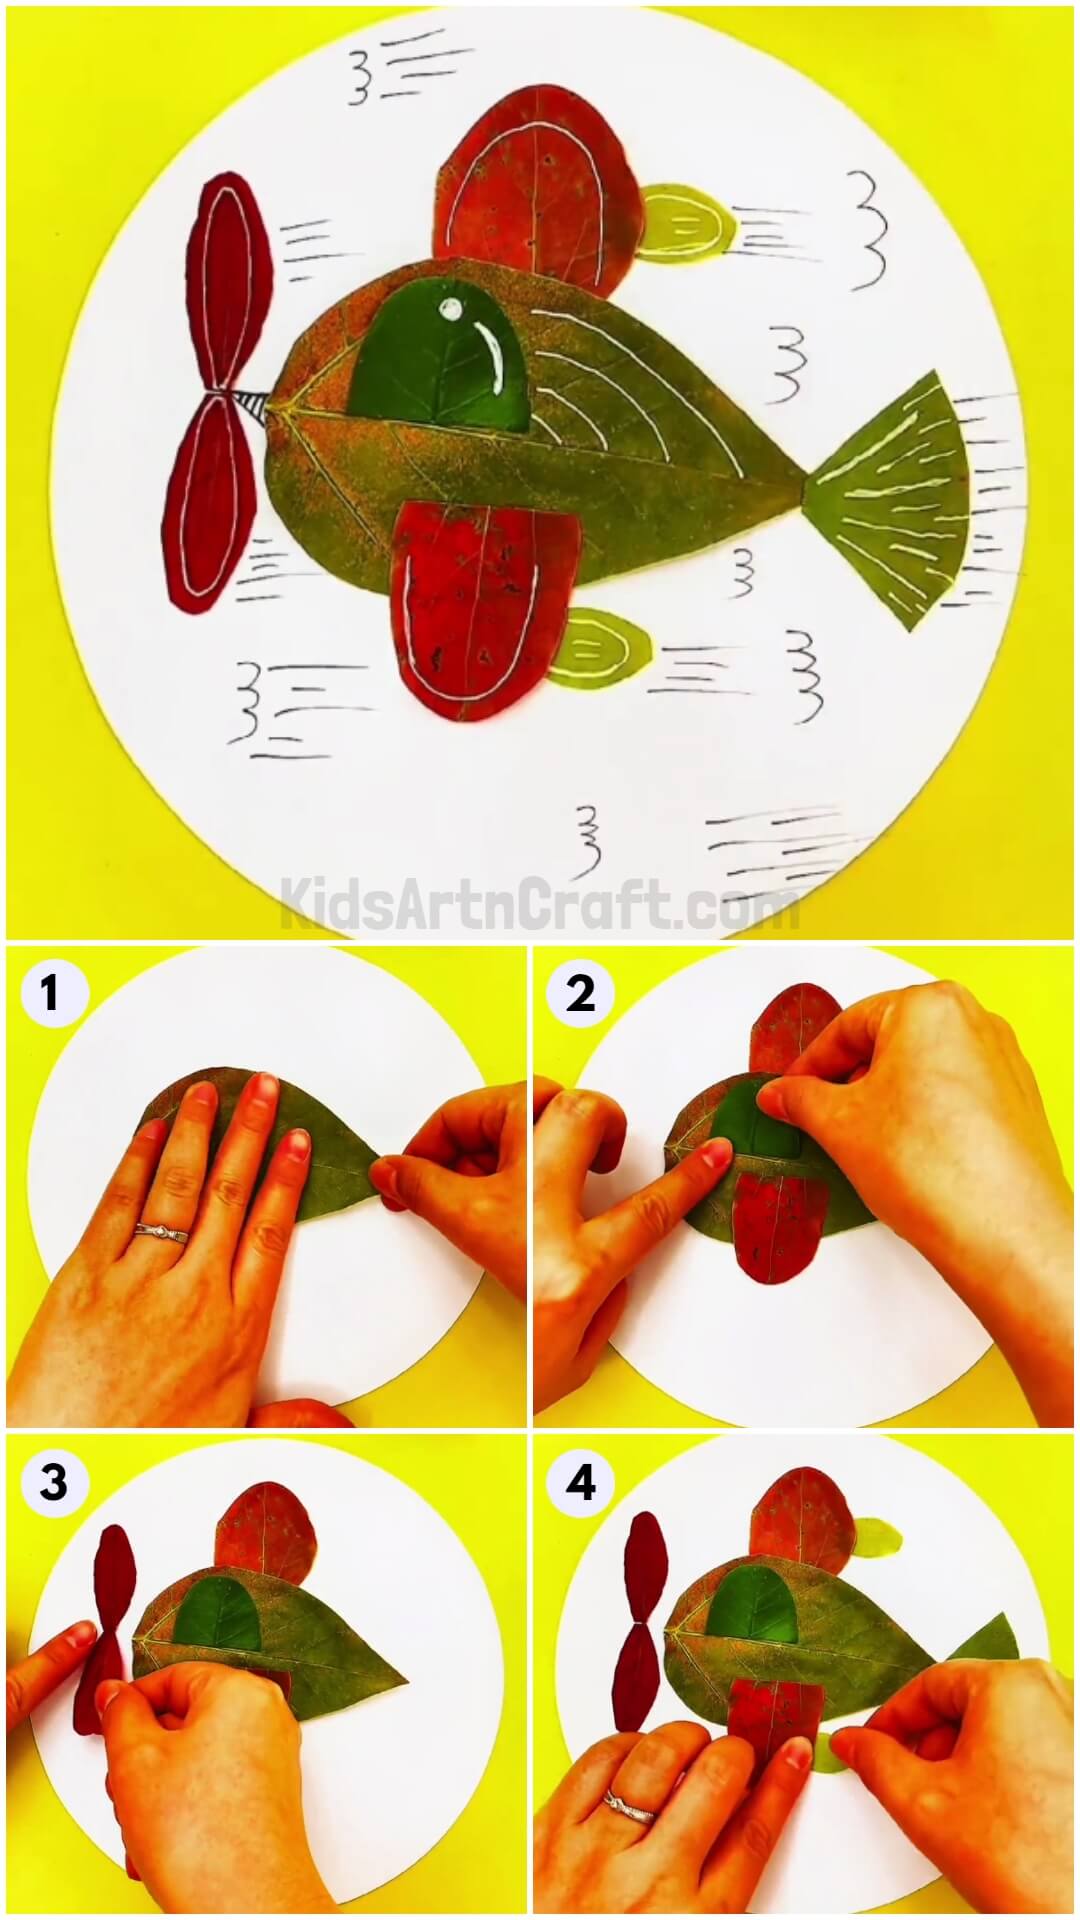
Difficult to make a plane? C’mon, not really. Make a Creative Airplane using Fall Leaves, using this easy tutorial given below with pictures and steps for every little move.
So, what do you have planned for this fall? Why not get a little creative! Grab out some fall leaves and let’s make an airplane. This is simple and easy craft idea for kids and adults all alike. For kids, it is a good way to get creative and for them to look at the world from a different perspective. It a very good start to get into art and craft for the beginners, not so challenging, interesting and yet slightly detailed. Let’s learn to think out of the box and create. Follow the tutorial below and you will have a leafy airplane in no time.
DIY Creative Airplane Fall Leaves Craft
Read More: DIY Step-by-Step Finger Puppet Craft for Kids
Materials Required
- Fall Leaves
- Scissors
- Fevicol
- Black Sketch Pen
- White Sketch Pen
- Plain white drawing sheet
Procedure
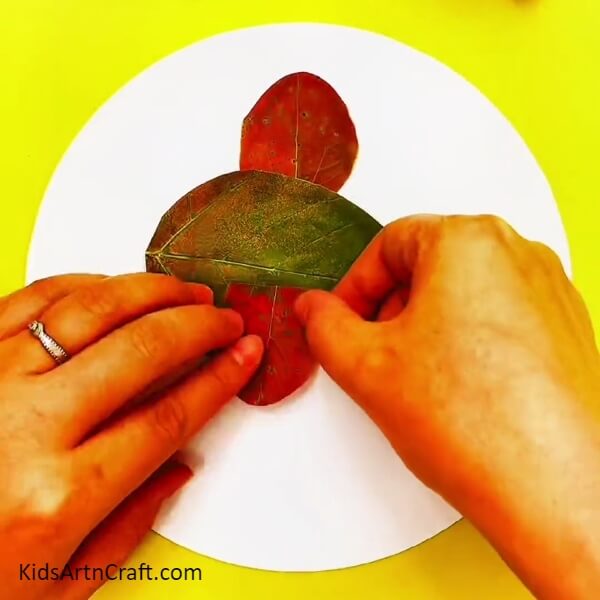
Step 1: Taking The Big, Green Leaf To Make The Body Of The Aircraft
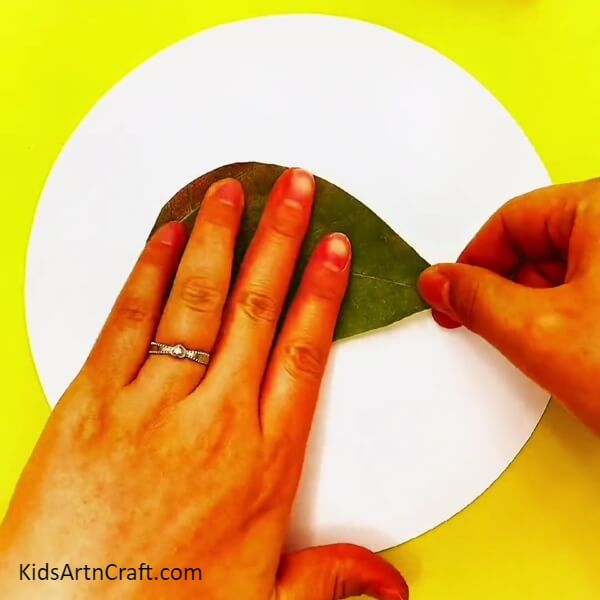
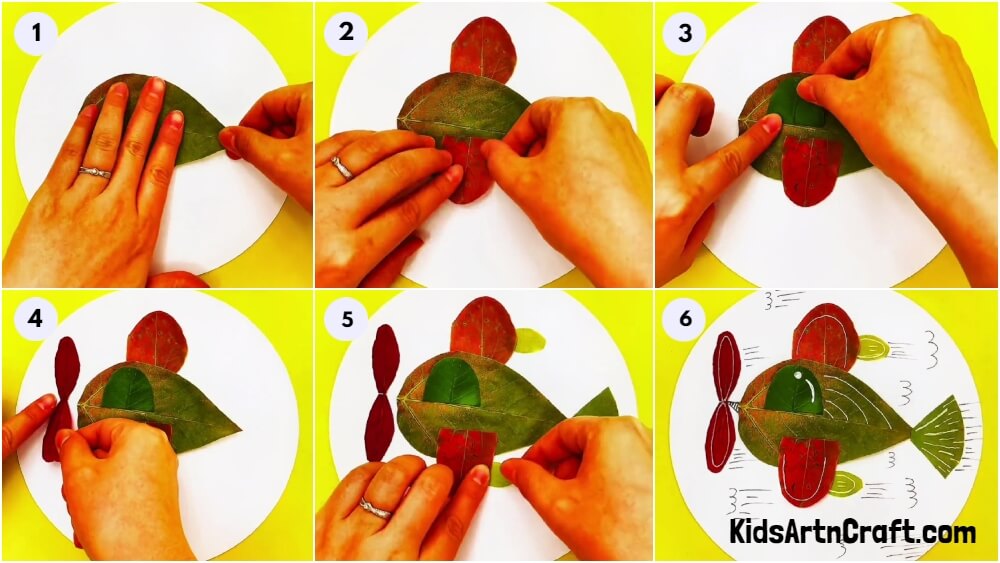
Take the leaf and paste it on the sheet of paper, using a fevicol to form the body of the airplane.
Step 2: Making The Fins Using The Red Leaves
Take those two smaller red leaves. Stick one of them a little beneath the bigger one and the other slightly folded from the streamlined area towards the other half of the bigger leaf. Carefully, observe the image above and follow the same pattern.
Step 3: Pasting The Green Leaf In Half To Make The Pilot’s Window
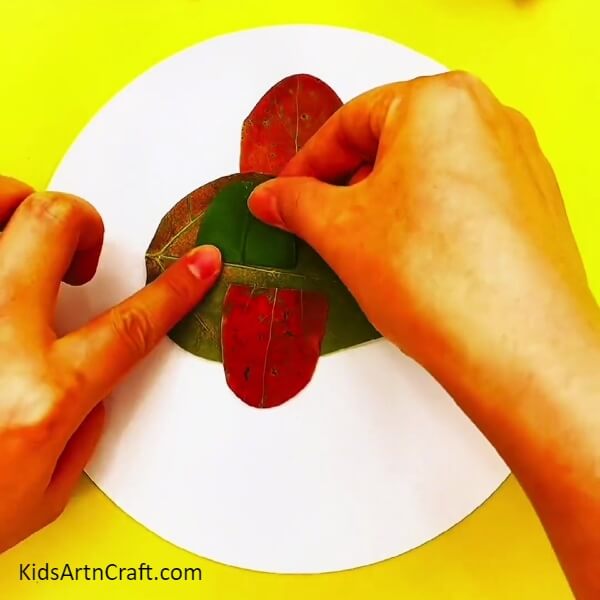
Take the half of the green leaf and stick it as shown in the picture above, using fevicol, for the initial window of the pilot.
Step 4: Taking The Think Red Leaves To Make The Fan
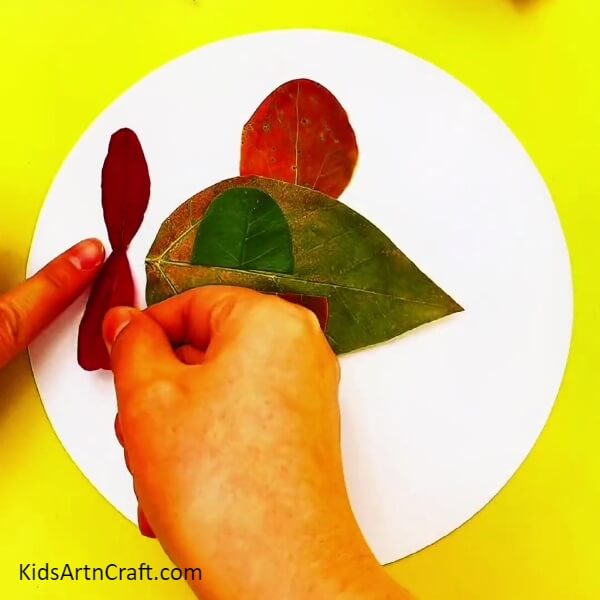
Now, take those thin red leaves and paste it in front of the big leaf. Paste them facing their pointed sides as done in the above image. And this way, the fan is done.
Step 5: Making The Fan Out Of Curvy Triangled Leaf
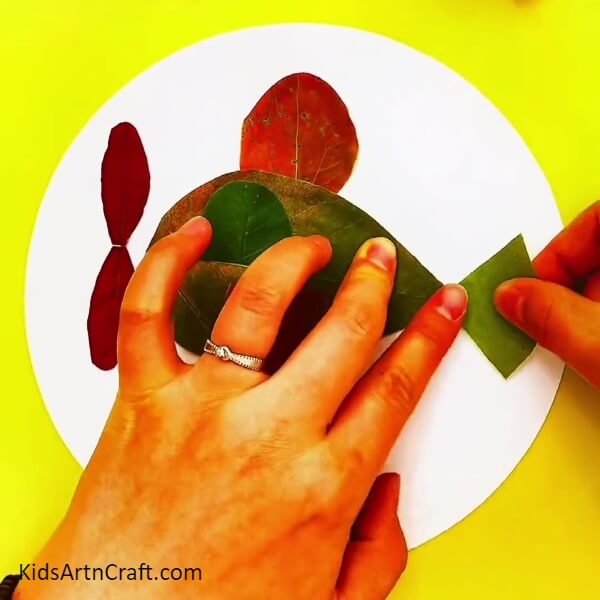
Take that green leaf, cut into a curved triangle as shown in the picture above. Paste it, facing its pointed side with pointed side of the big leaf.
Step 6: Picking Up Those Yellowish – Green Leaves
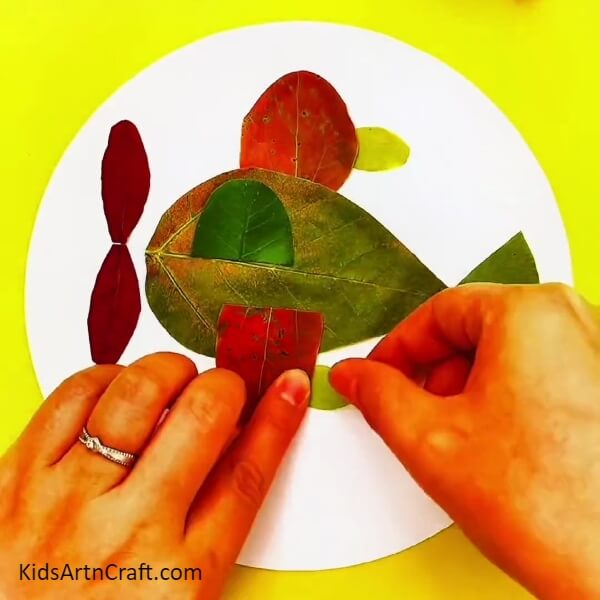
Now, take those two little yellowish-green leaves and paste them in the above manner.
Step 7: Giving Some Windy, Breezy Effects Using The Black Pen
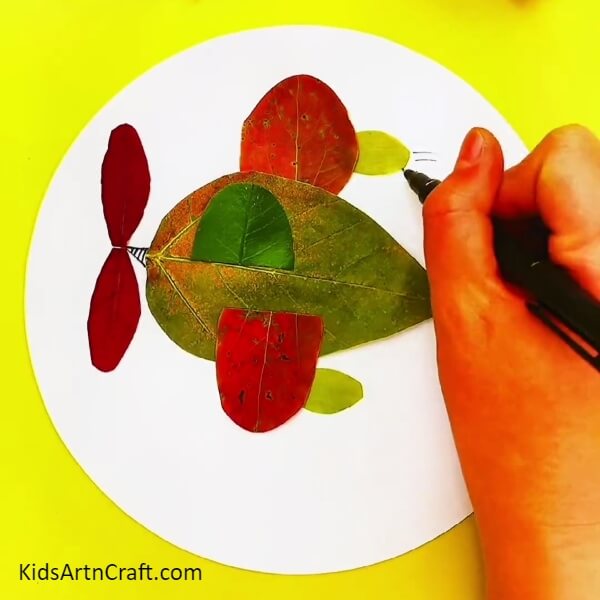
Using the black sketch pen, draw the breeze to show the movement of the airplane.
Step 8: Now Some Finishing Touches With The White Pen
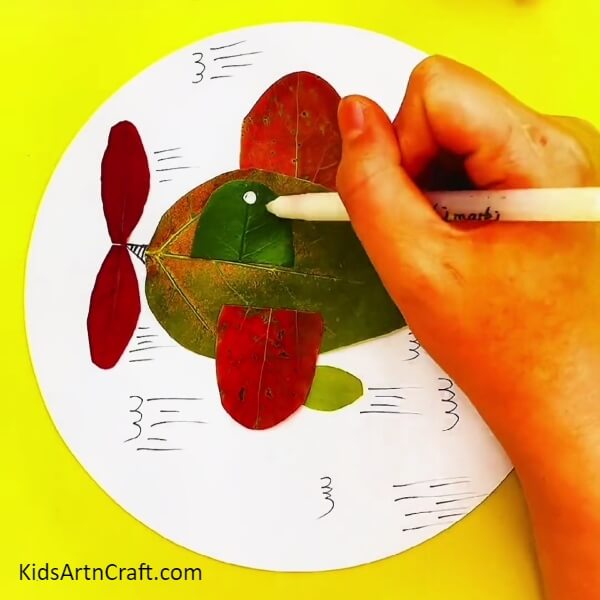
Add these finishing touches by putting in some details using a white pen. Refer to the image presented above.
Finally! The Fall leaves aircraft
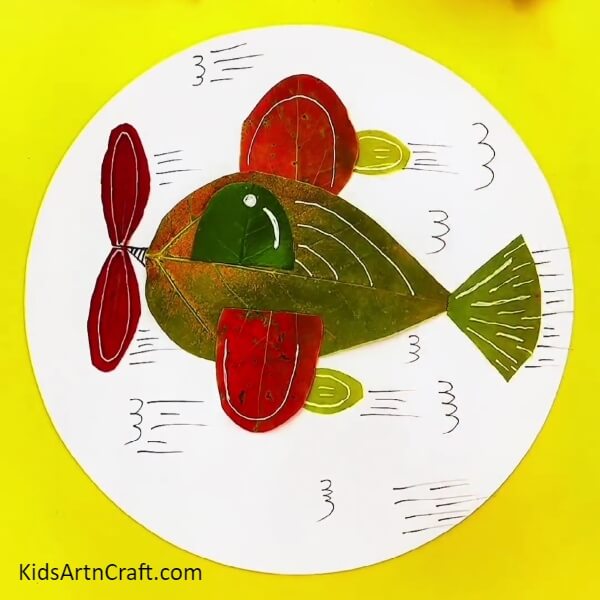
Here it is! See, how beautiful it looks. The leafy airplane is ready.
Not much time? No problem, you don’t need much any way. Get creative, get artisty. Grab some leaves, take a nice walk outside and well, make an airplane! For all ages, have fun with art and craft. Start now.
For more easy art and craft ideas and tutorials, visit the website. Kindly leave your suggestions, opinions and reviews in the comment section, we hope you enjoyed making this with us. Thank you for your time.
Follow us on Youtube for art and craft tutorials and much more.
More Articles from Kids Art & Craft
- DIY Foam Net Home Craft For Kids
- Fall Leaf Craft Tutorial for Kids
- How To Make Easy Fall Tree Craft From Leaves
- DIY Surgical Mask pouch easy tutorial
- Giraffe and Bird Leaf Craft Tutorial For Kids


