Recycled Crafts
How to Make Crocodile Craft Using Bubble Wrap Idea

Come join us in making a sweet little crocodile using a discarded sheet of bubble wrap. Follow this step-by-step tutorial and create the same!
Welcome to this step-by-step tutorial. Here we will make a sweet little crocodile, Mr. Crocs, using bubble wrap. Unleash your creativity by creating this amazing craft in no time! Everyone will love the results of your craftwork and you can even use it as your wall decor or even school project! This is a simple and fun craft idea that will keep kids engaged. Grab a discarded bubble wrap and some paints, and here we go!!
DIY Crocodile Craft Using Bubble Wrap Idea
Read More: DIY Car With Balloon and Straw Easy Tutorial
Materials Required
- Cardboard
- Paint Colors (Blue, Brown, Green, And Yellow)
- Black Marker
- Rounded Paintbrush
- Bubble Wrap
- Googly Eyes
- Red Bindi
- White Paper
- Cotton Earbuds
- Scissors And Glue
Procedure
Step 1: Painting The Ground
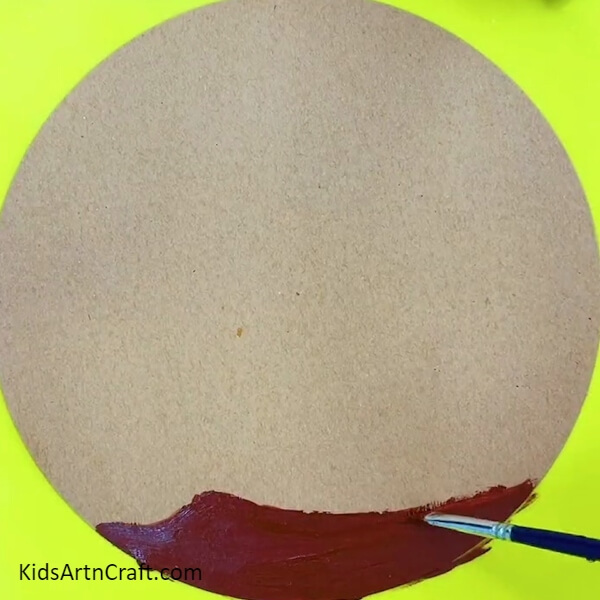
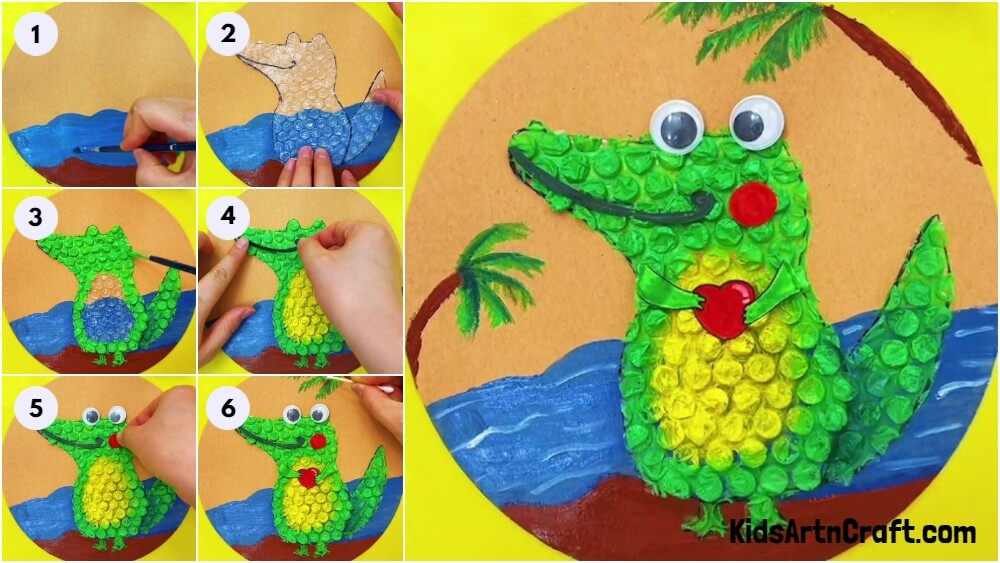
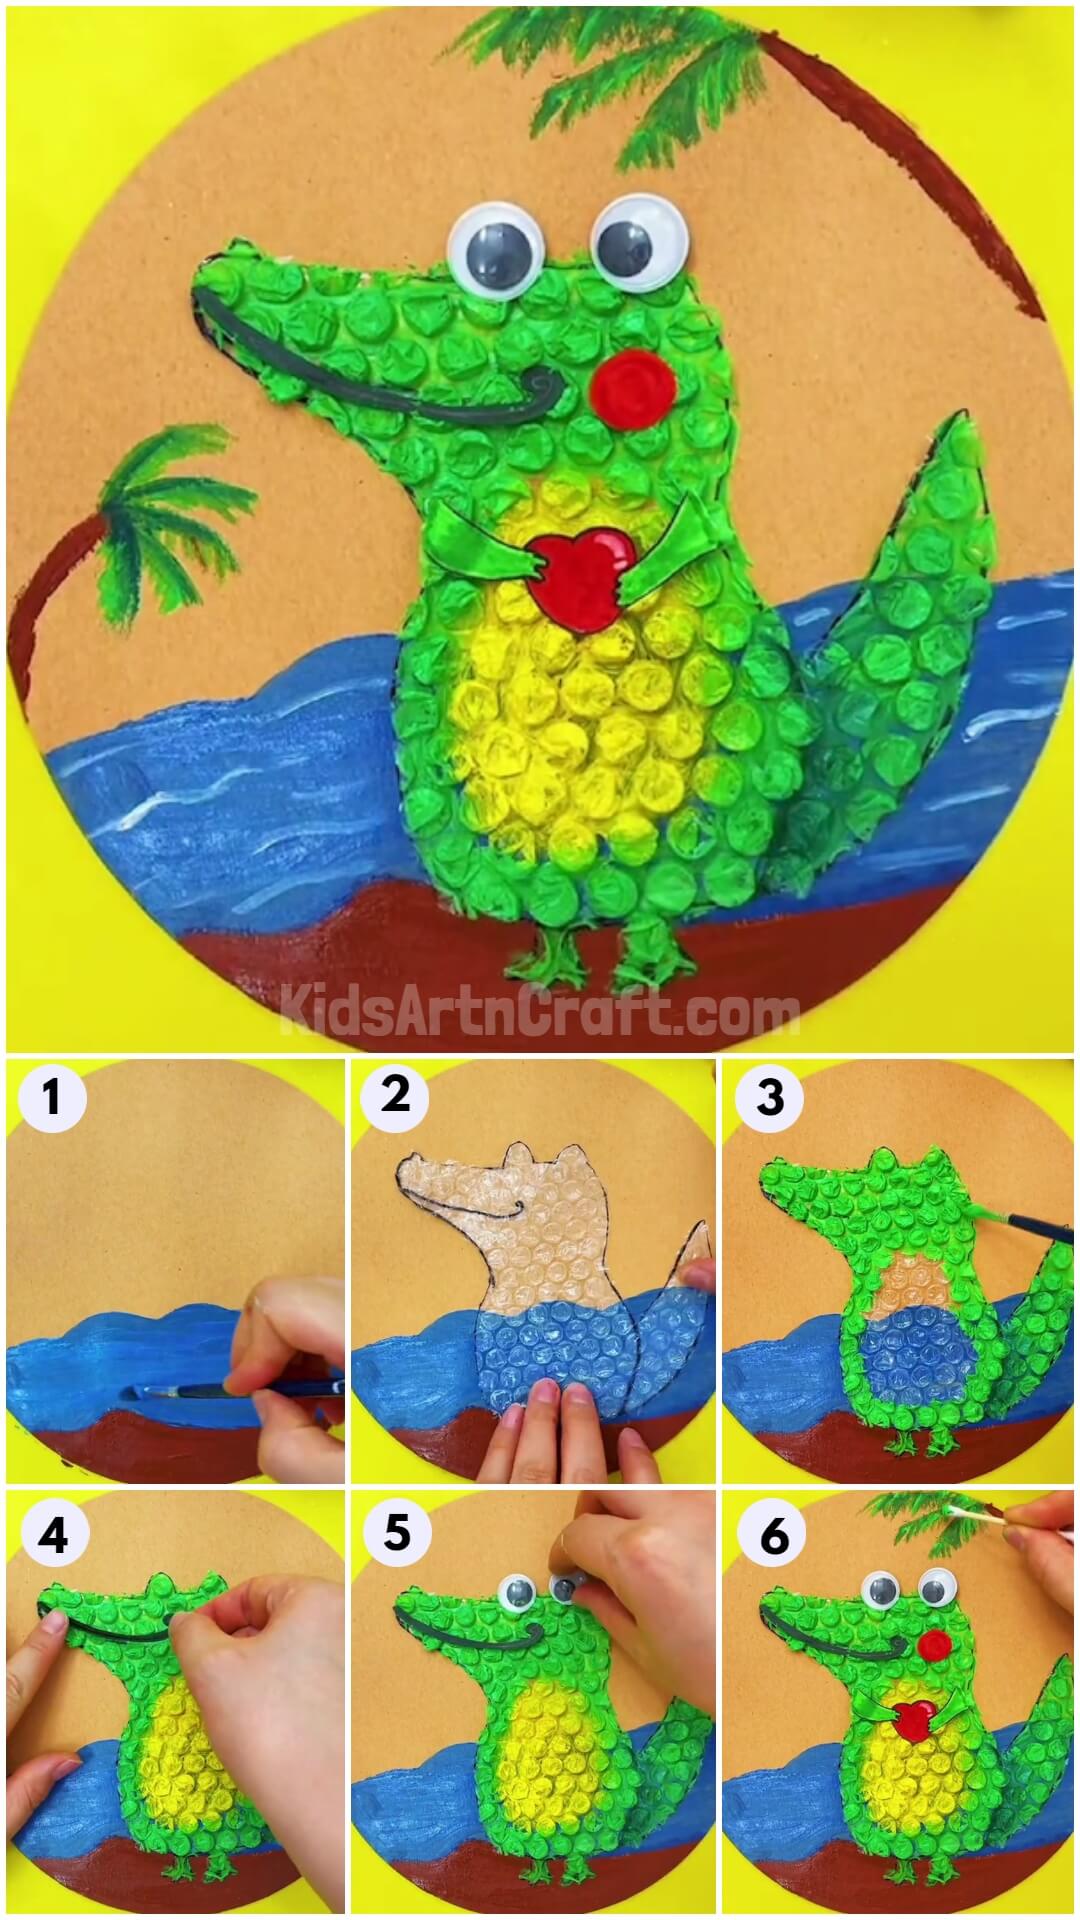
Cut out a circle from a thick sheet of paper or cardboard using scissors. Dip a round paintbrush into brown paint and paint the ground on the bottom of the base.
Step 2: Painting The Ocean
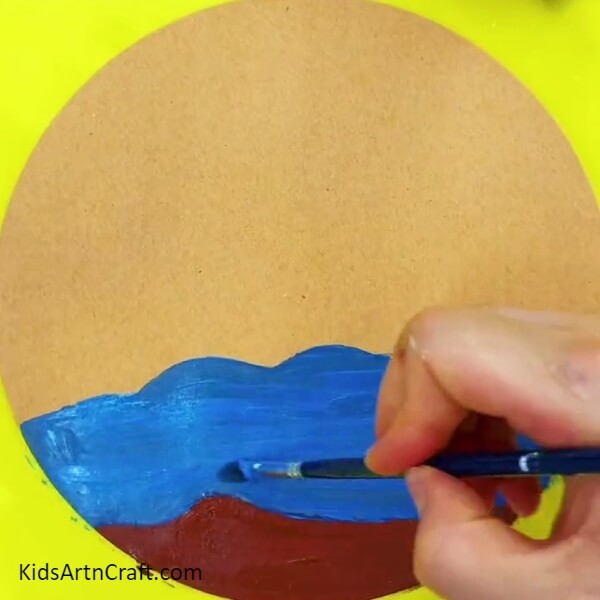
Dip the paintbrush into the blue paint and paint the ocean over the ground.
Step 3: Pasting Bubble Wrap Crocodile
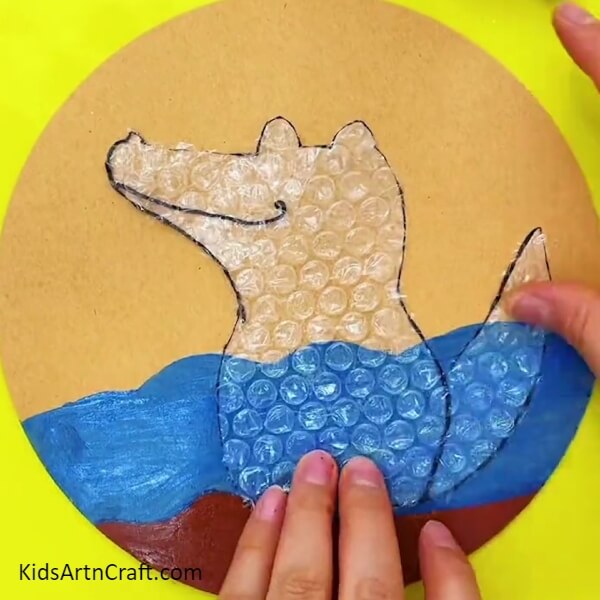
Take a sheet of bubble wrap, using a black marker draw, and cut out Mr. Crocs. Now, using glue paste the cut out onto cardboard.
Step 4: Painting Mr. Croc
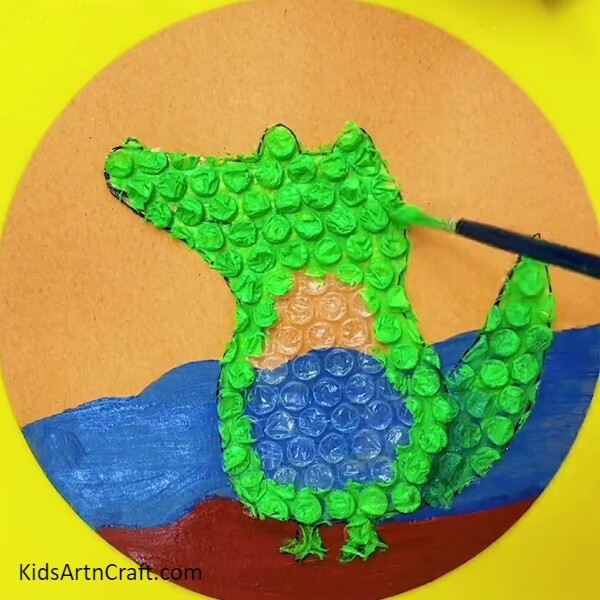
Dip the paintbrush into green paint and paint the bubble wrap, just leave some space unpainted in the tummy region.
Step 5: Painting The Tummy
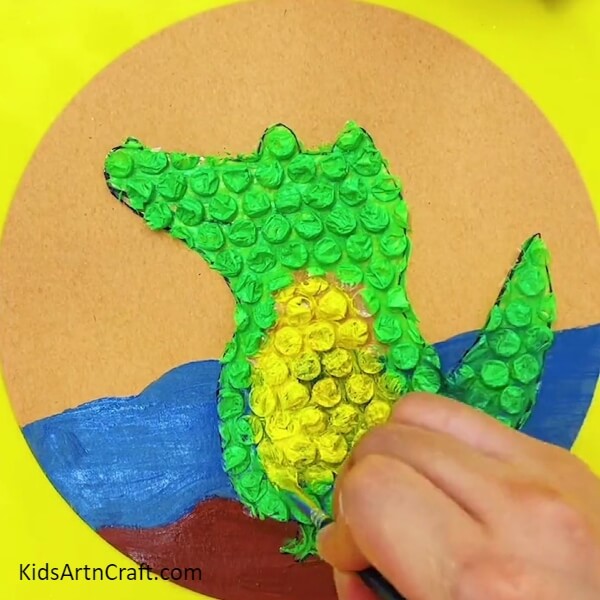
Dip the paintbrush into yellow paint and paint the unpainted region left before, to make the tummy.
Step 6: Adding A Mouth
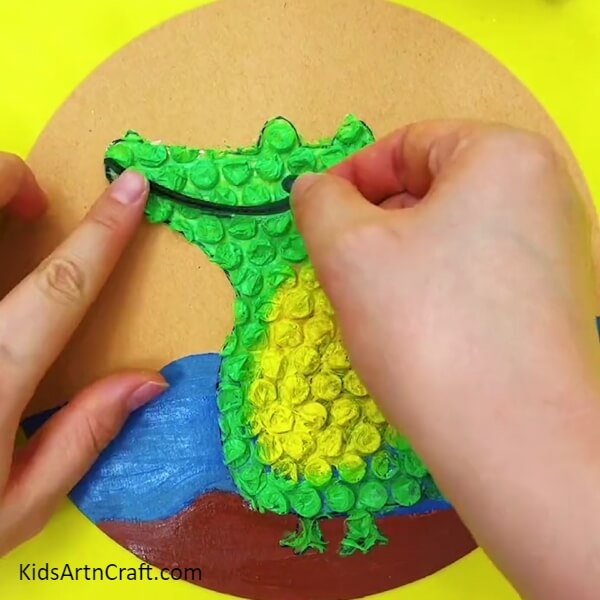
Cut out a smile from the white paper and color it using green color. Now, paste it over the face from the corner using glue.
Step 7: Pasting Eyes
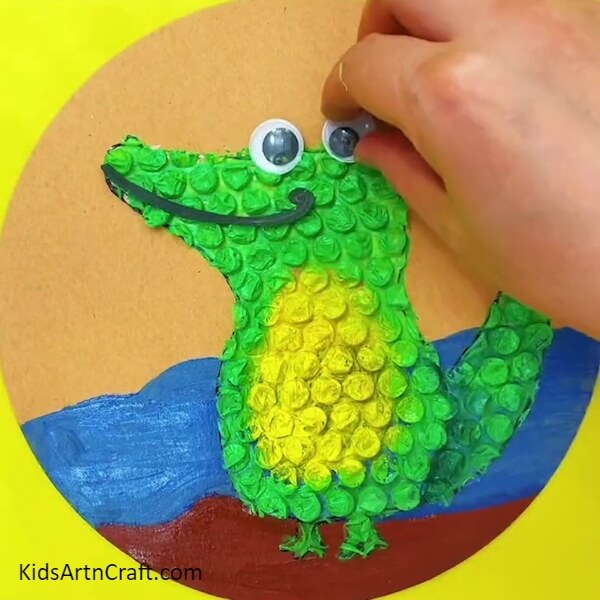
Now, paste the googly eyes on his snout using glue.
Step 8: Making Blush
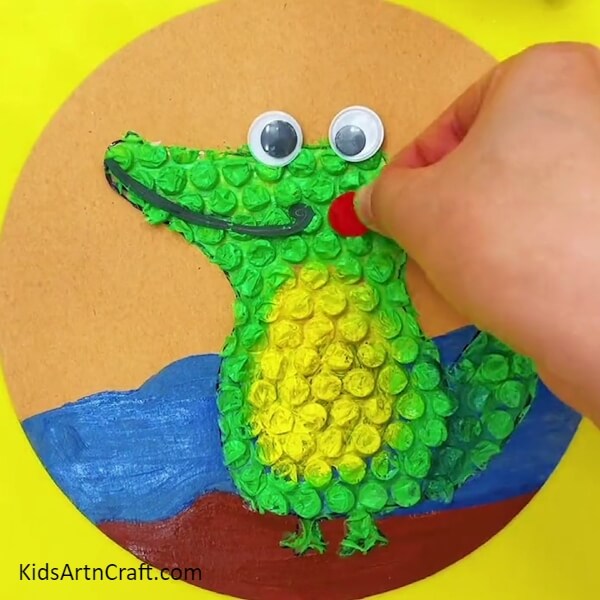
Use a red bindi or cut out a small circle from red colored paper to make his cheeks and stick behind the smile using glue.
Step 9: Pasting His Hands
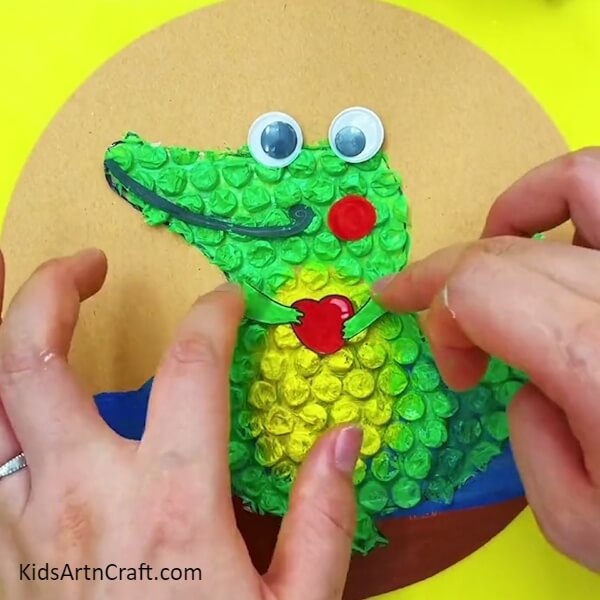
Draw and cut out crocodile hands holding a heart from the white sheet, color it using the paints, and paste them onto the crocodile’s body.
Step 10: Making A Coconut Tree
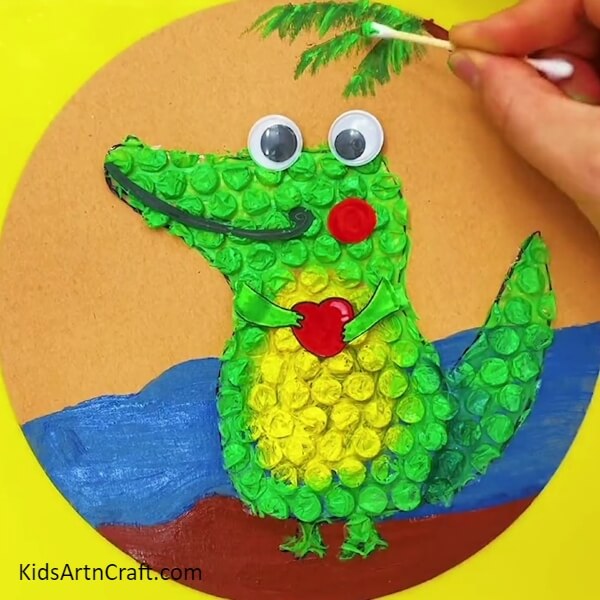
Use an earbud to draw bent coconut trees on the base using the green paint from the leaves and brown for the trunk.
Step 11: Adding Waves In The Ocean
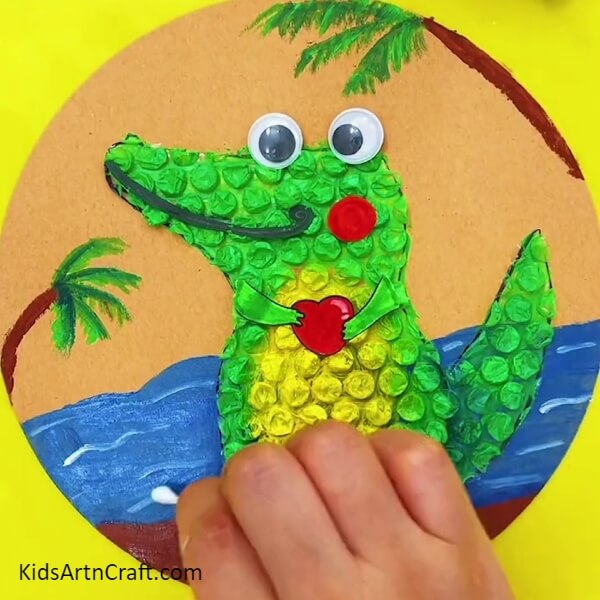
Dip the earbud into white paint and make wavy lines on the ocean to make the waves.
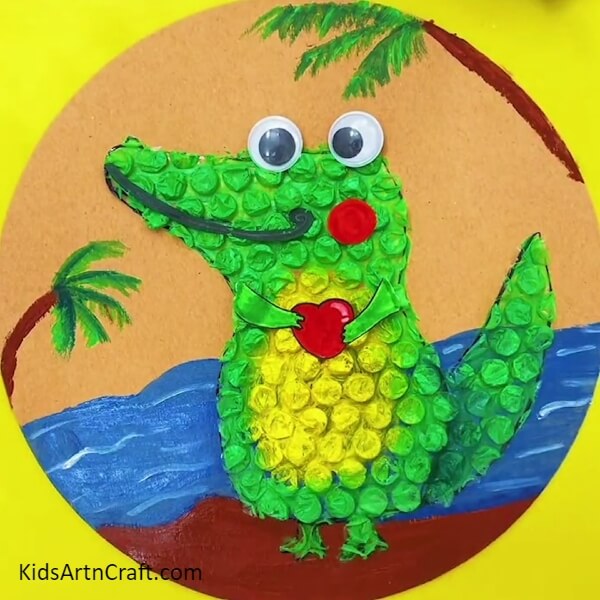
Finally, Mr. Crocs Is Now Ready!
Your crocodile craft is now ready! Take a minute to admire your creation!
This is a highly entertaining and fun activity that will keep kids engaged. Kids can use their creativity and imagination to add more details to Mr. Crocs. Check out our website to find other cool crocodile craft ideas. You can now decorate this craftwork over your room’s wall or can even use it as your school craft project! Show it off to everyone and let everyone be proud of your skills and creativity! This can also be the perfect craft to spend the boring afternoon time in the productive way!
Hoping that you will try this out. Let us know what you think of this craft in the comments section.
Thank you so much for visiting this website. Also, don’t forget to visit our page for more such ideas.
Follow us on Youtube for art and craft tutorials and much more.
More Articles from Kids Art & Craft
- How to Make Bubble Wrap Corn Craft Easy Tutorial
- Easy Bubble Wrap Monsters Craft Tutorial For Kids
- Recycled Egg Tray Mushroom & Flower Craft – Step-by-Step Tutorial
- Easy to Make Doll with Yarn and Tissue Paper
- Bubble Wrap Printed Pomegranate Craft For Kids


