Cardboard Craft
DIY Cardboard Box Flower Pot Craft Tutorial For Kids

Make a unique craft from the basic craft supplies like a pro and with this step-by-step tutorial! Let’s make a cardboard box flower pot!
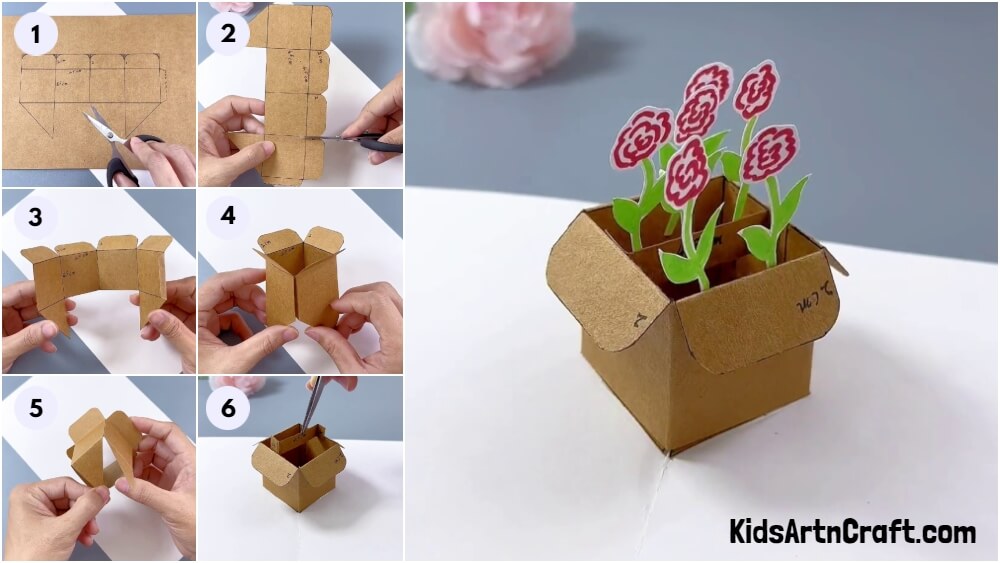
Hello and welcome to the wonderful world of crafting! Today, we brought you a step-by-step tutorial on making a 3D cardboard box as a flower pot with pretty flowers in it! This craft is perfect for kids to make of every age. It includes a variety of motor skills that will help your kiddos to develop themselves with their interest involved! Have a perfect afternoon craft time with your friends and family by creating this all together! Grab the basic craft material that you already have with you to begin!
Simple Cardboard Box Flower Pot Craft
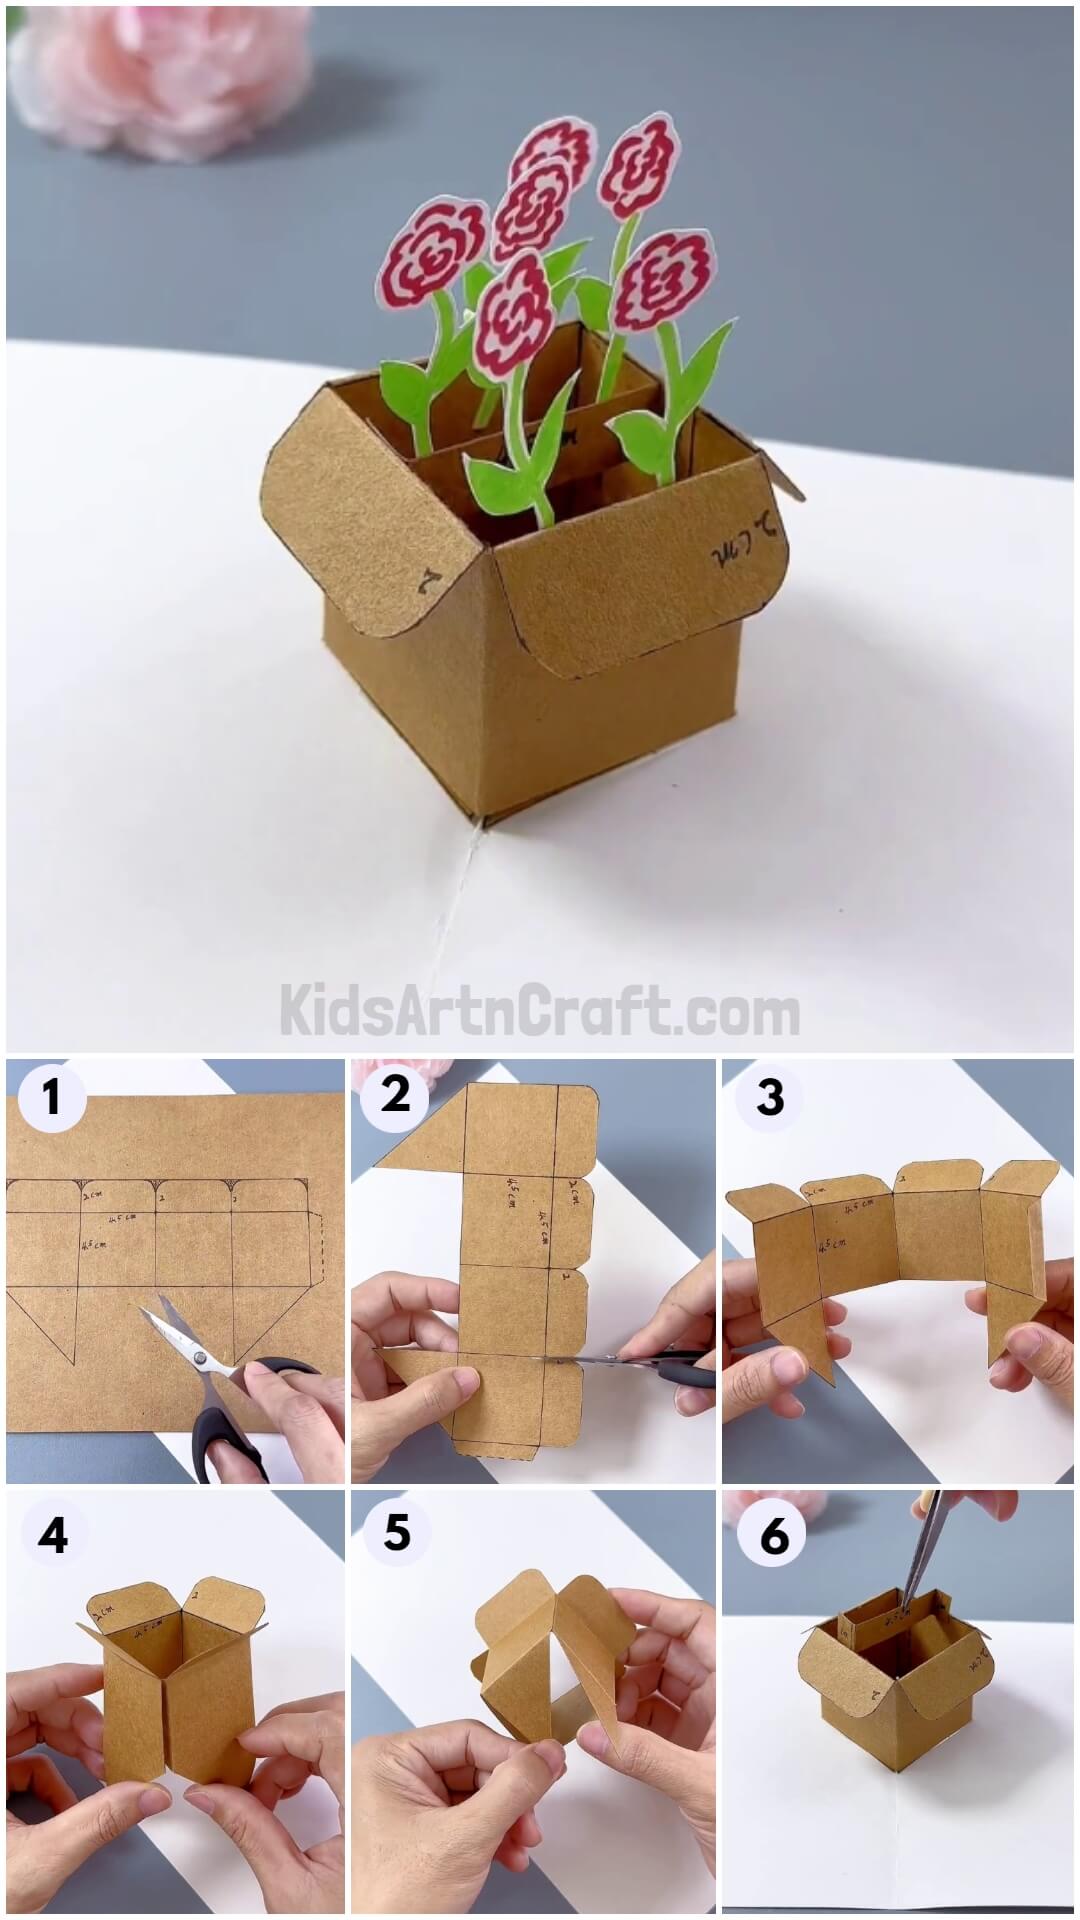
Read More: DIY Cardboard And Stick Cycle Centerpiece Home Decoration Craft For Kids
Materials Required
- White Paper Sheet
- Cardboard Piece
- Scissors
- Double-sided Tape
- Sketch Pens (Red and Green)
- Black Pen
- Craft Tweezers
Procedure
Step 1: Gathering Materials
Start this craft by taking a cardboard piece, a white paper sheet, and a black pen.
Step 2: Drawing The Cardboard Box Figure
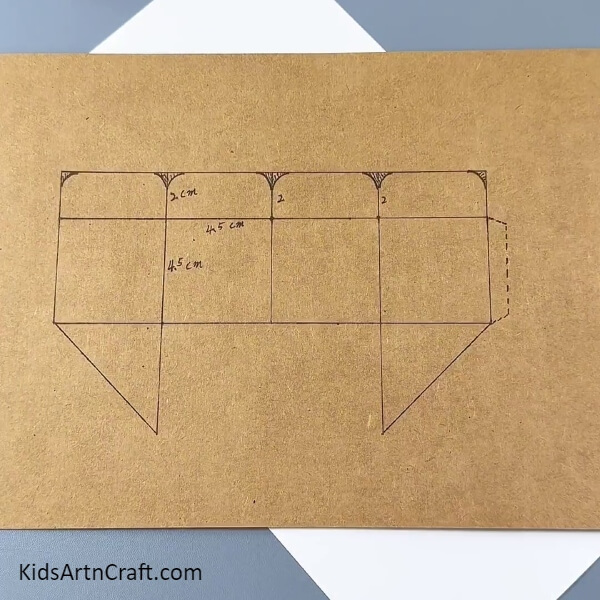
Using the black pen, draw the cardboard box figure with the help of a scale as shown in the image with the perfect dimensions as well.
Step 3: Cutting Out The Cardboard Box Figure
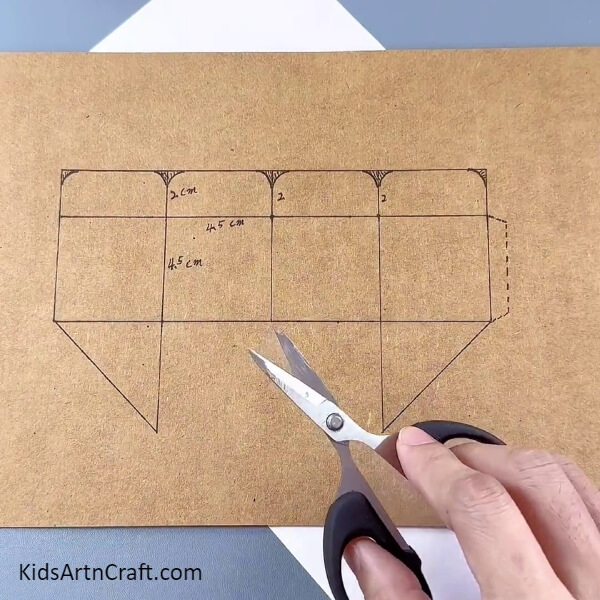
Using scissors, cut out the drawn cardboard box figure along the pen boundary.
Step 4: Cutting The Curved Parts
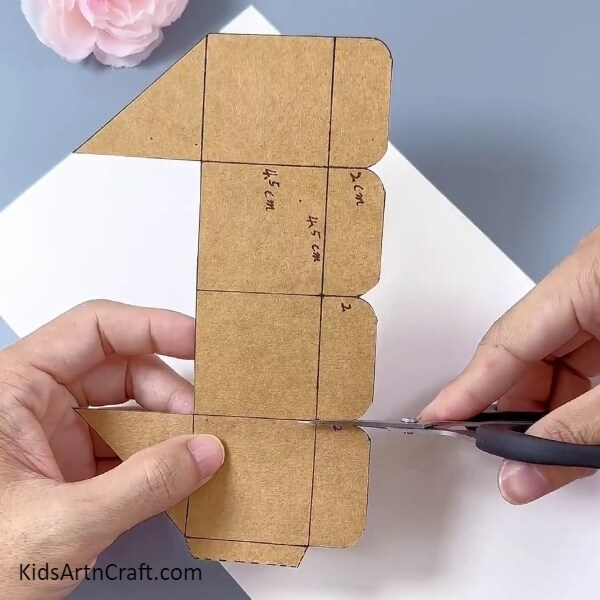
Using scissors, cut the curved parts along the pen outline till the long horizontal line.
Step 5: Bending The Carboard Parts Along Pen Outline
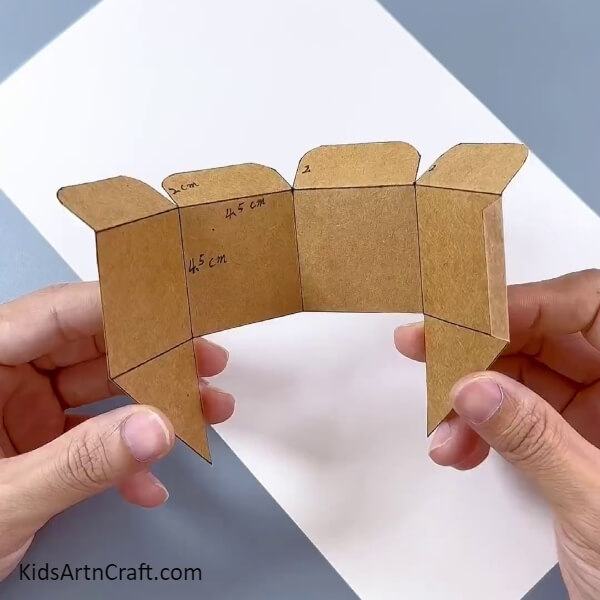
Bend the square parts towards each other inward and also the triangle parts. Bend the curved parts outwards. And the thin rectangle inward.
Step 6: Enclosing And Making A Box
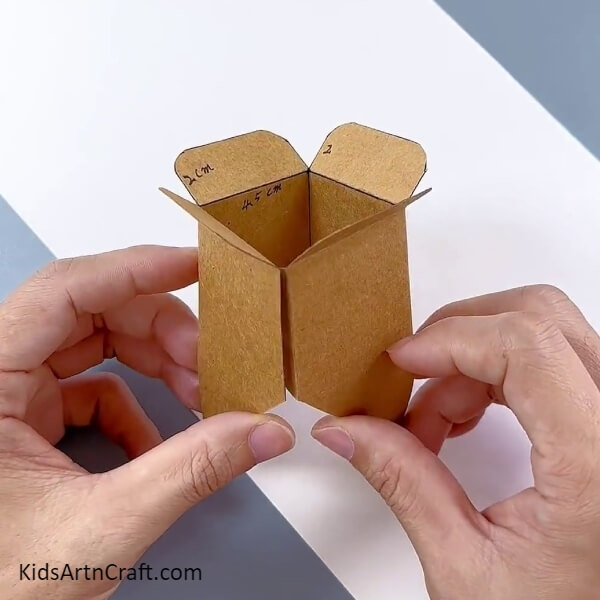
Enclose the square parts and apply double-sided tape on the thin rectangle to stick it to the corner square part and make a cardboard box.
Step 7: Turning The Box To The Bottom
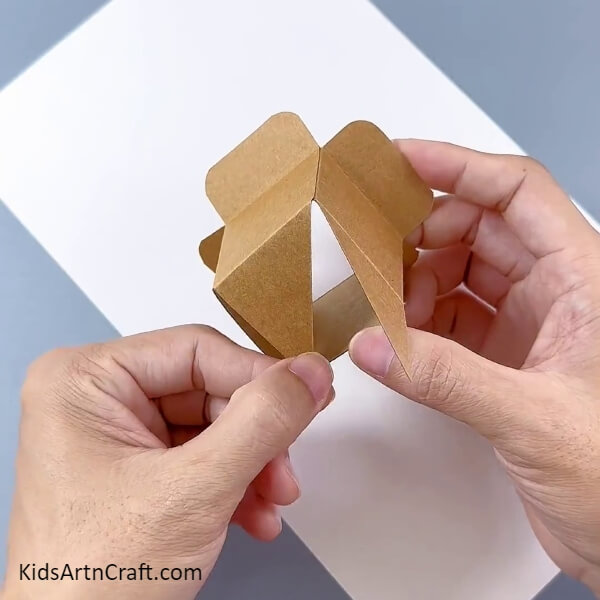
Turn the box to the bottom side to see the triangle parts.
Step 8: Sticking Double Sided Tape On Triangle Part
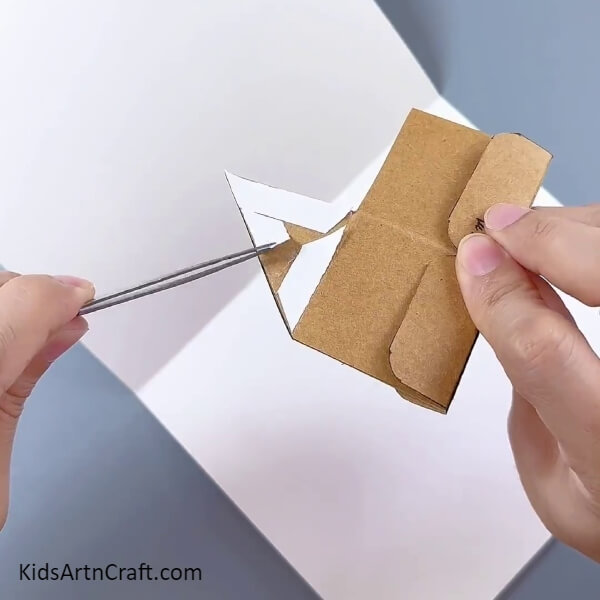
Press to fold the cardboard box over the triangle parts over each other and stick the double-sided tape on the triangle part of the cardboard box from the outside wholely and using craft tweezers peel the cover off.
Step 9: Pasting The Cardboard Box To Paper
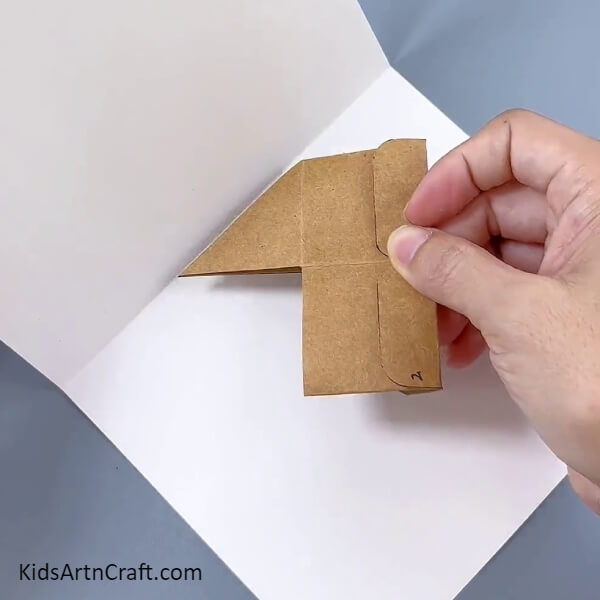
Fold the white paper sheet into half from the longer side and unfold again to see a crease. From the taped side of the box paste it on the paper on a side along the crease.
Step 10: Applying Tape On The Other Triangle
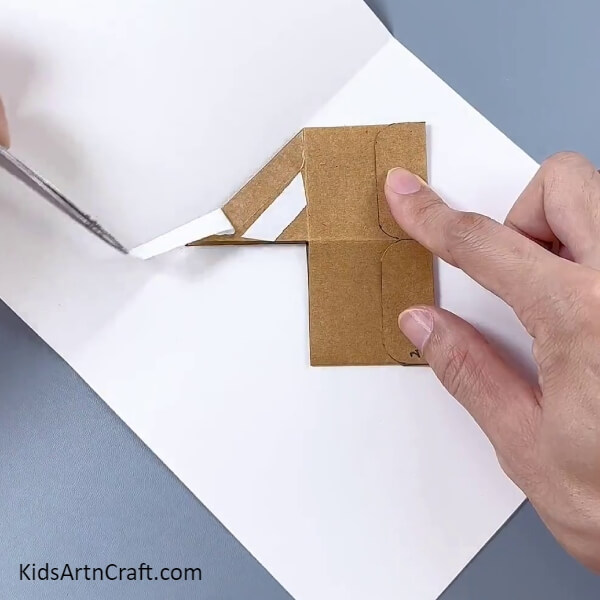
Apply the double-sided tape on the other triangle part and again peel the cover with craft tweezers.
Step 11: Pasting The Other Triangle To The Paper
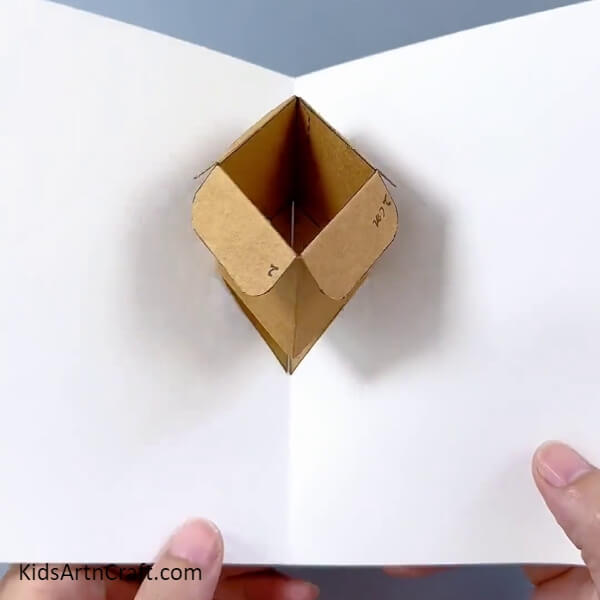
Fold the paper along the crease to make the triangle part stick to it. Open up the paper to see the same as the image.
Step 12: Inserting A Cardboard Strip
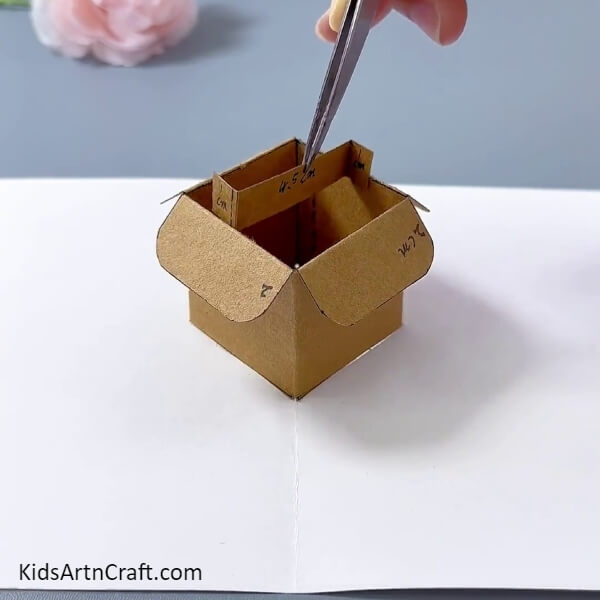
Cut out a cardboard strip using scissors of the dimensions shown in the image and fold it in the same way as seen. Hold up this strip with craft tweezers and stick it inside the cardboard box in the middle from the double-sided tape.
Step 13: Pasting A Flower Cut Out
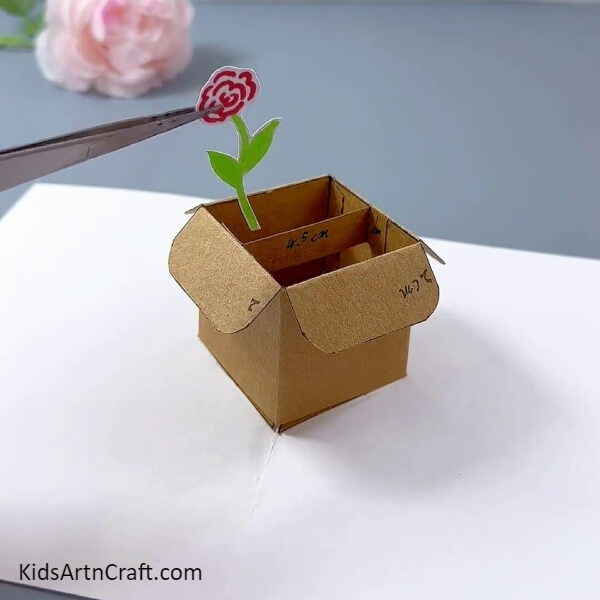
Using red and green sketch pens, draw a rose flower with curve lines red petals, and a green stem with green leaves. Then, using scissors, cut this flower out. Make sure to cut out by leaving a small border of white paper. Using craft tweezers hold and paste the flower cut out to the square side of the cardboard box to the top using glue.
This Is The Final Look Of Your Cardboard Box Flower Pot Craft!
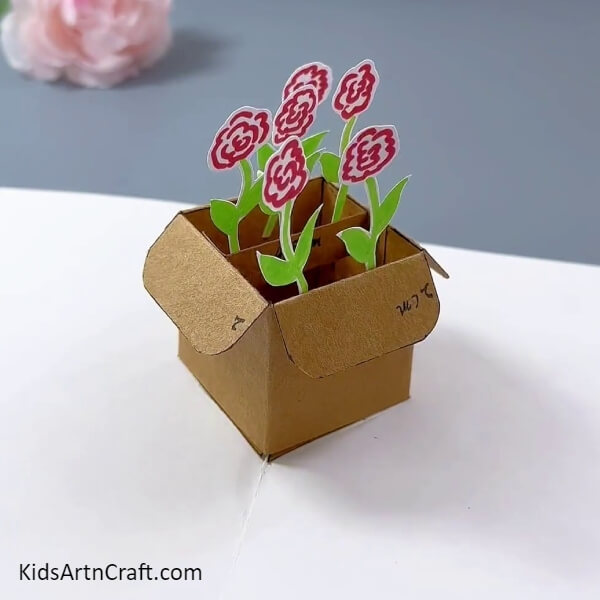
Following the same previous step, make 5 more flower cut-outs and paste the one beside the already pasted one, and further 2 at the cardboard strip, and the other 2 at the opposite square piece of cardboard as shown in the image.
Voila! Your super amazing and unique cardboard box with flowers in it is ready!
You can use this craftwork as a gift card for your loved one! They will definitely be happy to receive some flowers with a card that even pops up! This craft is a perfect time spending fun leaning activity for kiddos and will be able to dive into the creative madness though it! Let them unleash their creative side with such craft-making! You can even encourage them to customize it by adding different flowers, or adding textures to the box, coloring it, anything they can think of!
Hope you liked the article! Give it a like and comment, also, share it with your friends!
Follow us on Youtube for art and craft tutorials and much more.
More Articles from Kids Art & Craft
- How to Make Cardboard Ice cream Craft in Easy Steps
- How to Make Fighter Tank Using Cardboard Tube & Paper Cup
- DIY Cardboard Tube Owl Craft
- DIY Cardboard Roll Reindeer Puppet Craft For Christmas
- Creative Mountain Scenery Craft From Cardboard


