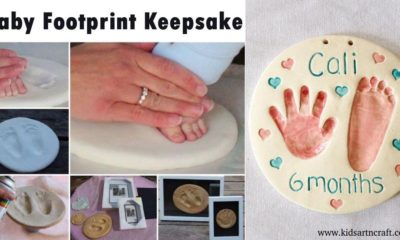


Clay Crafts
Learn to Make Clay Butterfly And Flowers For Kids

This guide will teach you and your kids how to make cool clay butterflies and flowers. Get ready to make some awesome art pieces with your children!
Welcome to this step-by-step tutorial on how to make clay butterflies and flowers craft for. This craft is very enjoyable plus gives knowledge on how to use clay for making other crafts and can be made with a little bit of effort. This will require very basic materials which will be available easily in any art and craft store. So without any further ado, let’s get started.
How To Make Butterfly & Flowers Craft Using Clay
Read More: How to Make Clay Flower Easy Tutorial for Kids
Materials Required
- Blue paper
- Red modelling clay
- Orange modelling clay
- Yellow modelling clay
- Dark and green Green modelling clay
- Dark green sketch pen
Procedure
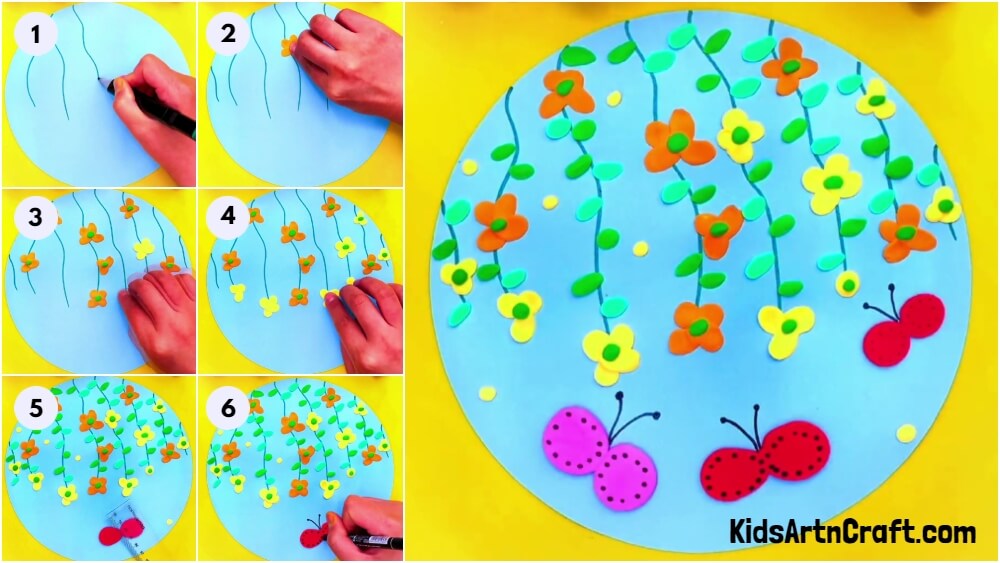
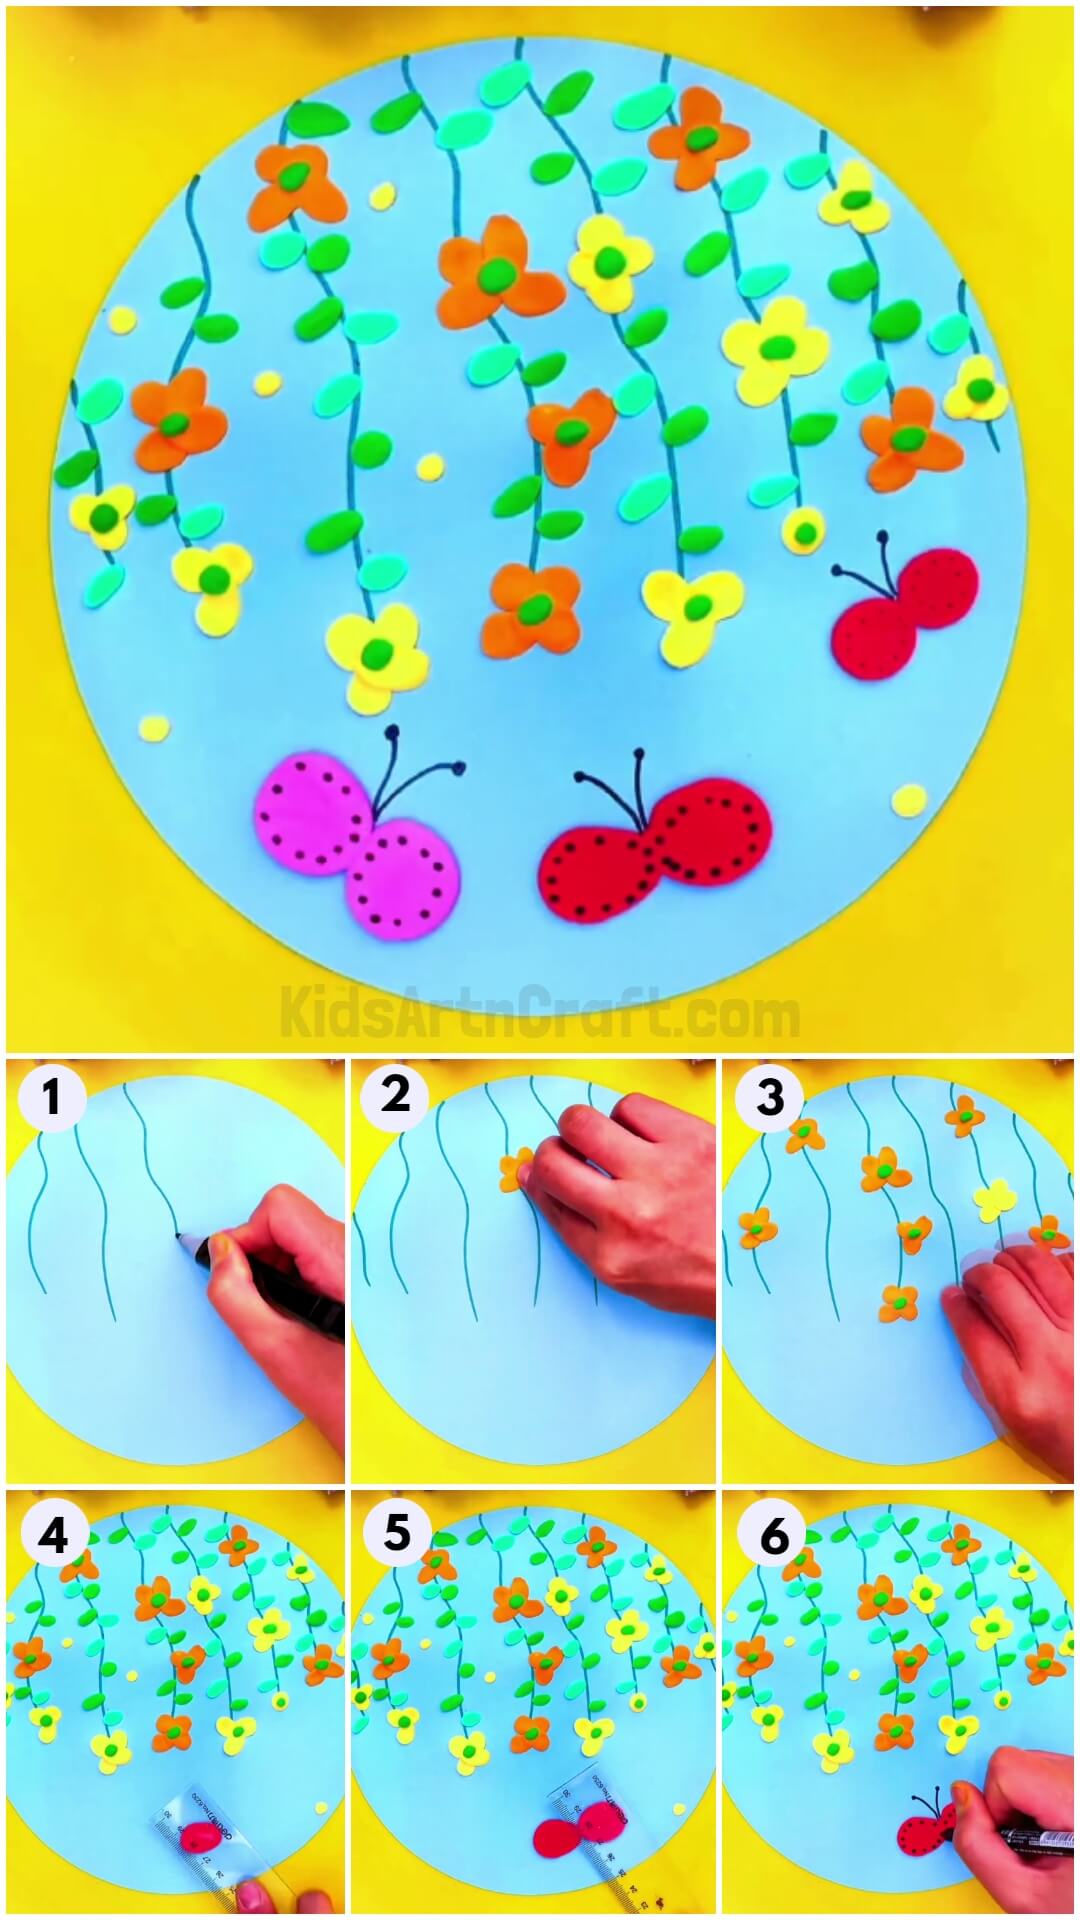
Step 1: Drawing The Stems Of The Flowers On Blue Paper
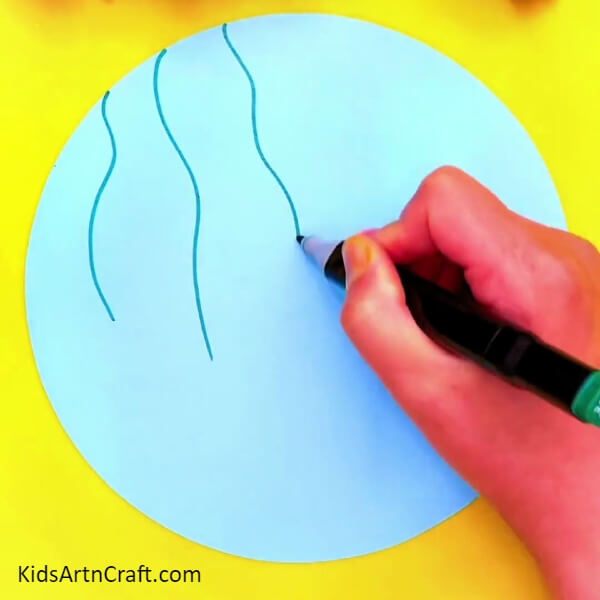
Take blue paper. It will be our ocean for the flowers. Now start drawing stems on the paper. For this draw curvy lines with a dark green sketch pen as shown on the paper.
Step 2: Make A Flower With Orange Modelling Clay

After drawing the stems on the paper. Now it’s time to make flowers. For this take orange modelling clay, and stick it in the paper in the shape of the flower with the fingers to give it the shape of the flowers as shown in the photo above.
Step 3: Keep On Making Flowers With Orange And Yellow Modelling Clay

Now keep on making flowers by sticking the orange and yellow modelling clay in the blue paper. Keep on shaping them with the fingers as shown in the photo above.
Step 4: Shape The Clay Into The Shape Of Flowers
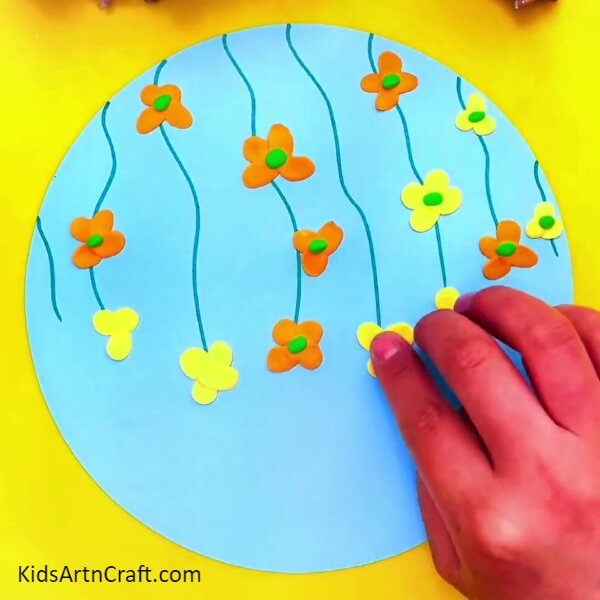
after sticking the clay keep on shaping it with your fingers all the yellow and orange coloured modelling clay. Make it on four sides all four petals as shown in the photo above.
Step 5: Make Leaves With Dark And Light Green Modelling Clay
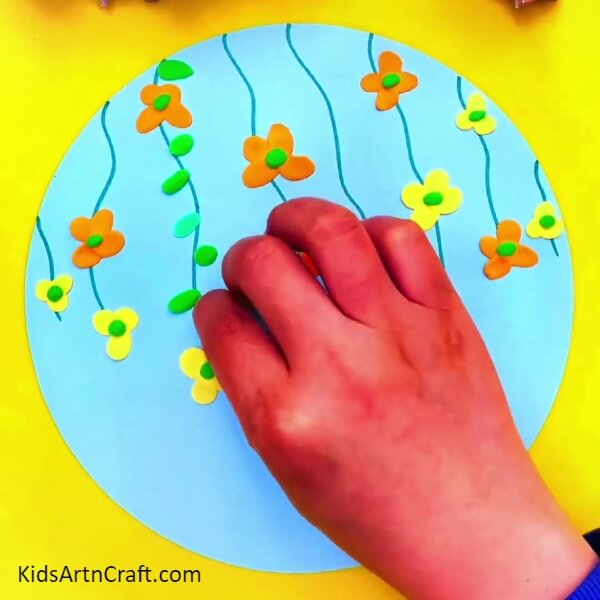
After making the flowers now it’s time to make leaves in the stem for flowers. For this take dark and light green modelling clay and make an oval shape with it, then stick it in paper and flatten it as shown in the photo above. Do it for both dark green and light green clay. Make leaves for every stem in the pattern some small and some big.
Step 6: Make A Butterfly With Red Modelling Clay
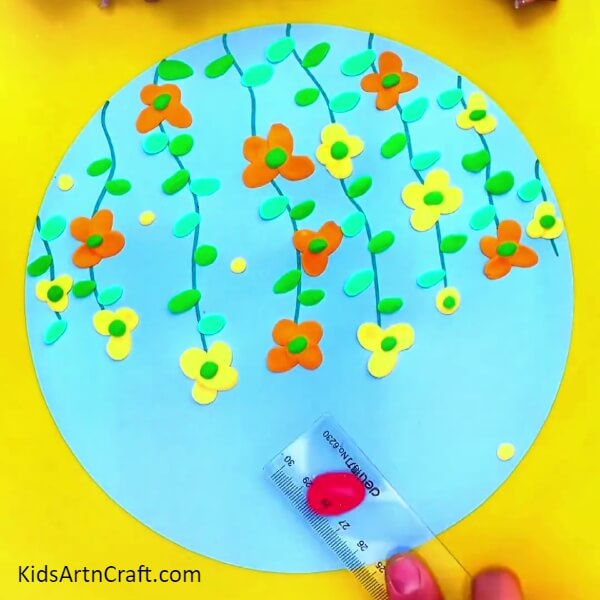
Now after completing flowers, leaves and stems now it’s time to add some butterflies. For this take red modelling clay and stick it in the paper then flatten it with the scale as shown in the photo above.
Step 7: Make The Other Wing Of The Butterfly
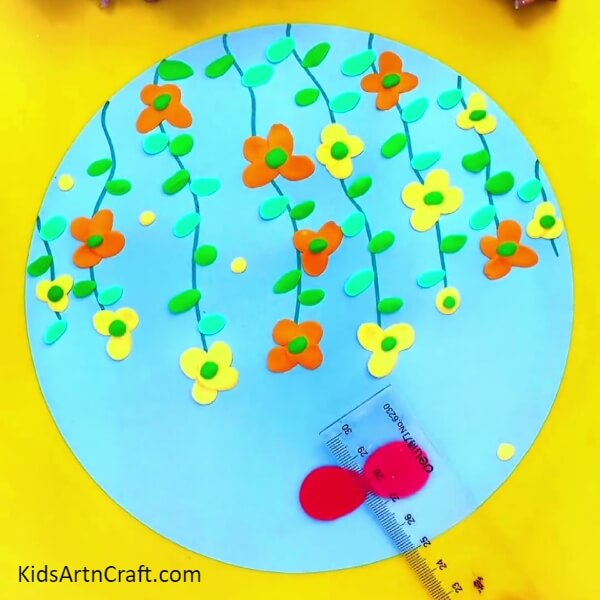
For this take another clay ball, and stick it on the paper. Then flatten it with the scale as shown in the photo above.
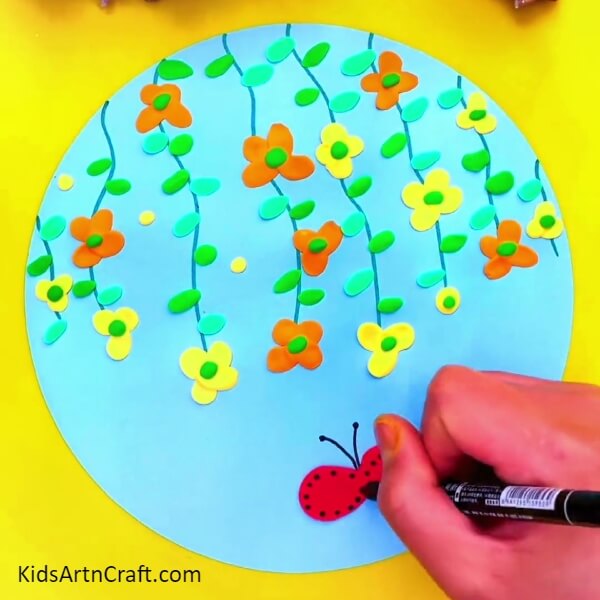
Step 8: Make Details Of The Butterfly With A Black Sketch Pen
After making the butterfly with clay, now start making some details with a black sketch pen in the red modelling clay. Start making small dots in the wings made with clay as shown in the photo above.
Tada! Our Clay Butterfly And Flower Are Ready
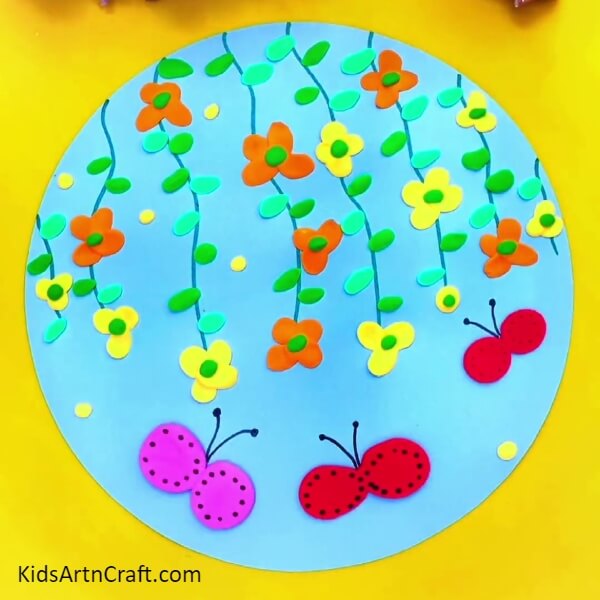
Tada! Our clay butterfly and flower are ready. These flowers were very beautiful and vibrant as well as our butterflies are lively with full of colours . Adjust the craft according to your choice and make them with different colour clays. You can try different shapes of flowers and show creativity in your form. Also don’t forget to enjoy the process all along the way. Now it’s time for you to try them out and let us know in the comment section. This craft requires only finger work which is quite easy and comes with a little bit of practice. Also, let us know much you enjoy the process and how helpful you find the tutorial. We would love to read your comments.
Thank you for visiting our website!
Also, make sure to visit other articles as well.
Follow us on Youtube for art and craft tutorials and much more.
More Articles from Kids Art & Craft
- How to Make Clay Flowers Artwork for Beginners
- Simple & Tasty Ice-Cream Craft Using Clay – Step-by-Step Tutorial
- Recycled Egg Tray Mushroom & Flower Craft – Step-by-Step Tutorial
- Easy Way To Make Paper Stress Relief Flower Craft
- Simple To Make Paper Cup Flower Craft For Preschoolers