


Clay Crafts
DIY Clay Doll Artwork Step-by-Step Craft Tutorial for Kids

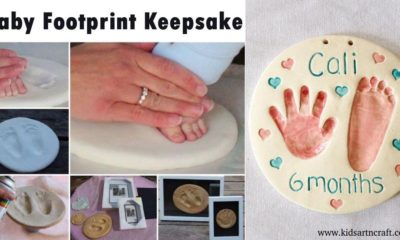
This article will show you how to make your own clay doll art. This fun and easy craft guide will help you and your kids make a special and attractive artwork.
Welcome to this step-by-step tutorial on creating beautiful clay doll artwork. This craft is designed for kids and provides detailed instructions to ensure a fun and successful crafting experience.
Adorable Clay Doll Artwork Craft Tutorial For Kids

Read More: DIY Miniature Clay Cake Craft Activities for Kids
Materials Required
- White circular sheet (for the background)
- A black marker or sketch pen
- Sketch pens in various colors
- Watercolors in different shades
- Black gel pen
Procedure
Step 1: Drawing The Upper Portion Of The Girl
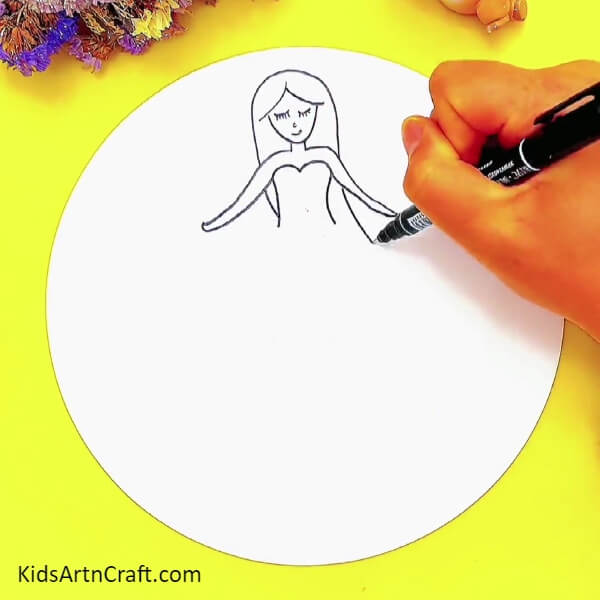
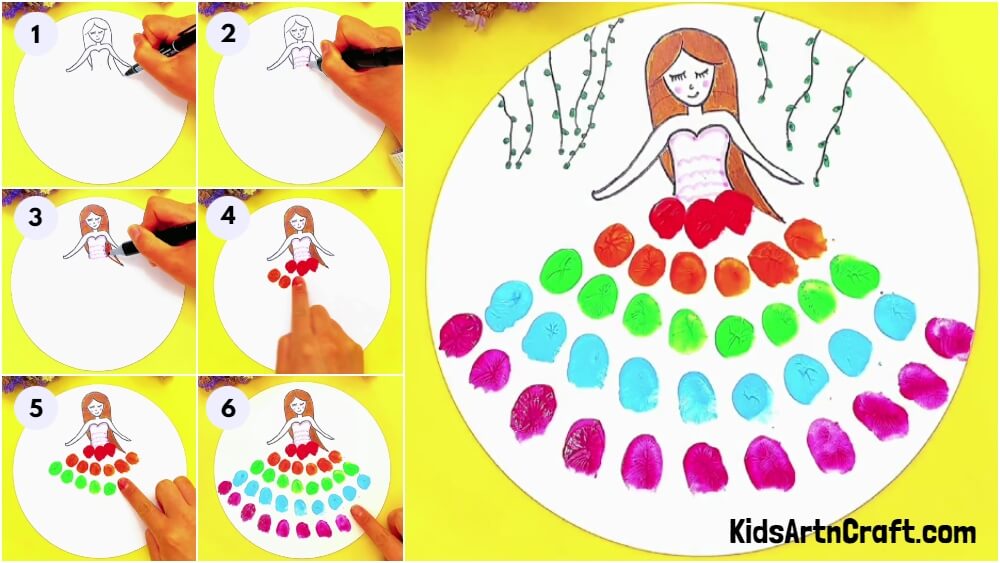
Take the white circular sheet and use a black marker or sketch pen to draw the upper portion of the girl. Start by drawing the shape of the face, including the eyebrows, nose, and lips. Look at the provided image to get an idea of how it should look.
Step 2: Coloring The Girl And The Upper Gown
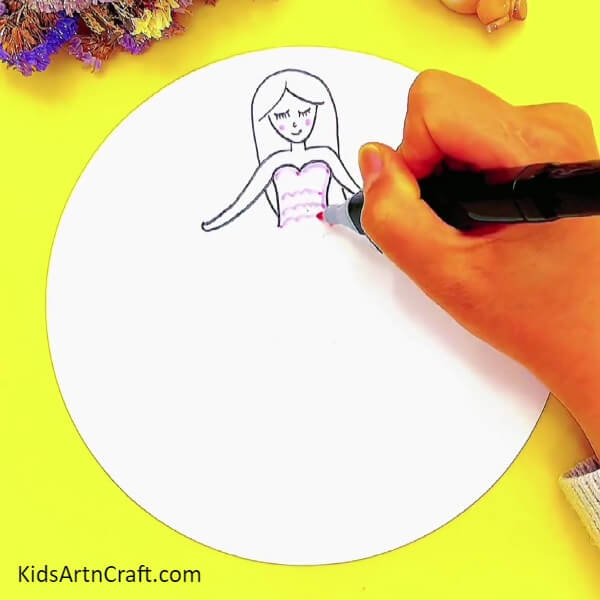
Once you have completed the drawing, it’s time to add colors to the girl. Use the sketch pens to color the upper gown of the girl, following the colors shown in the image. You can also add some details like folds and patterns to make it more interesting.
Step 3: Sketching And Coloring The Hair

Now, let’s focus on the hair of the doll. Sketch the hair using a black marker or sketch pen. Then, use sketch pens to color the hair. Look at the image for suggestions on which colors to use. If you prefer, you can also use your own colors to make it more personalized. Fill in the hair with the chosen colors, making sure to cover all the areas.
Step 4: Creating The Doll’s Gown With Finger Painting
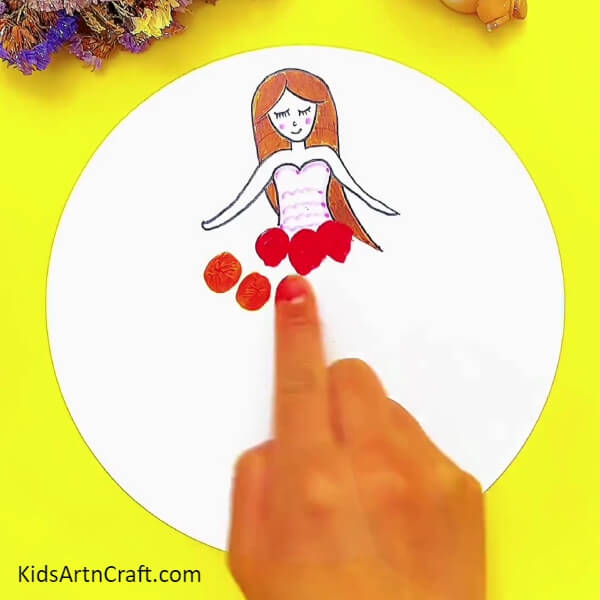
Get ready to have some fun with finger painting! We are going to use watercolors for this step. Dip your index finger into the watercolors of different shades, just like the ones shown in the image. Start by dipping your finger into the red color and press it onto the uppermost layer of the gown. This will create the first layer of the gown. Now, switch to a lighter shade, like orange, and repeat the same procedure to make the second layer of the doll’s dress. Press your finger onto the sheet to create the desired shape and color
Step 5: Start Creating Layers For The Gown
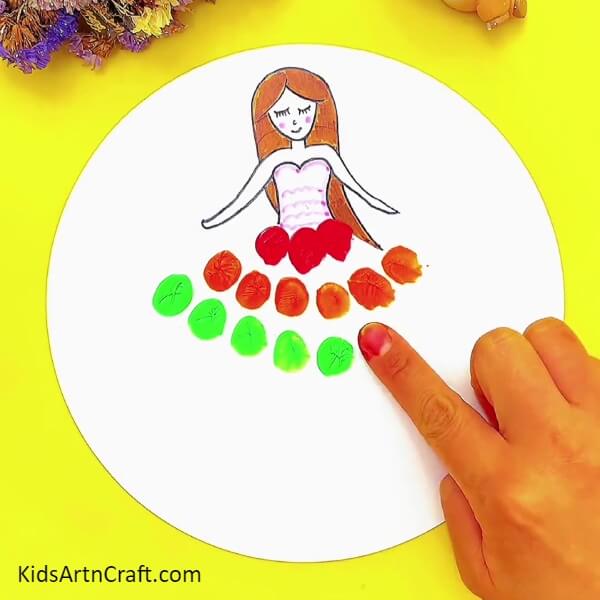
Let’s continue adding layers to the doll’s gown. For the third layer, use green color. Dip your index finger into the green color and press it on the white circular sheet just below the orange gown layer. Look at the image for guidance. This layer will provide a nice contrast to the previous ones.
Step 6: Adding More Layers
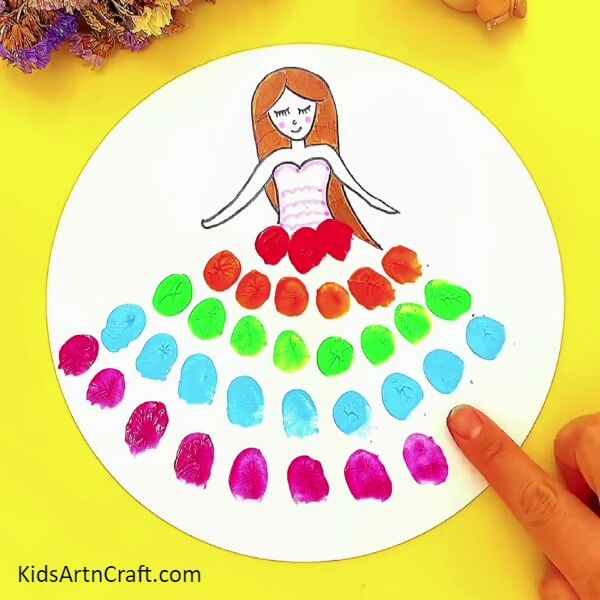
Now, we have two more layers to add. Use colors like blue and magenta for these layers. Dip your finger into the respective colors and press them onto the sheet, just like before. Take your time and make sure each layer is distinct and visible.
Finally, Adding Details to the Craft
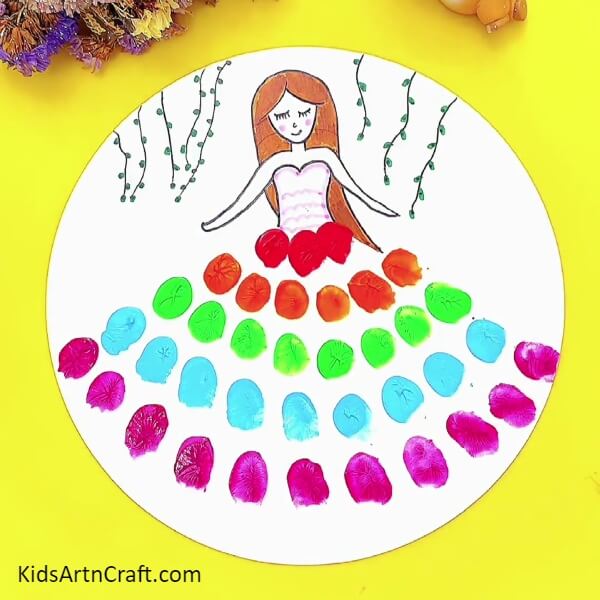
It’s time to add some special details to our artwork. Take the black gel pen and carefully sketch wavy lines on the top right and left corners of the white background circular sheet. Look at the final image for reference. These lines will add a decorative touch to the artwork. Next, use the green sketch pen to draw small leaves on both sides of the wavy lines. Repeat this step for the other lines as well. The leaves will bring some nature-inspired elements to the craft.
Some More Craft Tutorial
Home-Made Doll Changing Dress Craft From Paper Cup
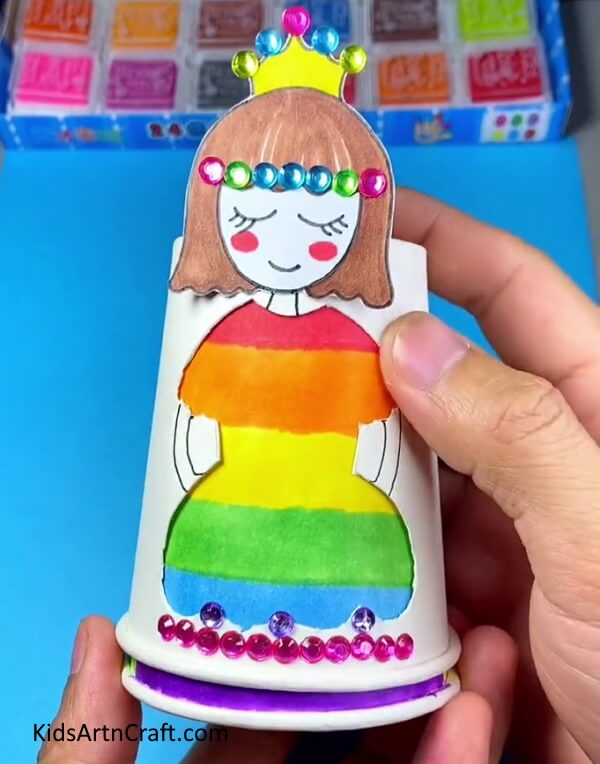
Image Source/Tutorial: Kids Art & Craft
This craft is a fun and creative way to make a home-made doll changing dress from a paper cup. This craft is perfect for children to have fun and learn a new skill. The result is an adorable paper cup doll with multiple colorful and unique dresses. It is a great activity to do with your children or to make as a gift for a special someone.
Some More Doll Craft Tutorial
DIY Paper Cup Doll With Outfit
Image Source/Tutorial: Kids Art & Craft
This DIY paper cup doll is an easy and fun craft for kids. It has an exchangeable outfit so kids can customize their doll and keep them fresh and new. It’s a great way to encourage creativity and imaginative play.
Well done! You have successfully created a beautiful clay doll artwork. Take a moment to admire your masterpiece. Feel free to experiment with different colors and designs to make each artwork unique. Remember, the most important thing is to have fun while creating your own clay doll artwork!
Follow us on Youtube for art and craft tutorials and much more.
More Articles from Kids Art & Craft
- How to Make Worms Using Clay For Kids
- DIY Bees Clay Art Tutorial for Kids
- Easy Leaf Art and Craft Step-by-Step Tutorial For Kids
- DIY Leaf Art Fish Making Easy Tutorial for Kids
- DIY Handprint Cactus Artwork For Kids To Try At Home