
Easter
DIY Easter Wreaths to Welcome Spring

Welcome spring into your home with these creative and fun DIY Easter wreaths! Get creative and build your own festive decorations with easy-to-follow tutorials and simple materials. Perfect for transforming your home into a springtime paradise!
What is a wreath? It is a beautiful floral and leaf decoration. It is used in many ways like it is used on the death of somebody. But in other ways, it is also used as gifts and decor. You can decorate your doors and walls by making these beautiful wreaths.
There are so many ways to make the wreath. It is upon you to choose the best idea.
Here are some ideas for your easter occasion to make the wreaths. Get all your supplies and be prepared for making! Start by doing something for yourself with your creativity. And for help, check the given ideas!
DIY Easter Wreaths
Cute Egg Carton And Flower Wreath Craft For Children
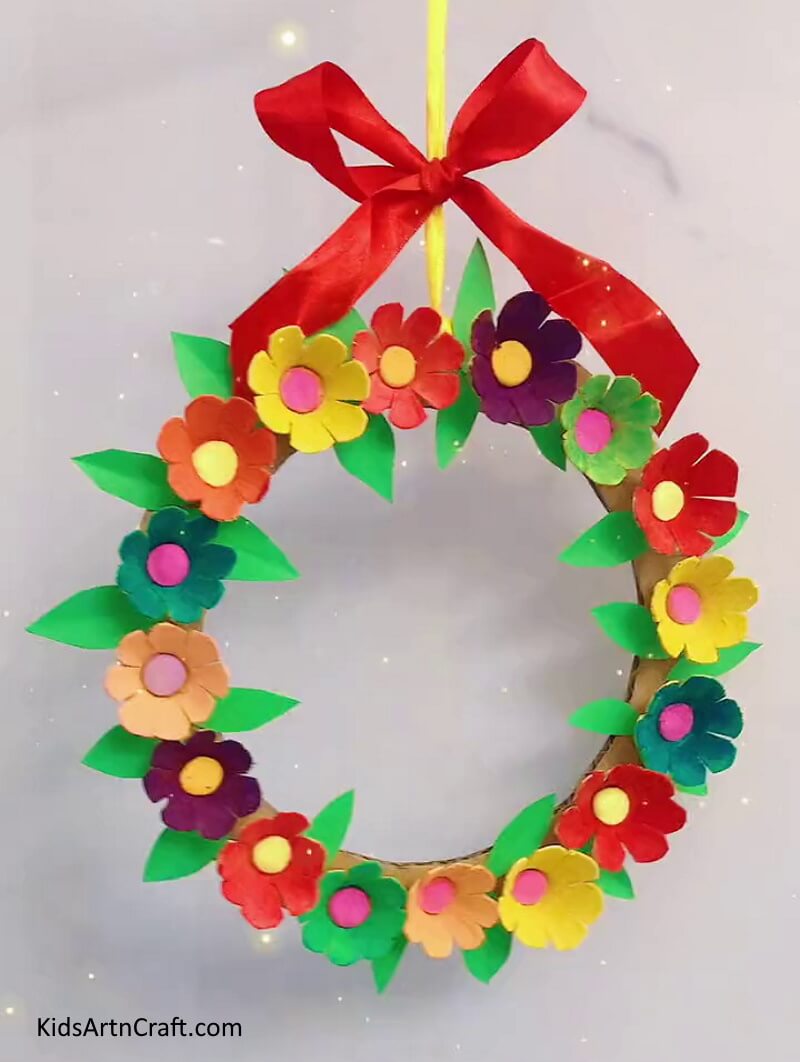
Image Source/Tutorial: Kids Art & Craft
This craft is perfect for children to make, as it is easy, fun, and creative. It consists of an egg carton and flowers that can be used to create a beautiful and colorful wreath. The possibilities are endless, and children will have a blast creating their own unique designs.
Printed Paper Easter Wreath
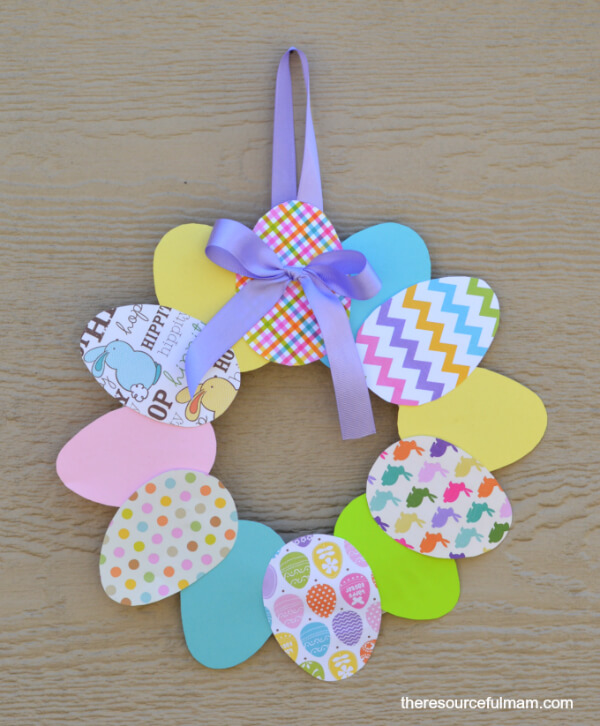
Image Source/Tutorial: The Resourceful Mama
Have you ever made wreaths? If not, then have a look at this craft. I love to make colored crafts. So, I tried for this. Make it so you can use it as decor for your home.
Get all your stationery and crafting materials and start!
Materials required:
- Paper plate
- Printed Colored papers
- Glue gun
- Ribbons
- Scissor
Procedure:
- Cut the rim of a paper plate and remove the inner portion of it.
- Cut the shapes of eggs from printed colored papers.
- Paste them on the rim of a paper plate. Keep one egg’s upper side and the other one below it. Repeat the same process for the other eggs also. This is your wreath.
- Take the ribbon and tie it to the upper portion of the wreath.
- Take another ribbon and make a loop of it. Paste it to the back of the wreath by using a glue gun to hang it.
Easter Eggs Wreath
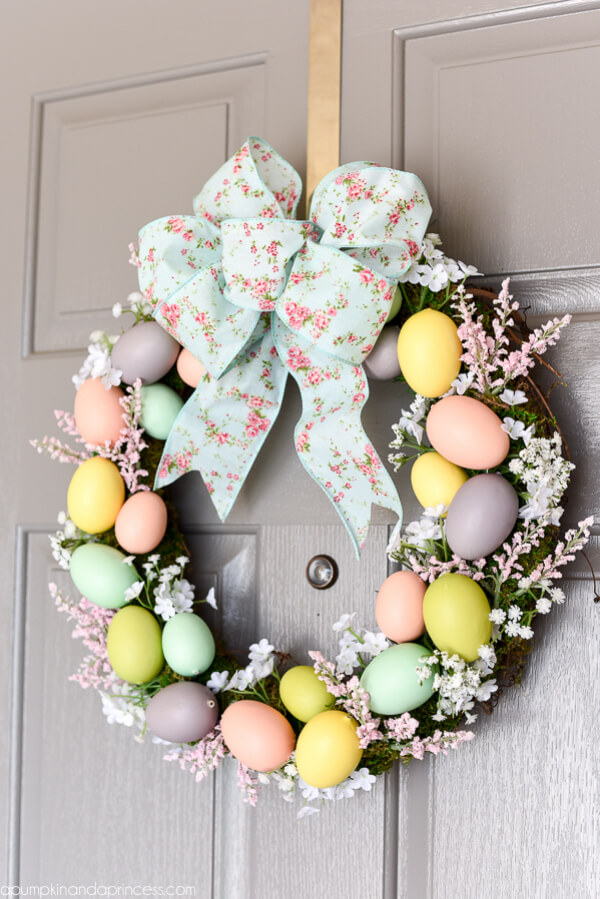
Image Source/Tutorial: A Pumpkin And A Princess
Use your eggs to make the Easter wreaths. In our previous posts, you will find how to make easter eggs. So, it’s time to use them in making wreaths. How? See the given procedure.
Materials required:
- Easter eggs
- Ribbons
- Glue gun
- Scissor
- Easter moss
- Flowers
- Grapevine wreath
- Stick
Procedure:
- Place the easter moss on the wreath using a glue gun.
- Stick the easter eggs on the moss in a decorative manner.
- Paste the flowers in the spaces left between the eggs.
- Take the ribbons and make a bow. Glue it on the top of the wreath.
- You can use floral wire to wrap the bow around the wreath.
- Take a stick and paste it on the back top of the wreath to hang it.
Beautiful Green Wreath
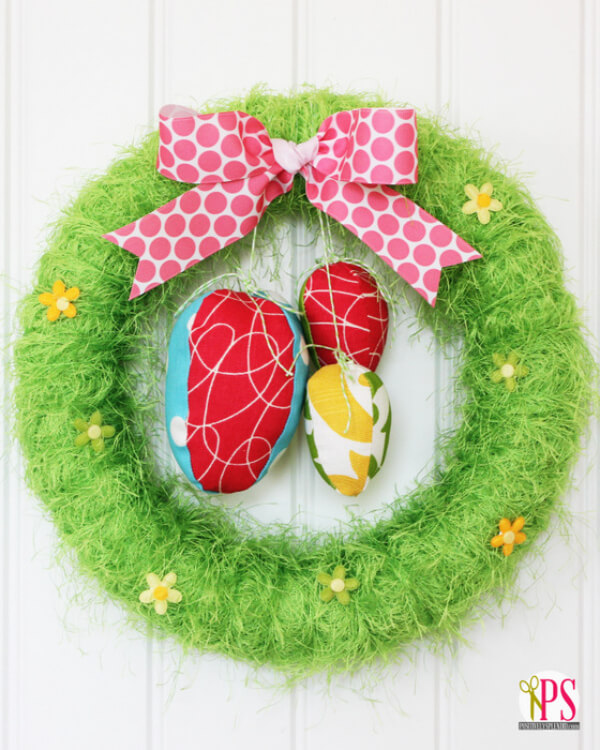
This is a beautiful green wreath that you can make using some simple and easy ways. You can use it as decor for your room or use it as a gift. Just see the procedure to make it.
Materials required:
- A wreath
- Green yarn
- Fabric easter eggs
- Twine
- Needle
- Ribbon
- Decorative flowers
Procedure:
- Take the yarn and wrap it around the wreath perfectly. For this first pin, put the end of the yarn on the wreath, then start wrapping. After the completion pin, the other end, or you can glue it too.
- Use twine and a needle to hang the fabric eggs in the middle of the wreath. Pass the threaded needle from each fabric egg and hang them on the wreath. Tie a tight knot.
- Use the ribbon to make a bow and stick it on the wreath.
- At last, glue the decorative flowers on the wreath.
Spring Candy Wreath
Image Source/Tutorial: Anna And Blue
Do you want crafty work? Here is an idea. You can make candy wreaths for Easter occasions. What you have to do is given below! So, let’s start by preparing yourself for this craft with some necessary materials.
Materials required:
- Candies
- Styrofoam wreath
- Glue gun
- Ribbons
Procedure:
- Cover the whole wreath with candies.
- Glue the candies inside the rim of the wreath.
- Then glue them again on the circumference of the wreath in a circular manner.
- Take the ribbon and glue it on the top of the wreath to hang it.
Your beautiful candy wreath is ready!
Washi Tape Easter Wreath
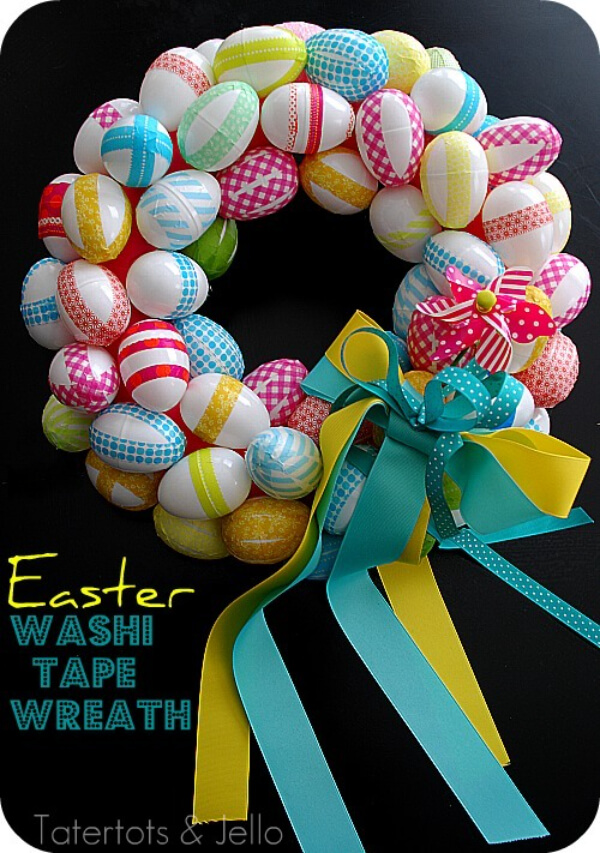
Image Source/Tutorial: Tatertots and Jello
If you adore Washi tapes, you can use them in the decoration of wreaths. Washi tapes give an adorable decoration to your crafts. So, see the given ways to make this type of wreath. Have fun and enjoy!
Materials required:
- Wreath
- Ribbons
- Plastic eggs
- Washi tapes
- Scissor
- Glue gun
Procedure:
- Take the wreath and cover it with a ribbon of your choice.
- Now take the eggs and decorate them with washi tape. Wrap the eggs with tape.
- Use your nails or fingers to remove the wrinkles from the tape and make it smooth.
- Glue the eggs on the wreath in a decorative manner. Cover the whole wreath with eggs.
- Again, use a ribbon to make a big bow and stick it on the top of the wreath.
Painted Eggs Easter Wreath
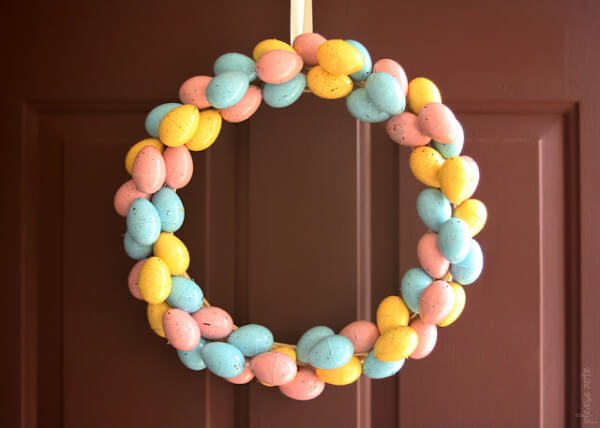
Image Source/Tutorial: Please Note
Use the sparkly and shiny eggs to make the wreath. It will give an immense look to the wreath. Just chase some materials for this craft and start making! You will also need some guidance for this. So, here it is!
Materials required:
- Wreath
- Plastic eggs
- Glue gun
- Spray paint
Procedure:
- Take the plastic eggs and spray the paint on both sides of the eggs.
- Now, put the paintbrush in brown or black paint and flick it onto the eggs to give them a speckled look.
- Let them dry.
- Glue the eggs on the wreath.
- You can use a stick to hang this beautiful wreath on your wall.
Basket Wreath

You are well known for how to make easter baskets. You can use the baskets to make the wreath. Decorate it with the given supplies and use them as a gift!
Materials required:
- A basket
- Rabbit toy
- Flowers
- Moss
- Burlap
Procedure:
- Get the basket and fill it with adorable flowers and moss.
- Make the rabbit toy sit in the basket in the middle of the broom
- Take the burlap and use your skills to make a bow.
- Glue it on the handle of the basket on the side.
Here is your basket wreath ready!
Easter Wreath with Easter Grass and Bunny
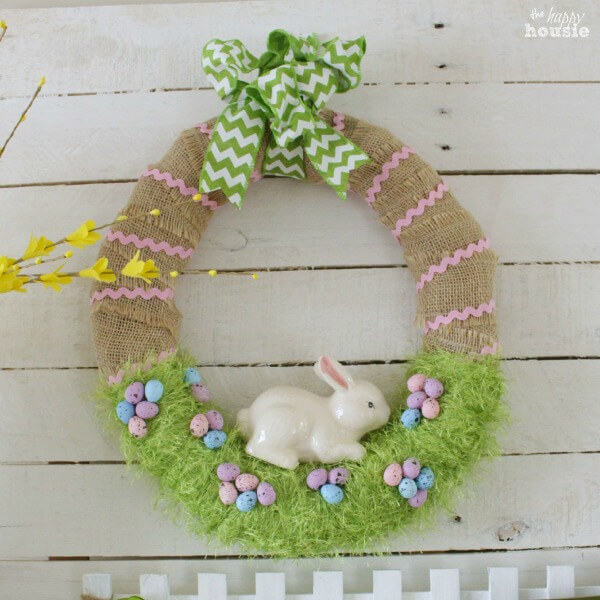
Image Source/Tutorial: The Happy Housie
You can give a beautiful scene to your wreath. Make the grass for the rabbit on the wreath and give it an adorable look. For this, you need some essential materials and a way of the procedure. So, we are here to help you! See the given ways.
Materials required:
- Grapevine wreath
- Burlap ribbon
- Different ribbons(thick and thin)
- Scissor
- Green eyelashes yarn
- Small Foam eggs
- Easter rabbit
- Glue gun
Procedure:
- Wrap the burlap ribbon around the circumference of the wreath.
- Also, wrap a zig-zag-shaped thin ribbon on half of the wreath by leaving some space between each of them.
- Take another ribbon and make a bow of it. Tie it on the top of the wreath
- Now, get the green yarn and start wrapping it around the half of the wreath that remained when we were wrapping the zig-zag ribbon.
- Glue the ends of the yarn.
- Take the foamed eggs and glue them on the wrapped green yarn.
- Glue the rabbit on the inner circumference of the green grassy area.
And here is your beautiful grassy wreath!
Moss and Burlap Easter Bunny Wreath
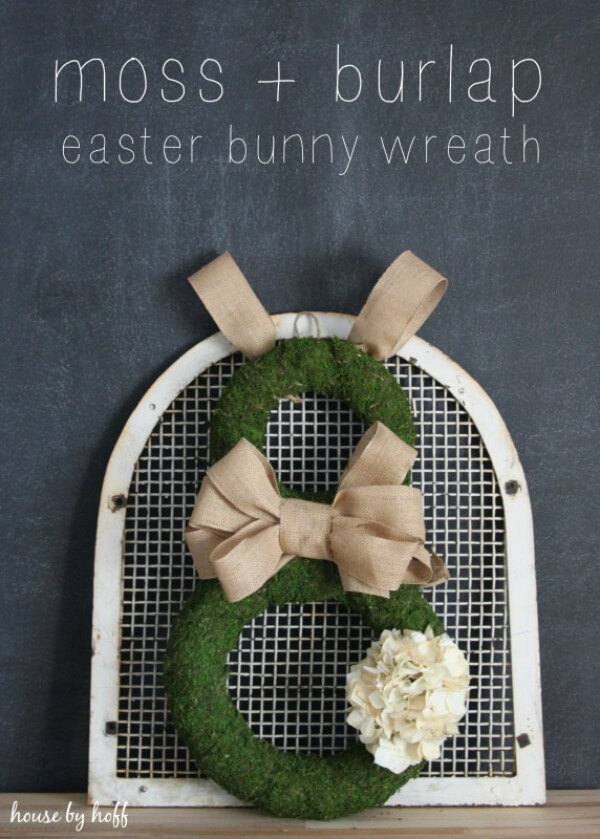
Image Source/Tutorial: House By Hoff
If you like bunny crafts and adore them, then it can be the best idea for you. You can make a bunny wreath by simply using the moss. Don’t panic, I am telling you the procedure.
Materials required:
- Two wreaths(one is small and the second is large)
- A Big flower
- Burlap ribbons
- Glue gun
- Moss
Procedure:
- Take both the wreaths and join them with each other by placing the smaller ones on the bigger ones. It will be the face and abdomen of the bunny.
- Now take the moss and glue it on the circumference of the wreath. Paste the ends to make it perfectly wrapped.
- Now, glue the flower on the big wreath.
- Take the burlap ribbon and make a bow of it. Glue it on the neck of the bunny.
- Again, take the burlap ribbon and cut it to form the two loops. Glue the loops on the top of the face to make the ears of the bunny.
Bunny Door Decor
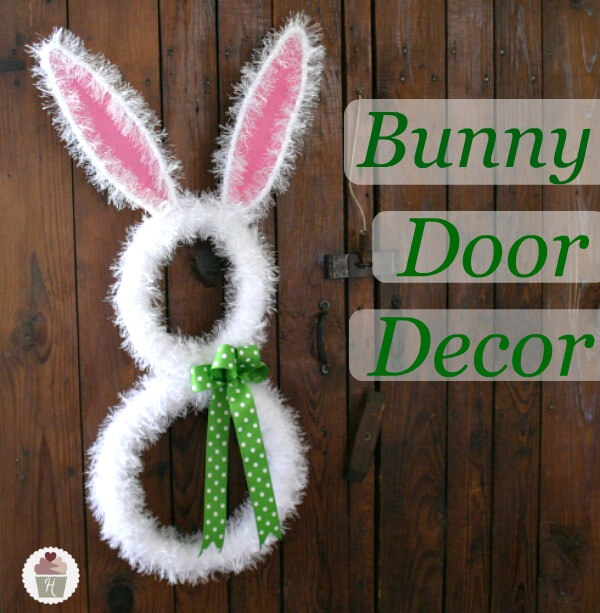
Image Source/Tutorial: Hoosier Homemade
Hurray hurray! Easter is on the way! Get ready to make bunny door decor. Get all your supplies and start making it.
Materials required:
- Foam pipe cover
- Vinyl-coated wire
- Ribbon
- White fabric
- Duct tape
- Fur
- Pink paper
- Glue gun
- Scissor
Procedure:
- Take the pipe cover and form a circle with it to make the wreath. Do the same with another one. But remember to make the second one larger than the first one.
- Wrap the white fabric around both the wreaths.
- Also, paste the fur on them.
- Now, join both the wreaths with each other to give the shape of a bunny.
- Now take the pink paper and cut two ears from it. Wrap them with white fabric and then with fur.
- Glue the ears on the face of the bunny.
- Take the ribbon and make the bow. Glue it on the neck.
Big Pipe Cleaner for Bunny Wreath
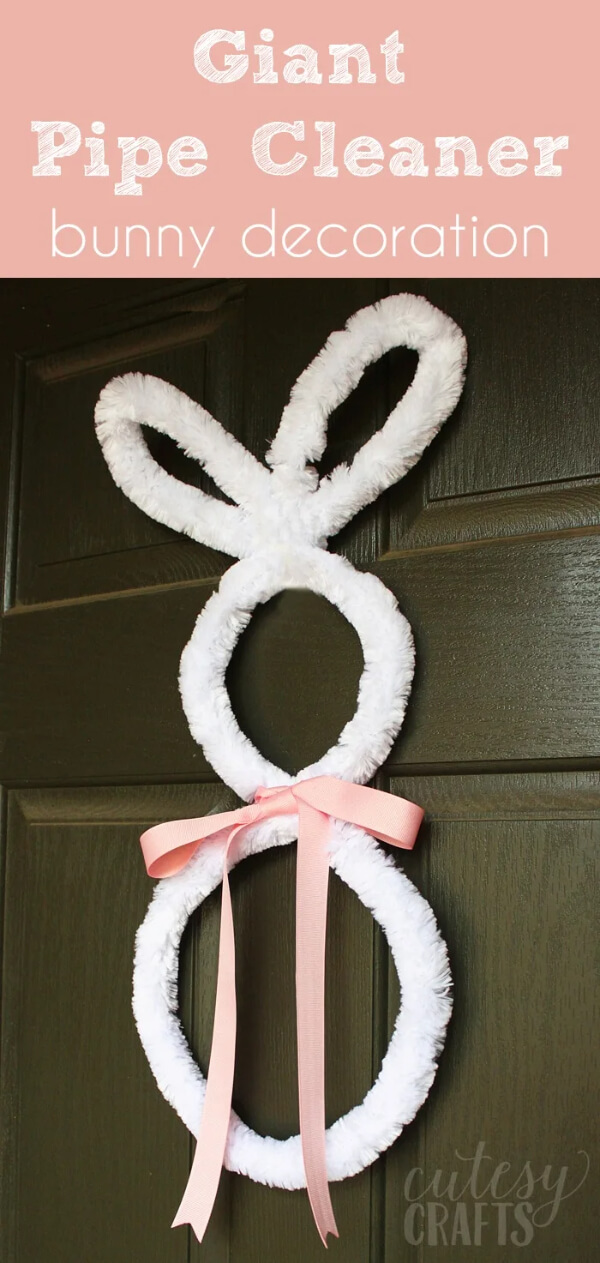
Image Source/Tutorial: Cutesy Crafts
You can use big pipe cleaners to make the bunny decor. What’s the procedure? Don’t panic! I am giving the easiest and simplest way to make the bunny wreath decor with big pipe cleaners.
Materials required:
- Big pipe cleaners
- Ribbon
- Glue gun
Procedure:
- Take the pipe cleaners and start making the face of the bunny by folding it. Fold it to make a small circle for the face and glue the ends.
- Now, take another pipe cleaner and fold it to make the abdomen of the bunny.
- Join both circles together to make the bunny.
- Now, take the ribbon and make the bow. Glue it on the neck of the bunny.
- Take another pipe cleaner and fold it to give the shape of ears. Glue the ends properly.
- Paste the ears on the top of the bunny’s face.
And you are all done!
Carrot Decor
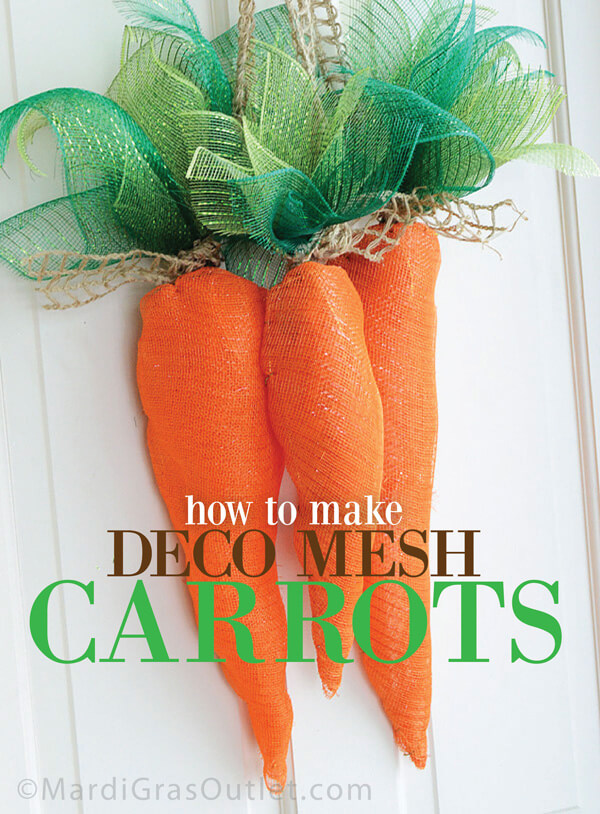
Image Source/Tutorial: Mardi Gras Outlet
Here is a way of making carrot decor by using some essential supplies. So, have a look at the given procedures and start making them.
Materials required:
- Metallic orange decor poly mesh roll
- Metallic green mesh roll
- Metallic moss
- Gold floral wire
- Jute ribbon
- Glue gun
- Scissor
Procedure:
- Take the golden wire and fold it to make the shape of a carrot. Add another strip of wire in the middle of the carrot to make it three-dimensional.
- Take the Orange mesh roll and cover your carrot with it. Cut the extranet.
- Glue the ends,s or you can also use small pieces of wire to tie it.
- Take the green mesh and cut four squares from it.
- Curl the sides up and tie the center of each square.
- Tie all the squares together and glue them on the back top of the carrot.
- Take the jute ribbon and tie it below the green meshes.
- Use this jute to hang the carrot decor.
Diy Paper and Fiber Easter Wreath
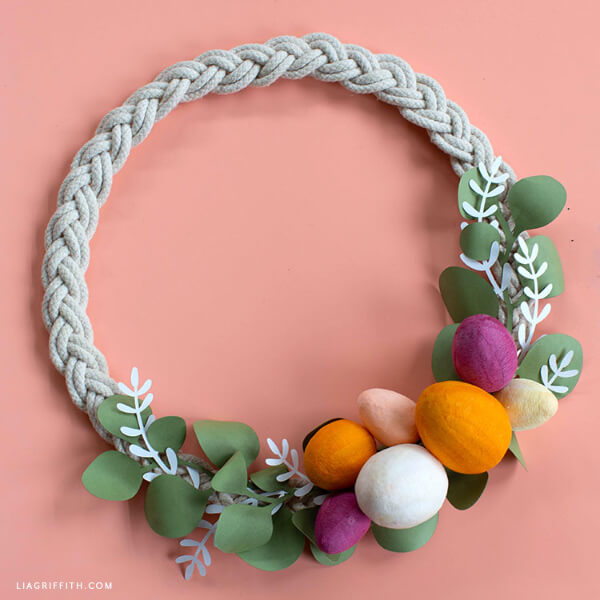
Image Source/Tutorial: Lia Griffith
It is a beautiful wreath made using paper and fiber. On this Easter, try this amazing craft and decorate your house. Want instructions? Here are the ways to make this wreath.
Materials required:
- Braided rope wreath
- Glue gun
- Colored papers
- Scissor
- Cotton spun eggs
Procedure:
- Take the green paper and cut leaves with a small stem. Also, use white paper to make the floral designs.
- Now, take the braided rope wreath and glue all the leafy patterns onto it. Remember not to cover the whole wreath with leaves. Use a leafy pattern for half of the wreath.
- Then glue the white floral designs in between the spaces of leaves.
- Take the eggs and glue them on one side of the leaves, giving it a corner decoration.
Hang it on the door or wall. Enjoy!
DIY Easter Wreaths to Welcome Spring Step-by-Step
Learn how to create beautiful DIY Easter wreaths to welcome spring with this easy step-by-step tutorial. Perfect for decorating your front door with colorful eggs, flowers, and ribbons. This beginner-friendly craft idea adds festive spring charm to your home and is a fun seasonal DIY decoration project.
Benefits of DIY Easter Wreaths for Kids
DIY Easter wreaths are a fun and creative way for children to celebrate the Easter season while developing important artistic and developmental skills. Using colorful eggs, bunnies, flowers, ribbons, paper, and other festive materials, kids can design unique wreaths that brighten homes and classrooms with springtime charm. Easter wreath projects encourage imagination, creativity, and hands-on learning through crafting.
Making Easter wreaths also provides an opportunity for children to explore colors, patterns, shapes, and seasonal traditions. These crafts can be adapted for different age groups and are perfect for classrooms, homeschool activities, Easter parties, and family crafting sessions.
Skills Children Develop Through Easter Wreath Crafts
- Fine motor skills through cutting, gluing, coloring, and assembling decorations.
- Creativity and artistic self-expression.
- Hand-eye coordination and attention to detail.
- Problem-solving skills while arranging decorative elements.
- Patience and concentration during the crafting process.
- Understanding of seasonal traditions and celebrations.
Educational Value of Easter Wreath Activities
Easter wreath crafts provide more than creative fun. They help children practice following directions, recognizing patterns, identifying colors, and expressing their ideas through art. Many wreath projects also introduce recycling concepts by using paper plates, cardboard, tissue paper, and other everyday materials to create festive decorations.
Tips for Making DIY Easter Wreaths with Kids
- Use child-safe scissors, glue, and craft materials.
- Choose bright spring colors and Easter-themed decorations.
- Encourage children to create unique designs and patterns.
- Incorporate recycled materials for eco-friendly crafting.
- Display finished wreaths on doors, walls, or classroom bulletin boards.
- Allow children to personalize their wreaths with names, drawings, or messages.
Fun Facts About Easter Wreaths
- Wreaths are circular decorations that often symbolize renewal and celebration.
- Easter wreaths commonly feature eggs, flowers, bunnies, chicks, and pastel colors.
- Many DIY Easter wreaths are made using paper plates, cardboard, or craft foam.
- Spring flowers are popular additions because Easter is celebrated during the spring season.
- Handmade wreaths make wonderful seasonal decorations and gifts.
FAQs
Q1. What materials do I need to make a DIY Easter wreath?
Answer: To make a DIY Easter wreath, you will need a wreath form (either straw or foam), some greenery (such as boxwood, eucalyptus, or magnolia), ribbons, Easter-themed decorations (such as eggs, bunnies, and chicks), and glue or wire to secure the decorations. You may also need scissors and clippers to trim the greenery.
Q2. How long does it take to make an Easter wreath?
Answer: The time it takes to make an Easter wreath can vary depending on the complexity of the design and the materials you are using. Generally, it takes between 1 and 2 hours to make a basic Easter wreath. If you are using more intricate materials such as ribbon, lace, or felt, it can take up to 3 or 4 hours.
Q3. What type of ribbon is best for an Easter wreath?
Answer: The best type of ribbon to use for an Easter wreath is a grosgrain or satin ribbon. Both of these types of ribbon have a nice texture and will hold their shape well to give your wreath a professional look. Grosgrain ribbon is a bit thicker and more durable, while satin ribbon is more lightweight and has a glossy finish. Choose a ribbon color that complements the colors of your wreath for a beautiful and festive look.
Q4. Do I need a special frame or base to make an Easter wreath?
Answer: No, you do not need a special frame or base to make an Easter wreath. You can make a wreath using materials such as grapevine, twigs, or ribbon. You can also use a foam wreath form or a metal or wire frame to shape your wreath. Depending on the type of wreath you are making, you may also need some glue, tape, or wire to attach the decorations.
Q5. What type of decorations can I use for an Easter wreath?
Answer: For an Easter wreath, you can use a variety of decorations such as colorful eggs, bunny-shaped objects, spring flowers, ribbons, and even small Easter-themed figurines. You can also add items like Easter-themed signs, colorful feathers, and even glittery Easter eggs. Depending on the size of your wreath, you could also add some pom-poms or felt shapes to give it a more festive look.
Q6. What colors should I use for an Easter wreath?
Answer: For an Easter wreath, it’s a good idea to use traditional Easter colors such as pastel pink, yellow, light blue, and lavender. You can also use more vibrant colors such as green, orange, and purple. Accent the wreath with ribbons, bows, and decorations in various shades of yellow, pink, and white. Add some Easter eggs and spring flowers to complete the look.
Q7. How do I attach decorations to my Easter wreath?
Answer: To attach decorations to your Easter wreath, you will need a hot glue gun, glue sticks, and your chosen decorations. Start by selecting the decorations you want to use and arranging them on the wreath to get an idea of the design. Once you know where you want the decorations to go, use the hot glue gun to attach them. Begin by applying a small amount of glue to the back of each decoration, then press it onto the wreath. Hold the decoration in place for a few seconds to ensure it is securely attached. Repeat this process until all the decorations are in place. Be sure to allow the glue to cool completely before handling the wreath.
Q8. What type of glue should I use to make an Easter wreath?
Answer: The best type of glue to use for making an Easter wreath is a hot glue gun. Hot glue is strong and fast-drying, so it will hold the materials of your wreath together securely and quickly. You can also use craft glue, which is a water-based adhesive, but it may take longer to dry and may not hold the materials together as securely.
Q9. How can I ensure my Easter wreath will last?
Answer: To ensure your Easter wreath will last, there are a few steps you can take. Firstly, make sure the wreath is placed in a cool, dry area away from direct sunlight. This will help to prevent the materials from fading or becoming brittle. Secondly, use artificial flowers, as these will last longer than fresh ones. Additionally, it is important to use a waterproof sealant to protect the wreath from moisture and humidity. Finally, regularly check the wreath for any signs of wear and tear, and repair or replace any damaged parts. With these steps, your Easter wreath should last for many years.
DIY Easter wreaths provide children with a creative and meaningful way to celebrate the Easter season. Through cutting, decorating, and designing festive wreaths, kids develop important artistic and developmental skills while creating beautiful handmade decorations. These enjoyable craft projects encourage imagination, learning, and family fun while adding colorful springtime cheer to any space.
Stay connected for daily crafts, creative ideas, and enjoyable activities. Become part of our community on Telegram, YouTube & Facebook.
Reviewed By Rachit Gupta
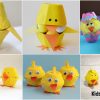
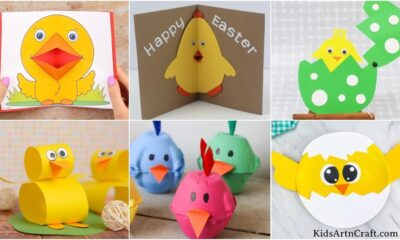
More Easter Crafts From Kids’ Art & Craft
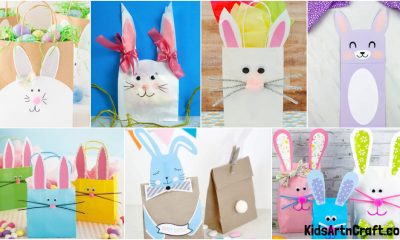
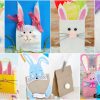
Creative Easter Bunny Gift Cards You Can Make at Home
Design creative Easter bunny gift cards you can make at home. These handmade cards add a special touch to Easter presents and are simple to craft.
Best Easter Egg Decorating Tips for a Stylish Look
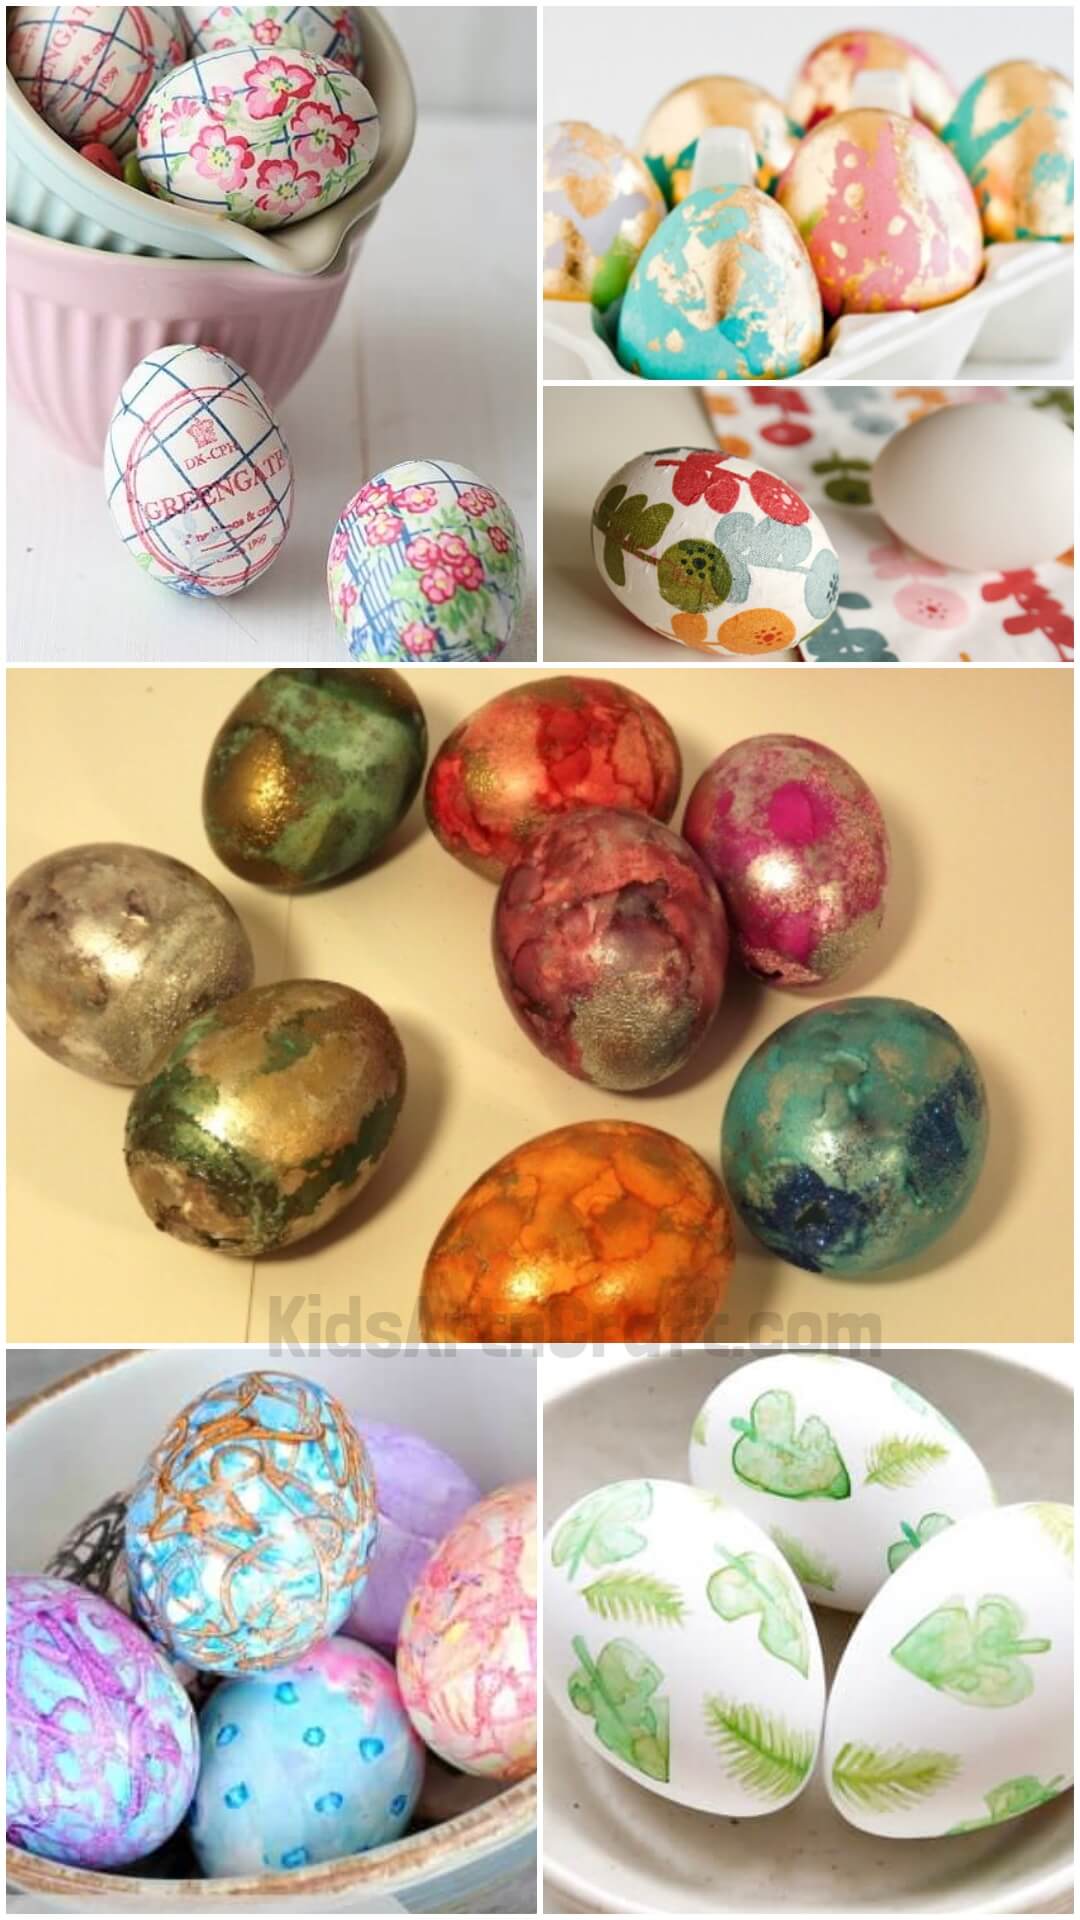
Find the best Easter egg decorating tips for achieving a stylish look. These techniques help you create elegant and beautiful Easter eggs with minimal effort.
How to Design Character-Themed Easter Eggs for Fun
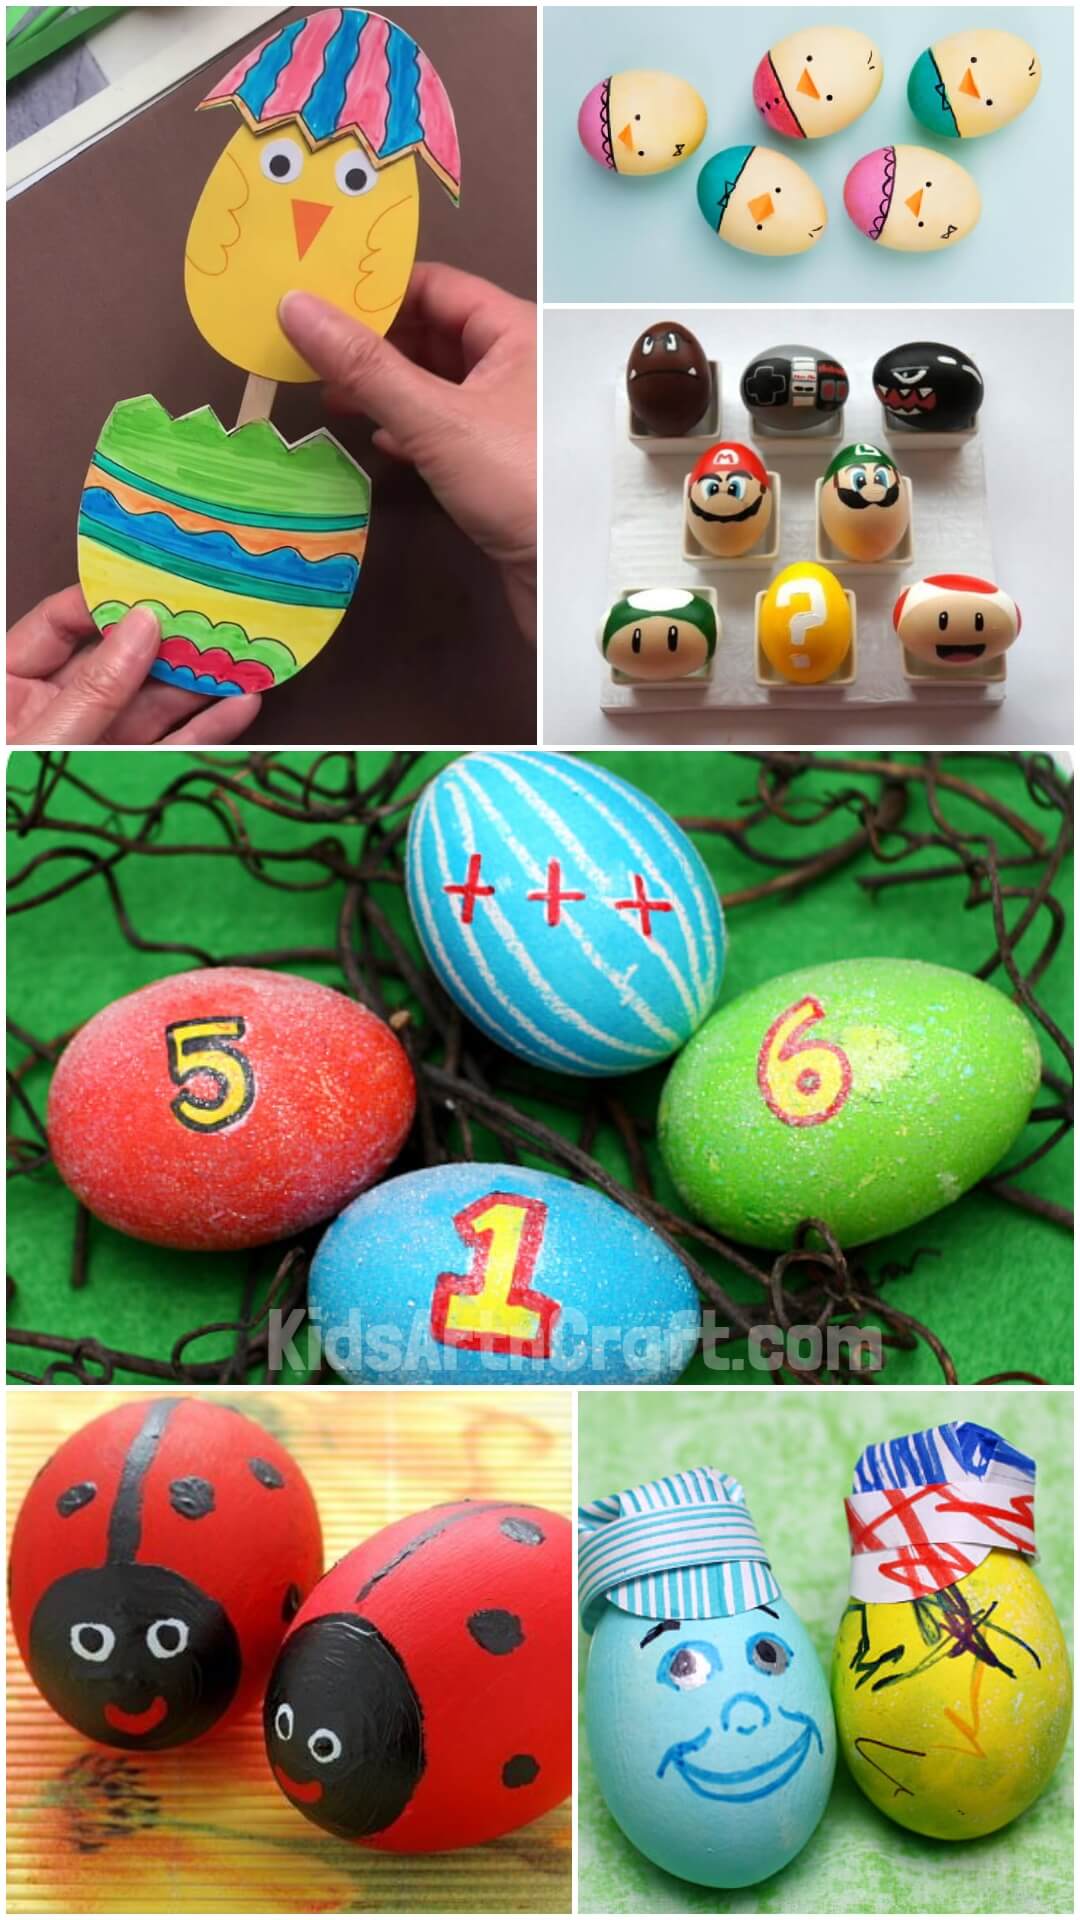
Learn how to design character-themed Easter eggs for a fun holiday activity. Use your favorite animated or movie characters to make egg decorating extra enjoyable.
Simple Easter Garland Crafts You Can Make at Home
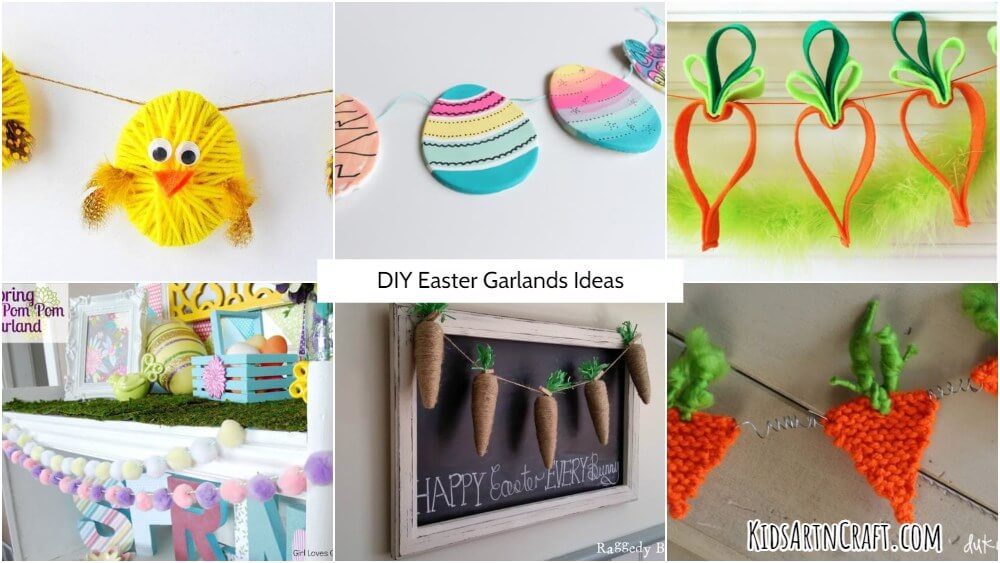
Make simple Easter garlands at home with these DIY craft ideas. They’re easy to create and perfect for adding a personal touch to your spring decorations.
Fun and Free Easter Coloring Pages for Kids & Grown-Ups

Bring Easter to life with these fun and free coloring pages, suitable for kids and grown-ups alike. Enjoy hours of creativity with delightful Easter-themed images designed for all ages.