


Paper Crafts
How to Make Paper Bee Craft for Kids

In this tutorial, we are back with another flying creature. No, it’s not a bird but it can still fly. It’s not a wasp but it can still sting. It’s a tiny little creature with colorful, vivid bodies.
It survives on flowers and produces something very sweet and healthy. Their home is made of multiple conjoined small cells and they have a queen as well. Yes, you guessed it right. It’s a BEE. Buzzing little bees with their tiny wings attached to their black and yellow bodies. We will be replicating all these colors and attachments in our art today. Ready, get set, GO!
Easy To Learn Paper Bee Craft Tutorial For Kids
Read More: DIY Easy Paper Strawberry Tutorial For Kids
Material Used
- A Big White Chart Paper, a Yellow Chart Paper, a Black Chart Paper.
- A Glue Stick
- A Pair Of Scissors
- An Ice Cream Stick
- Blue Paint
- Black Sketch Pen
- Red Crayon
Procedure
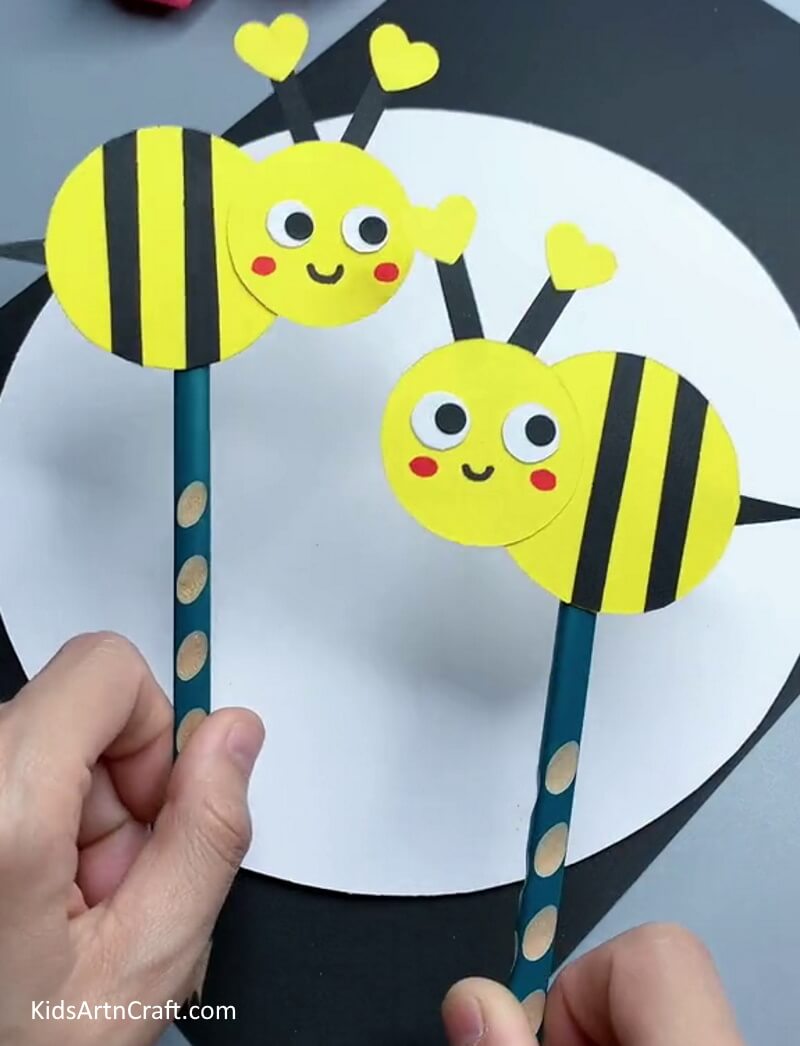
Step 1: Cutting The Sheets

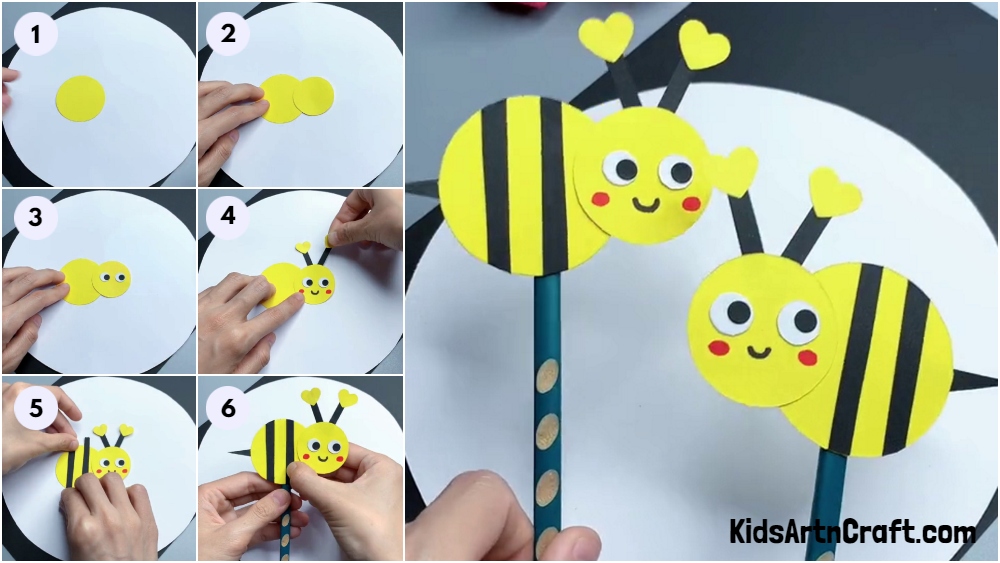
Take a white sheet of paper and cut it into a big round circle as shown in the picture below. Now, take a yellow sheet of paper and cut it into a very small circle. See the picture for reference. Don’t paste it just place the yellow circle in the middle of the white circle. It should be placed a little toward the left side of the sheet.
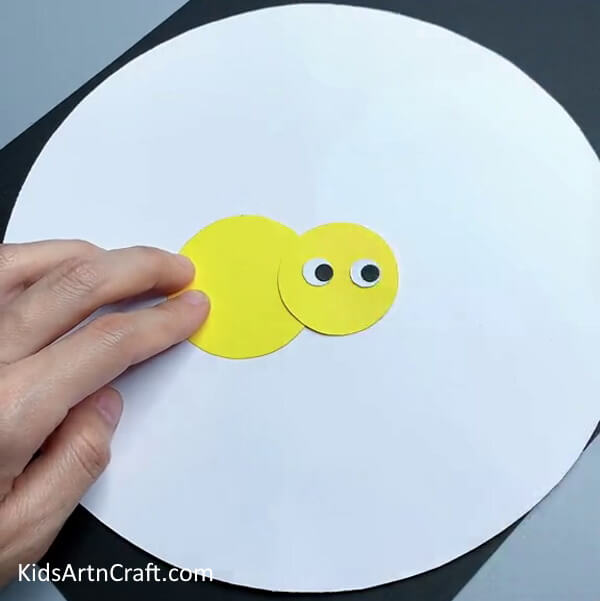
Step 2: Cutting Another Round Circle
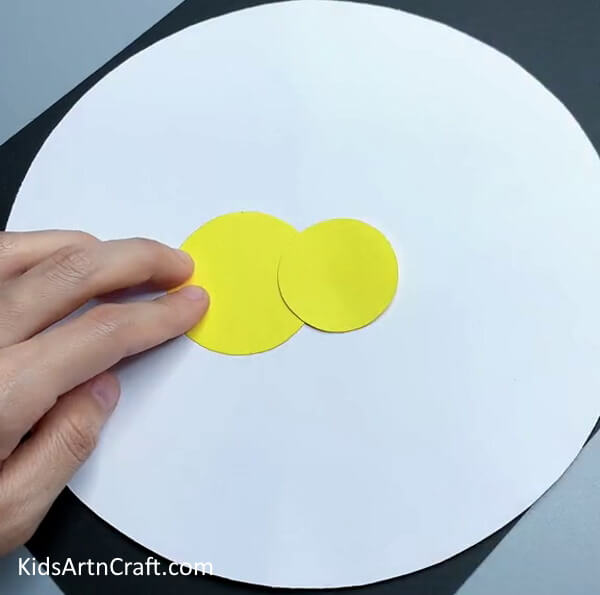
Take a pair of scissors and the same yellow sheet of paper and cut a circle smaller than the previous one. Paste this smaller circle on the right side of the yellow circle placed on the white sheet. The smaller yellow circle should be placed on the white sheet covering just a little area of the bigger yellow circle. Apply pressure to paste the circle properly. This gives the shape and a basic structure to our bee. The smaller circle is its head and the bigger one is its body.
Step 3: Adding Eyes
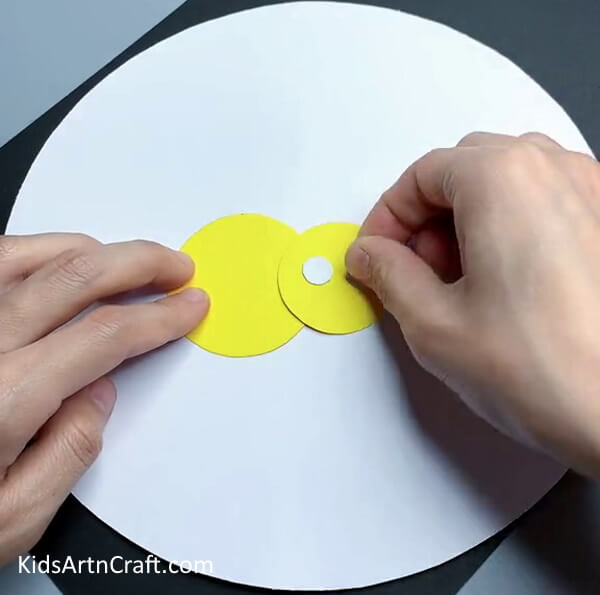
Take a sheet of white paper and cut it into two very small circles as shown in the image below. Now paste these circles on the round shape you pasted in the previous step. The circles should be pasted next to each other at a little distance.
Step 4: Giving Definition To The Eyes
Take a black sheet of paper and cut two tiny circles out of it, smaller than the eyes you just pasted. Take a glue stick and paste them on the eyes of the bee. They should be pasted on the extreme right side of the eyes as shown in the picture below. Cutting such a tiny circle can be tricky. Don’t worry, I have a solution for you. Draw two small circles on a black sheet of paper and using a pointed object like a compass, make marks on the drawn circles until they cut into the desired shape.
Step 5: Adding Two Antennas

Take a black sheet of paper and cut two thin, small strips as shown in the picture below. Paste these strips on the head of the bee, i.e., the smaller circle. They should be placed on the white sheet with the bottom tip pasted on the top of the bee’s head. Take a black sketch pen and draw a horizontal curved line a little below the eyes. Take a red crayon and make two dots on the cheeks of this face. Our bee now has a mouth, eyes, and two blush cheeks. Have you ever seen a bee blush? No, but yours does, that’s what makes it unique.
Step 6: Adding Hearts To The Antenna
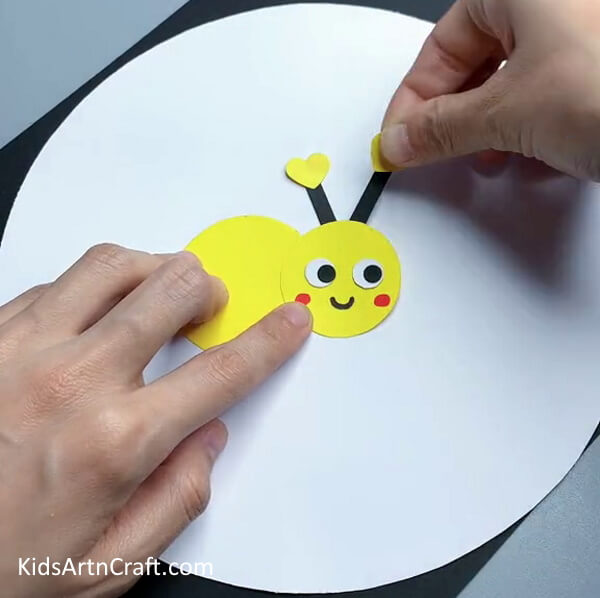
Take a piece of yellow chart paper and cut two tiny hearts out of it. You can repeat the process of drawing and marking with a pointed object to cut out the hearts as well. Paste these hearts on the top of the antennas so that they only catch good vibes and happy feelings around them.
Step 7: Adding The Black Strips
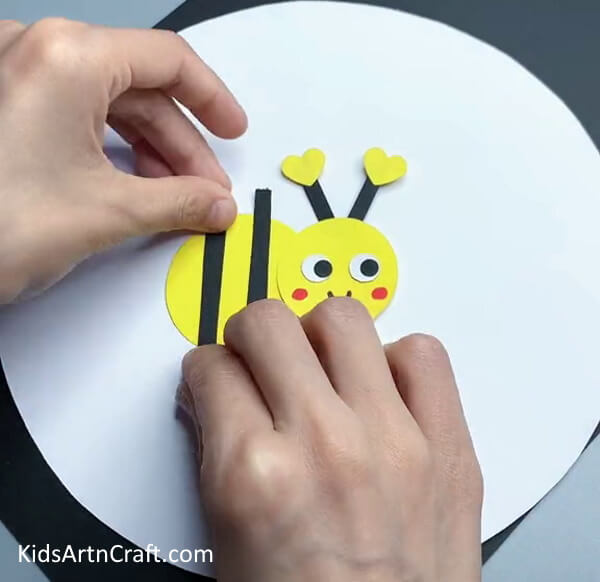
To complete the color combination of black and yellow pattern, take a black sheet of paper and cut it into two thin, long strips and paste them in the middle of the body, i.e., the bigger circle, parallel to each other. Paste the excess strip behind the big yellow circle by simply folding it behind the circle and pasting it on the other side. Do this to all four excesses.
Step 8: Add The Stinger And Make It Fly
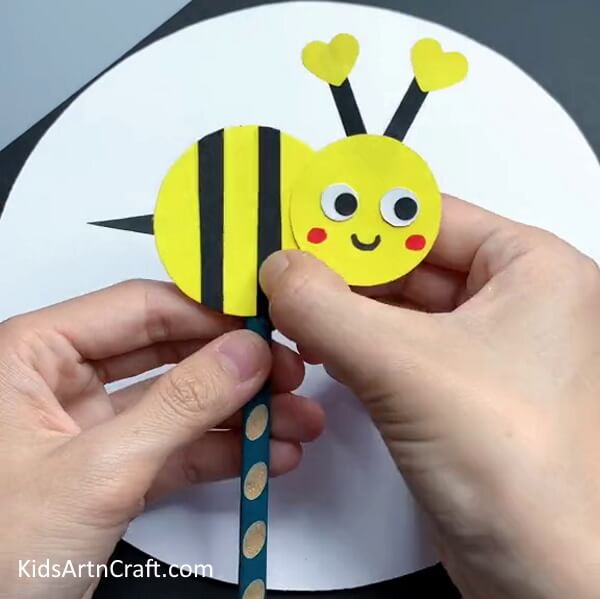
Take a black sheet of paper and cut it into a small cone and paste it on the left side of the bigger circle as shown in the picture below. This gives our bee a stinger, so try not to mess with her, she might get angry and fight back.
Take an ice cream stick and color it blue and let it dry. After completely drying paste the stick at the back of the bee. Use tape to seal the stick completely. You can make it fly with the help of this stick.
Happy Beautiful Bees
Make another one following the same steps and make them fly all day, in the garden, in your room, or in the classroom.
Some More Bee Craft Tutorial
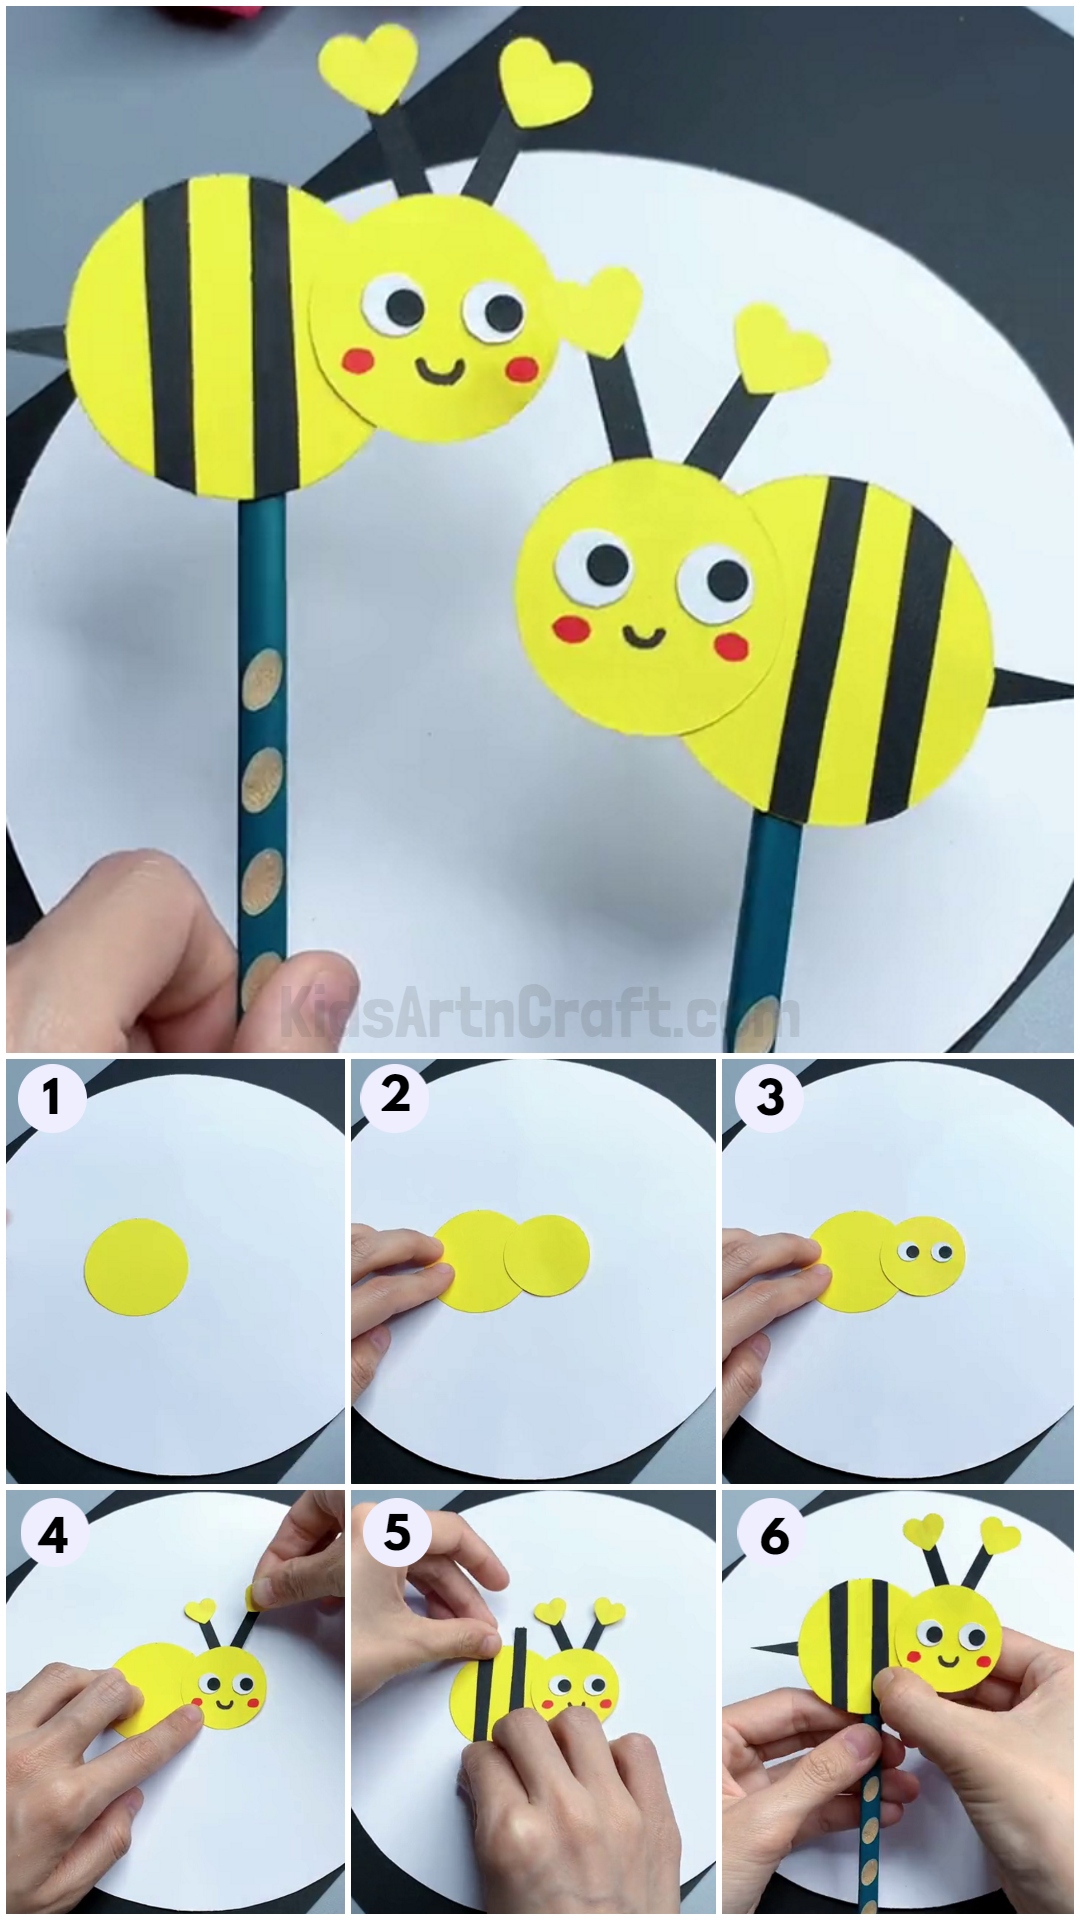
Adorable Bee Craft Using Cardboard Roll For Kids
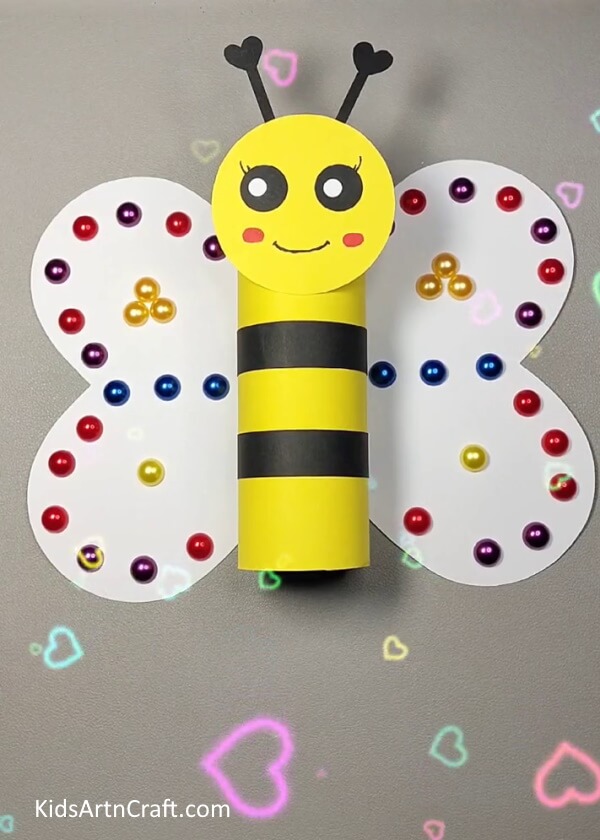
Image Source/Tutorial: Kids Art & Craft
This craft is perfect for kids! It’s a cute and easy bee craft made from a cardboard roll and other materials. Kids will have fun making this craft and they’ll be proud of their finished bee. It’s a great way to get creative and explore new crafting techniques.
Easy Crafting a Bee with Paper For Children
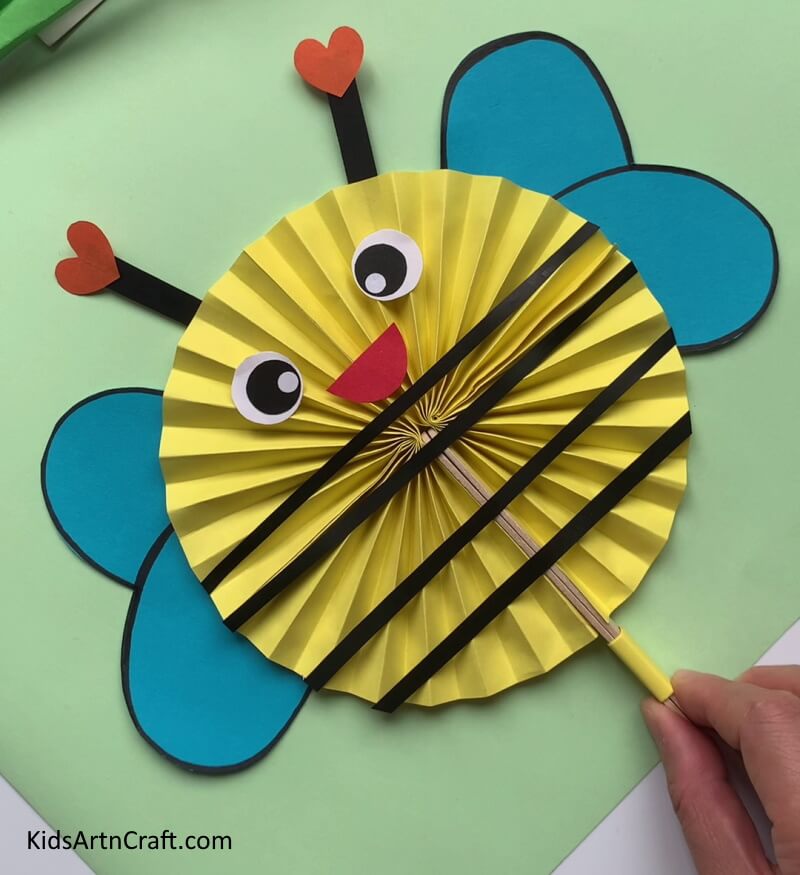
Image Source/Tutorial: Kids Art & Craft
This easy crafting activity is perfect for children! With paper and glue, they can create a cute bee that will bring a smile to their face. They will love this fun and creative activity!
This completes our tutorials today and we are left with wonderful art and new techniques. Today we learned to make objects of art fly. You can also use similar techniques using sticks to make other forms of art fly, walk or even run. Make a human figure and attach these sticks to it and you can make it walk, run or even fly. Congratulations on making flying on their own possible for humans. NASA might recruit you soon. Don’t stop there make more human or animal figures and add these sticks to them and make them act through these sticks and film these acts to make a movie. Keep experimenting to perfect the art. Today we also learned different parts of the bee and fun facts about it. Did you know that bees die after they sting someone?
Follow us on Youtube for art and craft tutorials and much more.
More Articles from Kids Art & Craft
- Paper Rainbow Cloud Craft step by step Tutorial
- How To Make Tulip Flower Easy Paper Craft For Kids
- Simple Paper Crafts Make At Home Video Tutorial for Kids
- Easy to Make Paper Crafts Video Tutorial for Kids
- Recycled Plastic Bottle Dragon Craft Tutorial for Kids


