


DIY and Crafts
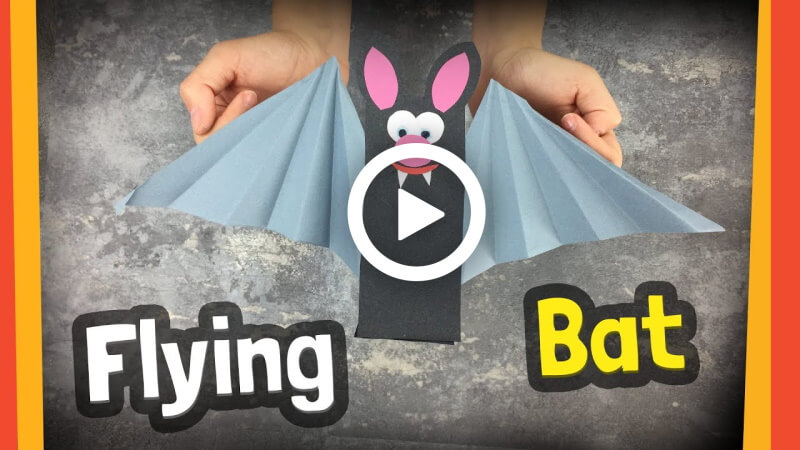
How to Make A DIY Halloween Craft – Flying Bat

Halloween is almost here! You must have planned a scary party and family get-together. You must have wanted to decorate your house with some fun and scary stuff. You have come to the right place! Today you’re going to make a DIY Halloween bat. Kids will love them. It will be made of paper, so it’s going to be so easy and fun! So, without any words, let’s make it!
How to Make A DIY Halloween Craft – Flying Bat
Materials:
- Two purple colour papers of any size. ( Depends on how big you want to make the bat)
- Two sheets of black-coloured paper of any size. ( Depends on how big you want to make the bat)
- Pink-coloured paper.
- Black colour paper.
- A glue stick
- Scissors.
Procedure:
- Take a purple coloured paper, fold it into a triangle shape. If you pick a square or rectangular shape paper, then after folding it in half like a triangle, cut out the rest of the parts.
- Fold the paper into an arrow-like shape over and under to make fold lines.
- After folding all the paper, it should look like a narrow arrow.
- Open the paper, and a bat wing will be in front of your eyes.
- Take the other purple colour paper and follow these steps for this page as well to make another wing of the bat.
- Take a black colour paper, make a long length and a small breadth. It should look like a rectangular shape. Follow the shape on the reference video if you have any confusion.
- Fold the bottom of the rectangular shape a little narrowly by making a straight fold.
- Take the two wings you made previously, and attach the wings to the middle sides of the rectangular page with a glue stick.
- Attach the wings by placing them, triangle one over another, in a criss-crossing way.
- Take another black colour page, make a long length and a small breadth. It should look like a rectangular shape. Follow the shape on the reference video if you have any confusion.
- Fold the bottom of the rectangular shape a little narrowly by making a straight fold like the previous black page.
- Take this page and attach on the wings attached page.
- The top of the page should be attached planely and attach the bottom by gluing the narrow straight fold one over another.
- Attach the sides of the bat as well with the glue stick.
- Take a black colour page and draw two bat ears, cut them out with scissors and attach them to the top of the bat with glue.
- Take two colour strips, the same colour as the bat’s wings.
- Make two rings with the strips by rolling them roundly.
- Pertain glue at the end of the rings to secure them.
- Attach the rings in between the folds of each wing with the glue stick.
- Put your fingers on the wings and fly the bat.
- Turn over the bat, take a colour paper and cut out two small ears of the bat smaller than the attached ears.
- Attach the ears over the black ears.
- Take a paper and draw bats cute, round eyes with black eyeballs.
- Cut out the drawings and attach them to the bat’s face with glue.
- Take coloured paper and also make a round nose and cut it, and then attach it under the eyes with glue.
- Make two white teeth and the mouth of the bat on a page, cut it out and attach them on the bat’s face.
- Your Halloween bat will be ready!
P.S- Here are some actions mentioned that are not mentioned in the reference video. So, you can follow these steps for your help!
Look how cool it is! This bat will shine at your Halloween party. As you can see, this process is easy for any age person to make. It requires fewer materials and effort. Without buying anything, you must use your creativity and bring life to your party. So, why are you wasting your time? Hurry up and make a beautiful paper decor!
Educational Benefits of Making a Flying Bat Craft
Creating a flying bat craft is not only entertaining but also educational for children. Halloween DIY activities help improve several important developmental skills:
- Improves fine motor skills through cutting, folding, gluing, and assembling craft pieces.
- Boosts creativity and imagination by allowing kids to decorate and personalize their bats.
- Encourages STEM learning as children understand simple movement and flying mechanisms.
- Enhances hand-eye coordination while handling small craft materials and tools.
- Supports problem-solving skills when kids figure out how to balance or flap the bat wings.
- Teaches about bats and wildlife, including their role in nature and ecosystems.
Materials Commonly Used for Halloween Bat Crafts
Most DIY bat crafts can be created using simple household or classroom supplies, making them budget-friendly and eco-friendly. Popular materials include:
- Black construction paper
- Cardboard or toilet paper rolls
- Glue and scissors
- Googly eyes
- String or yarn
- Straws
- Markers and crayons
Many Halloween bat craft ideas also encourage reusing recyclable materials like paper tubes and scrap paper, helping children learn about sustainability while crafting.
Tips for Making Your Flying Bat Craft More Fun
You can make this Halloween flying bat activity even more exciting with these creative ideas:
- Add glow-in-the-dark stickers or paint for a spooky effect.
- Hang multiple bats from the ceiling for Halloween decorations.
- Use colorful paper instead of black for a unique craft design.
- Create moving wings using strings or straws for interactive play.
- Pair this activity with Halloween storytelling or bat facts for educational fun.
Why Kids Love This DIY Flying Bat Halloween Craft
Halloween crafts are a fun way to keep kids creative and engaged during the festive season. This DIY flying bat craft is simple, affordable, and exciting because children can actually make the bat “fly” using easy craft materials. It combines creativity, imagination, and hands-on learning in one fun activity.
This craft is perfect for preschoolers, kindergarten kids, and elementary students who enjoy spooky Halloween decorations and interactive paper crafts. Parents and teachers can also use this activity for Halloween classroom projects, party decorations, or weekend craft sessions at home.
FAQs on How to Make A DIY Halloween Craft – Flying Bat
Q1. What materials do I need to make a DIY Halloween craft – Flying Bat?
Answer: You will need black cardstock paper, googly eyes, a hot glue gun, scissors, and string.
Q2. How long does it take to make a Flying Bat?
Answer: It should take around 20 minutes to assemble the Flying Bat.
Q3. What steps do I need to follow to make a Flying Bat?
Answer: Step 1: Cut the black cardstock paper into a bat shape.
Step 2: Glue googly eyes onto the bat.
Step 3: Cut two small holes on each side of the bat and thread a piece of string through.
Step 4: Tie the strings together in a knot and hang your flying bat.
Q4. What type of glue should I use to attach the googly eyes?
Answer: We recommend using a hot glue gun for the best results.
Q5. Can I make the Flying Bat with any type of paper?
Answer: Yes, you can use any type of black paper you prefer, such as construction paper.
Q6. Is it easy to make a Flying Bat?
Answer: Yes, making a Flying Bat is a relatively easy craft project.
Q7. Do I need any crafting tools to make a Flying Bat?
Answer: Yes, you will need scissors and a hot glue gun to complete the project.
Q8. What size should I make the Flying Bat?
Answer: The size of the bat is up to you, but we recommend making it around 8 inches wide and 10 inches tall.
Q9. Do I need any special skills to make a Flying Bat?
Answer: No, all you need are basic crafting skills.
Q10. Can I make a Flying Bat with my children?
Answer: Yes, this is a great project to do with your children.
This DIY Halloween flying bat craft is a fun and engaging activity for kids of all ages. It combines creativity, learning, and festive excitement while helping children develop important motor and problem-solving skills. Whether you make it at home, in the classroom, or during a Halloween party, this easy bat craft is sure to become a favorite spooky activity for kids and parents alike.
Explore fun crafts, easy DIY ideas, and exciting learning projects for kids! Join our Telegram and follow us on YouTube & Facebook for daily inspiration.
Read More:
- 27 Parenting Hacks that will make your life easier with your kids
- Rat Crafts & Activities for Kids
- Recycled Button Craft Ideas for Kids
- Bubble Wrap Crafts & Activities for Easter
- No-Sew Crafts With Fabric Scraps


