


Paper Crafts
Paper Elephant with moving trunk easy Craft For Kids

This is a great craft for kids to do when it is raining outside. You can make a paper elephant with a wiggly trunk using basic materials. Just follow the instructions and you will have your own paper elephant quickly!
Big, pointed white tusks with a long trunk in the middle, big flappy ears, and a huge frame. Elephants have one of the most unique structures in the world. They have a nose that doesn’t look like other animals and is quite versatile. It is used to grab things like food and also to snort water and even splash it back. Have you ever seen any other creature do that? That’s what makes them unique and one of a kind and today we are going to make art out of its marvellous build. This tutorial is not just about making an elephant but presenting it in its full glory, with its tusks and a moving trunk. Let’s get right into it.
DIY Movable Paper Elephant Trunk Craft Tutorial For Kids
Read more: Learn To Make Tree with Paper step by step Tutorial
Materials Required
- Yellow, White & Black Sheet Of Paper
- A Sketch Pen
- A Plastic Straw
- Tape
- A Glue Stick
- A Pair Of Scissors
Procedure
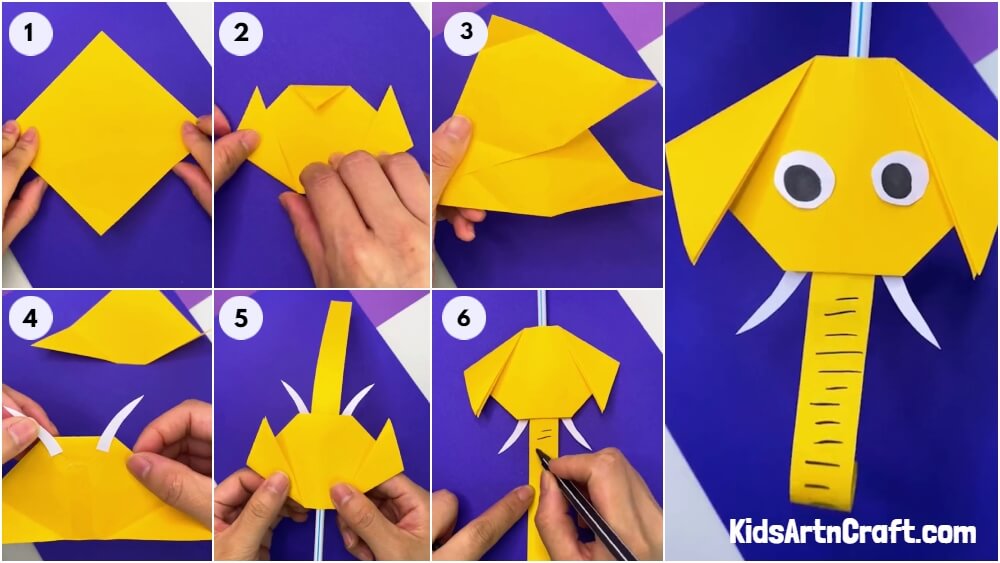
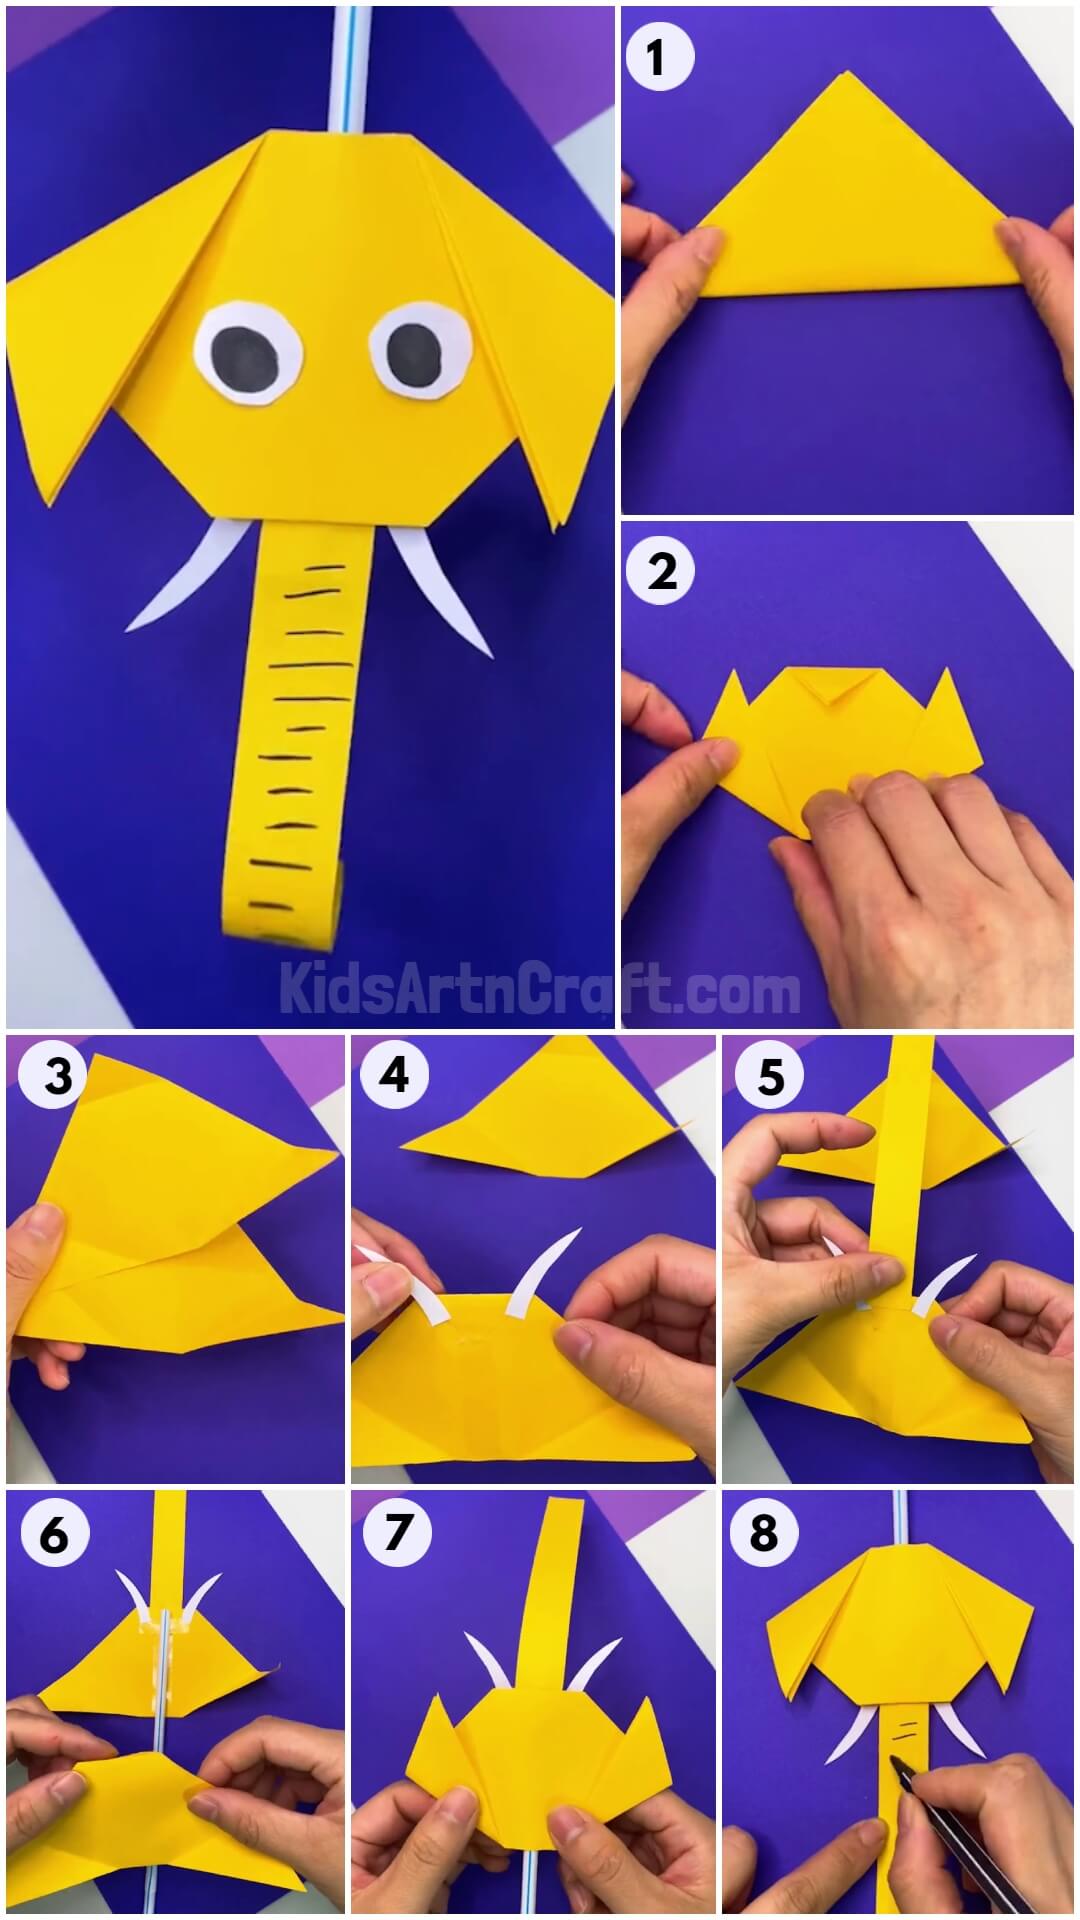
Step 1: Taking a Yellow Sheet Of Paper
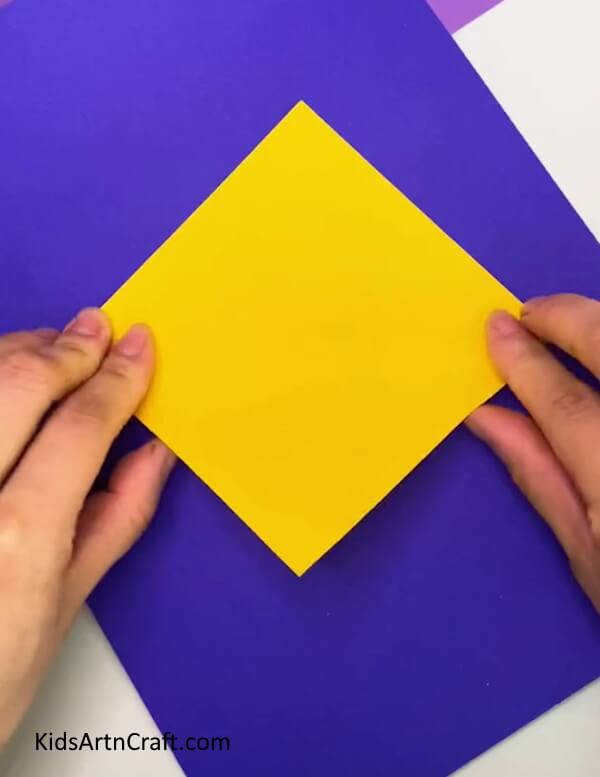
Take a yellow sheet of paper and place it on the table in the shape of a rhombus.
Step 2: Folding The Sheet
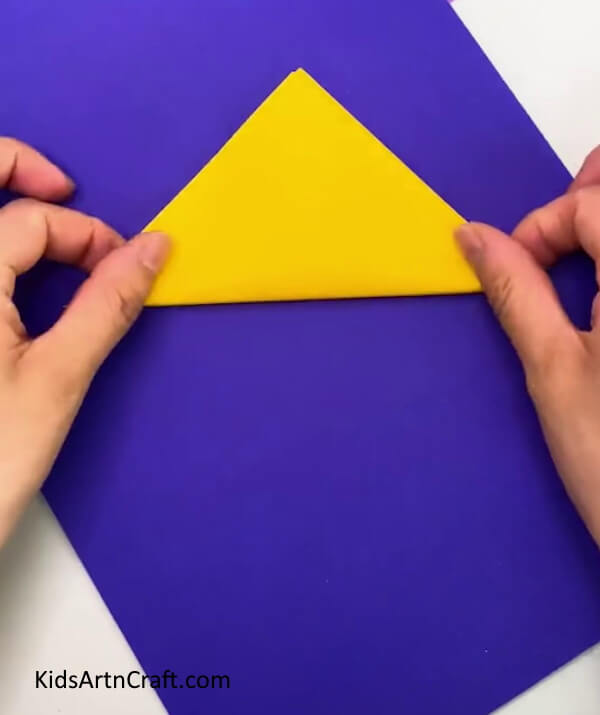
Fold the sheet from the bottom corner to the top corner making a triangle.
Step 3: Making a Small Fold
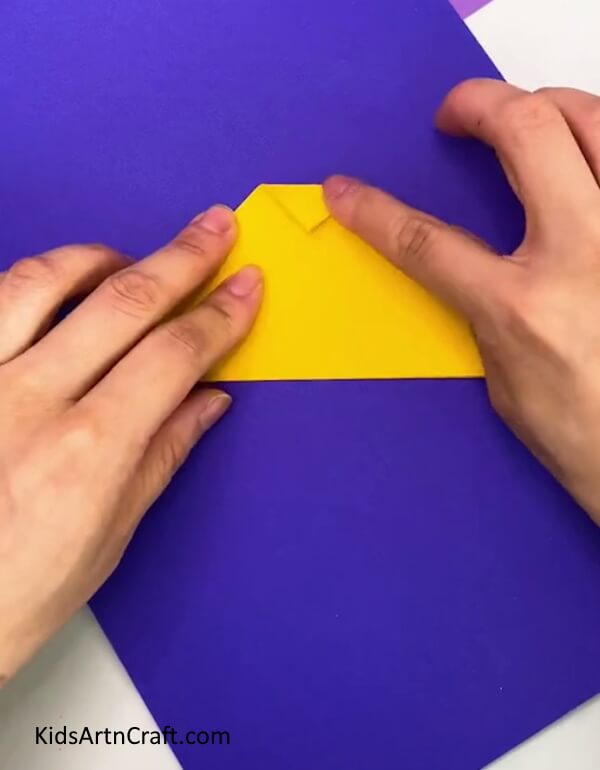
Make a small fold at the top corner of this triangle as shown in the picture below.
Step 4: Creating Two Triangles
Fold the side of this triangle at the corner creating a smaller triangle. Repeat the process on the other side as well. Now, we have two smaller triangles at the sides of the bigger triangle.
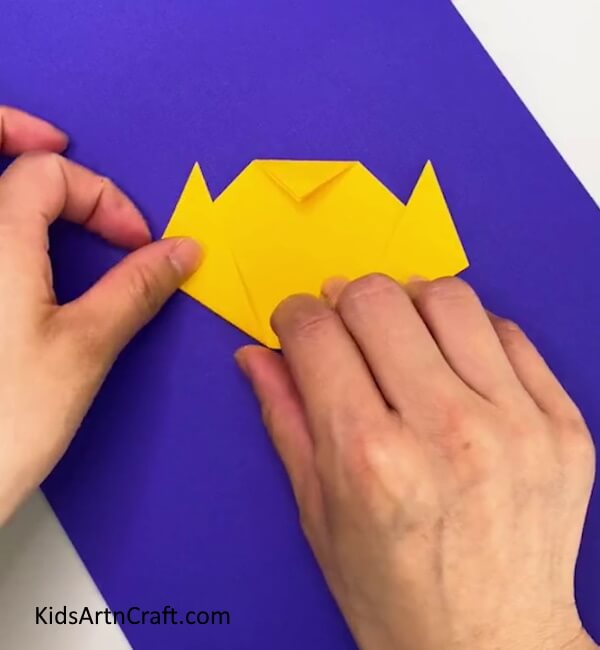
Step 5: Unfolding The Triangle
Make another such shape you made in the earlier steps. Follow all four steps to create this shape. Now, unfold both shapes to reveal the basic triangle again. You have three marks on each of the two shapes.
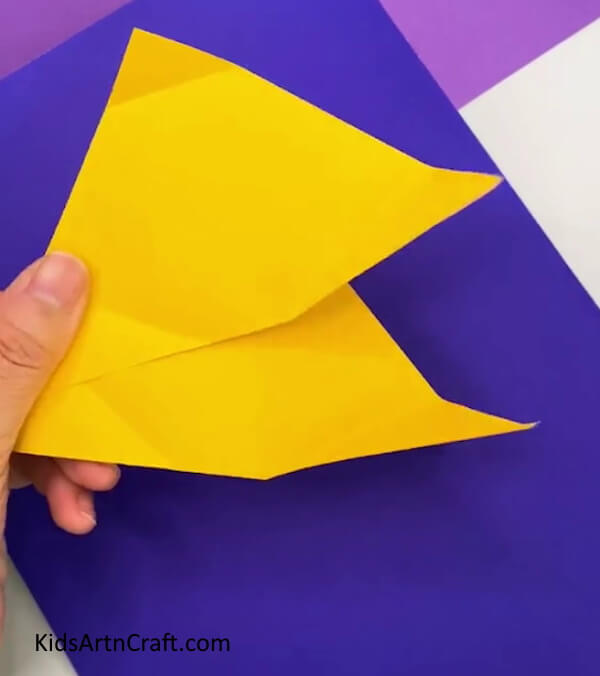
Step 6: Taping The Top Triangle

Take one of the triangles and fold the top cornerback following the mark and stick a small piece of tape on it to seal the shape.
Step 7: Cutting The Tusks Out
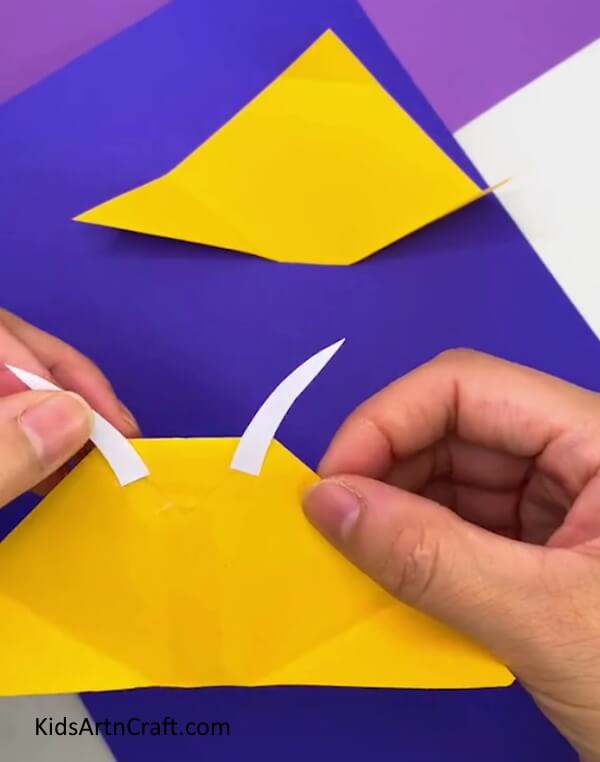
Take a white sheet of paper and draw two small tusks on it and cut them out with a pair of scissors. You see the picture below for reference. After completing the cutting, paste the tusks on the sealed top side of the paper. Both should be placed at the corners of the sides. Use a glue stick this time.
Step 8: Cutting Out The Trunk
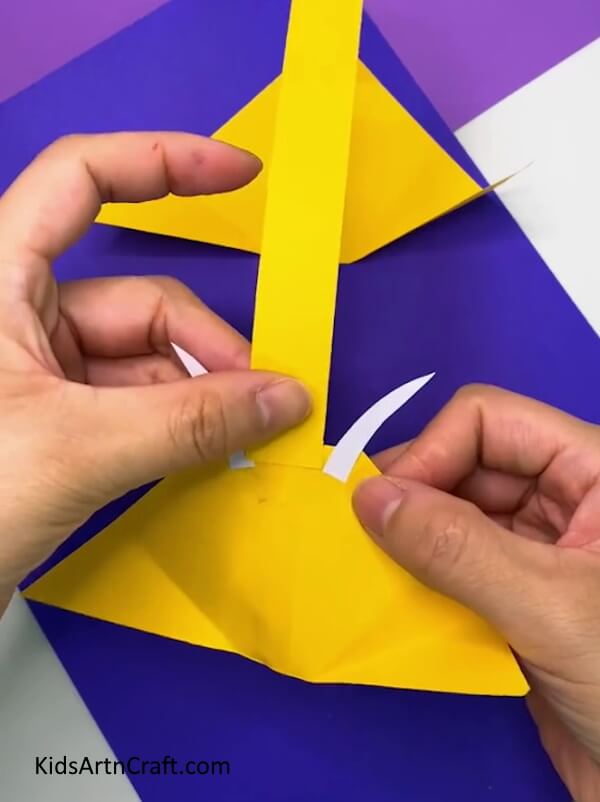
Take a yellow sheet of paper and cut out a long thick strip. The thickness of the strip should be equal to the thickness of the top side you pasted the tusks on, right from one task to the other as shown in the picture below. With the help of a glue stick, paste this strip in the middle of the tusks. This is going to serve as the trunk of the elephant.
Step 9: Pasting The Straw
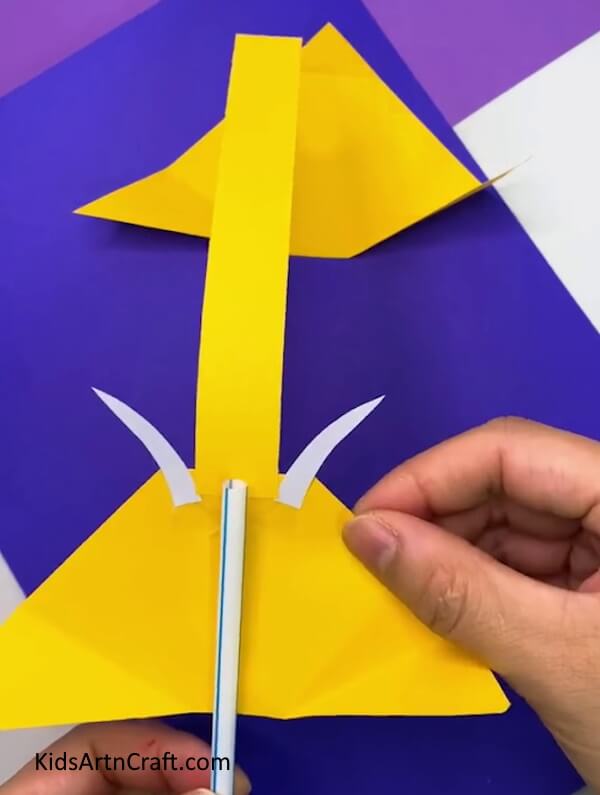
Take a straw and place it right in the middle of the entire sheet with one of its ends in the middle of the trunk as shown in the picture below. Attach it to the sheet with the help of some tape. Seal it properly and do not cut the excess straw.
Step 10: Using The Other Shape As Well
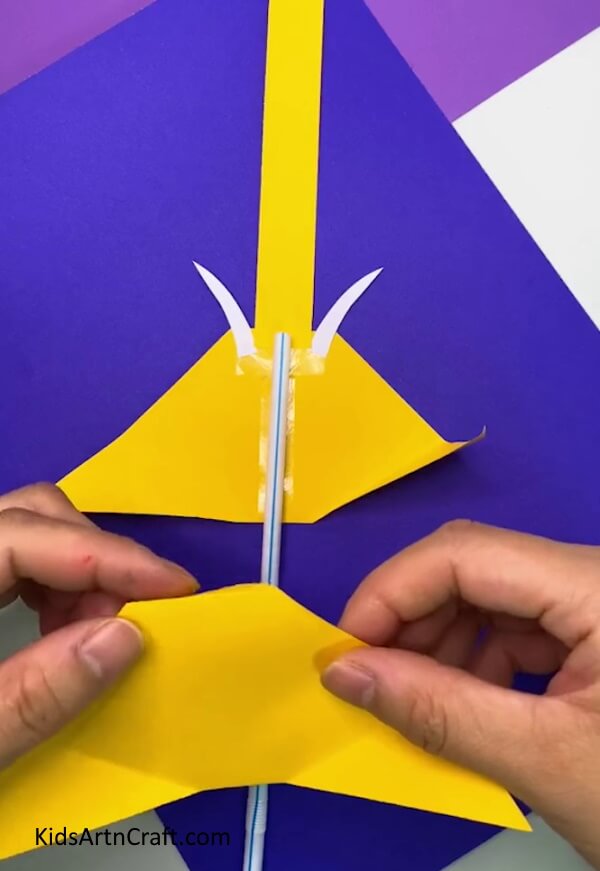
Take the other shape you made earlier in the fifth step and fold the top end back following the mark on it.
Step 11: Connecting The Two Shapes Together
Now, place this shape on the shape with trunk and tusks. Adjust the shapes properly covering the sides with accurate symmetry. Refer to the image below for more clarity.
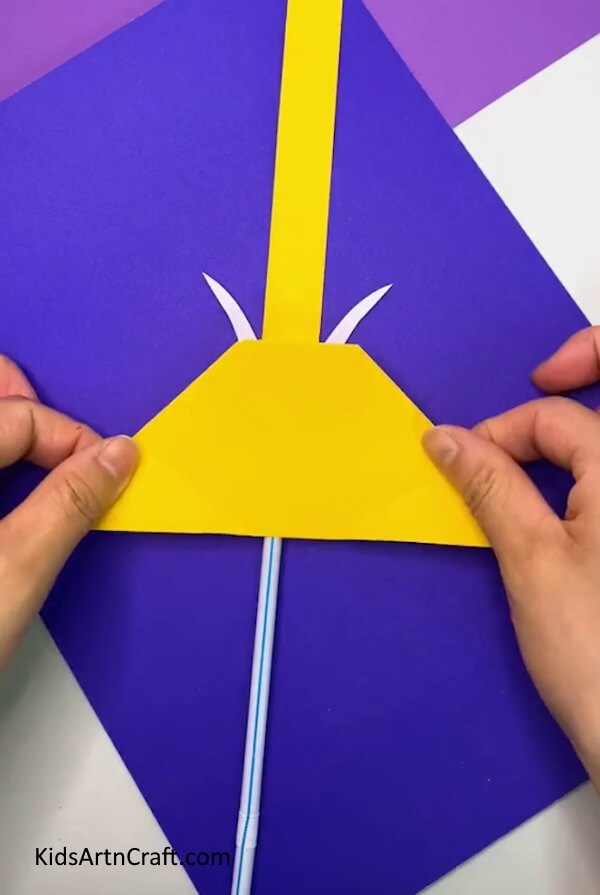
Step 12: Folding The Marks Again
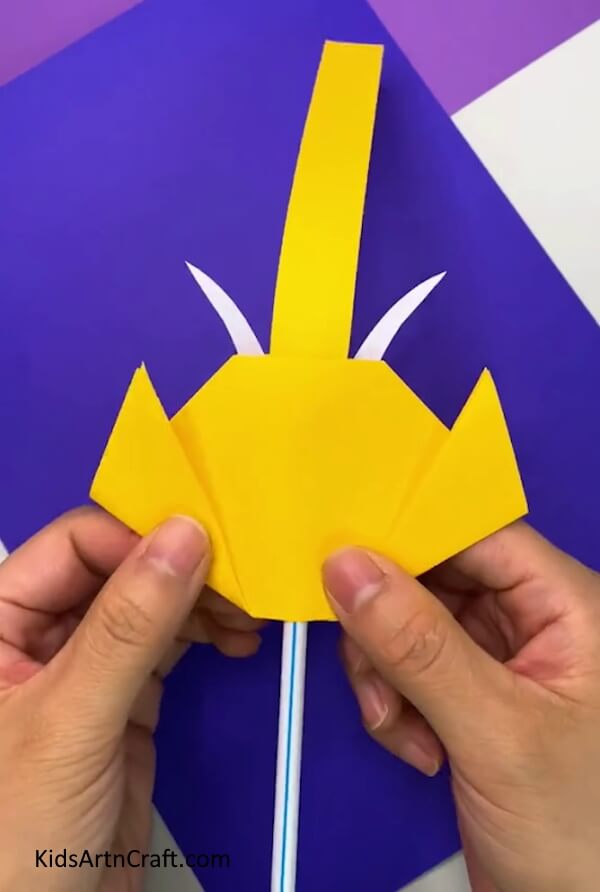
Fold the marks on the sides of these two shapes creating two small triangles again. Press the folds to lock the shape. These will act as the ears of the elephant.
Step 13: Drawing Some Lines
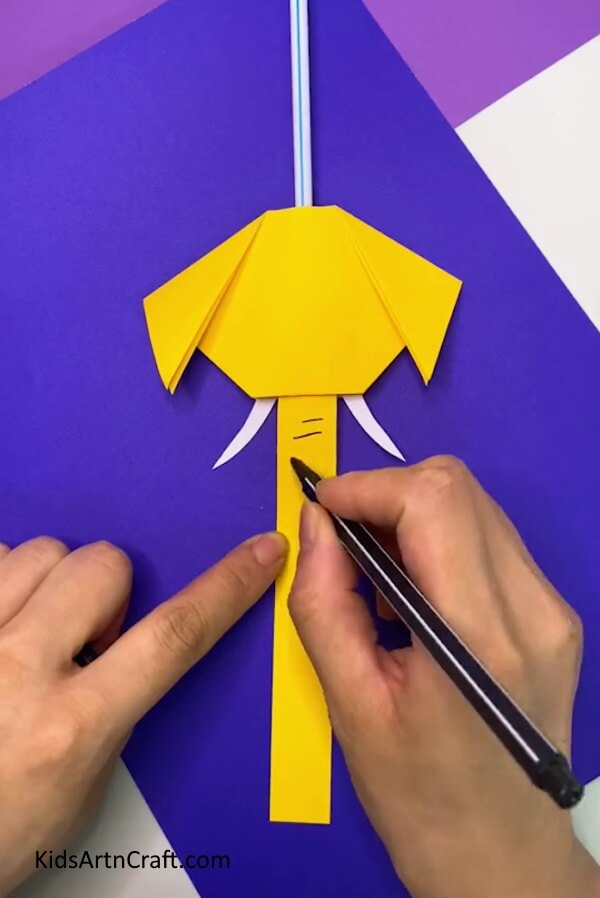
Turn the entire shape around with the straw at the top and the trunk at the bottom. Now, with the help of a black sketch pen, make small horizontal lines on the trunk.
Step 14: Shaping The Trunk
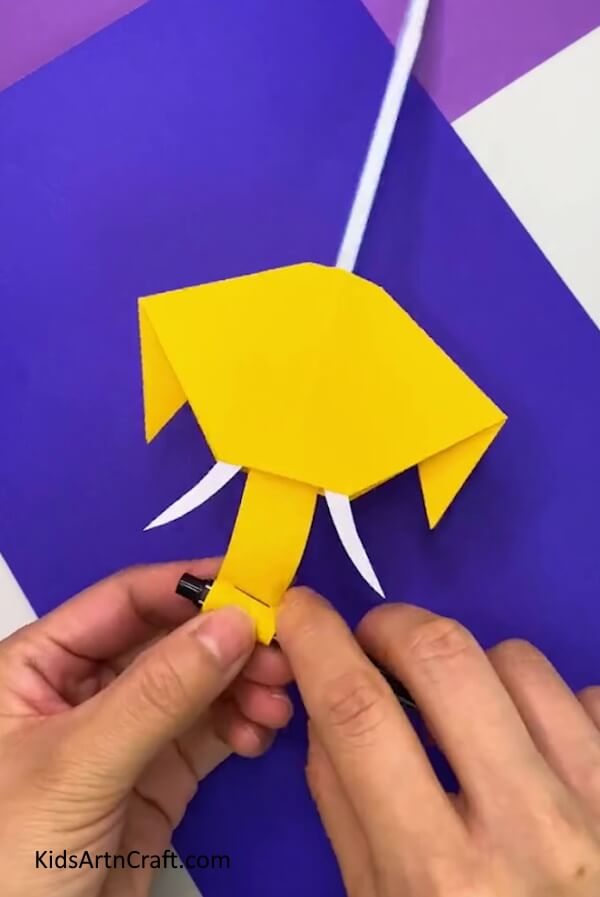
Take the same pen and place the bottom end of this pen on the open tip of the trunk strip. Start folding it into a roll and tighten the fold to hold the roll in its shape.
Congratulations, Paper Elephant With Moving Trunk Craft is Ready!!
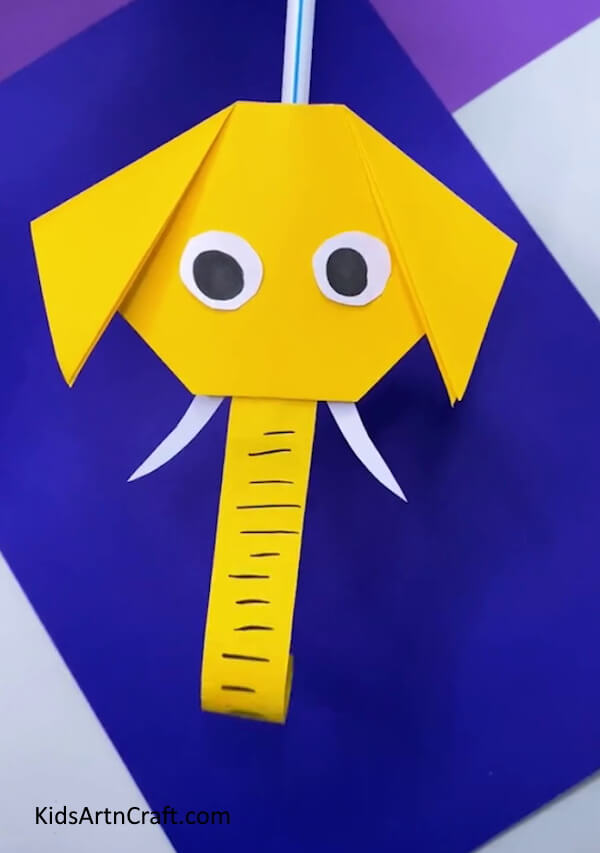
Cut out a small white circle and a smaller black circle and paste the black circle on the white circle. Make two of these shapes. With the help of a glue stick paste these shapes on the head of the elephant next to each other. Blow into the straw to see the magic work. The trunk of the elephant moved rolling up and down.
Today, we learned to make an art piece very close to actual life. It is fun, innovative, and smart. You can show it to your friends and play around with it like a toy, so, it serves the purpose of both great art and a fun toy. Use the techniques you learned in this tutorial to make other such fun and innovative art and expand your horizons of art and craft. Keep practicing.
Follow us on Youtube for art and craft tutorials and much more.
More Articles from Kids Art & Craft
- Simple Paper Animal Craft Ideas Video Tutorial for All
- Paper Strips Frog Craft Step-By-Step Tutorial
- Easy Ladybug Craft For Kids Using Leaves and Paper
- Easy Animal Crafts At Home Video Tutorial for All
- DIY Paper Crafts Video Tutorial for All


