Paper Crafts
Colorful Paper Fish in Water Craft Tutorial for Kids

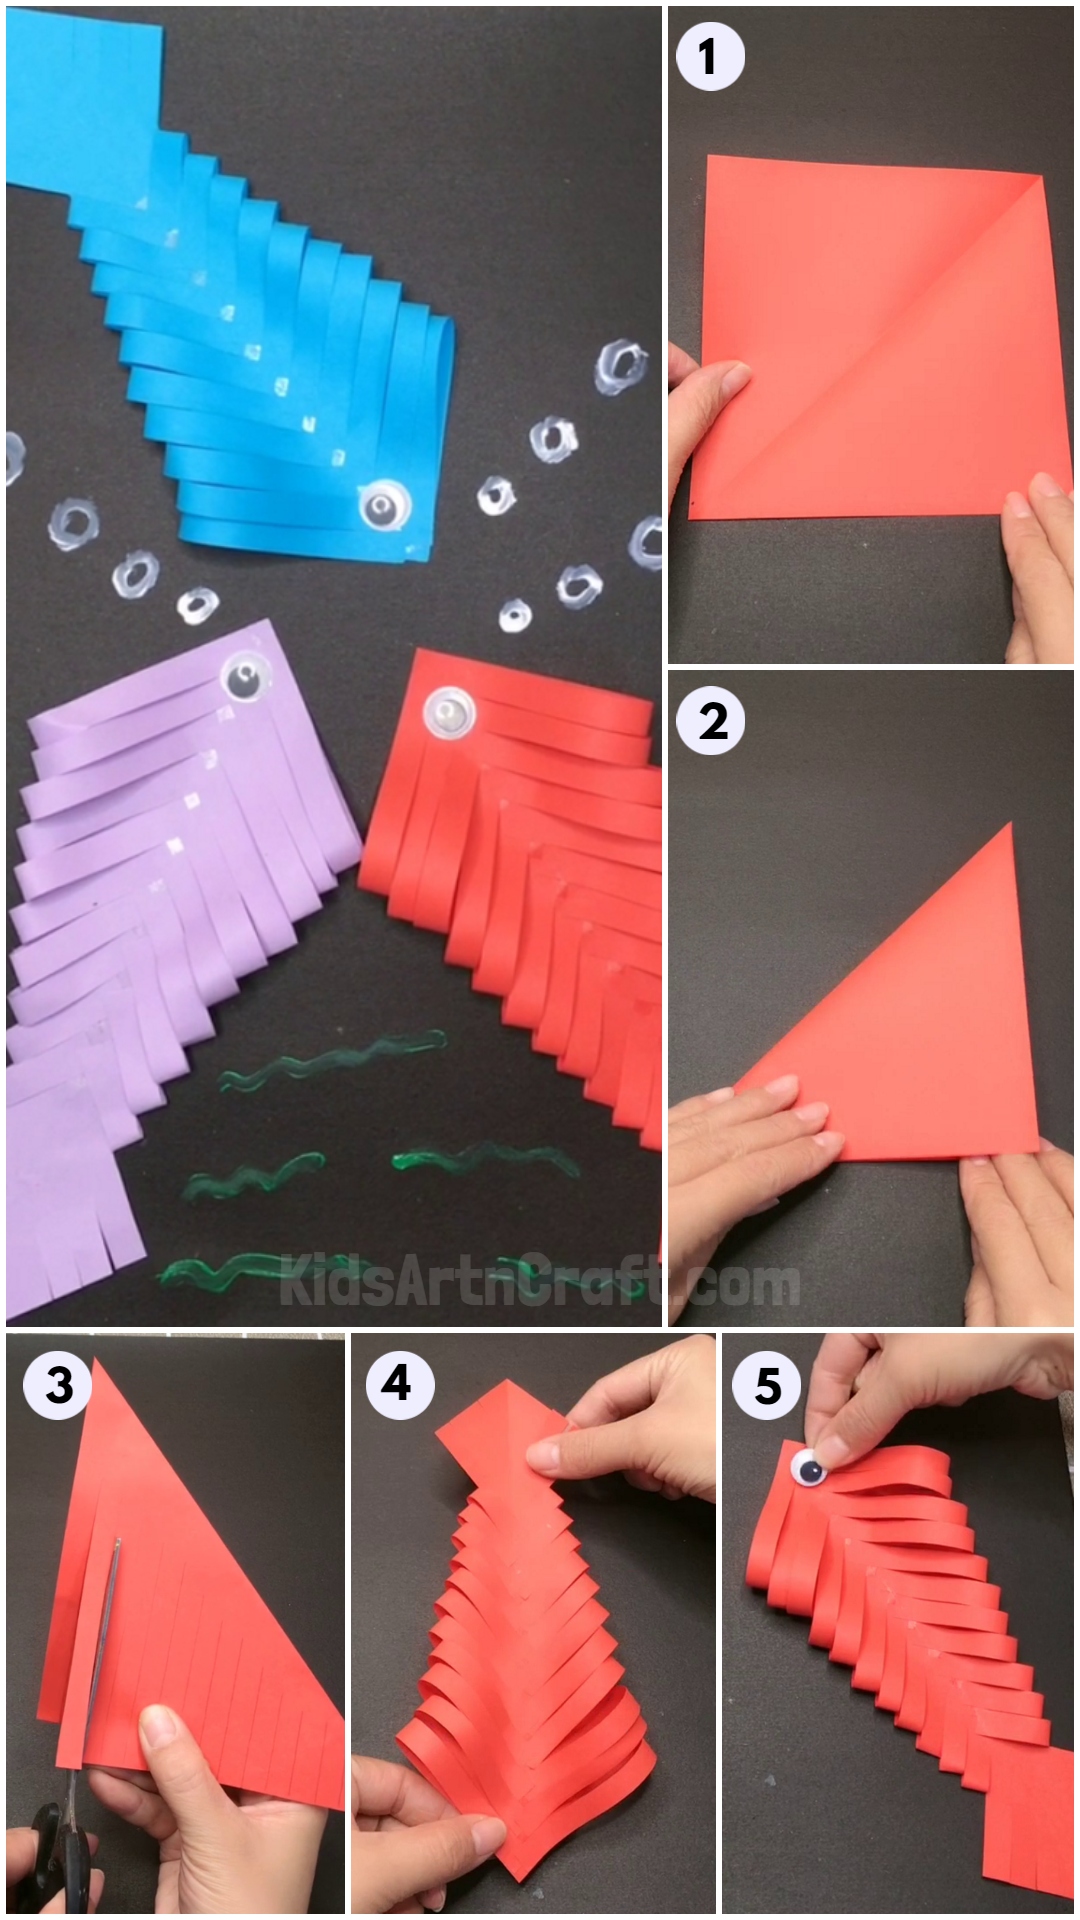
This fun and easy craft tutorial are perfect for young children! Kids will learn how to make their own colorful paper fish in a water scene. All you need is paper, scissors, markers, and glue. Follow along with our step-by-step instructions to create a beautiful and vibrant fish craft.
Welcome to this fun and creative craft tutorial! In this tutorial, we will be teaching you how to make a colorful paper fish in water! This craft is perfect for kids to make, as it is easy and fun to do. With just a few simple materials and steps, you can have your very own, unique paper fish to decorate your home with! So, let’s get started!
How To Make Colorful Paper Fish in Water Craft Tutorial for Kids
Read More: Super Simple Pine Cone Crafts For Kids
Material Used:
- Crafting papers
- Scissors
- Glue
- Black chart paper
- Googly eyes
- Watercolors.
- Ear buds
Instructions:-
Step 1: Start By Taking A Square Of Red Craft Paper And Black Chart Paper
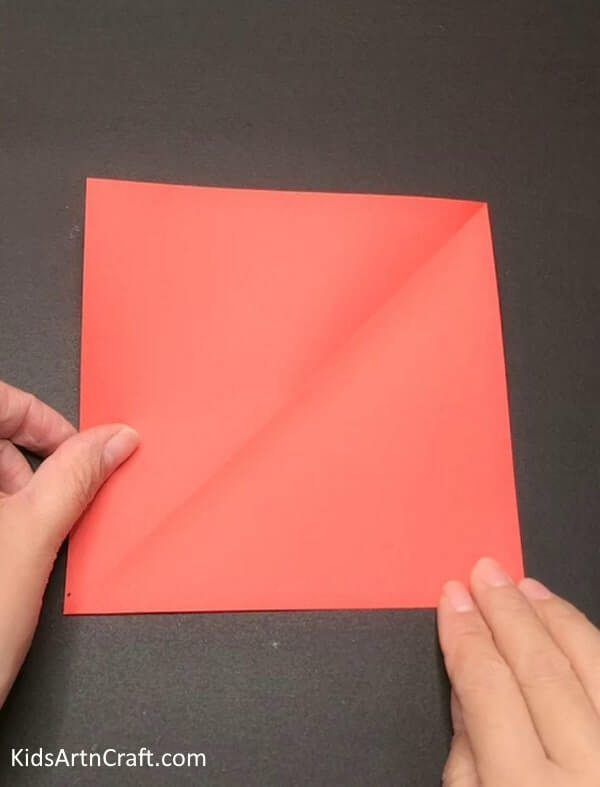
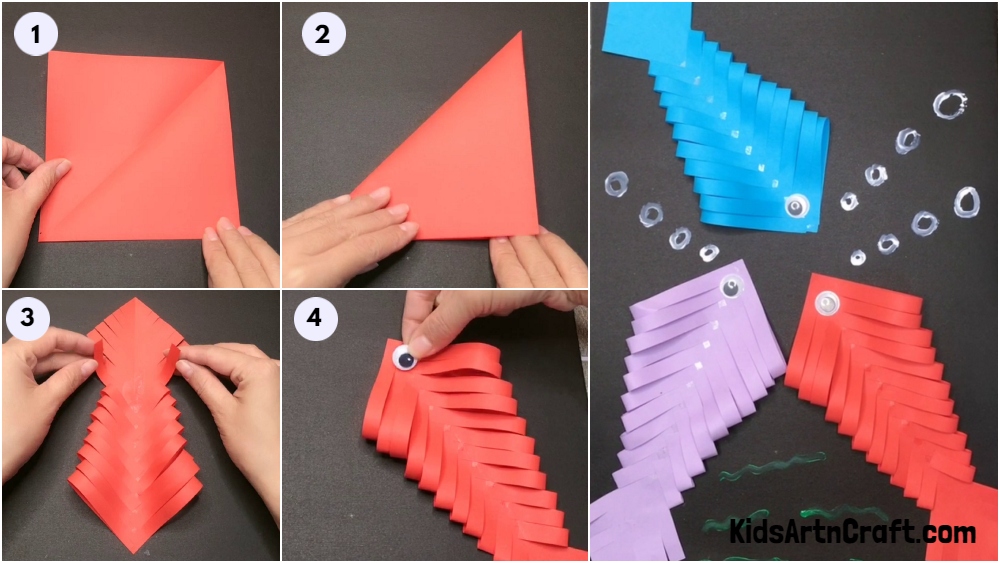
Let’s start by taking black chart paper as our background for our craft. Now take a square of red craft paper and fold it diagonally. Crease it well and unfold it you will see a diagonal line on the sheet.
Step 2: Fold The Red Craft Paper Into Triangles
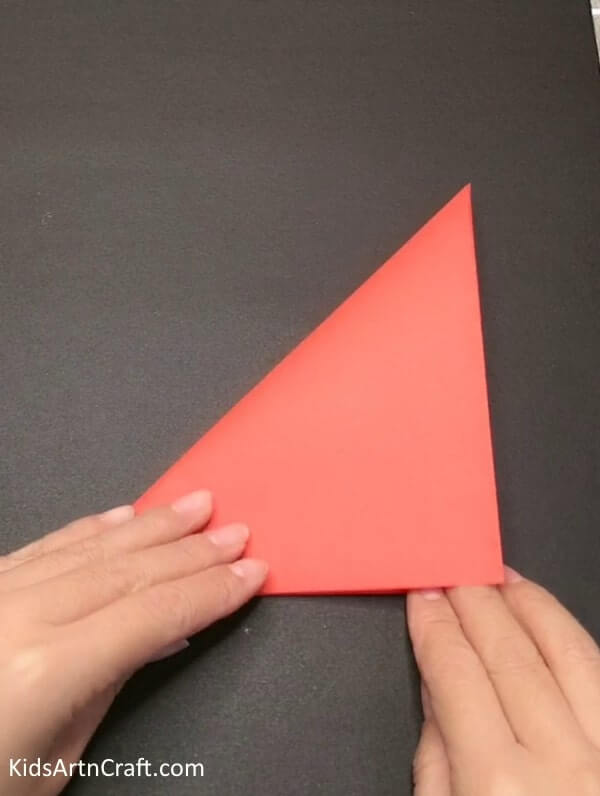
Now fold the paper along the diagonal to make a triangle.
Step 3: Cutting The Edges Into Strips With Scissors
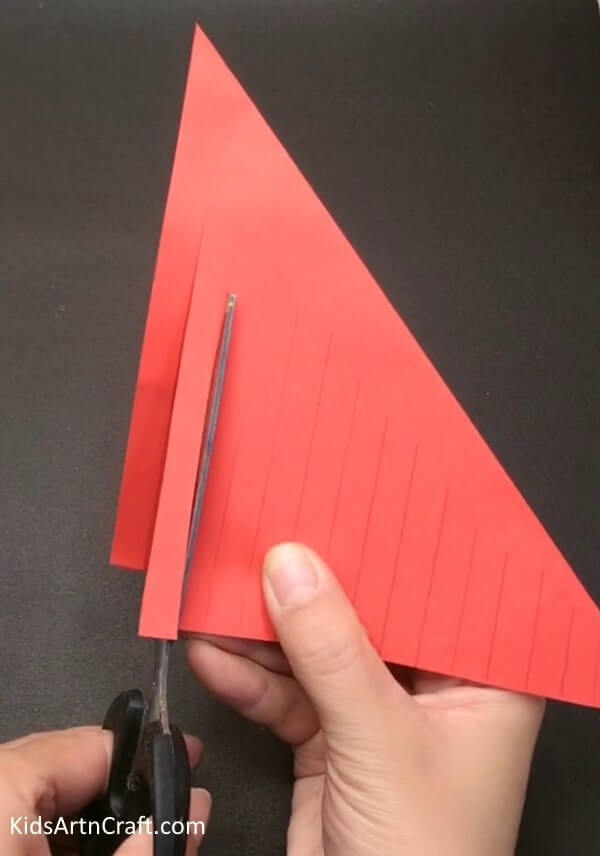
Now with the help of pencils make vertical lines on the open side of the triangle equally spaced. Don’t touch the lines with the edge make it below it. Now with the help of scissors cut the strips making frills.
Step 4: Gluing The Frills At The Centre To Make The Fish
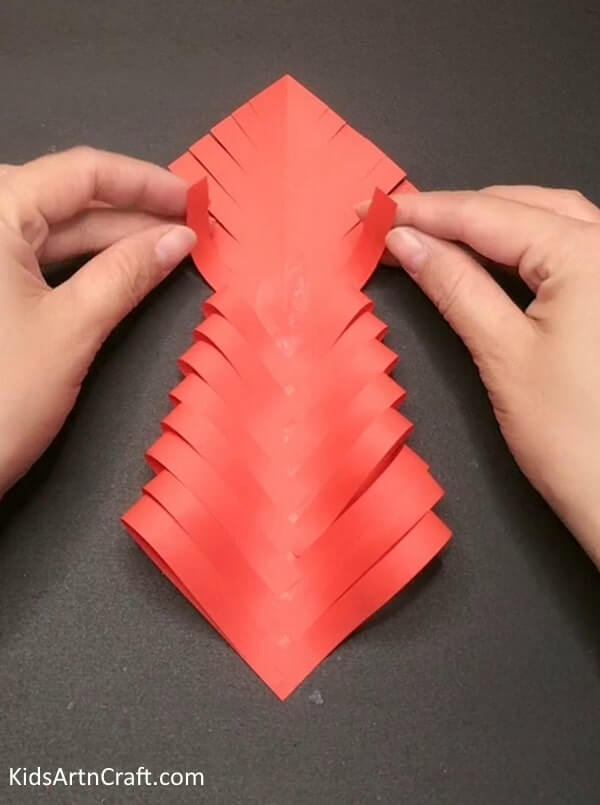
Now when you open the triangle you will get the strips on both sides with a crease at the Centre. With the help of glue stick the end of the frills at the central crease by folding the strips upwards as shown in the image.
Step 5: Making The Tail Of The Fish
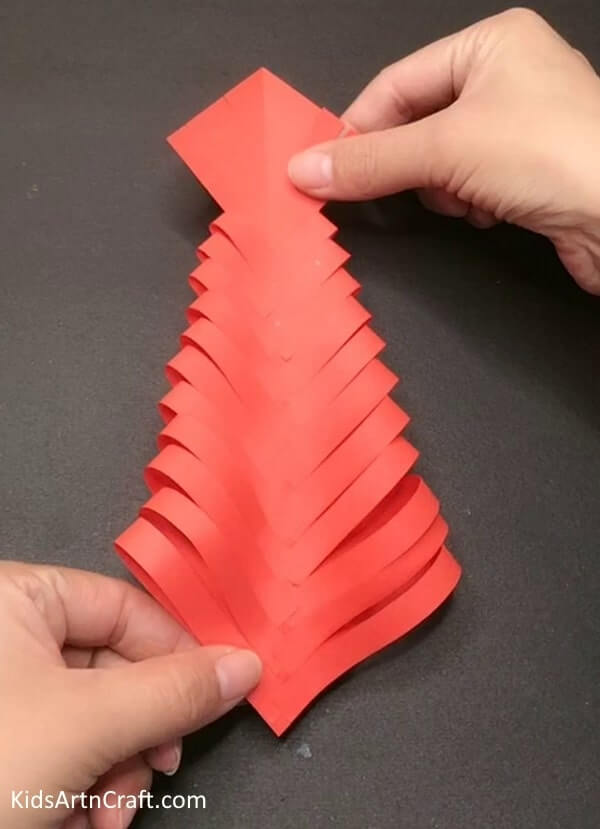
Glue the strips to the central crease and leave the last smaller strips making a diamond shape this will be the tail of our fish.
Step 6: Adding Googly Eye To The Fish And Sticking The Fish On The Black Chart Paper
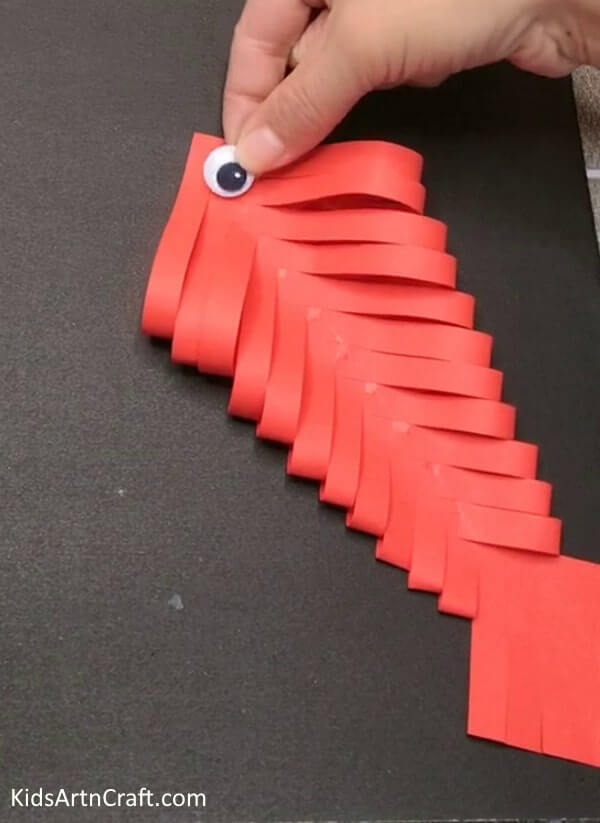
Now stick the fish diagonally on the black chart paper and add a googly eye at the end of the fish’s body as shown in the image.
Follow the same steps and make two more fishes from purple and blue craft papers.
Step 7: Sticking The Other Two Fishes With Our Red Fish
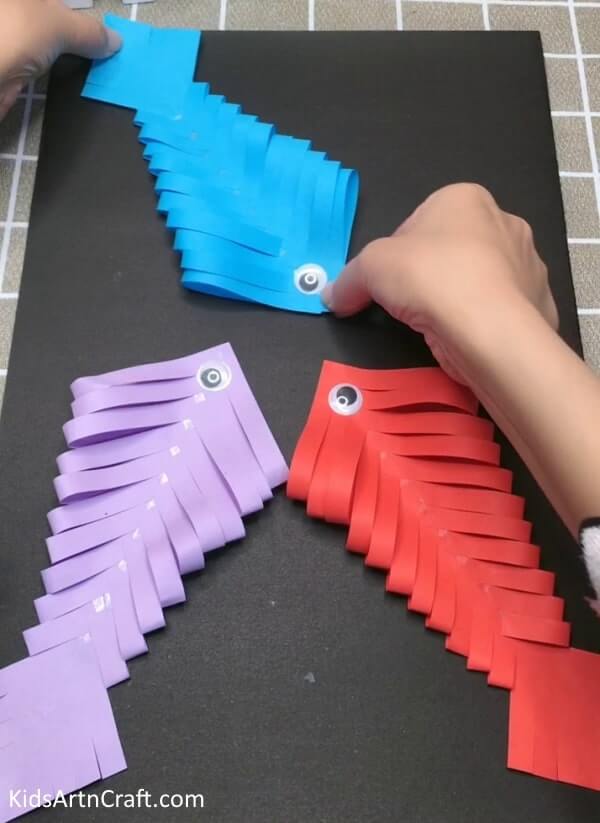
Now add stick the purple and blue fish on the black chart paper along the redfish with each fish facing the other.
Step 8: Creating The Bubbles With White Paint And Ear Bud
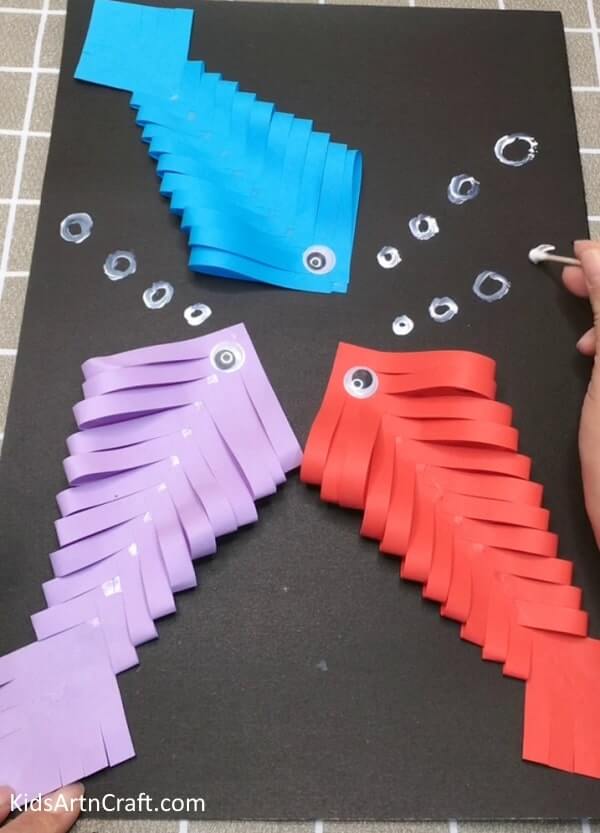
Take an earbud and dip it into white paint. Now make small circles along the fish making the air bubbles.
Also, make some grass with green paint at the bottom of the sheet to add more detail.
Final Step: “Swim Into Fun With DIY Origami Colorful Paper Fishes Under Water Tutorial For Kids”
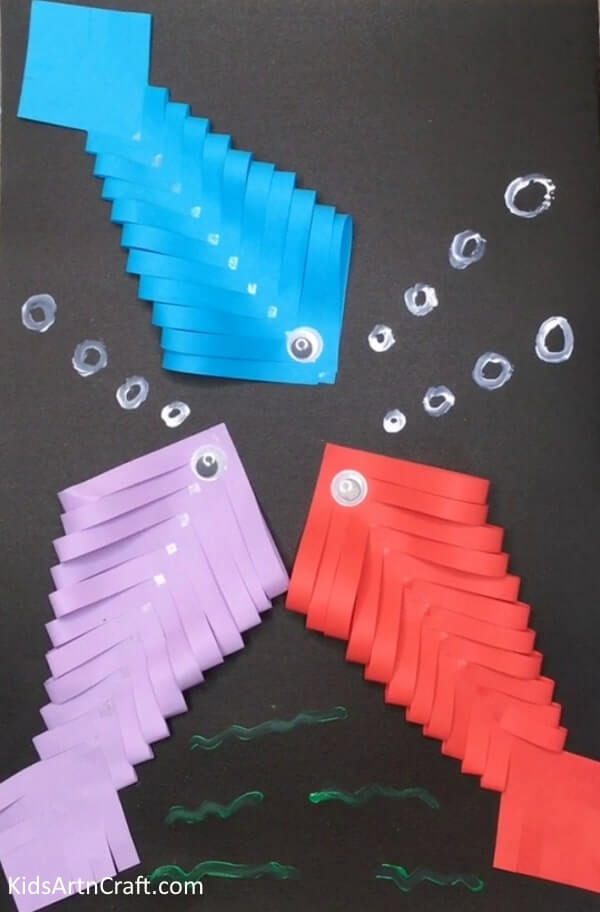
Yay! The Origami Colorful Paper Fishes Under Water is done. These Origami Colorful Paper Fishes are a fun and easy DIY activity that kids can enjoy. Not only does it improve their fine motor skills, but it also sparks their creativity and imagination. By following the simple steps outlined in this tutorial, children can create a vibrant and lively underwater scene that they can proudly display to family and friends.
This Origami Colorful Paper Fishes Under Water tutorial is a great way to spend a rainy afternoon or a quiet weekend. So gather your paper, your markers, and your scissors, and You can experiment with different paper sizes, colors, and patterns to create your own unique fishes underwater. So, gather your family and friends and make a splash with your colorful creations!
Some More Fish Craft Tutorial
Super Easy Fish Craft Using Leaf For Kids
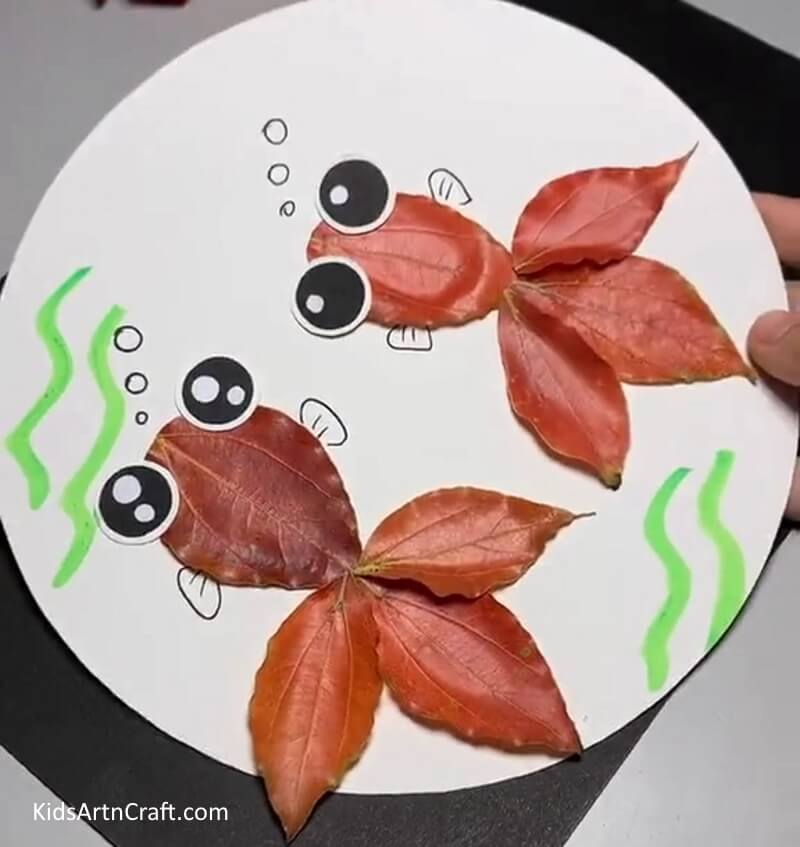
Image Source/Tutorial: Kids Art & Craft
This craft is super easy and fun for kids. All you need is a leaf, some paint, and a few other supplies. With a few simple steps, kids can create a unique and beautiful fish craft. It’s a great way to get creative and spend time with the family.
Constructing A Fish Craft From Paper Cups
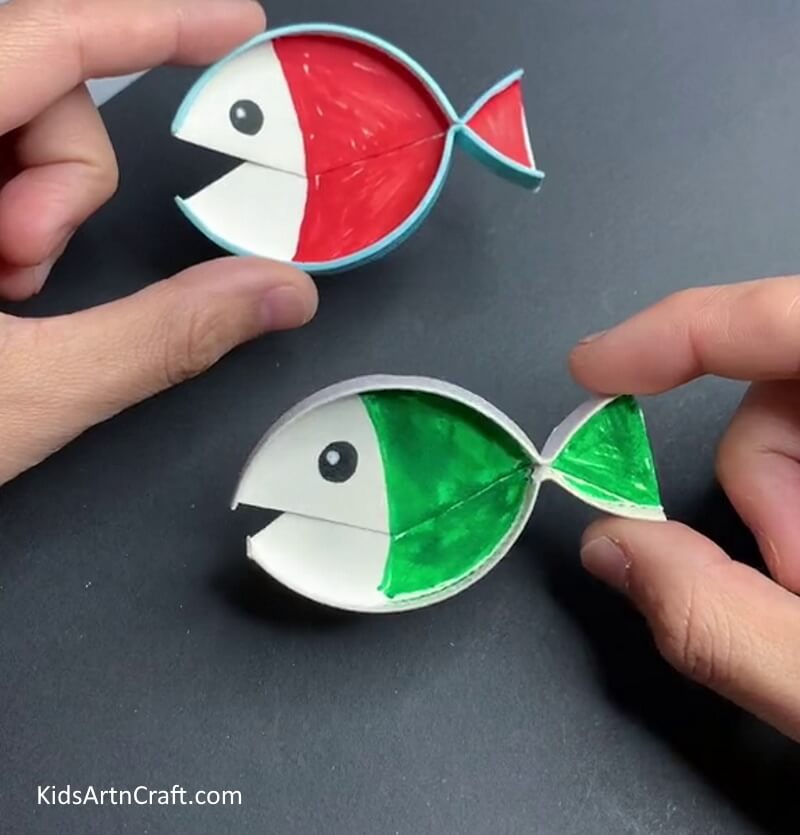
Image Source/Tutorial: Kids Art & Craft
Constructing a Fish Craft from Paper Cups is an easy and fun way to keep little ones entertained and teach them about shapes and colors. This simple project requires minimal materials and is sure to bring a smile to their faces.
Crafting a Fish Craft With Handprint
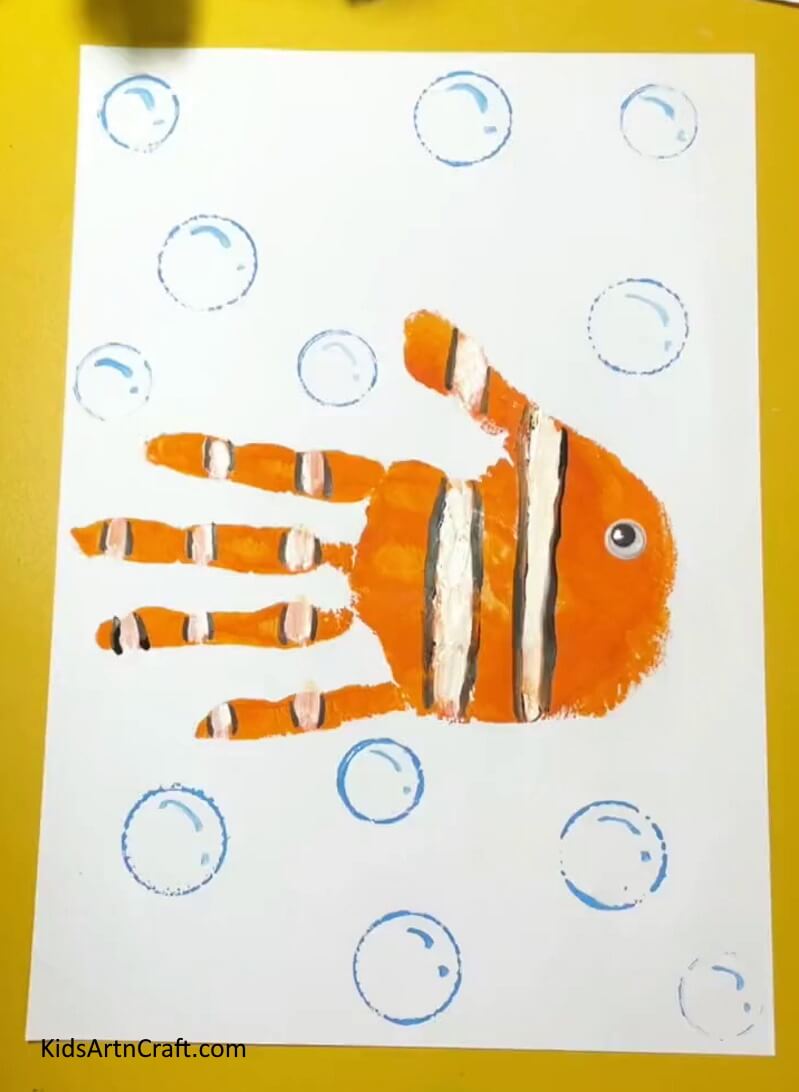
Image Source/Tutorial: Kids Art & Craft
Crafting a fish craft with your children’s handprints is a fun and easy activity. It’s an excellent way to bond with your kids while creating a unique piece of art. With just a few supplies and a bit of imagination, you can create a beautiful craft to display in your home.
FAQs
What materials do I need to make the colorful paper fish in water craft?
You will need paper, scissors, glue, and a container of water.
Can I use any kind of paper?
Yes, you can use any kind of paper you have available. Colored paper will give the best effect, but you can also use white paper and paint it afterwards.
How do I make the fish?
Cut the paper into the desired shape for the fish. Glue the two sides together and then fold it to create the fins. Finally, glue the fin onto the back of the fish.
How do I make the water?
Fill the container with water and add a few drops of food coloring to create a colorful effect.
What do I do with the fish once it’s made?
Place the fish in the container of colored water. This will create a fun and interactive craft.
This Colorful Paper Fish in Water Craft Tutorial for Kids is a fun and creative way to keep kids entertained and learning this summer!
Follow us on Youtube for art and craft tutorials and much more.
More Articles from Kids Art & Craft
- World Parrot Day Coloring Pages For Kids – Free Printables
- Poppy Coloring Pages For Kids – Free Printables
- Lion Drawing & Sketches for Kids
- Crumpled Paper Animal Crafts for Kids
- Meditation Coloring Pages For Kids – Free Printables


