DIY and Crafts
DIY Paper Slinky Frog Craft For Kids – Step by Step Tutorial

Make a fun and interactive paper slinky frog craft with your kids! This easy tutorial shows you step-by-step how to make a DIY paper slinky frog using basic materials. It’s the perfect craft activity for kids of all ages to enjoy!
Welcome to our step-by-step tutorial on how to make a DIY paper slinky frog craft for kids! This fun and easy craft is perfect for any age and can be a great way to keep kids entertained during a rainy day or just for a creative and fun activity. With just some basic supplies and a few steps, you can create a fun and unique paper slinky frog. Read on to learn how to make your own paper slinky frog craft!
Easy To Make DIY & Craft Paper Frog For Kids
Read More: Super Simple Pine Cone Crafts For Kids
Material Used:
- Crafting Paper
- Black Marker
- Glue
- Scissors
Instructions:-
Step 1: Cutting Out A Circle From Green Craft Paper For The Leaf
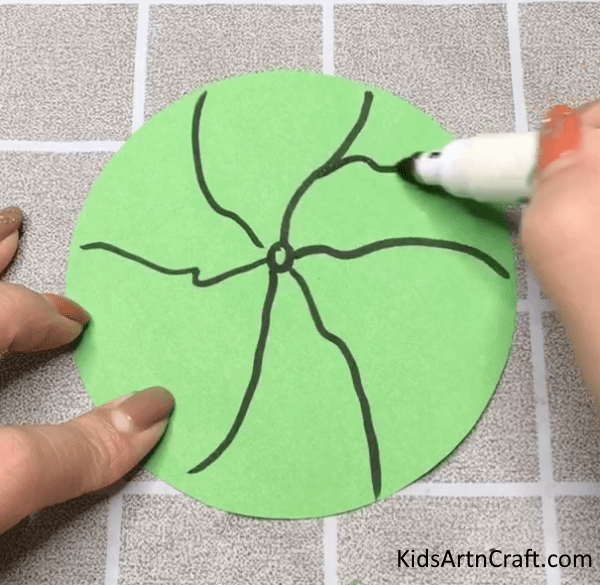
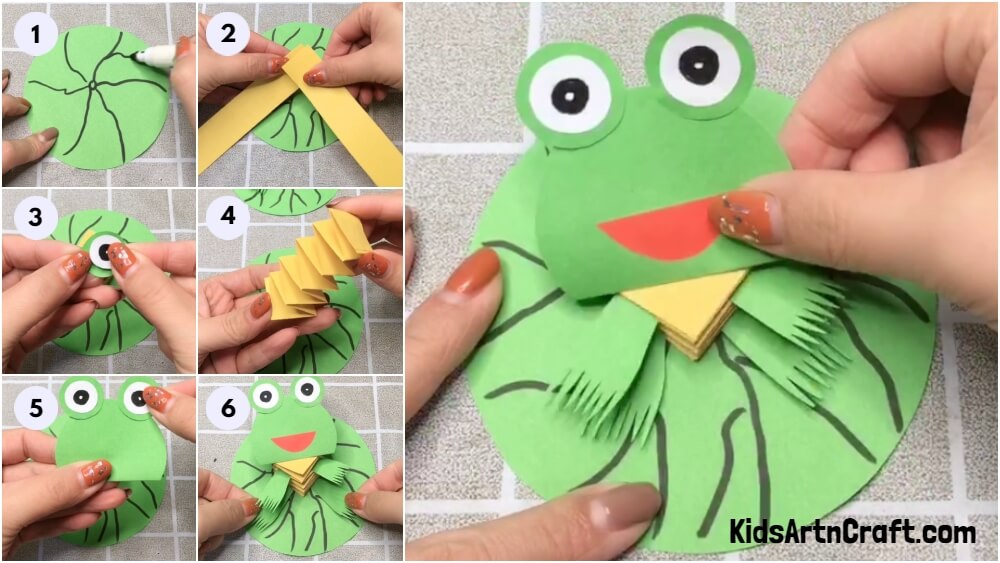
To start making the DIY Slinky Frog, cut a circle out of green craft paper with the help of scissors.
Now, Take the black marker and make a small circle with it in the Centre, From the center make uneven lines in a radial pattern as shown in the image.
Step 2: Cutting Out Strips From The Yellow Craft Paper
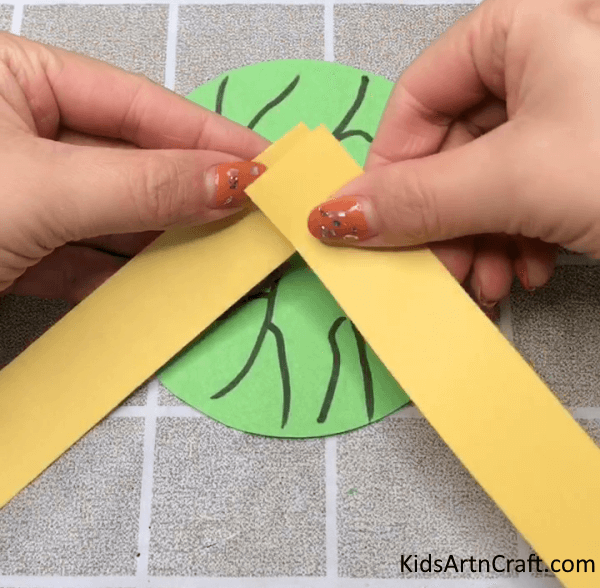
Now take the yellow craft paper and with the help of scissors cut out two long thick strips.
Now join the edges of the strips with help of the glue and an angle making a square.
Step 3: Make The Spiral From The Strips
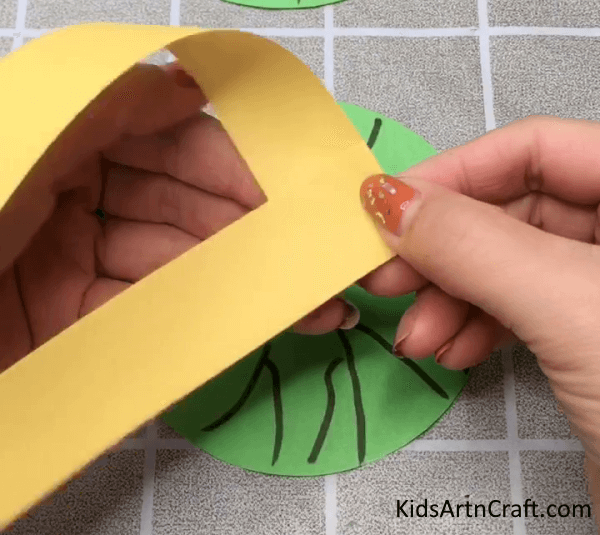
In this step, hold the left side and bring it to the right side holding the point where we joined the strips with glue. Now take the right side and bring it to the left side.
Step 4: Make The Spiral Till The End
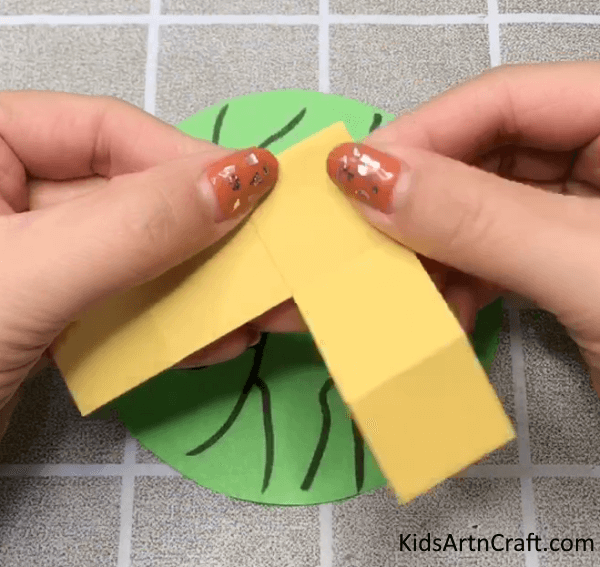
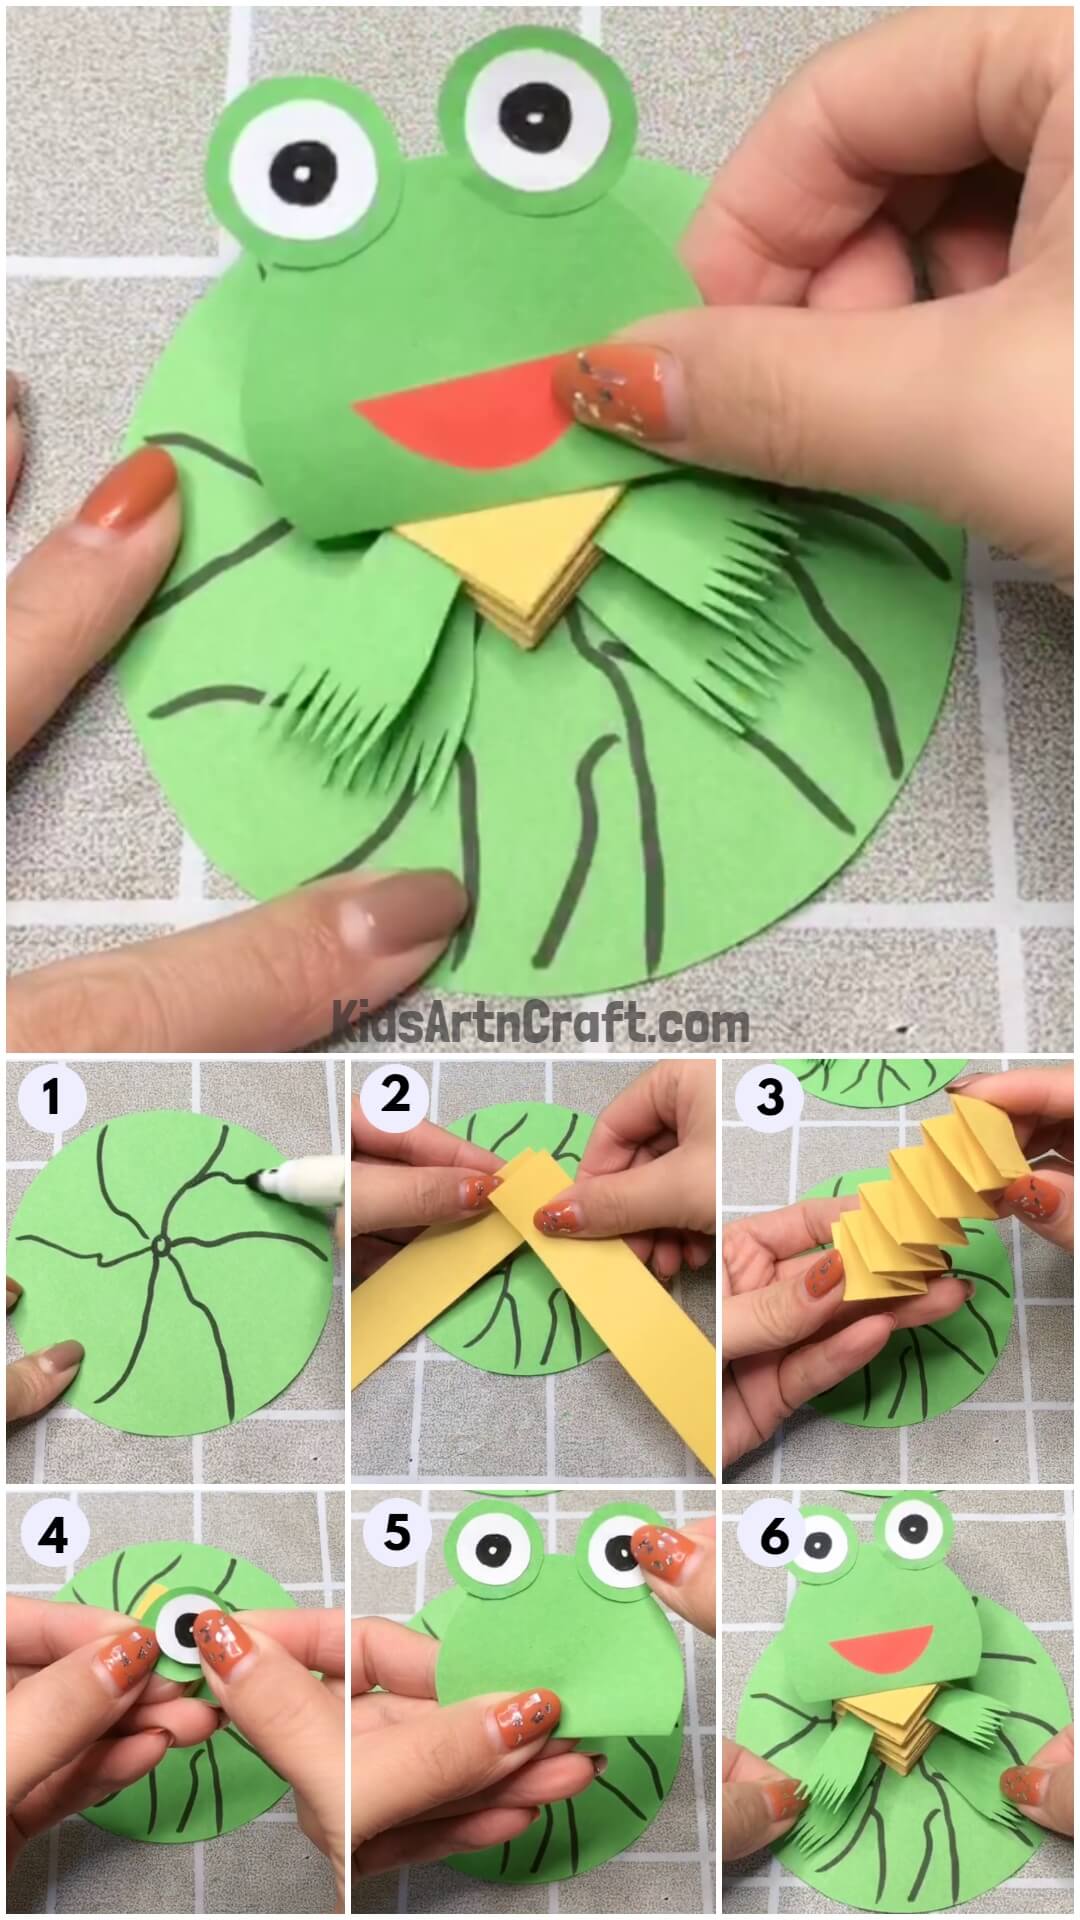
Repeat this process 5 to 6 times till there is no possibility to do more as shown in the image. Leave the extra edges to hold it and paste it with the base.
Step 5: Forming The Spiral From The Yellow Strips
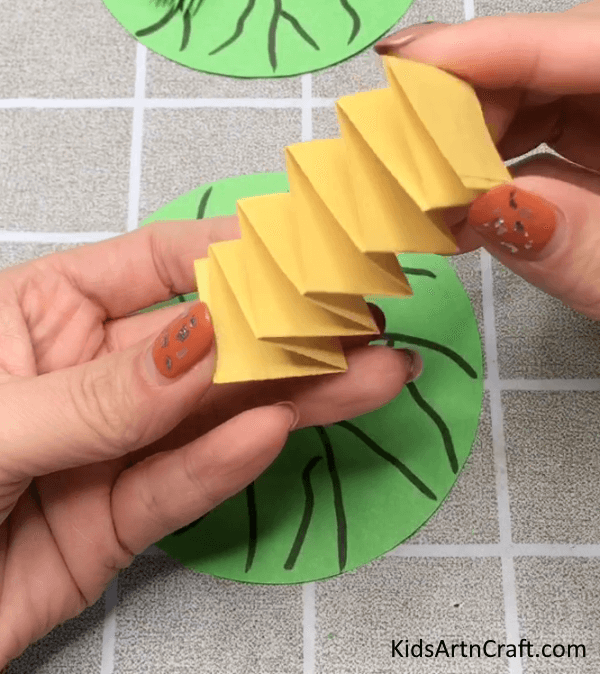
After completing the steps . Stick the end part of the spiral we left out to secure it and when you open it you will see a shape as shown in the image, Now sticks the spiral in the middle of the leaf base we made.
Step 6: Making The Eyes For Our Frog
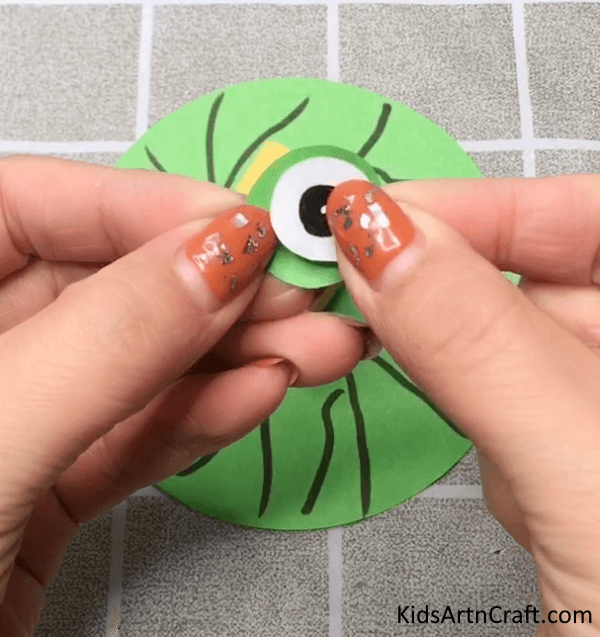
Now take the green craft paper and cut two medium size circles out of it. Now cut out a smaller circle from white crafting paper and paste it at the center of the green circle. With the help of the Black maker make an eyeball in the center of the white circle leaving a small white dot in between.
Follow the same steps and make one more eye.
Step 7: Making The Face Of The Frog From Green Craft Paper And Add Eyes!
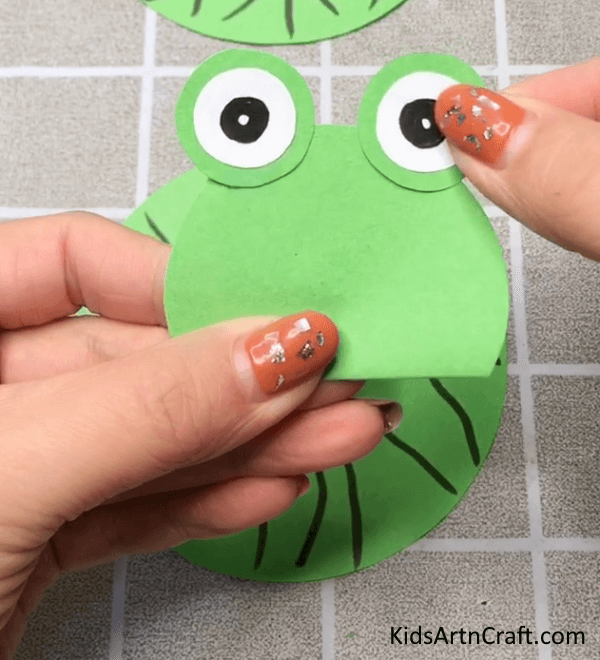
Cut out a semi-circle from the green craft paper and paste the eyes we make on the curved part by sticking only half part of the eyes.
Step 8: Adding Details To The Frog By Adding A Mouth With Red Craft Paper!
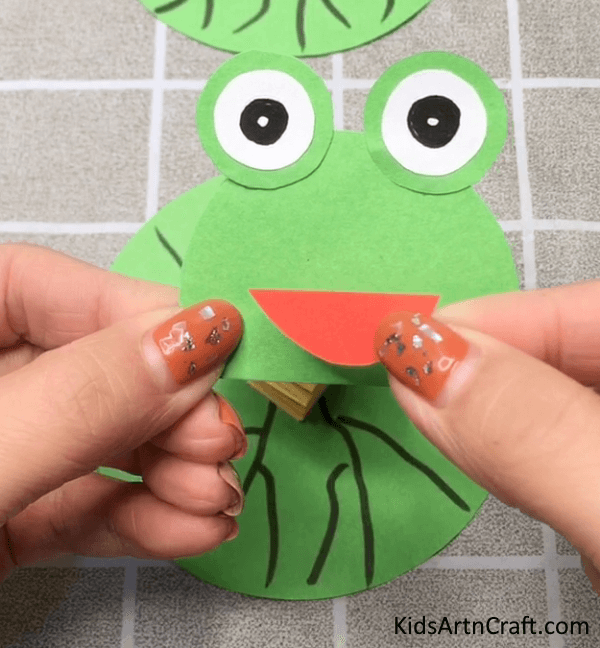
Now to add a smile to our frog that will bring a charming and playful element, Cut out a semi circle from the red craft paper and paste it with the help of glue onto the face of the frog.
Step 9:Creating Hands and Legs for a Frog Craft
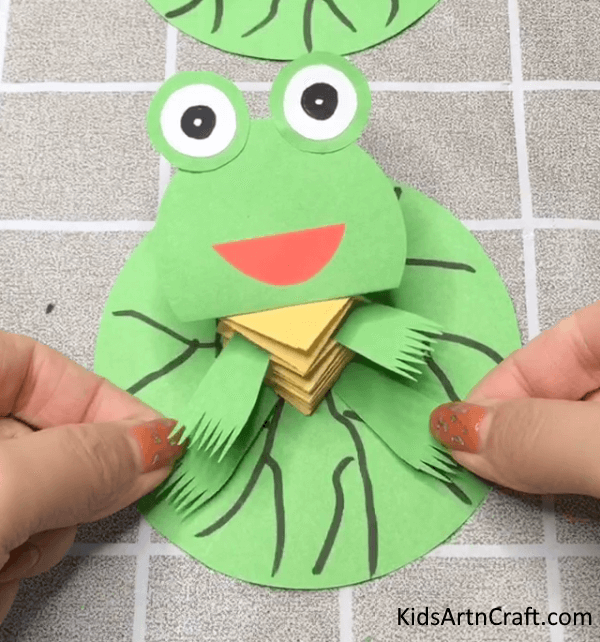
In this step paste the face of the frog on top of the spiral. Now take the green craft paper and cut out four rectangles. With the help of scissors make the fingers on the rectangles by making triangles as shown in the image. Stick two rectangles on the left and right sides of the frog by pasting the edges of both the rectangles in the spiral to create the hands of the frog. Stick the other two rectangles on the base as the legs of the frog.
Advisory- Use the scissors under adults’ supervision.
Final Step: DIY Paper Slinky Frog Craft for Kids – Step-by-Step Tutorial!
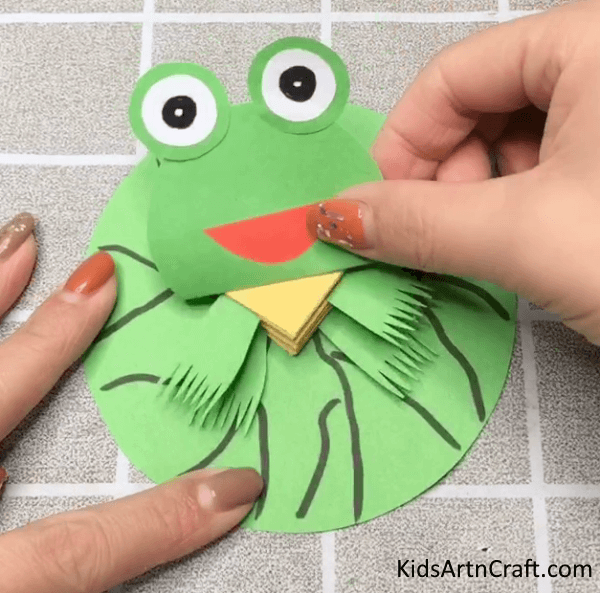
Yay! your DIY Paper Slinky Frog Craft is ready! The DIY Slingy Frog Craft is an exciting project that is perfect for children who enjoy both crafting and creative activities. This simple yet fun craft allows kids to create their own cute and colorful frog toy that can be used to play. To make the DIY Slingy Frog, all you need are a few simple materials and some basic crafting supplies. The DIY Slingy Frog Craft is a wonderful project that provides hours of entertainment and encourages kids to about crafting, while also promoting physical activity and learning. So why not hop to it and give this craft a try? Your kids are sure to love it!
Some More Frog Craft Tutorial
Unique Way To Use Paper Cup to Form Frog
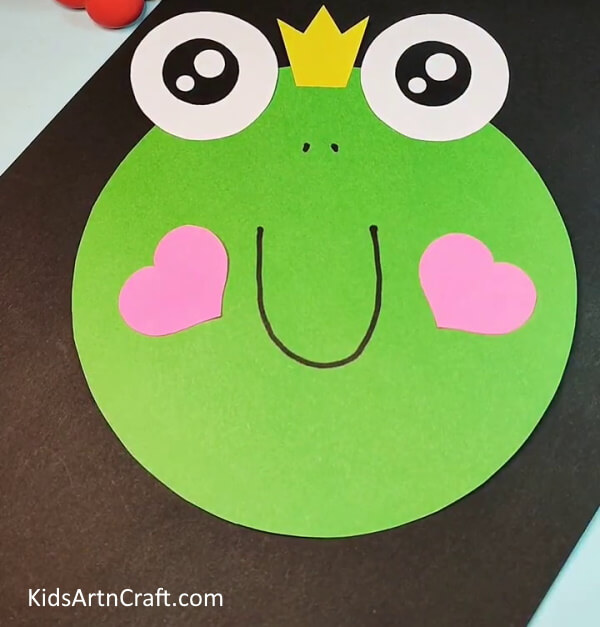
Image Source/Tutorial: Kids Art & Craft
Creating a paper cup frog is a fun and creative way to turn a simple paper cup into a cute frog. It can be used as a decoration, party favor, or gift. It is a great way to get creative and spend time with family and friends.
Make Your Own Paper Frog Craft For Kids
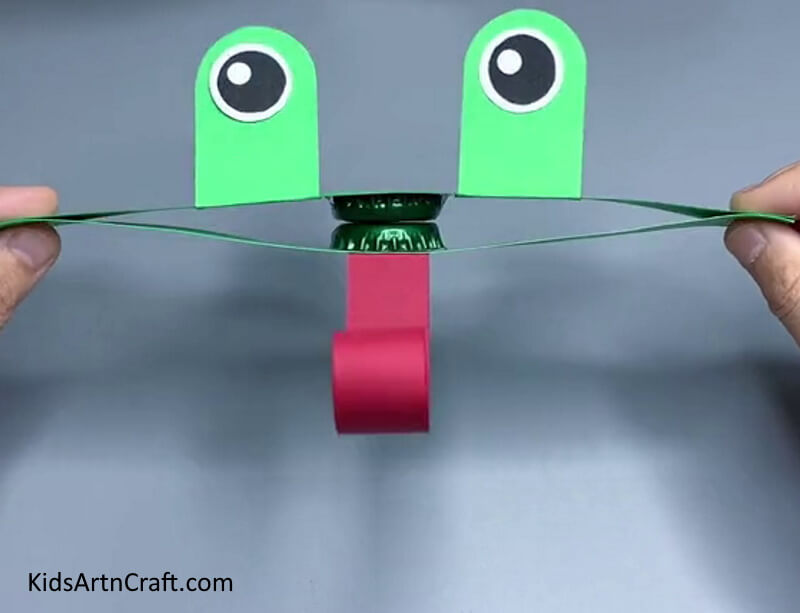
Image Source/Tutorial: Kids Art & Craft
Making art with paper can be a fun and creative activity. This article shows how to make a frog with paper. It’s a great way to express creativity and make something unique! Using Paper.
FAQs
What supplies do I need to make this paper slinky frog craft?
You will need: construction paper, scissors, glue, markers, and a ruler.
What colors of paper should I use?
You can use any colors you’d like.
How long will this craft take to make?
This craft should take about 15-20 minutes.
What age group is this craft best suited for?
This craft is best suited for kids ages 5-10.
How do I make the slinky for the frog?
Cut a strip of paper about 2 inches wide and 8 inches long. Roll the strip of paper into a circle and then twist it to make a coil.
This DIY Paper Slinky Frog Craft is a fun and easy way to keep the kids entertained and busy. With just a few simple materials, they can make a unique and creative frog craft that will be sure to bring them hours of fun.
Follow us on Youtube for art and craft tutorials and much more.
More Articles from Kids Art & Craft
- World Parrot Day Coloring Pages For Kids – Free Printables
- Poppy Coloring Pages For Kids – Free Printables
- Lion Drawing & Sketches for Kids
- Crumpled Paper Animal Crafts for Kids
- Meditation Coloring Pages For Kids – Free Printables


