


Clay Crafts
Rocking Paper Penguin Toy Using Bottle Cap And Clay

This is a Rocking Paper Penguin Toy Using Bottle Cap and Clay Easy Tutorial. Follow the given steps and make this cute and adorable penguin in no time.
It is a Rocking Paper Penguin Toy Using Bottle Cap and Clay, step – by – step tutorial for kids. It is apt for kids of age 4 and above. These cute little penguins are easy to make. They are swamped with creativity and will enable the kids to develop their craft skills. This craft idea is very unique as it is not just a penguin but a rocking penguin, made out of bottle caps and clay. The list of materials is listed below. So, in your free time, why sit idle when you can actually do something fun and c’mon, who doesn’t love penguins? These squishy little creatures are adorable. Let us get started.
Easy Rocking Paper Penguin Toy
Read More: Easy Paper Spinning Top Toy Craft for Kids Avatar
Materials Required
- Orange, Red, Yellow, Black & White Craft paper
- A pair of Scissors
- Glue
- Black Pen
- A bottle cap
- Clay
- Pencil and eraser
Procedure
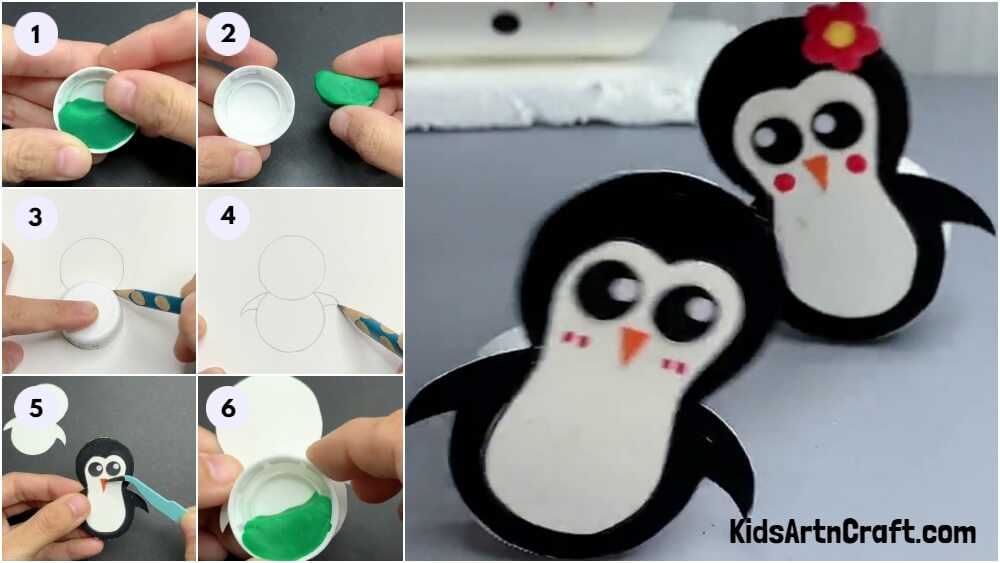
Step 1: Holding A Piece Of Clay And A Plastic Bottle Cap

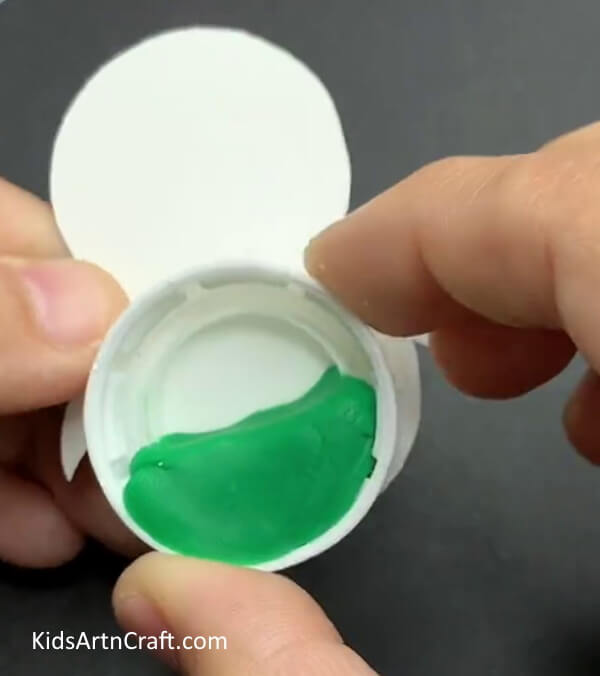
Take a bottle cap of plastic and a piece of clay, neither too big nor too tiny.
Step 2: Placing And Compressing The Clay Partially In The Bottle Cap
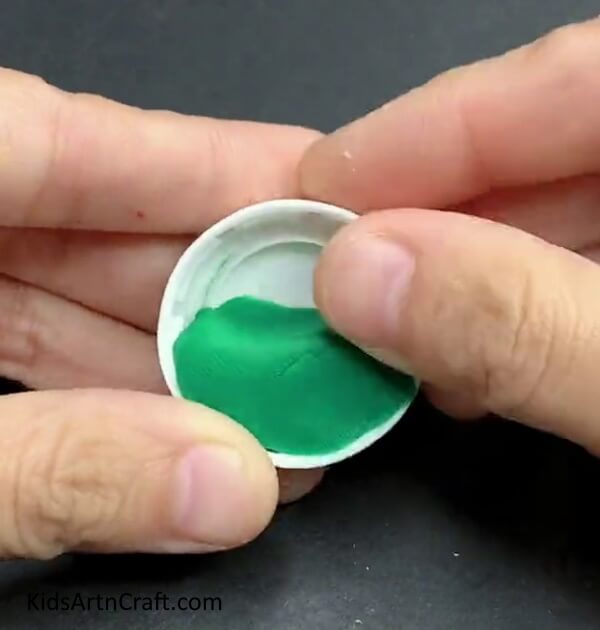
Now, place the clay inside the bottle cap, in such a way that it fills a little more than half of the space of the bottle cap. Compress the clay enough that it does not come out of the cap and at the same time, there is enough space, as mentioned above, left inside the cap.
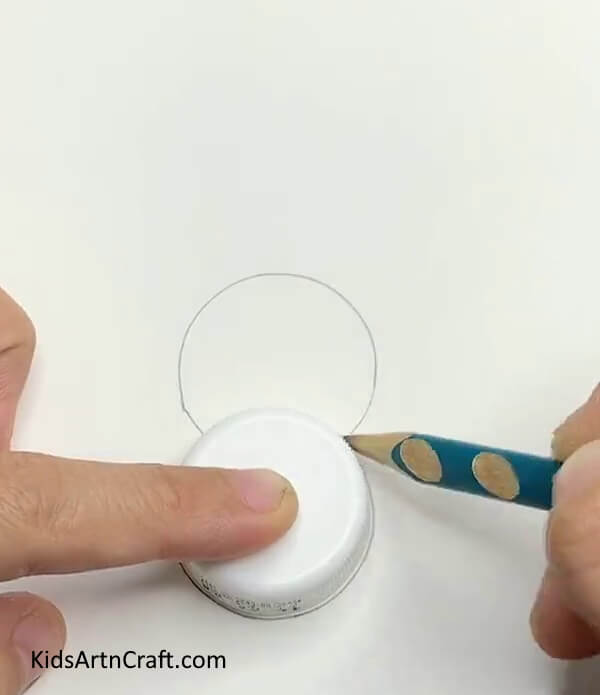
Step 3: With The Help Of The Bottle Cap, Draw A Circle

Place a white sheet of paper in front of you. Position the bottle cap on the paper and draw an outline using a pencil. Now you have a circle on your paper.
Step 4: Below That Circle, Draw Another Circle But Not Completely
Keep the bottle cap a little below the circle, in a way that the circles will overlap. Draw the outline of the cap. This time, you do not get an entire circle, a little part of the first circle overlaps on this one.
Step 5: Making Arms Of The Penguin Now
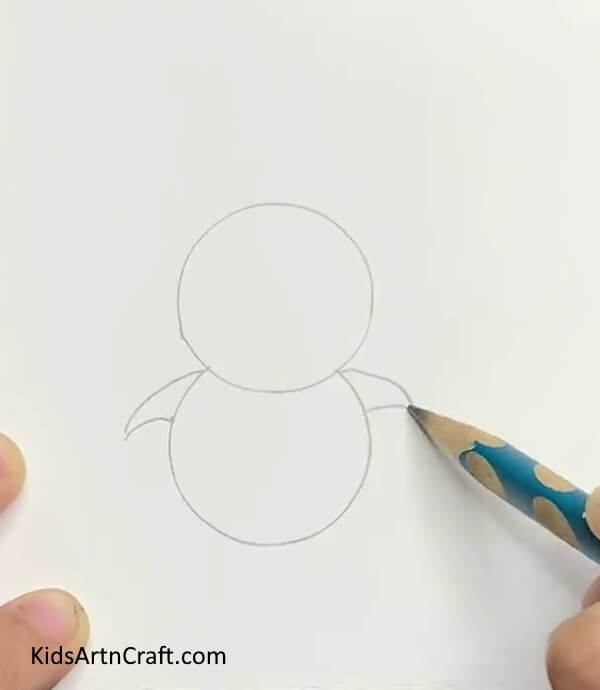
Now, using a pencil, draw the arms of the penguin as shown above, on both sides.
Step 6: Cutting The Outline, You Must Now Have Two Identical Penguins
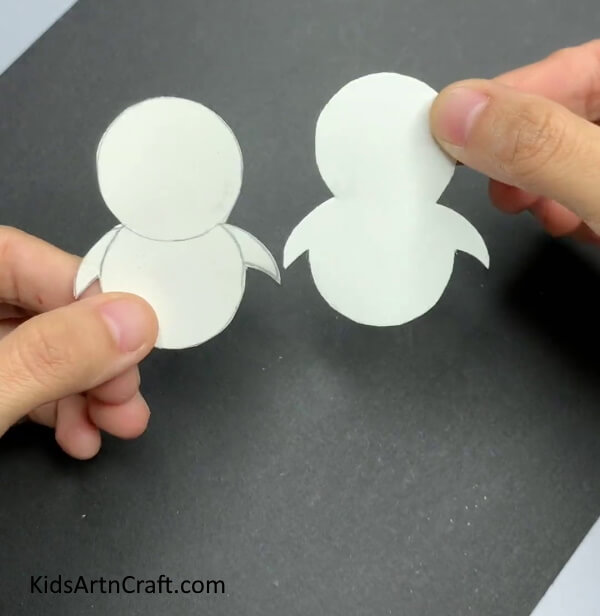
Keep another layer of the same white sheet or fold the same one in a way that they are in layers. Now cut through the outline of the drawing and you will get two identical penguins as a result.
Step 7: Starting Coloring The Penguins Using A Black Pen
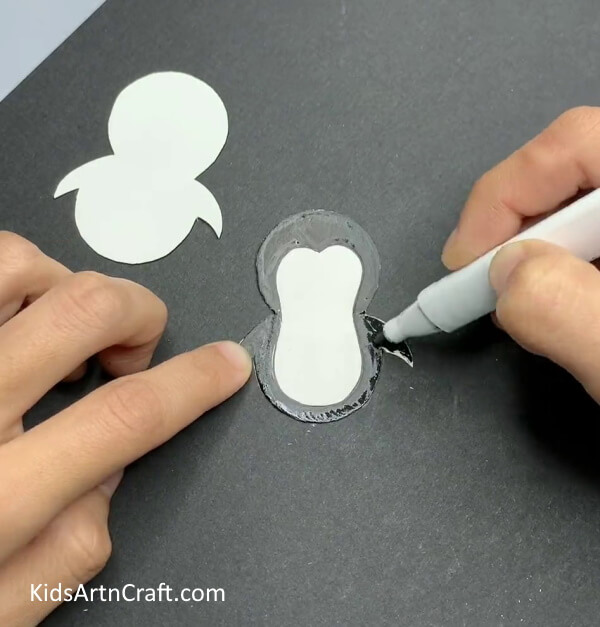
Start coloring the penguins using a black pen with the help of the reference image attached above. You can also make an outline using a pencil, before coloring to make sure you get it done right.
Step 8: Cutting Out The Eyes And Nose And Paste Them
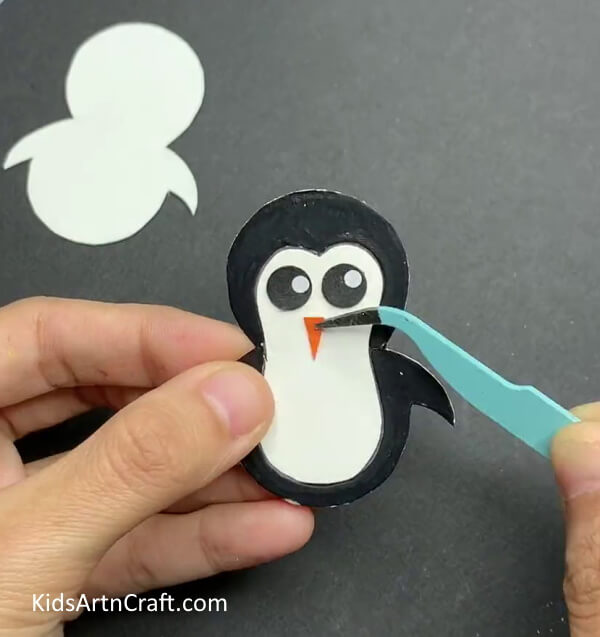
Now, make eyes from black paper and small circles from white paper place and paste them as shown in the above image. Make a triangular nose out of orange paper and paste it in between the eyes with the pointed side facing downwards.
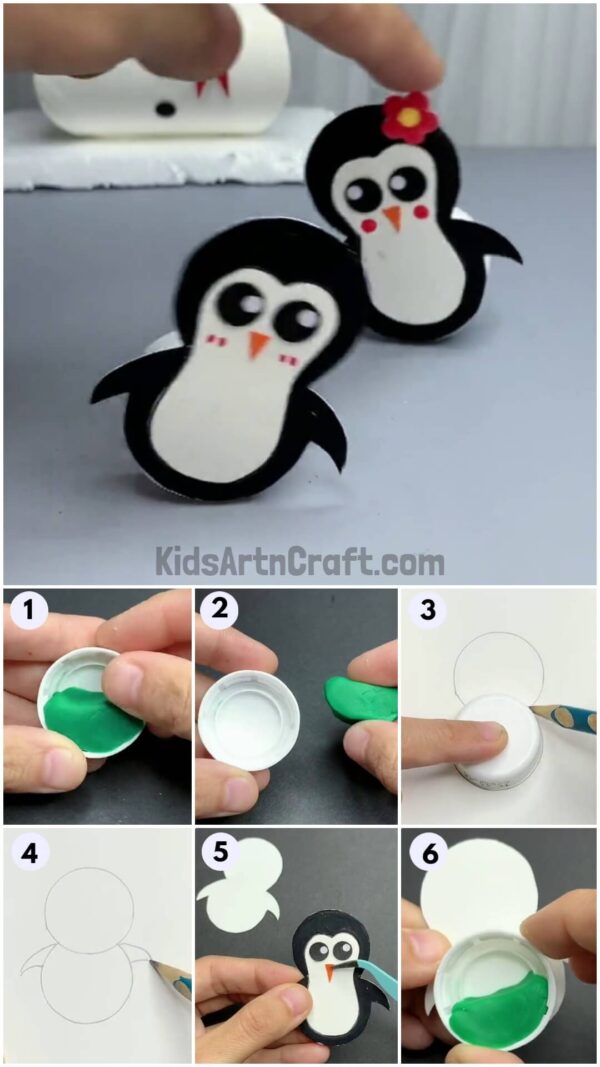
Step 9: Pasting The Bottle Cap Behind The Body Of The Penguin
Now, take the bottle cap again and stick it behind the body of the penguin. Keep it in mind to place the side of the clay downwards.
Yay, We Did It! Here Are The Adorable Rocking Penguins
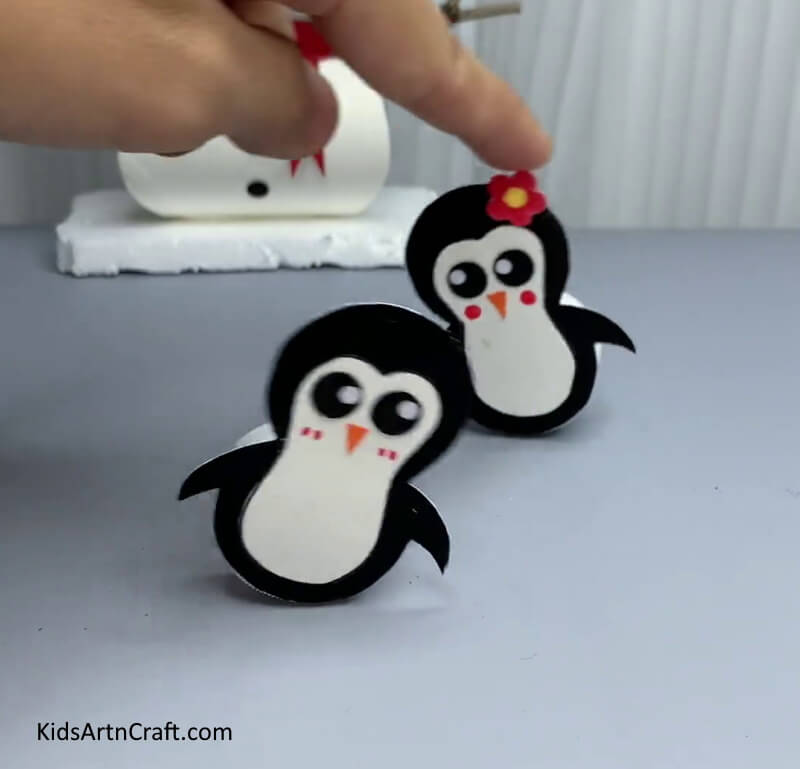
Yay, We Did It! Here Are The Adorable Rocking Penguins- Creating a Rocking Paper Penguin Plaything with a Bottle Cap and Clay
So… I bet you enjoyed it. Mention down in the comment section how your penguins turned out or did you make an entire family of penguins already? This is just a beginning you can always blend in your own ideas to create something unique and awesome. Talking about ideas, check out the main website for more similar and distinct ideas, tutorials, and articles related to art and craft. You will find some real jewels in there. Also, share your suggestions and reviews in the comment section, we look forward to connecting with you.
We hope you enjoyed this and also learned something from it. Thank you for your time, visit again soon.
Follow us on Youtube for art and craft tutorials and much more.
More Articles from Kids Art & Craft
- DIY Simple Paper Toy Craft For Kids To Play
- Easy Paper Craft Toy Tutorial For Kids
- Easy Paper Bird Toy Craft To Play For Kids
- Paper Fan Toy Craft for kids to Play Easy Tutorial
- DIY Easy Origami Paper Shark Toy Tutorial For Kids