Painting
Pretty Peacock Over Tree Branch Stamp Painting Tutorial

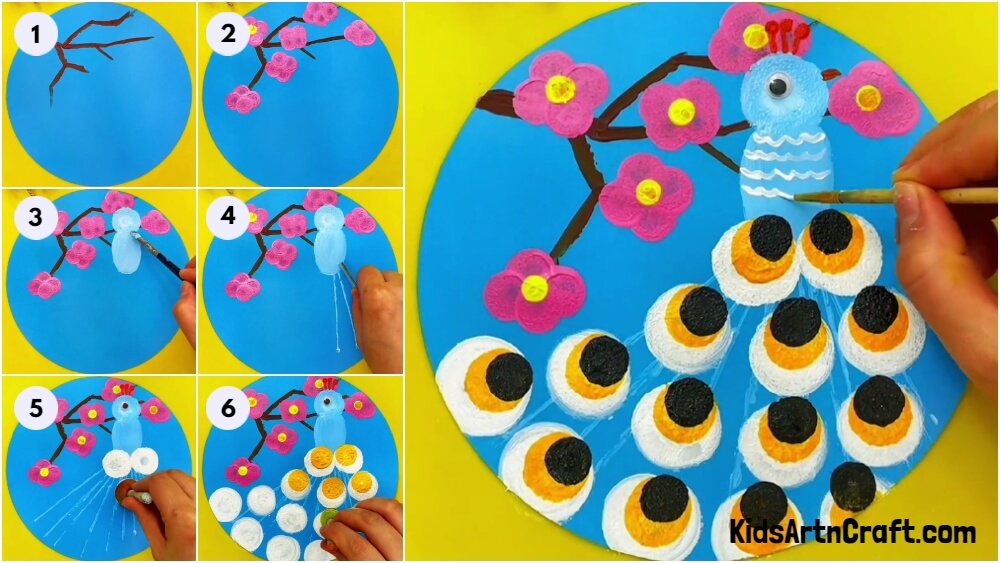
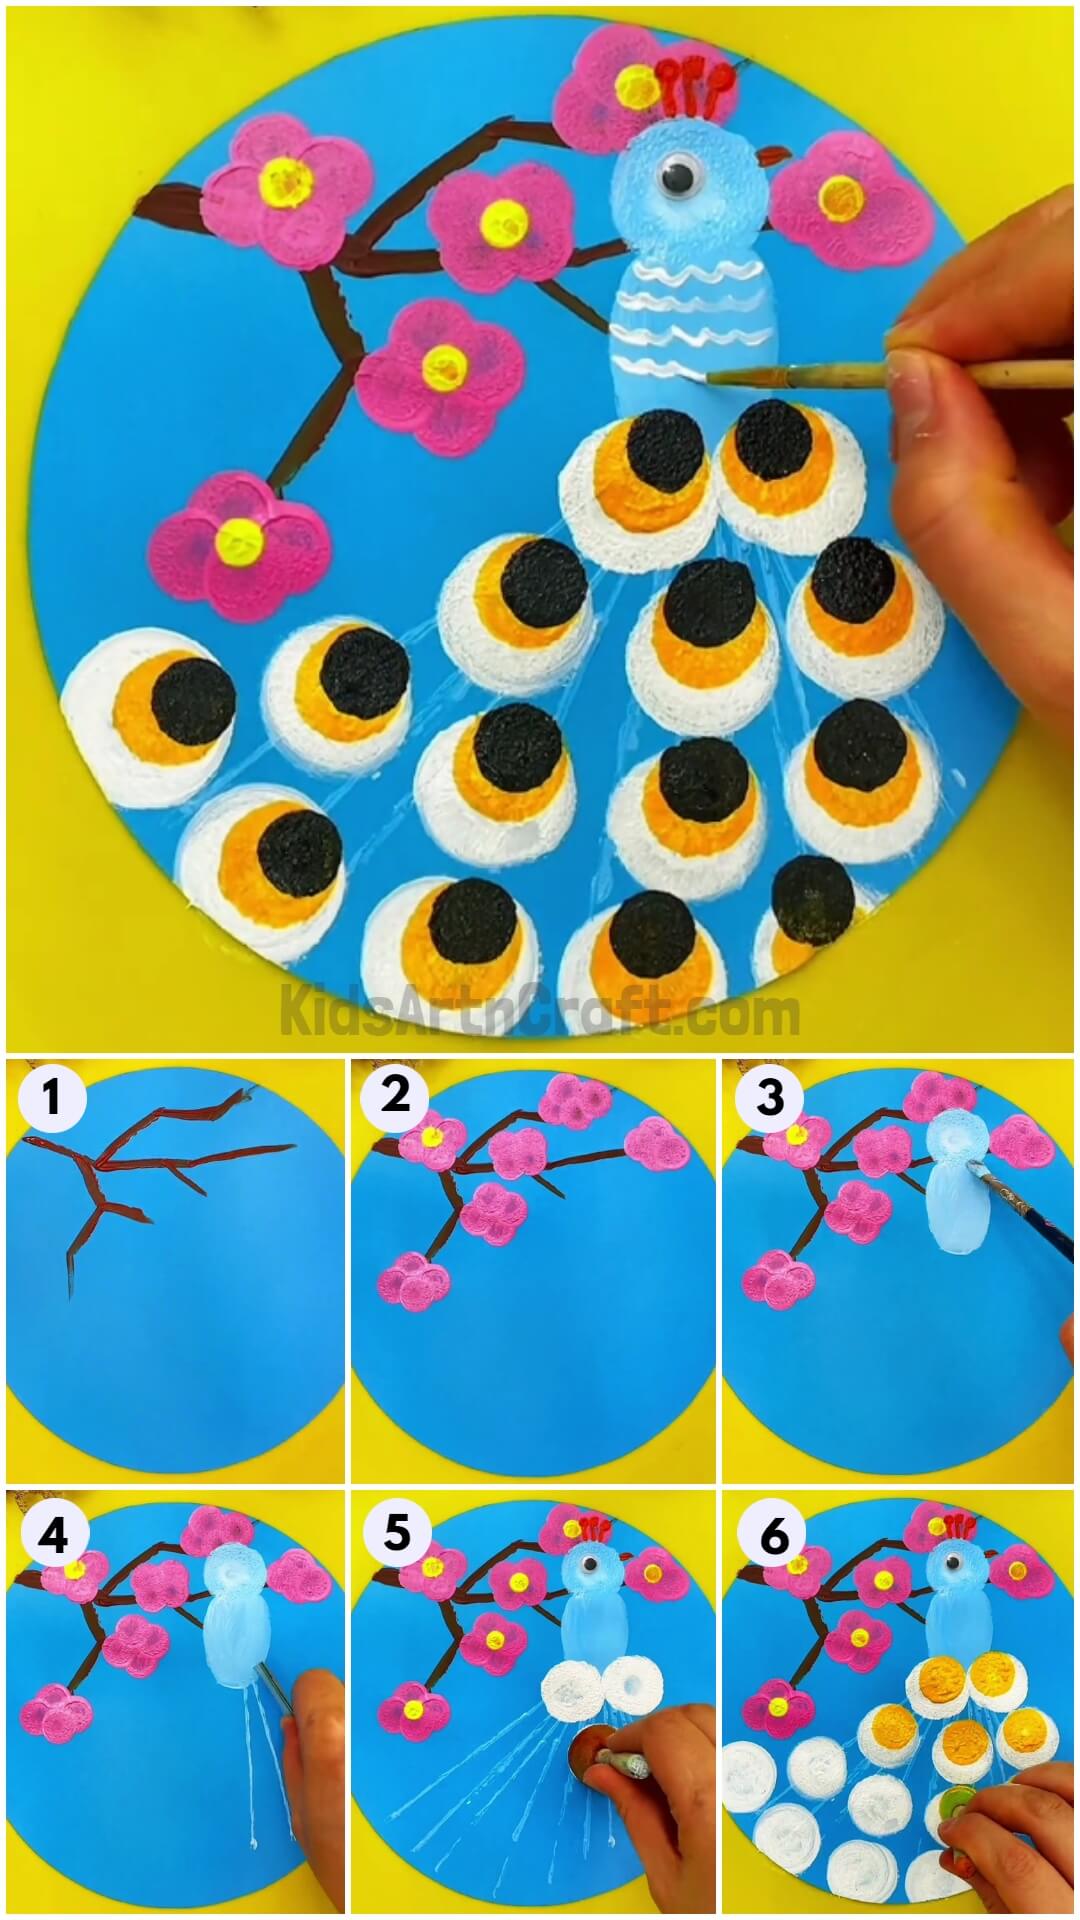
This step-by-step tutorial will teach you how to paint a pretty peacock on a tree branch by using a stamp.
Welcome to this easy step-by-step tutorial on stamp painting ideas. This tutorial will guide you step-by-step to paint a pretty peacock sitting on a tree brunch. It is a fun project that can be done by children of 8 years onwards to adults as well. The painting of the peacock will be a fun and creative way to learn. You’ll require some colours and a stamp for this project. Why delay? Let’s get started!
Pretty Peacock on a Tree Branch Painting
Read More: Cute Penguin Hand Outline Painting Tutorial For Kids
Materials Required
- Blue or any colour chart paper
- Colours – brown, pink, yellow, sky blue, white, red, black
- Artificial craft eye
- Stamp – narrow and thick mouthed
- Paintbrush
- Earbud
- Scale/Ruler
Procedure
Step 1: Painting The Branch

Paint the branches using brown colour, Paint multiple branches using straight lines in various directions.
Step 2: Painting Flowers On The Branches
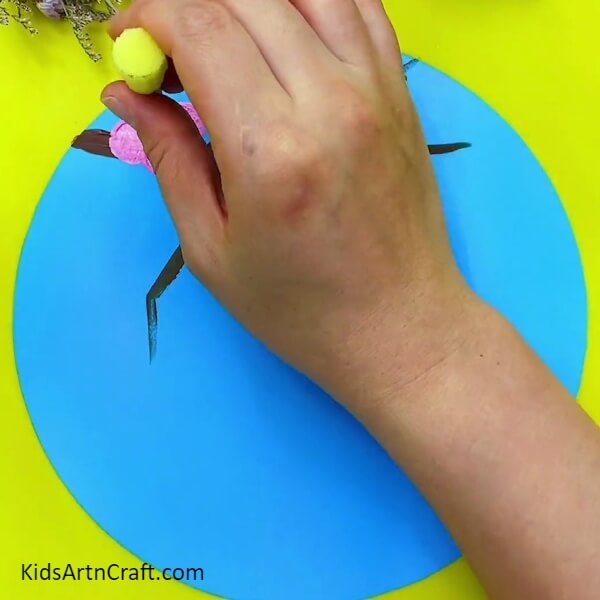
Using the narrow-mouthed stamp, paint flowers on the branches with pink colour. Stamp the pink colour with four dots to make the flower petals.
Step 3: Finishing The Flowers
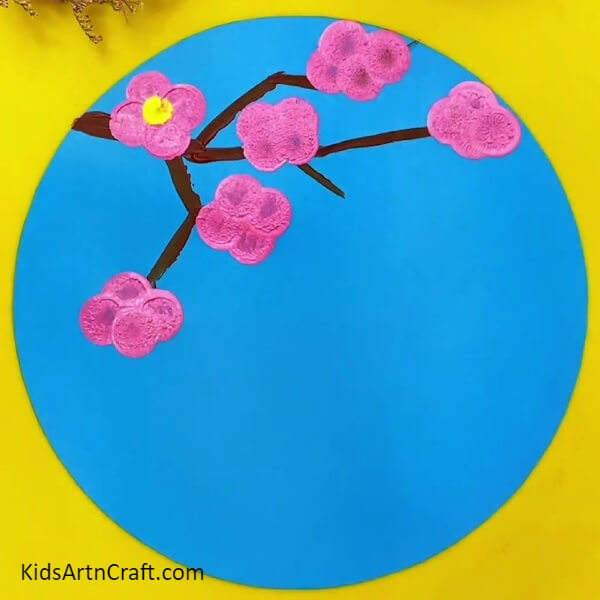
Put yellow colour in the middle of the flowers you have painted. Our branch is ready with flowers on it. Let’s paint the peacock now!
Step 4: Painting The Peacock’s Head With Stamp

Use the thick-mouthed stamp and the sky colour. Stamp on the lower branch to form the head of the peacock.
Step 5: Painting The Body Of The Peacock
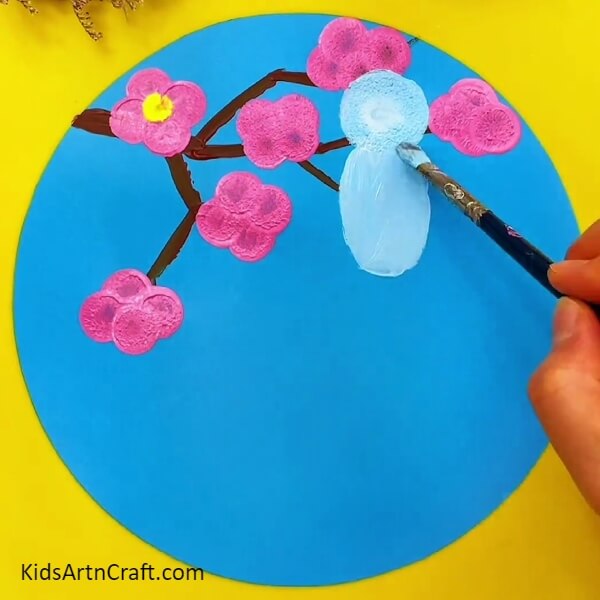
Paint an oval shape just below the head. Use sky colour to paint the body of the peacock. We are almost getting the body of our peacock!
Step 6: Using Ruler To Paint The Structure Of Peacock’s Tail
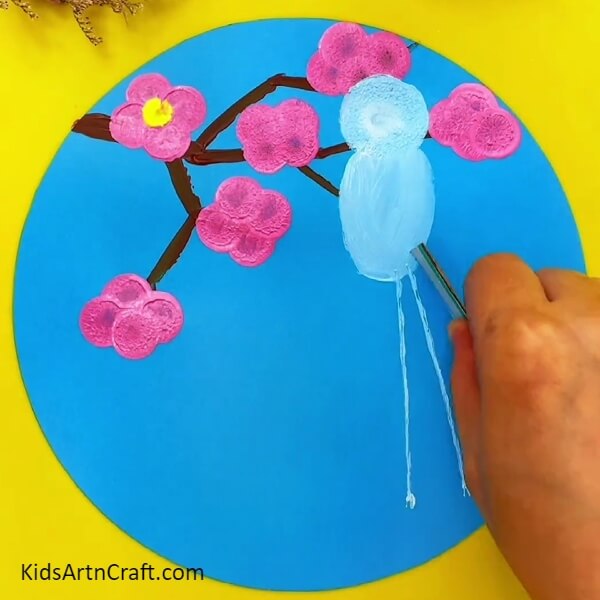
Dip one side of the ruler in sky colour. Use the ruler to draw the tails of the peacock. With the help of the ruler, form straight lines one next to the other from the bottom part of the peacock’s body. The outline for our peacock’s tail is ready. Let’s proceed to the next steps!
Step 7: Outline Of The Peacock’s Tail’s Structure
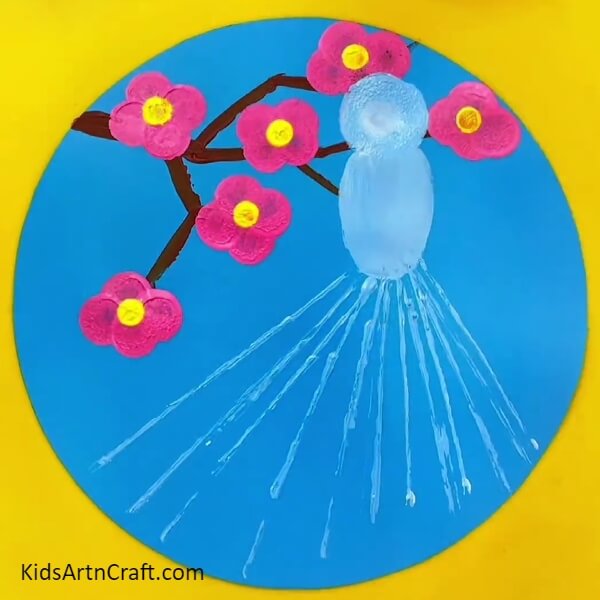
Take a look at the tail structure. Looks exciting right? Let’s elaborate on it now!
Step 8: Completing The Face Of The Peacock

Stick the artificial craft eye in the middle of the peacock’s head. Paint the beak with red colour. Use earbud to complete the feathers on the head of the peacock. The feathers on the head are made by drawing three straight lines with red dots on top of them using the earbud. Our peacock’s face is ready!
Step 9: First Layer Of Feather On The Peacock’s Tail
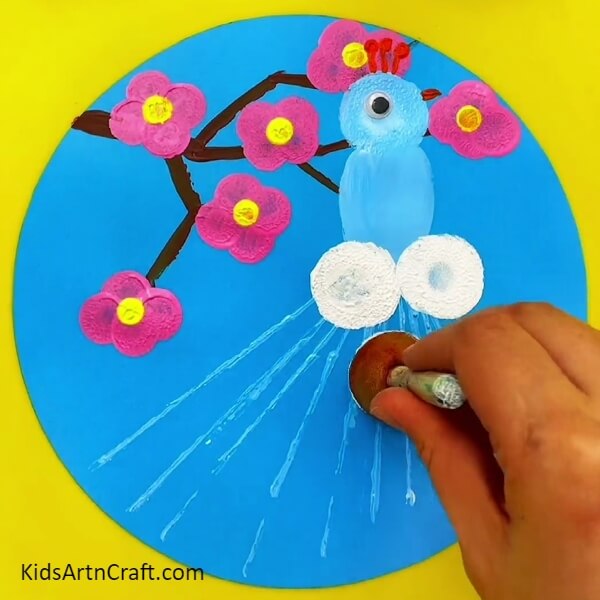
Dip the thick-mouthed stamp in white colour. Stamp on the tail structure side by side as well as up and down to form the white feathers on our peacock.
Step 10: Yellow Layer Of Feather On The Peacock’s Tail

Dip the narrow-mouthed stamp in yellow colour. Stamp on the white dots to form the second layer of feathers on our peacock’s tail.
Step 11: Final Touch To The Peacock’s Tail
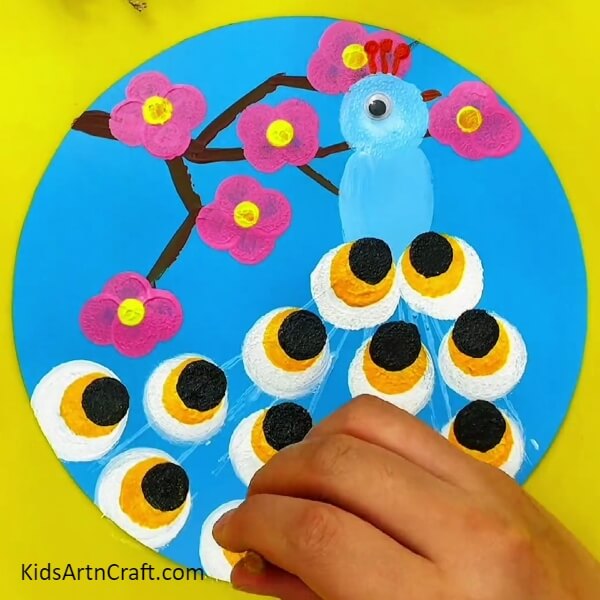
Dip the narrow mouthed stamp in black colour. Stamp on the yellow dots to complete the peacock’s tail but see that all three colors are visible simultaneously.
Finally, Pretty Peacock Painting Using Stamp Is Ready
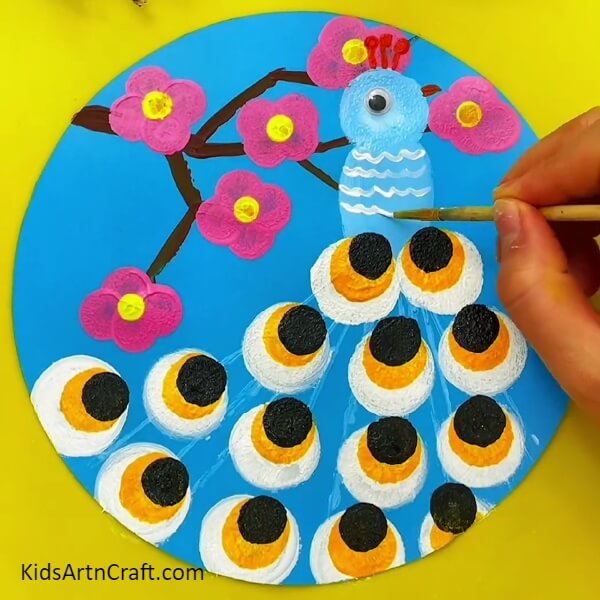
Complete the peacock painting by drawing white wavy patterns on his body. There you go, our pretty peacock sitting on a tree branch painting is ready. This creative method of painting using a stamp is a unique way of learning art. Children as well as adults can learn a lot through this creative and innovative painting idea. This tutorial makes painting even more fun. Try out this new stamp painting idea now!
Hope that you find this new painting idea fun and educational. We would love to hear your thoughts on this painting idea as well in our comment section below. Please visit our website for more fun and creative articles!
Thank you for visiting our website.
Some More Peacock Craft Tutorial
Creating a Paper Strips Peacock Craft for Children
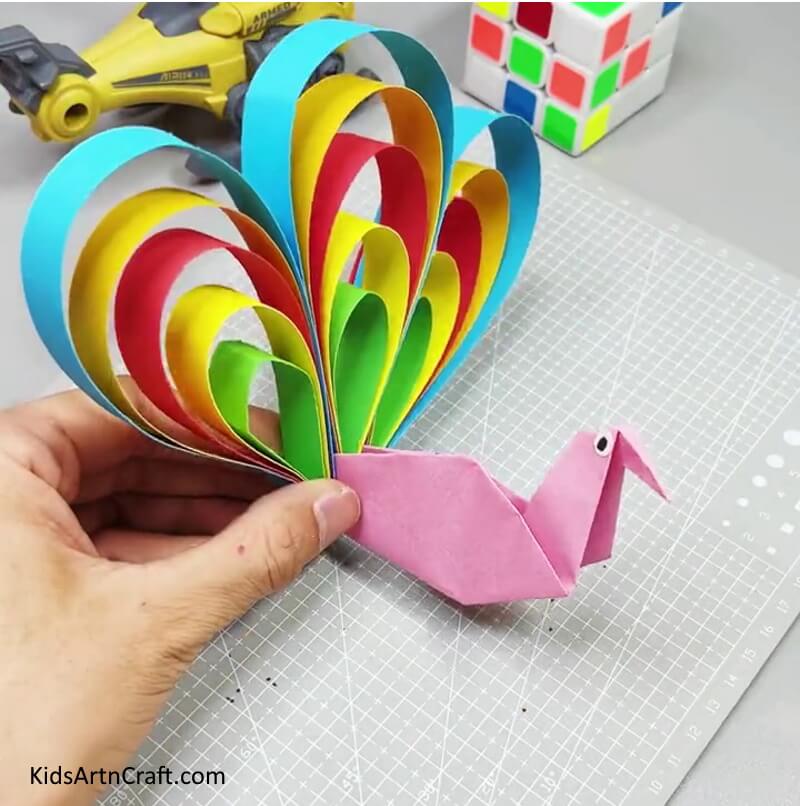
Image Source/Tutorial: Kids Art & Craft
This paper strips peacock craft is a great activity for kids to enjoy. It’s fun and creative and teaches them the basics of paper crafts. It’s easy to put together and the end result is a beautiful peacock that they will be proud of.
Follow us on Youtube for art and craft tutorials and much more.
More Articles from Kids Art & Craft
- Creative Owl Painting Idea For Kids Step-by-step Tutorial
- Easy Painting Video Tutorial for Beginners
- Realistic Tree Landscape Stamp Painting Using Fruit foam
- Easy Watermelon Stamp Doodle Painting Step-by-Step Tutorial
- Beautiful Tree Painting Using Leaf Impression Step-by-step Tutorial For Kids


