Drawing
Beautiful Tree Fingerprint Painting Step-by-step Tutorial

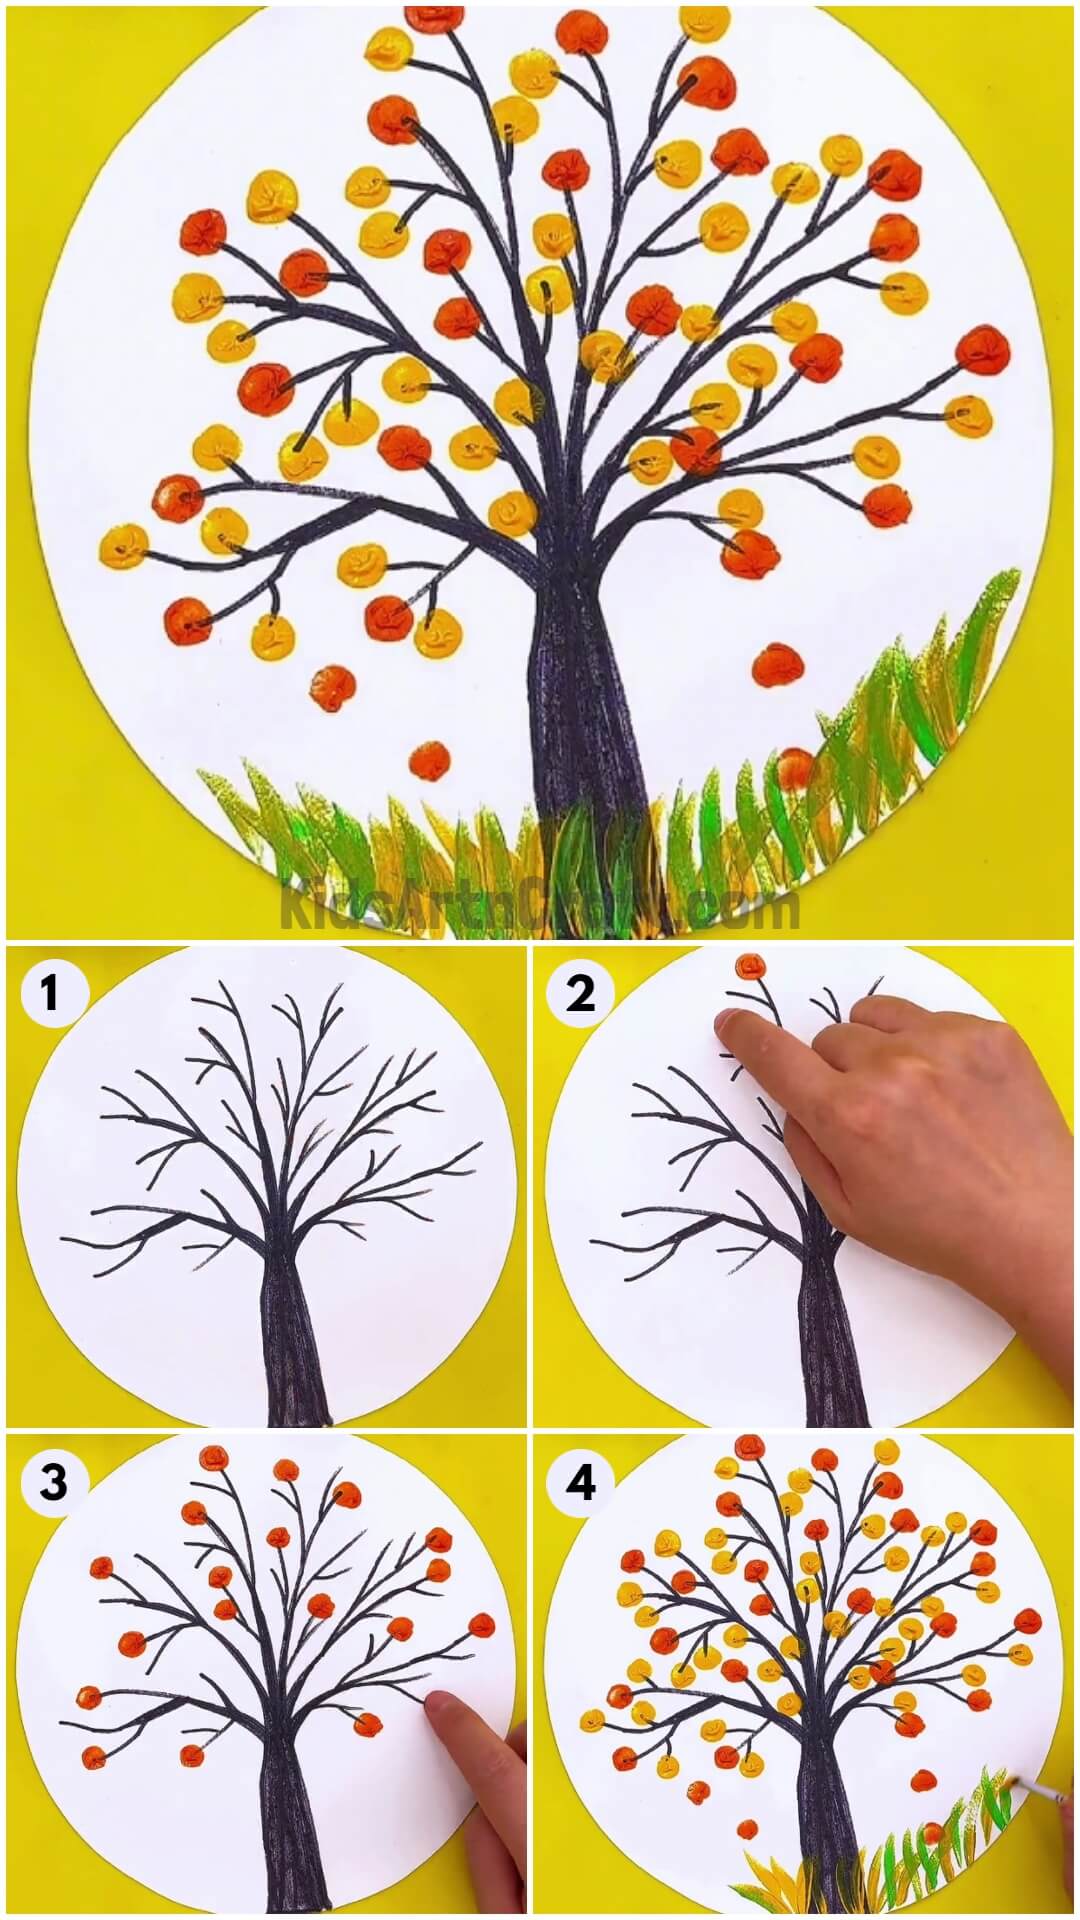
Create a unique and beautiful tree fingerprint painting with this step-by-step tutorial! Learn how to use your fingerprints to create a stunning art piece that is perfect for any home or office. All supplies are easily accessible and all skill levels are welcome.
Finger painting is always fun to turn your art into something you never imagined. It is always fun to play with colours on your fingers, especially for kids. So, today we are going to have some fun with a session of finger painting art. Let’s have some fun!
Tree Fingerprint Painting Artwork For Kids
Read More: Beautiful Tree Painting Using Leaf Impression Step-by-step Tutorial For Kid
Materials Required
- White craft paper
- Dark Brown marker/sketch pen
- Colours (Orange, Yellow, Green)
- Paintbrush
Procedure
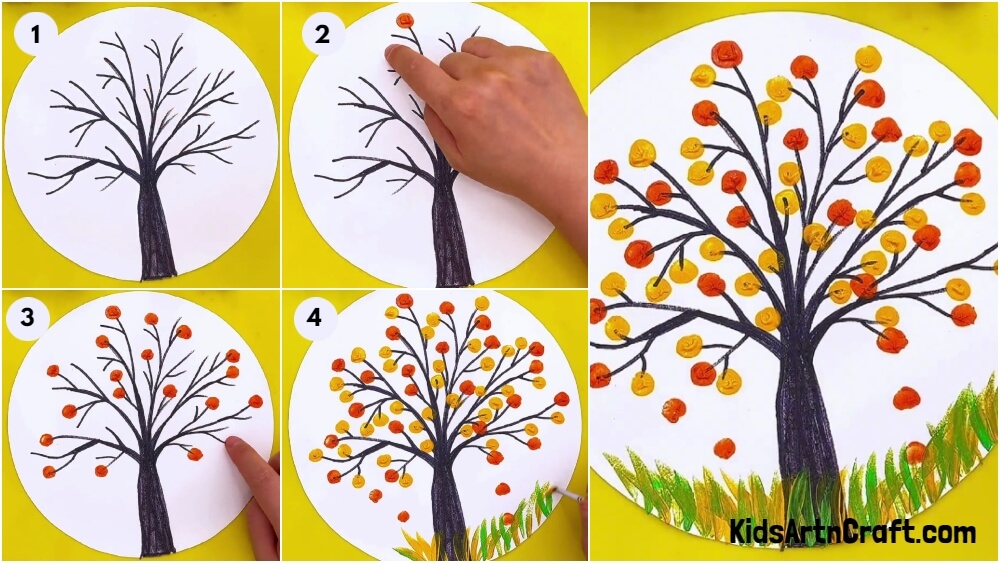
Step 1: Making a Tree Trunk and Branches with Dark Brown Marker/Sketch pen
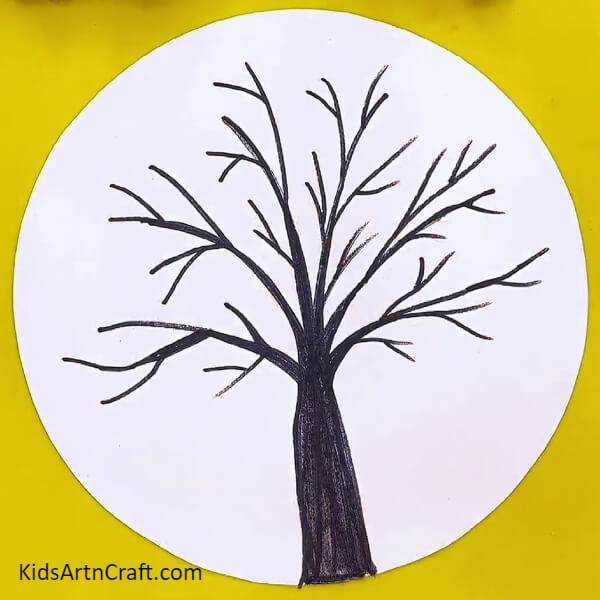
Your first step is to take a white coloured craft paper. Make the white coloured craft paper into a circle shape. Then, take a dark brown marker/sketch pen and make a tree trunk and branches on the white coloured craft paper as shown.
Step 2: Dipping your Finger in Orange Colour
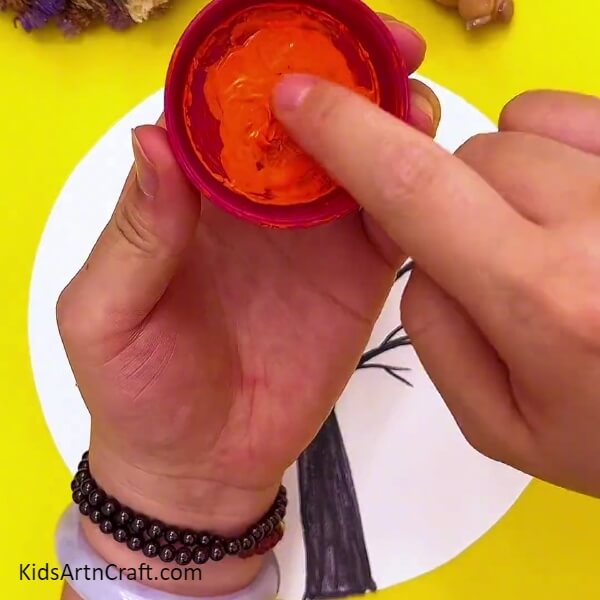
Now, take an orange colour and dip your finger into an orange colour for fingerprinting. (Preferably take an acrylic colour as it is non-toxic for children to use).
Step 3: Printing your Finger on the Branches on the White Craft Paper
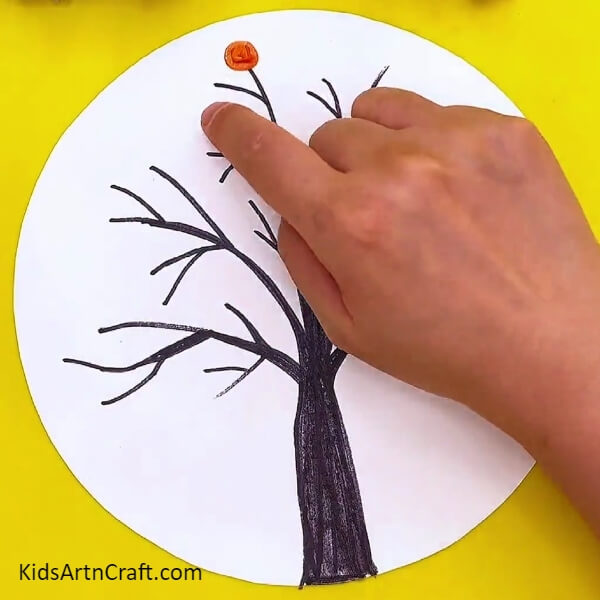
After dipping your finger into an orange colour, make a print on some of the tips of the tree branches which you made from the dark brown marker/sketch pen on the white coloured craft paper. Do not make orange prints on all the tips of the branches.
Step 4: Making a Fingerprint with Yellow Colour
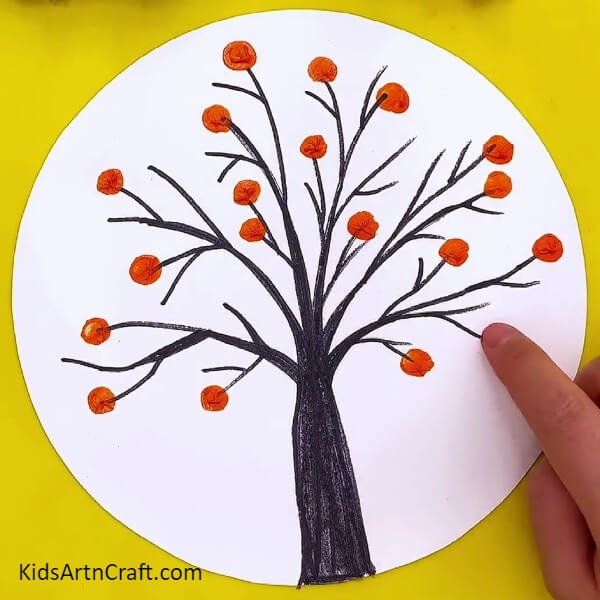
Now, take a yellow colour and dip your finger in yellow colour. After dipping your finger in yellow colour, make a fingerprint on the tip of the branches which you did not make your fingerprint as shown.
Step 5: Making yellow Colour Finger Prints on All the Remaining Branches
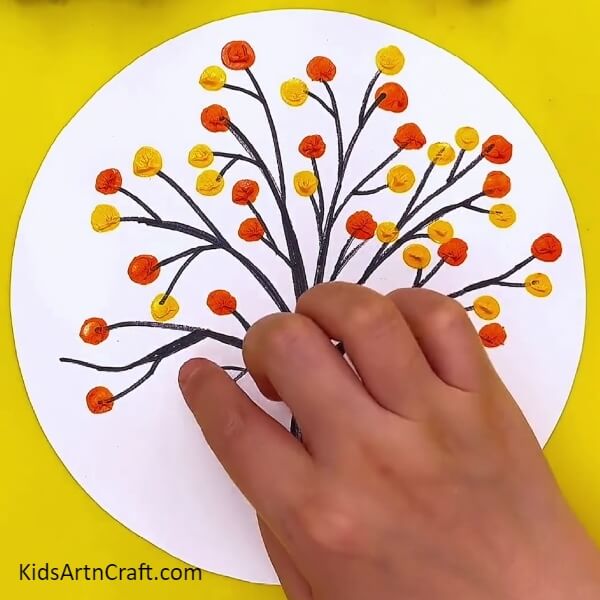
After dipping your fingers into yellow colour, make fingerprints on all the remaining branches which you did not fingerprint your orange colour on.
Step 6: Making Falling Leaves With Orange colour
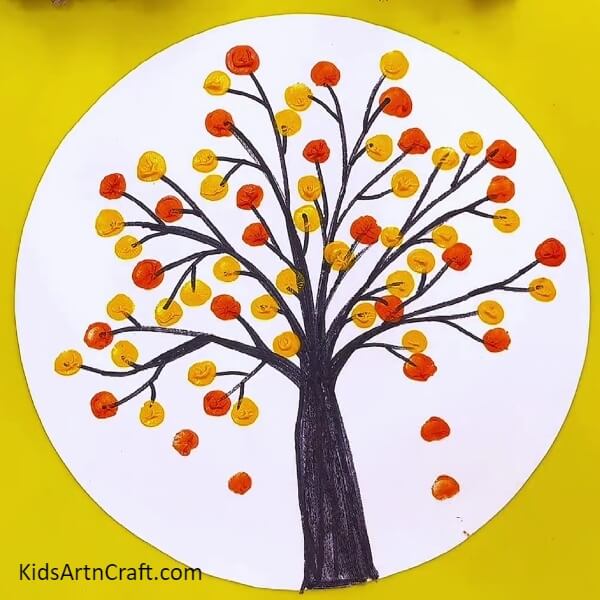
To give an effect of falling leaves/autumn season, take an orange colour. Dip your fingers in orange colour and make fingerprint on the white coloured craft paper below the branches as shown in the picture.
Step 7: Making grass with Yellow Colour and Paint Brush
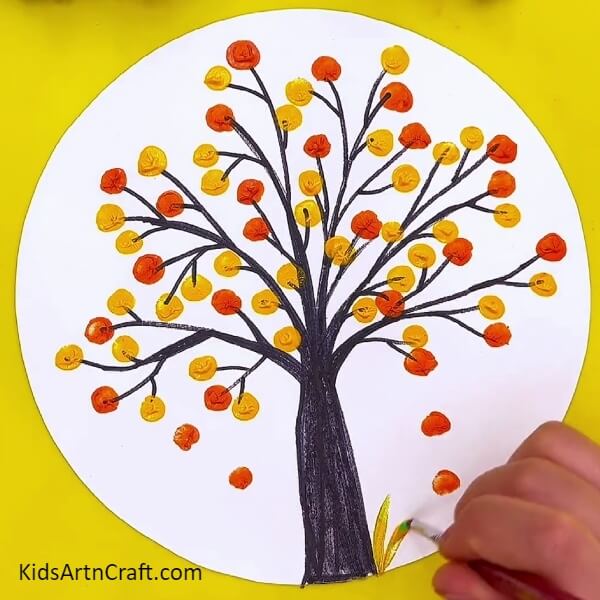
Now, take a paintbrush and a yellow colour. Dip your paintbrush in yellow colour and give strokes at the bottom of the white coloured craft paper to make grasses.
Step 8: Making Grasses with Green Colour and Paintbrush
Now, take a paintbrush and a green colour. Dip your paintbrush in green colour and give a stroke at the bottom of the white coloured craft paper to make grasses. To give it a more autumn effect, make green colour and yellow colour together on the white coloured craft paper as shown in the picture.
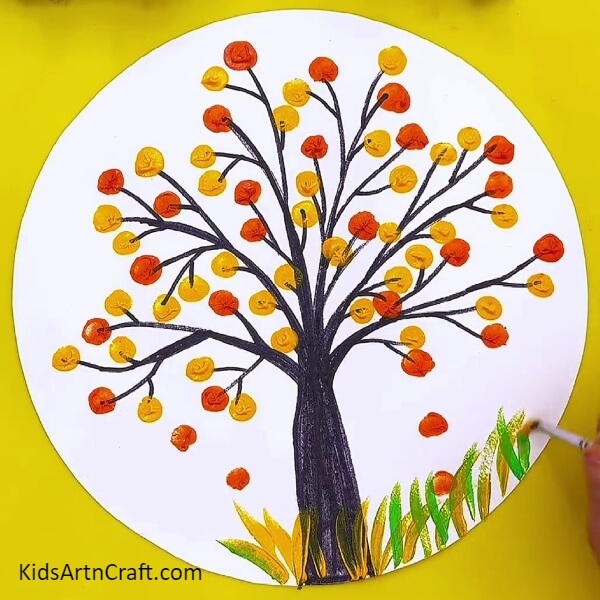
Your Artwork Is Ready!!
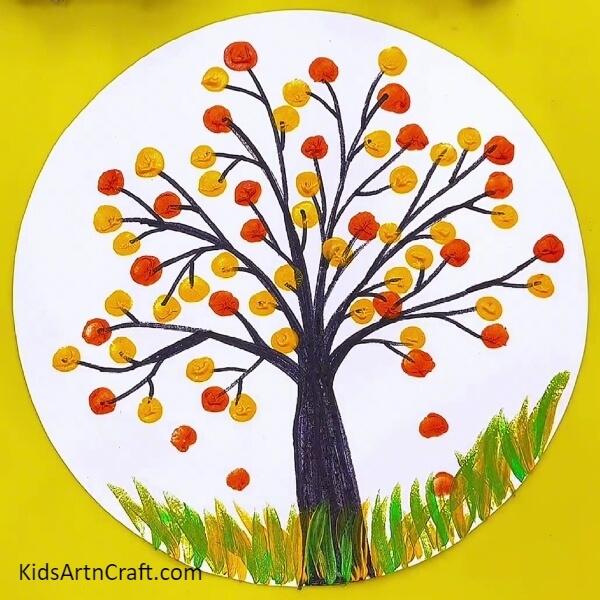
Your beautiful masterpiece finger painting is finally ready to leave everyone in awe of your artwork. This painting looks so pretty and gorgeous that no one will be able to look away from it. This painting is also so easy to make and it also teaches kids so many things about creativity, art, colours and how just by your fingers, you can create something so serene and beautiful. I would definitely recommend you to try this art as it is literally so inexpensive and even easy to create. You can definitely add your own creativity in this art if you want.
If you want to leave everyone in awe of your artwork, then, what are you waiting for, go and make your beautiful tree painting now and everyone how your fingers holds magic in everything you make. Have fun and enjoy every process of your art.
Follow us on Youtube for art and craft tutorials and much more.
More Articles from Kids Art & Craft


