

Kids Activities
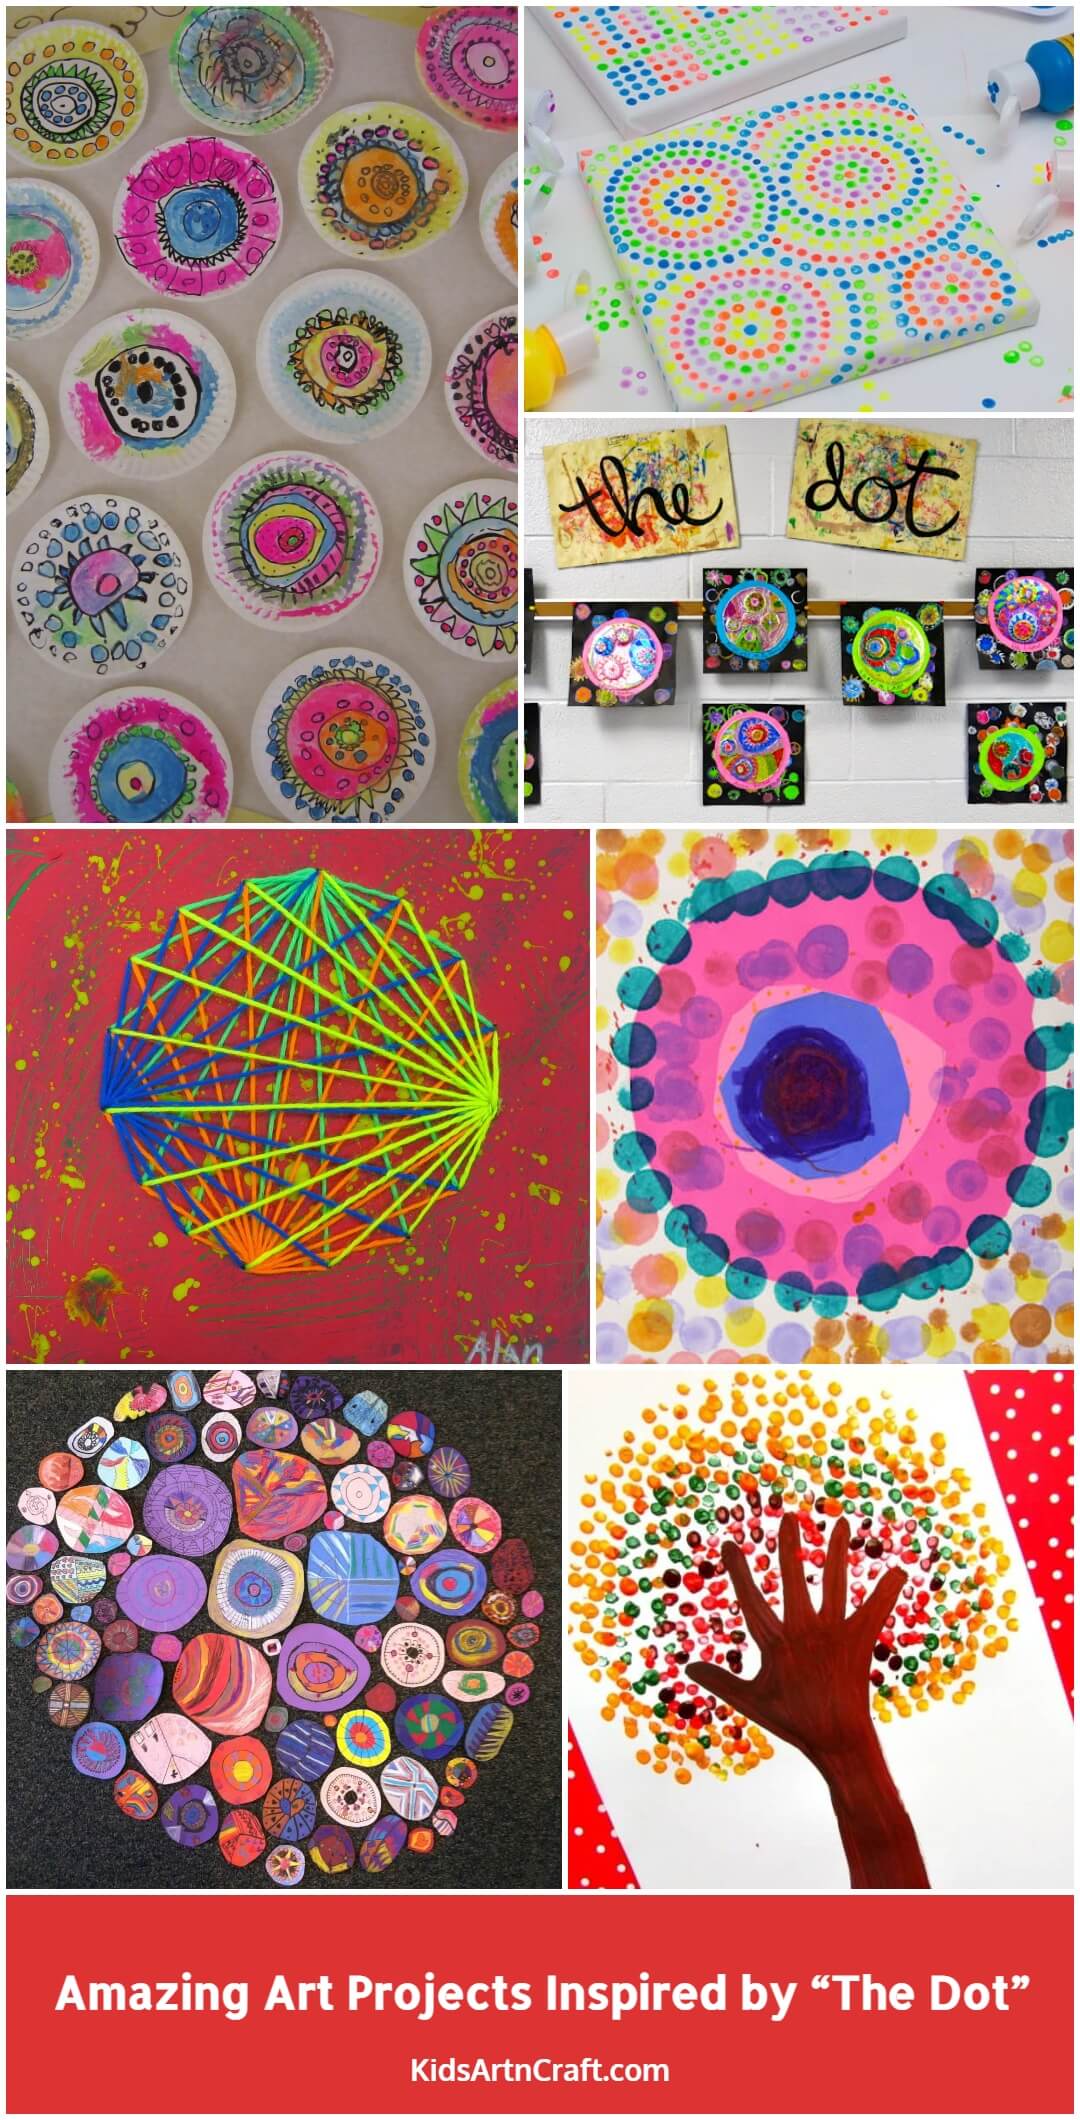
Amazing Art Projects Inspired by “The Dot”

If you’re searching for amazing art projects inspired by “the dot” for kids to do at home, you’re in the right place! Keep your learning spirit alive with our curated list of amazing art projects inspired by “the dot” like string stitched dot lesson, the dot lesson plans for 3rd grade, paper plate dot art project for preschoolers, dotted relief sculpture art project, handprint tree art inspired using dot, dot mandala rainbow art project, and how to make dot marker art activity.
We know international friendship day, mothers day, fathers day, forest day and more but have you heard about International Dot Day? Seems new? Yes, we have dot day. Ok, Are you searching for the theme and history of this dot day? Read this, you will get to know. Some of us may have thought, this is huge so we can’t do this until we start doing small. Same way, Vashti is a girl, who is the protagonist of the book “The Dot” written by Peter H. Reynolds, who believes that she can’t draw. Her teacher encourages her, she just made a dot and that’s the point she discovered herself. September 15 is International dot day which symbolizes the encouragement of courage, creativity and collaboration. Take a look at craft ideas on the Dot theme.
Amazing Art Projects Inspired by “The Dot”
Read More: Art Project Ideas for 2nd Grade
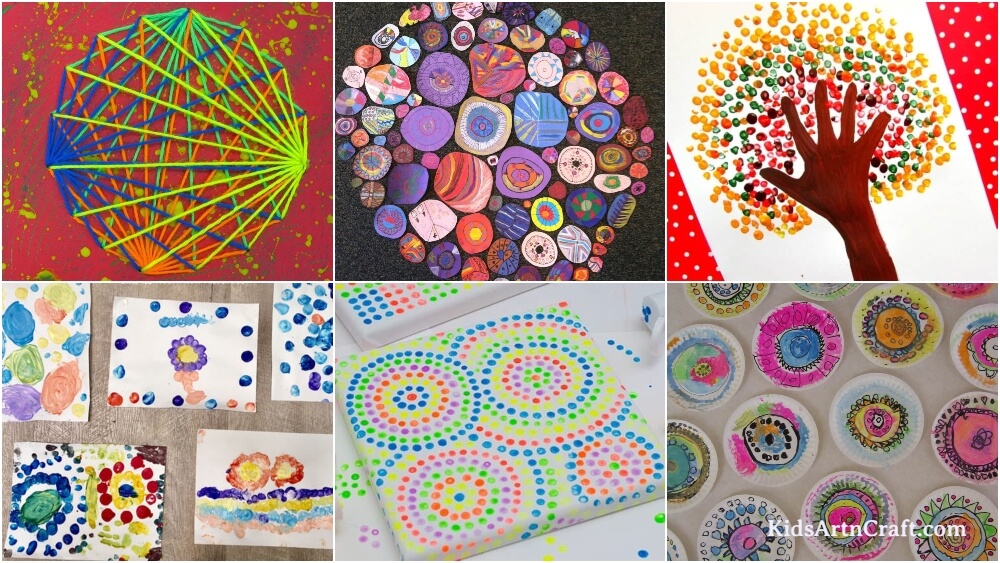
String Stitched Dot Lesson
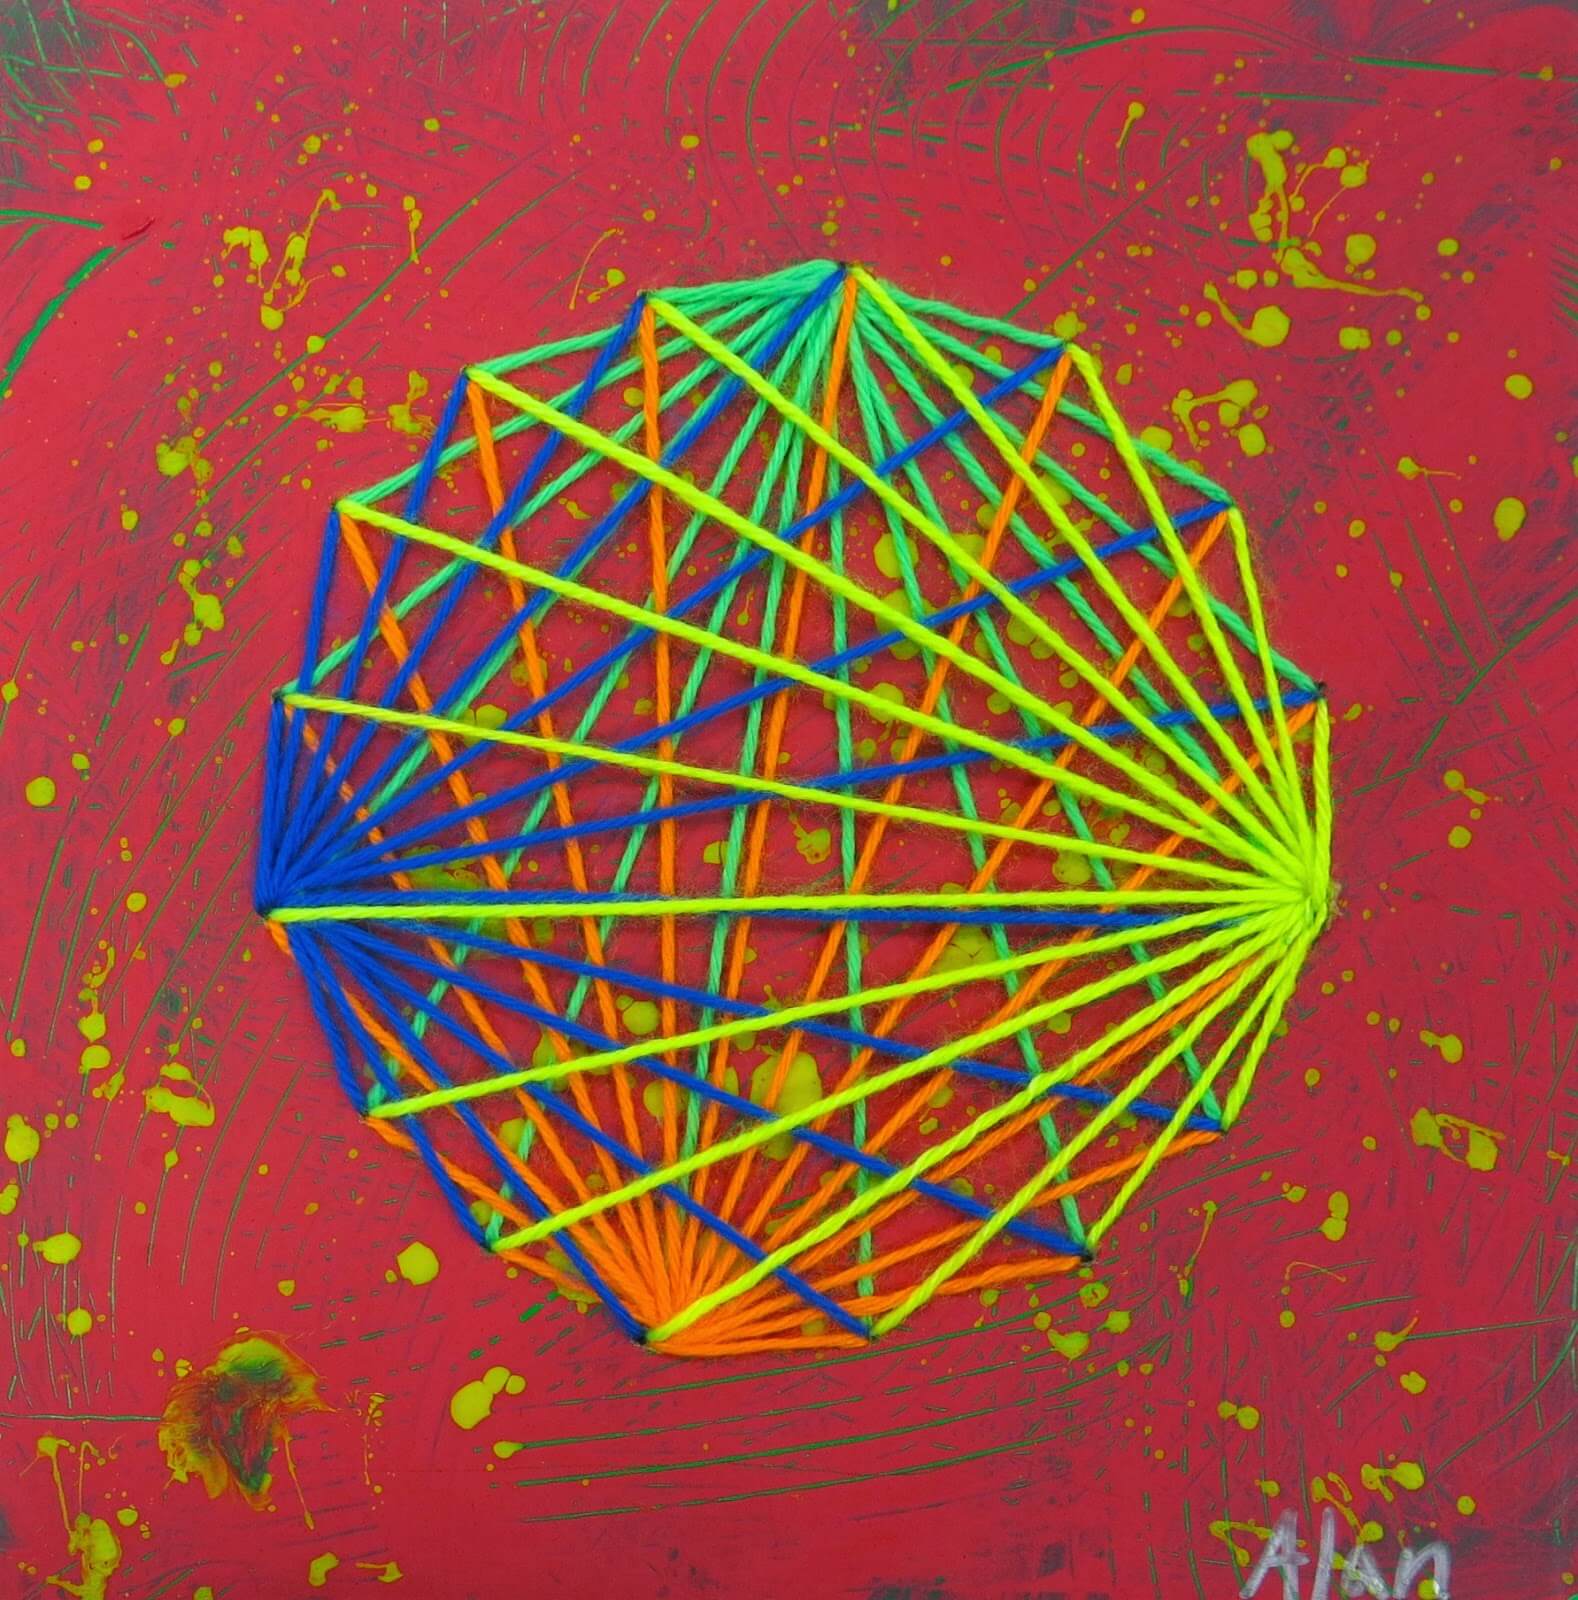
Image Source/Tutorial: Cassie Stephens
Materials required: Cardboard, Colourful Yarns, Scissors, Tape, Crayons, Black Paint, Texture Tool, Pencil Or Sketch And Needle.
Difficulty level: Easy
Description: Rather than lanterns, home décor using plants, or newspaper craft we can try different models which will make us unique among crowds. Here we have used four colours and you can limit this to any number of colours. Your Lil kids can do this but give them the plastic needle to stitch the yarn. Make different patterns and hang them on a light background wall.
Procedure: Take the cardboard, and fill that with a green colour crayon. Now paint red colour above the crayon-filled cardboard. Before the paint gets to dry, with the texture tool, make a design in this. If you want, split some light green paint on this cardboard. Use the compass (which is used in math class) or the lid of any jar to get a big circle shape. Mark dots at an even distance like in the clocks. Here we have made 16 dots. Make that in the back side(free from paint) of the cardboard and pinch a hole with a needle at each marked dot. Like the radiant which starts from a single point and reaches many different locations, we are gonna do this string craft. Select 1 point among 16 dots and poke that with a needle attached with yarn on the backside. Don’t make a knot at the starting point of the dotted hole, as that will block the way, with the tape secure it without disturbing other holes. From one point, make a straight line to another point and come back to the initial point. Repeat this process until you cover all the holes. This way you can create one radiant. If you want to make more radiates with several colours like shown in the above image go ahead. For reference watch this. Create an art gallery at your home.
Paper Plate Dot Art Project For Preschoolers
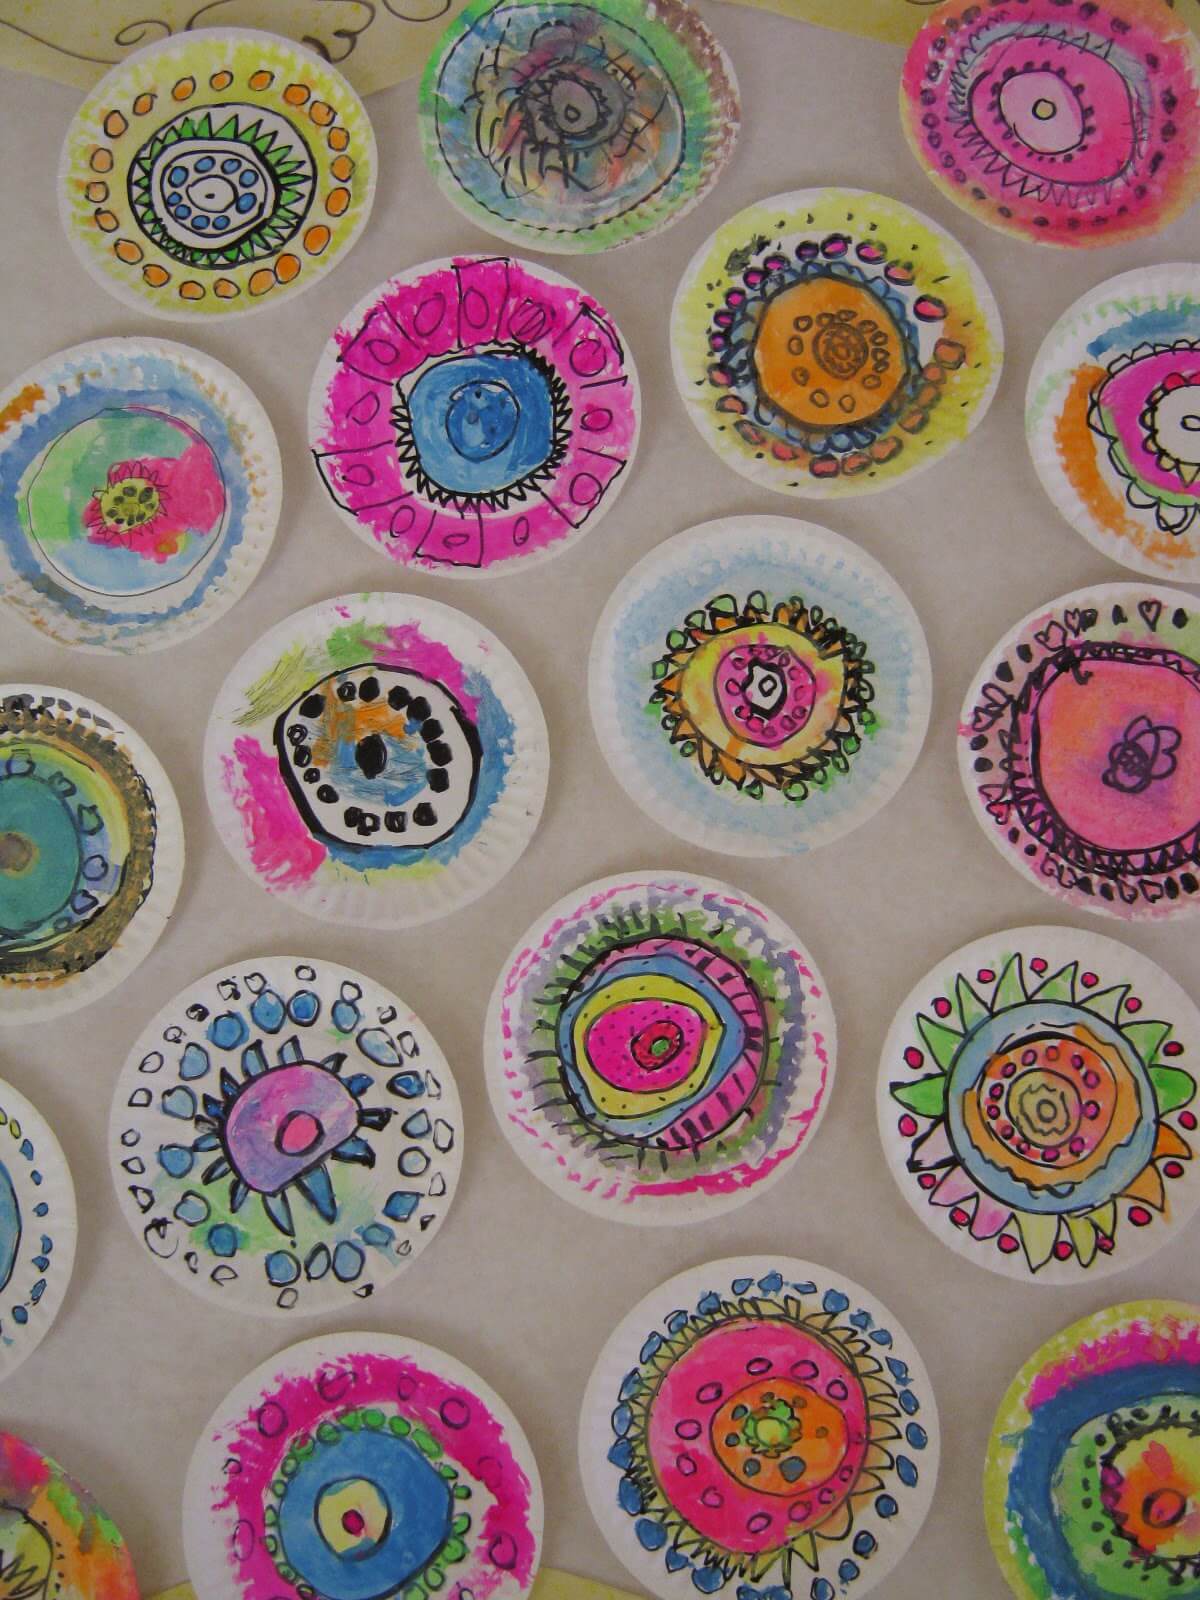
Image Source/Tutorial: Tales From The Travelling Art Teacher
Materials required: Cardboard, A4 Sheet, Paints, Paintbrush, Cork And Scissors.
Difficulty level: Easy
Description: From toddlers to college students can do this craft. The perfection and the model may differ based on their maturity and age level. If you are a teacher or head of the school then give this as a task for International Dot Day and inform the students that you are gonna display their work on your classroom walls. This classroom project would help kids to collaborate with others, explore creativity and improves hand-eye coordination.
Procedure: Cut the cardboard in a round shape and paste an A4 sheet on that. Can also use a rectangle or square shape without cutting cardboard and paper but it would be less attractive than a round shape. Allow your students to draw any pattern that comes to their mind and let them paint it. Some students like me may expect sample drawings or ideas to initiate the process. So show them the mandala designs, Wassily Kandinsky artwork, metal relief, sand mandala, stained glass window designs, Rectangle patterns and more.
Dotted Relief Sculpture Art Project For School
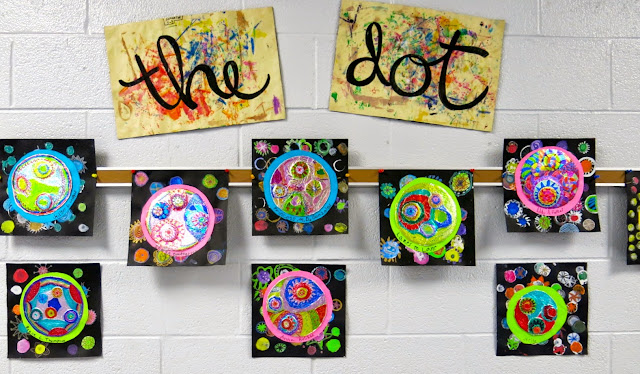
Materials required: Styrofoam Plate, Glue, Aluminium Foil And Sharpie Colours
Difficulty level: Easy
Description: This is for preschoolers and kindergarten kids. Putting dots and drawing circles is easy for them. Show this image as the model and they’ll start doing this in their style. Finally, hang them on the classroom walls or in your home if it is your kid and the designed name board of “The Dot”, it gives aesthetic look, isn’t it?
Procedure: Ask kids to cover the plate with aluminium foil and start working on painting dot work. You may wonder where to start, start with a simple dot. Make a circle around the dot, draw circles one about the e other and draw some designs between the circles and do the same again and again until you get the bigger good-looking design. At last, let them paint those with various colours. Adding a matching background is also good as given in the above image. In a black chart, add dot designs and paste the design into that.
Dot Activity Using Paper & Color
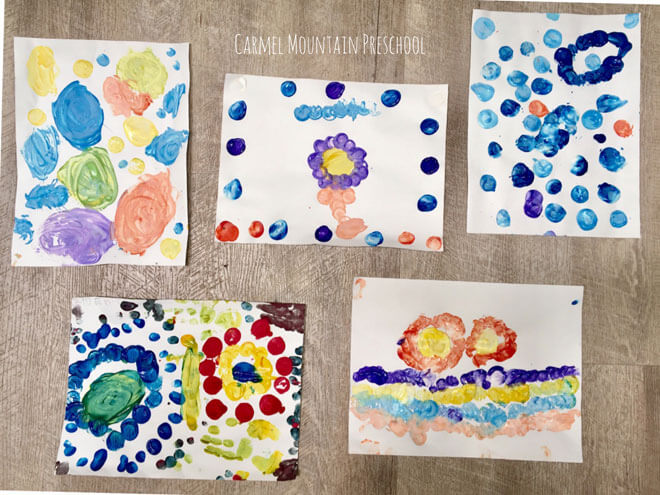
Image Source/Tutorial: Carmel Mountain Preschool
Materials required: White Paper, Paintings And Cork.
Difficulty level: Easy
Description: This craft is purely for preschoolers and kindergarten kids. Just one of the dot artwork project will help the kid’s fine motor skills and helps hand-eye coordination. Give white paper and painting to your kids, and let them paint with the cork in any design.
Handprint Tree Art Project Inspired Using Dot
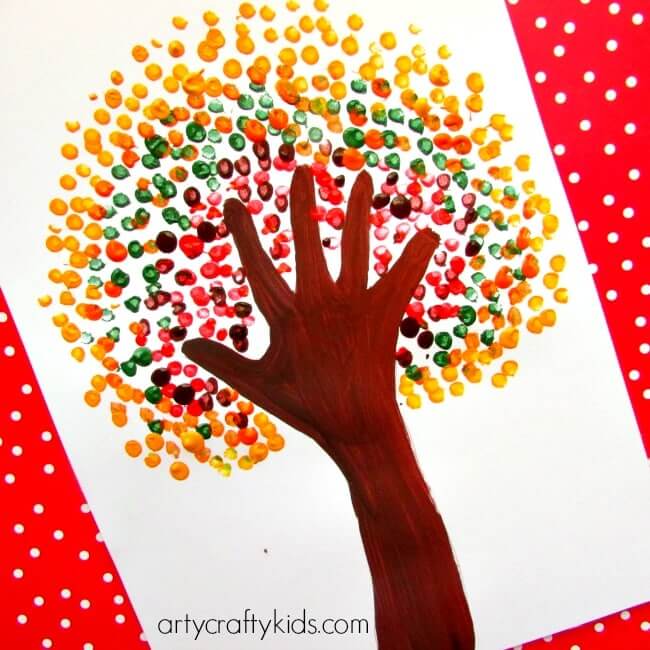
Image Source/Tutorial: Artycraftykids
Materials required: White Paper, Paint, Brown Paper(Optional) And Cork.
Difficulty level: Easy
Description: In this, we are making a dot tree in a simple way in which kids will feel easy and have an interesting craft design. Here our kid model is used as the stem of the tree and dot art as the leaves.
Procedure: Take A4 or white paper, using any small round object you can do this dot art. Better use cork, it’s easily available or you can use a bottle cap. By using that make a bunch of dots in an aligned manner as we are working on n specific pattern instead of abstract art. If your kid is a toddler or preschooler, outline the tree and ask them to stamp it in the given space. You can use only green for leaves or any colour you want. Draw your kid’s hand and ask them to colour it in brown colour. Otherwise, you can cut and paste brown construction paper in the shape of the hand. We are done with our craft!
Read More: 3rd Grade Art Projects for Classroom
Very Easy Dot Art Idea For Preschoolers
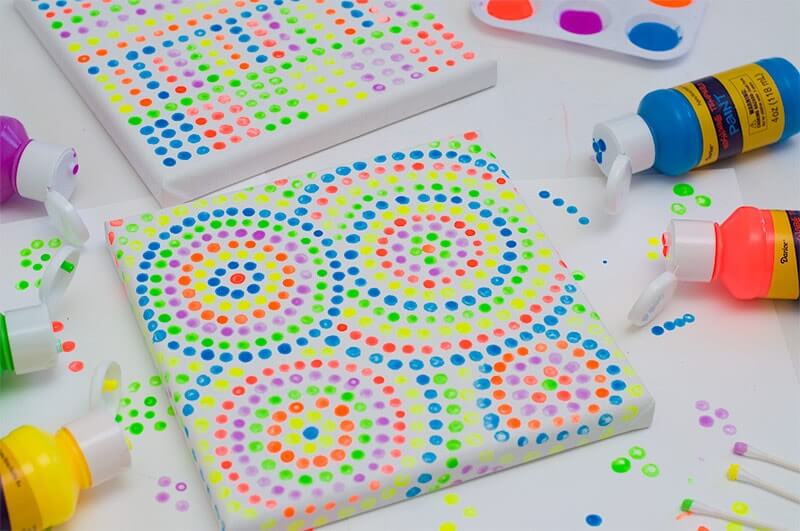
Image Source/Tutorial: Crafts By Courtney
Materials required: Cardstock, Washable Paint, Q-Tip And Paint Tray.
Difficulty level: Easy
Description: Quickly tell me what you had in your mind when you looked at this. For me, it’s simple, easy and awesome. And also it gave me the thought of discipline. Yea, See how neat and aligned they are!
Procedure: Take white paper or A4, get ready with paint in the paint tray and choose the aesthetic colour. Fix any pattern line, straight line, circle, triangle and so on. With the help of a Q-tip make a stamp on the paper. Use a different colour for each layer and cover the paper until it gets filled. Finally, collect all your collections and store or hang them in your home.
Dot Mandala Rainbow Art Project

Materials required: Canvas, Nail Dotting Tool, Paint And Q-Tip.
Difficulty level: Moderate
Description: This looks beautiful, isn’t it? The materials used here are less but you need should be careful in creating this design. You should be patient till you complete this. If you think you are gonna work on each swirl colour separately and then move on to the next swirl colour then you’ll be a mess. Because there is more chance to miss smooth texture.
Procedure: Take the black canvas(can work on any colour) and in the right measurement, make a cross mark with a white pencil and draw lines between the space. So that you will get an asterisk symbol. In the centre place black paint in a medium size. Start from any drawn line, place various colours of paint in a small size with even space. Start to remove the white drawn mark layer by layer as that will spoil the final beauty. Here we have used 8 colours in 2 ways. You can use different colours for 16 swirls. If you wanna do like in the given image, start placing the same colour in opposite lines and continue the pattern. If you are done with one layer, move on to the next layer by increasing the size of the dot mark. Place black colour in-between black and red in 2nd layer to make a swirl, that’s the hack here! Repeat the process until you are done with all layers. You can leave at this stage or you can decorate even more as shown in the image. Try making different patterns and designs.
The Dot Lesson Plans For 3rd Grade
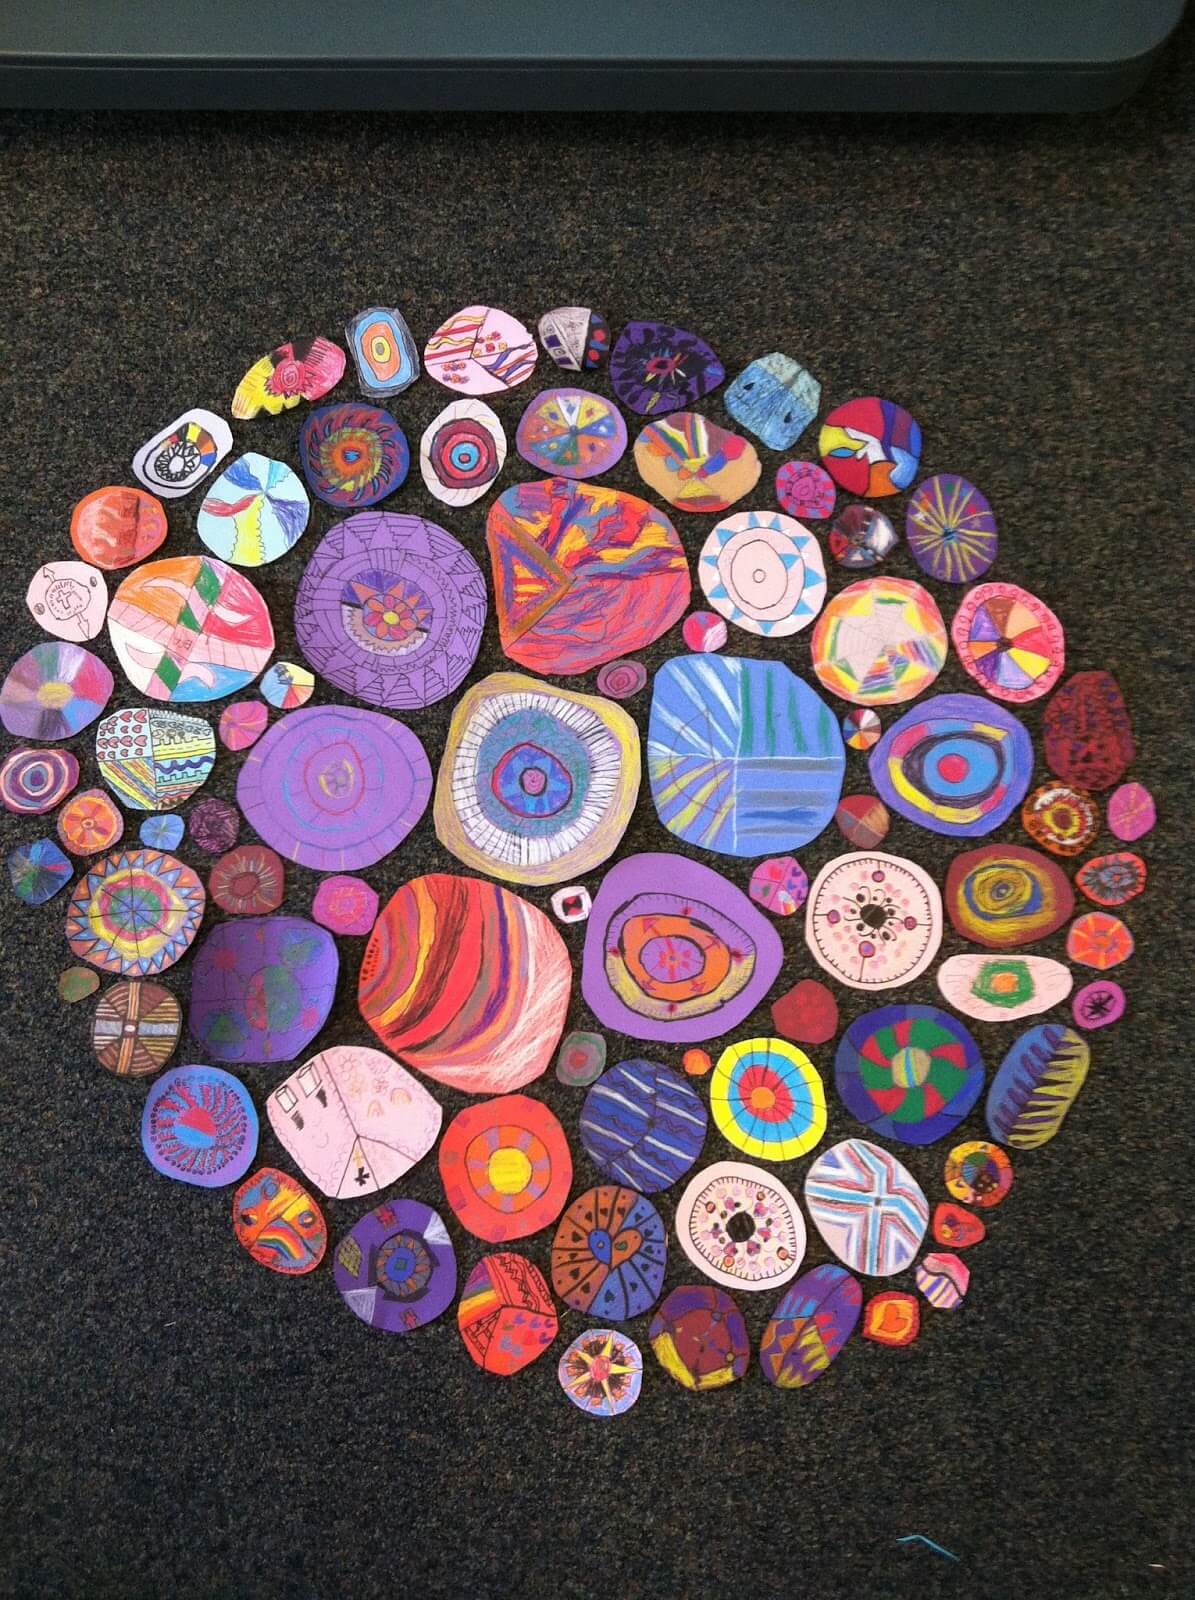
Image Source/Tutorial: Shine Briteza Morano
Materials required: Paper, Pencil And Crayons Or Colour Pencils.
Difficulty level: Easy
Description: You can try this easy dot project at your home or in classrooms. This doesn’t need any instruction or procedure to follow, It’s total up to the kids. This helps kids to learn shapes and patterns.
Procedure: Ask your kids to draw and cut the paper into ovals or rectangles or any shape. Allow them to colour it and decorate it with stickers. Repeat the process to collect more designs and arrange all those in one place as shown in the above image. Share this in your circle or on social media.
Milk Caps & Lids Squish Painting Art For Kids
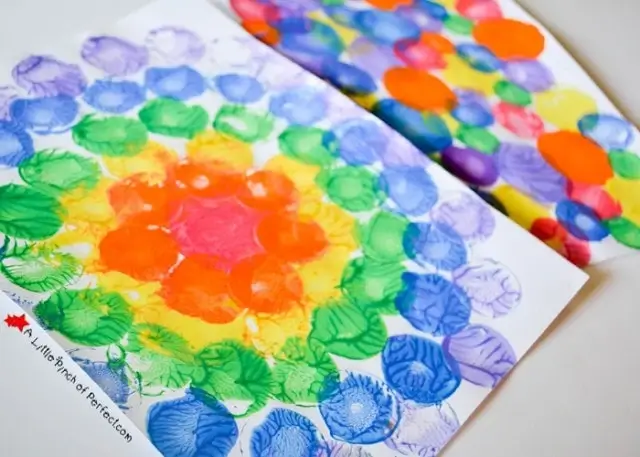
Image Source/Tutorial: A Little Pinch Of Perfect
Materials required: White Paper, Paint, (Milk) Caps Or Lids And Paintbrush(Optional)
Difficulty level: Easy
Description: s This looks elegant. Your 3-year-old kid can make this art. Are you searching for artwork for your Lil one? If so, you got the right page and right post. The work behind this project is simple and easy. Just you need ideas and interest to play with paint.
Procedure: Take A4 or white paper and a paint tray or plate to pour paint. Be ready with a milk bottle cap. Pour the paint into the tray, with paintbrush fill the upper portion of the cap or you can use your fingers. Be alert as kids may place their painted fingers on their mouths or eyes. You can directly push the lid in the paint and stamp that on the paper but this may contain excess paint which may soak your stamped paper. You can stamp in any method but be with your kid until they complete this work. If the lid contains any designs or lines your artwork will give better look. Use different colours to get an alluring look.
How To Make Dot Marker Art Activity
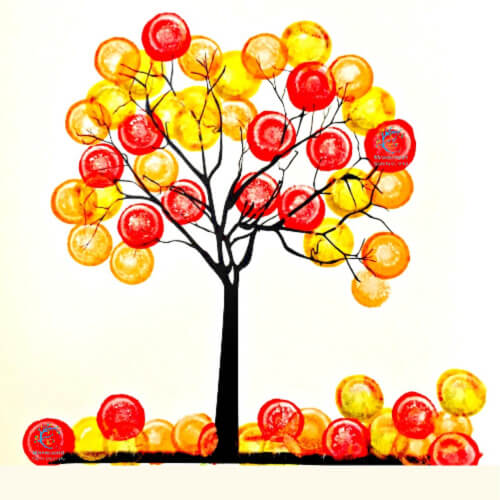
Image Source/Tutorial: Mosswood Connections
Materials required: Dot Markers, Paper, Paint And Paintbrush.
Difficulty level: Easy
Description: Before this craft, you might have crossed dot tree craft where it was used with cork or fingertip. But here we are using a dot marker. This craft is a dot marker tree, you can make any craft in this method.
Procedure: Simply paint the stem and branches of the tree on paper with brown paint and a paintbrush. Now use the dot marker to draw the leaves of the tree. As this image is meant to be an autumn season, we have drawn fallen leaves to symbolize that.
Read More: 8th Grade Art Project Ideas
Fun Dot Activity For Kindergartners
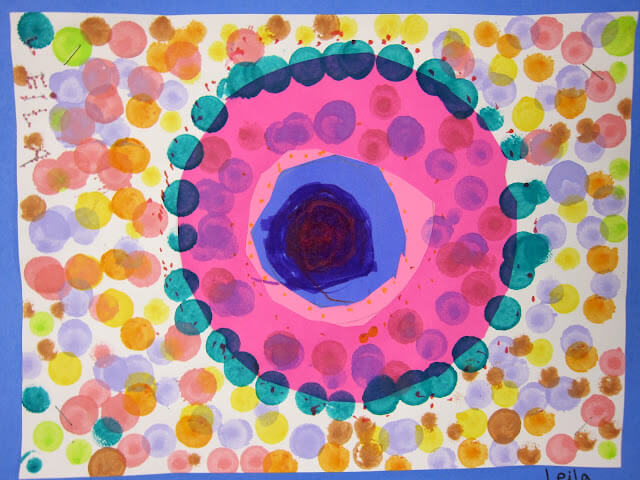
Image Source/Tutorial: Vividlayers
Materials required: Colourful Construction Papers, Glue, Scissor And White Paper.
Difficulty level: Easy
Description: It’s easy for kids to make this artwork. Keep various colours of construction paper on your side and start to cut them in circle-shape in different sizes. And start pasting that on the white paper. Some kids may blindly start pasting the circles and some may have the idea behind pasting the pattern. The kid who has done this artwork had an idea which is the overhead view of her dancing in a ballgown dress. You may not get that theme when you looked at first but she had given it a nice try, isn’t she? After I get to know the theme I can recognize it. So delegate this task to your kids and see how they are performing and how they are converting their ideas into artwork.
Simple Dot Painting Using Watercolor
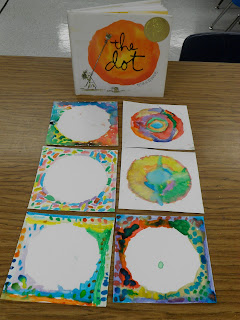
Image Source/Tutorial: Drip Drip Splatter Splash
Materials required: Watercolours, Paintbrush And White Paper.
Difficulty level: Easy
Description: If you wanna make a photo frame in a different style then you can try this method. Showcase your talent for making painting photo frame with this artwork.
procedure: Take white paper and keep watercolours and paintbrush aside. Leave the centre space in a circle or square or rectangle shape to stick your photocopy. Start doing designs on the corner side of the paper after leaving space for photos. Use different colours and draw flowers, grass and more. Finally, paste the photo in the centre. You can leave it as it is. Otherwise, you can paste this on a separate paper or cardboard and use a transparent sheet to cover that. So that we can avoid the damage which may happen in your artwork and that will give the lamination effect too.
The Dot Lesson Plans Ideas For Kindergarten
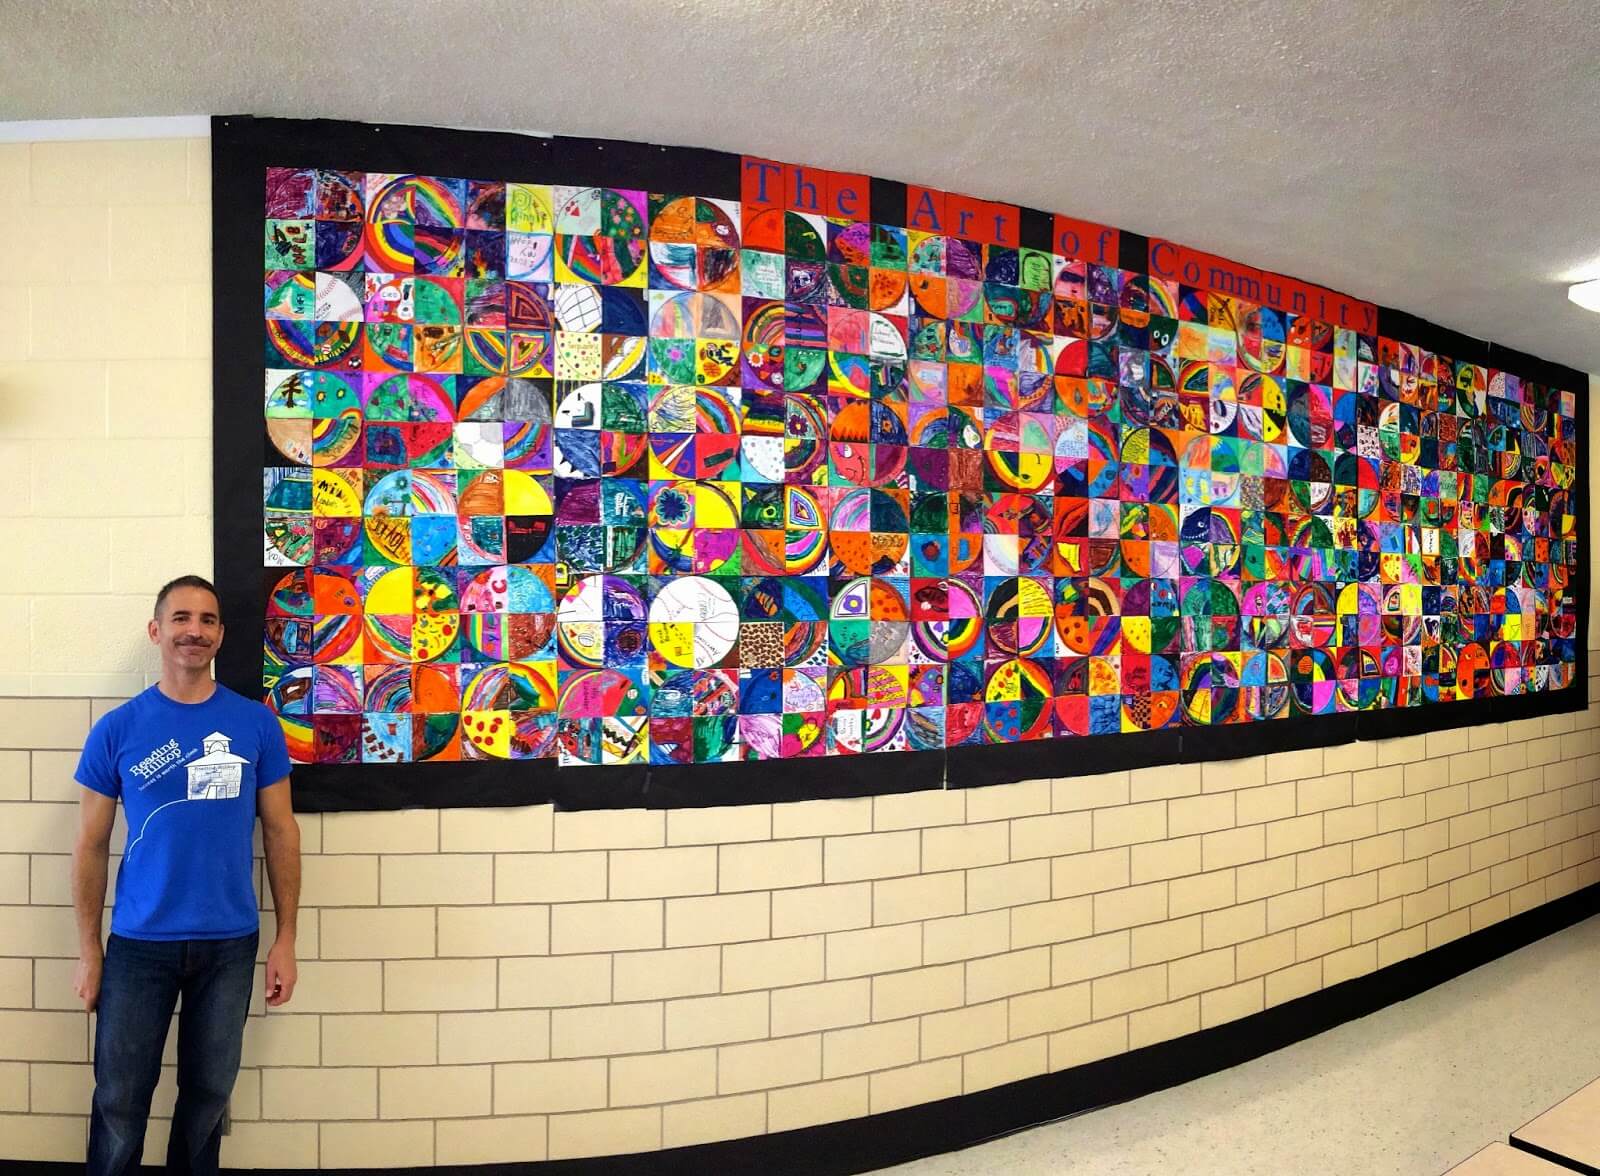
Image Source/Tutorial: Fabulous In First
Materials required: Papers And Colours.
Difficulty level: Easy
Description: You may think about how we can make this craft and where to start. This artwork is a combo of small easy circle-shaped and coloured paintings. Take a paper, start making a circle shape and divide that into 4 sections and draw anything you want in that section. If you want to add only colours then go ahead. Try different things in each section and collect all those in one chart as given in the above image. Make an art gallery in your room and display that to everybody. The beauty lies in the number of collections. If you have a small number then that may appear less than huge numbers.
Dot Art Ideas For School
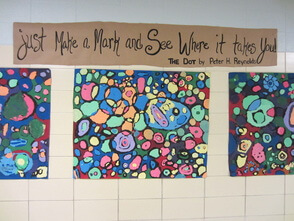
Image Source/Tutorial: Becker Intermediate Art Weebly
Materials required: Paint, paintbrush and canvas.
Difficulty level: Moderate
Description: In this period, abstract art place a big role and this dot project also give abstract art mostly rather than realism. Let your kids get introduced to artwork. This art doesn’t need figurative art, realism, or character artwork. So it is so simple for kids to draw and paint something on the canvas which looks good. Start drawing any shapes like circles, pebble shapes and more and fill that with a variety of colours. If your painting is a fine texture then your work will look awesome. At last hang that on the wall. Try this in your home and have fun in that.
Step By Step Dotted Drawing Activities
Image Source/Tutorial: Blog Hoppin
Materials required: Paper, Colour Pencil And Pencil.
Difficulty level: Easy
Description: This is the method most of us had done in our childhood days. I was familiar with craft work in recent days and I had worked on drawing and painting work in my school days. So this doesn’t need any fancy items to work on. Just draw any image like a man or environment or animals or insects and describe that in a few lines which will help kids to grasp pencils and the habit of writing. If they didn’t know about the drawing theme then they may get the chance to know them.
We Hope you have tried the listed artwork and if you haven’t tried it yet, then try it right now! Don’t postpone, Immediate action is a good way to work on a project. Let your kid take this as an initial point for them to start artwork. Encourage your kids and do visit our website for various craft activity ideas.
Follow us on Youtube for art and craft tutorials and much more.
More Articles from Kids Art & Craft
- 25+ Easy and Creative Plastic Spoon Projects
- 1st Grade Science Projects for School
- 7th Grade Science Fair Projects
- Creative Art Projects for Kindergarten
- Animal Habitat Projects for Kids


