


Paper Crafts
Colorful Paper Chicks Step-by-step Craft Tutorial For Kids

Make this adorable paper chick craft with our easy step-by-step tutorial! This craft will be a perfect afternoon activity for your kiddos this summer!
Welcome, this tutorial will guide you to the step-by-step easy instructions for making this chick paper craft! Through this tutorial, you will learn to make these little chicks without using scissors! You may be thinking that this might be origami, but you will be shocked to make it by tearing paper! Learn to tear the paper in the required shape and then paste it over, this way you will be able to make a paper chick! Crafting has no certified methods, you can make anything using any method! Always look up for new ways to enhance your creativity and innovation! Grab your papers and supplies to begin!
DIY Colorful Paper Chicks Craft Tutorial For Kids
Read More: How to Make Easy Paper Snowflakes Tutorial
Materials Required
- White Circular Paper Sheet
- Colorful Sheets (Red, Yellow, Purple, And Orange)
- Black Marker
- Sketch Pens (Red, Pink, Yellow, And Green)
- Green Colore Clay
- Glue
- Googly Eyes
Procedure
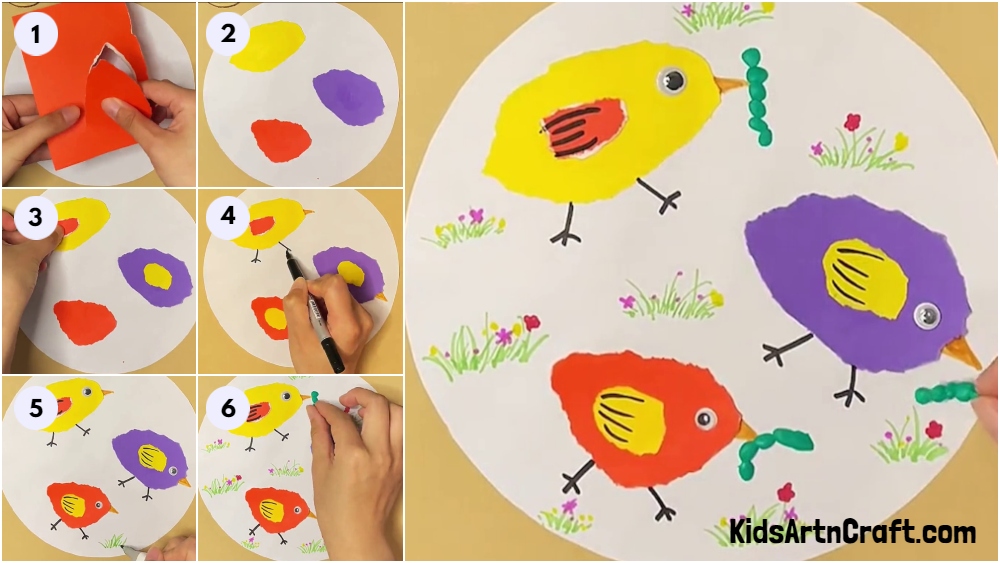
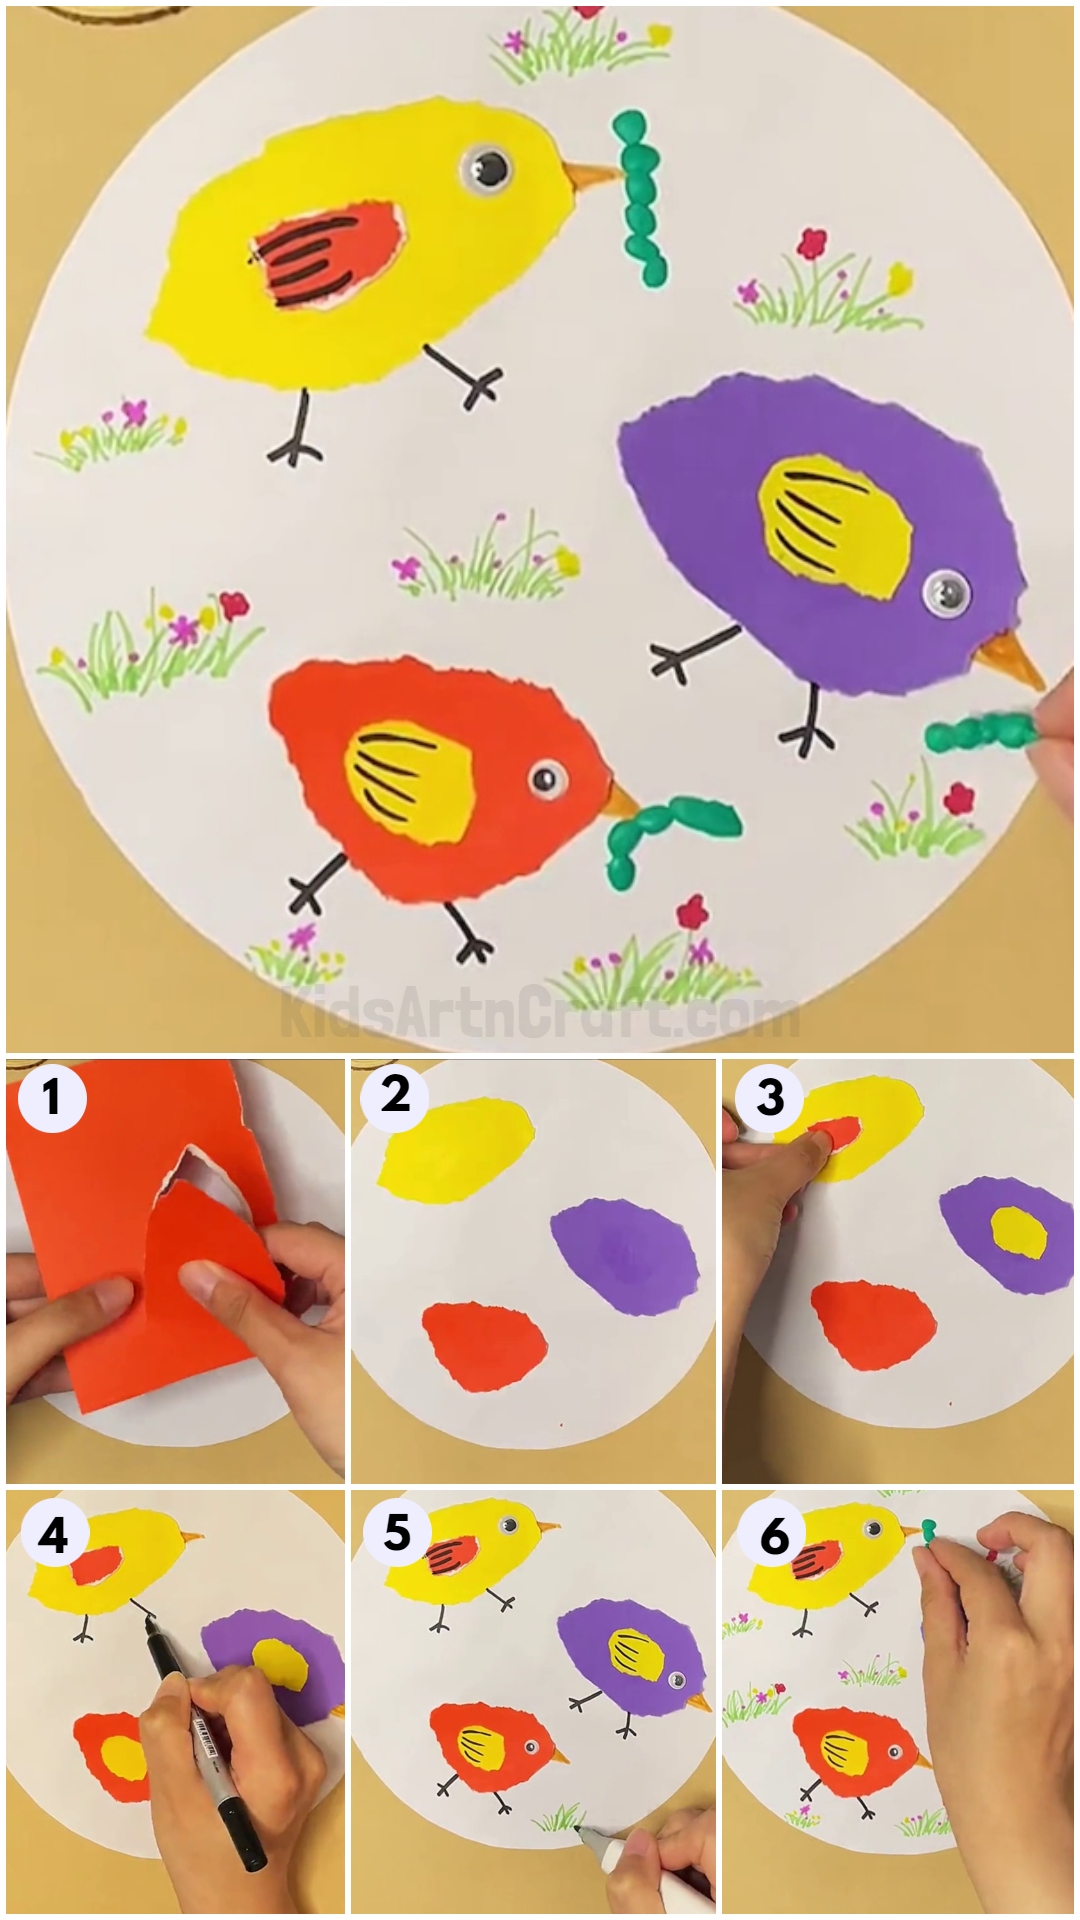
Step 1: Tearing Out Red Drop-Shaped Body
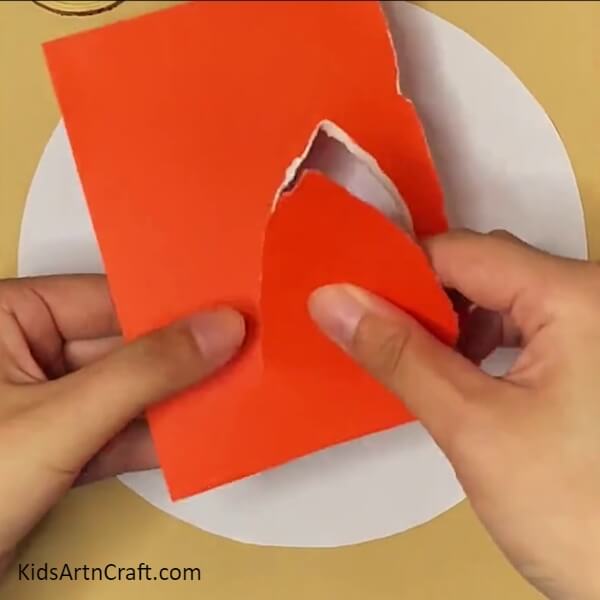
Let’s begin this craft by taking a white circular paper sheet as the base. Now, from the red paper sheet tear out a big drop shape carefully. This will become the body of the chick.
Step 2: Tearing Out The Yellow Body
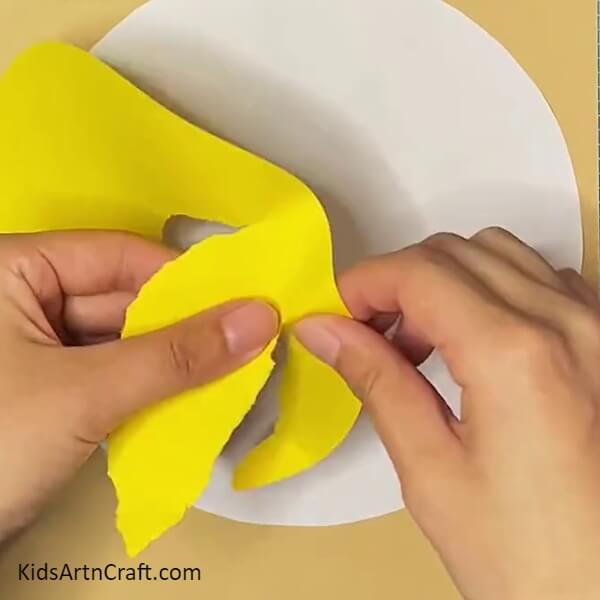
Do the same to tear out a yellow drop-shaped body of the chick.
Step 3: Pasting The Chick Bodies
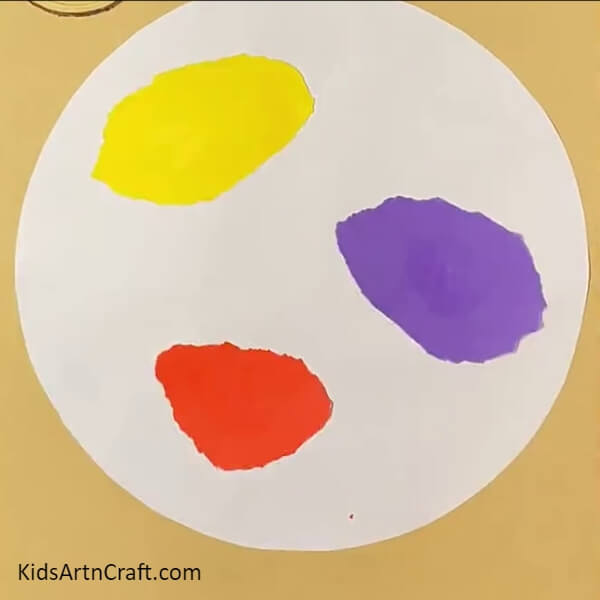
Make another chick’s body from a purple paper sheet. Paste all the 3 chick bodies over the base randomly tilted using glue as shown in the image.
Step 4: Making Wings Of The Chicks
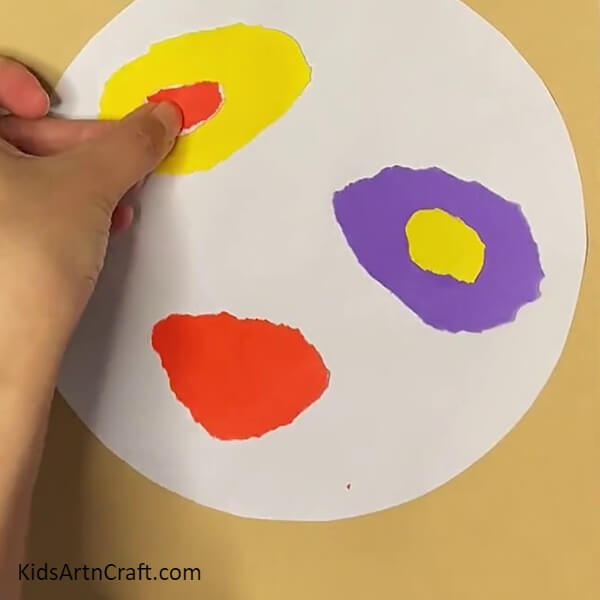
Tear out 2 yellow and one red wing from the paper sheets. Paste the red one over the yellow chick’s body and the yellow one over the rest using glue.
Step 5: Completing Pasting The Wings
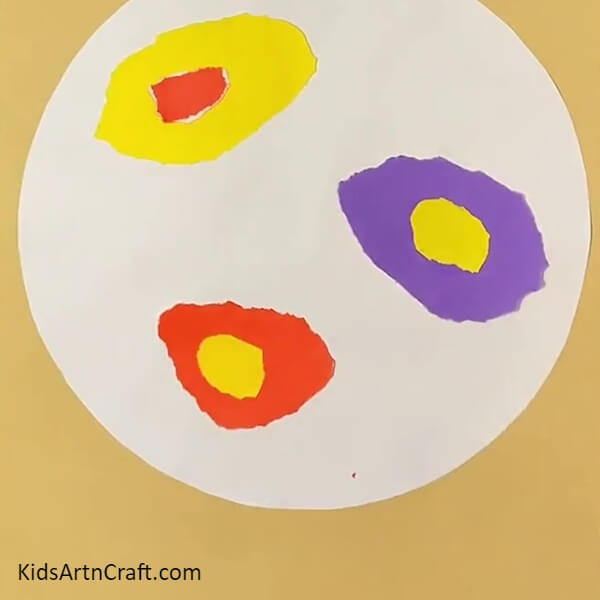
Paste the yellow wings over the purple and red chick’s body using glue.
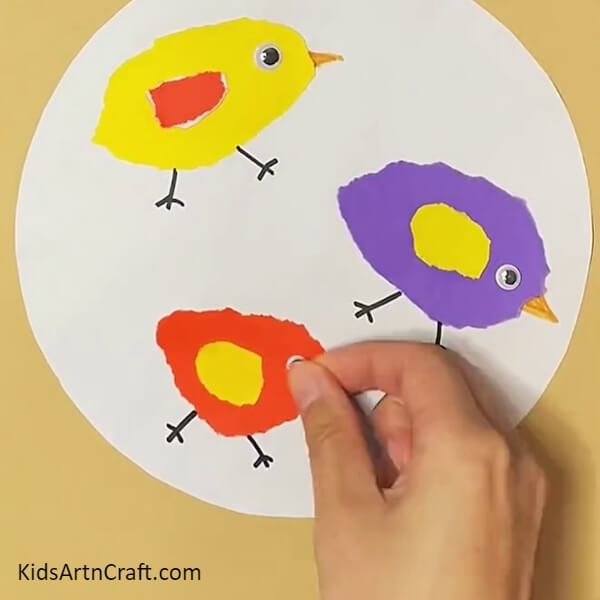
Step 6: Making Legs And Beaks Of The Chicks
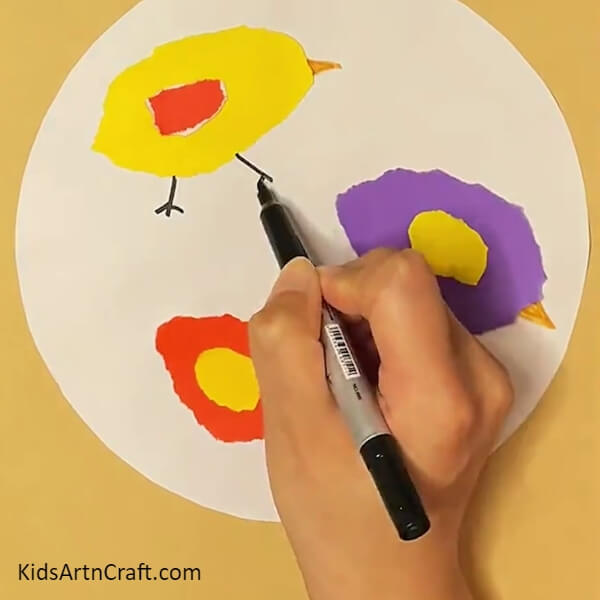
Using a black marker, draw the legs of chicks beneath them. Now, tear out a small triangle from an orange sheet of paper, using glue paste them from below the chick’s face to make their beaks.
Step 7: Pasting Googly Eyes
Paste 1-1 googly eye over each chick using glue.
Step 8: Detailing The Wings And Making Grass
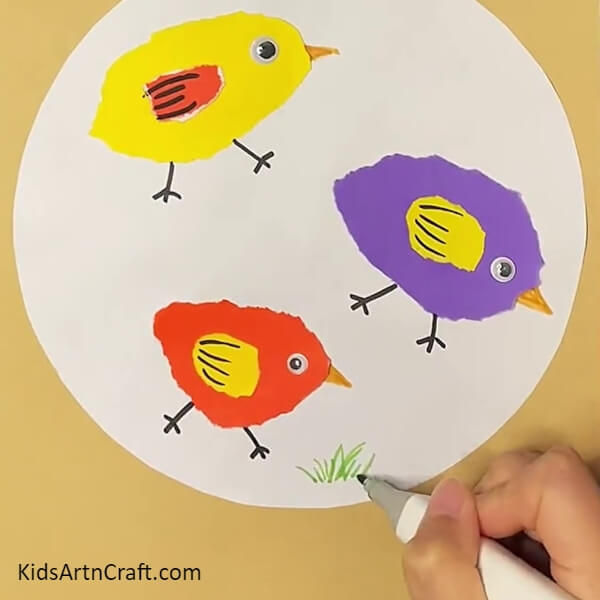
Using the black marker, draw curvy strokes over the wings of the chick to detail them. Now, using a green sketch pen make curvy strokes over the white base randomly to form grass.
Step 9: Drawing Flowers In The Grass
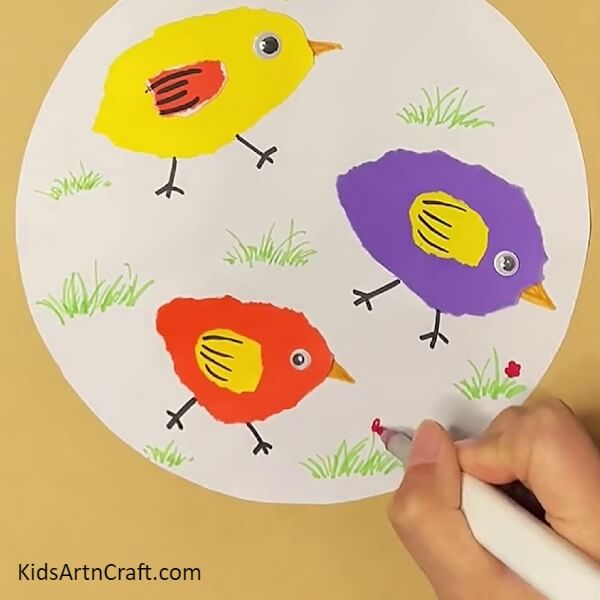
Using red, pink, and yellow sketch pens, make small flowers over the grass, randomly.
Step 10: Making Worms
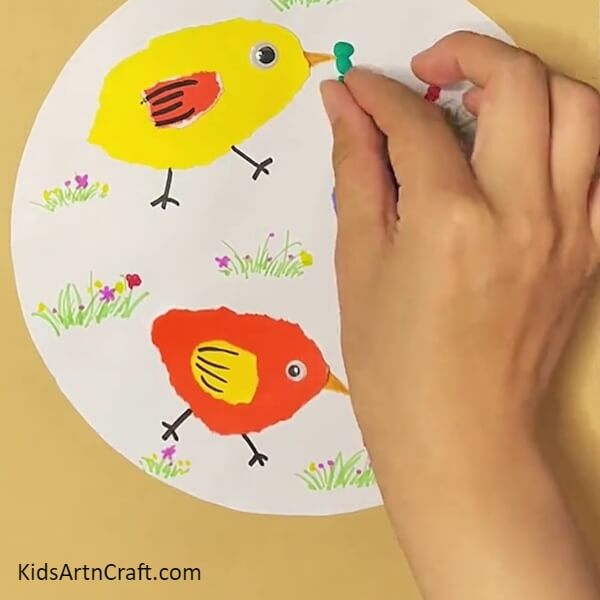
Using green clay, make tiny balls and arrange them in a wavy line ahead of the beaks and then press them to make them stick. This will form worms in the chick’s beaks to look like they are eating.
Your Paper Chicks Are Ready And Eating!
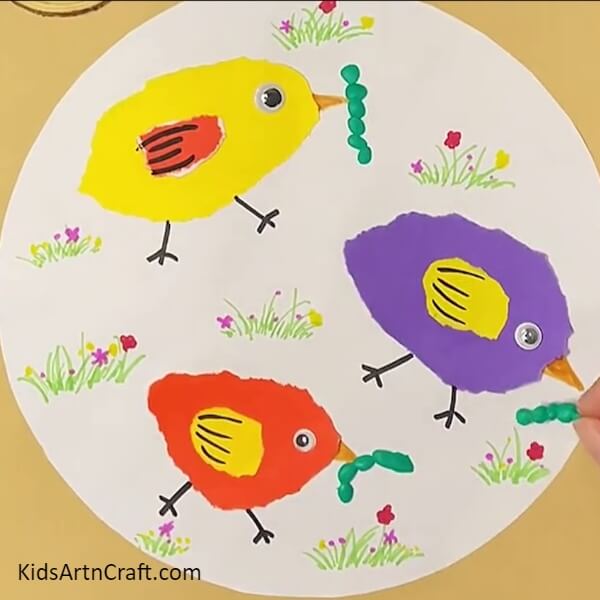
Voila! Your paper chick craft is ready to thrive!
Look at those realistic clay worms in their beaks! The paper tearing method gives the chicks an irregular texture which makes them look even more realistic with the googly eyes! You can also teach about chicks to your little ones through this project and they will surely be keen to learn about them too! Hang their creation over their bedroom wall to make them more confident about their creation and bring a smile to their faces!
Follow us on Youtube for art and craft tutorials and much more.
More Articles from Kids Art & Craft
- How To Make Cute Paper Fish Craft Tutorial
- Learn To Make Tree with Paper step by step Tutorial
- How To Make Paper Doll From Craft Paper
- Paper Crafts And Activities Video Tutorial for Kids
- How to Make Paper Umbrella Craft for Kids Tutorial


