


Paper Crafts
DIY Swallow Paper Craft For Kids – Step By Step Tutorial

Bring a summery feel to your home with this fun swallow paper craft! Learn how to make this easy DIY project with a simple step-by-step tutorial. Perfect for kids of all ages!
Are you looking for a fun and creative way to keep your kids entertained? Look no further! With this step-by-step tutorial, you can teach your kids how to make a DIY swallow paper craft. This craft is perfect for kids to learn how to use different materials, practice their fine motor skills, and create something unique and exciting. The project is easy to follow, and the results are sure to be beautiful. So grab some paper, glue, and scissors, and get ready to have some fun!
Easy To Make Swallow Paper Craft For Kids
Read More: Eye-Catching Rainbow Crafts & Activities for Kids
Material Used:
- Craft Papers
- Black Color Paper
- White Color Paper
- Red Color Paper
- Pencil
- Scissors
- Glue
- Googly eyes
Instructions:-
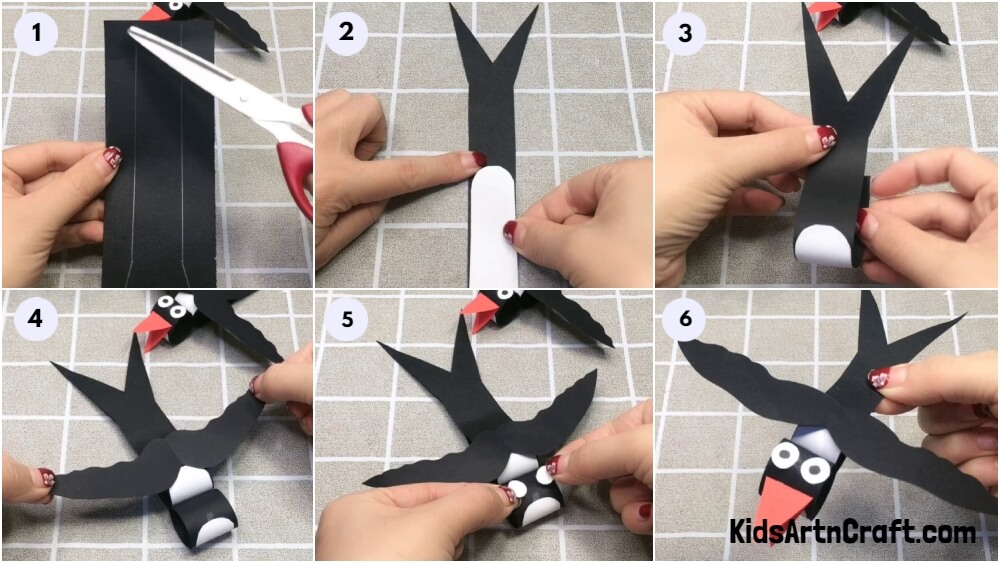
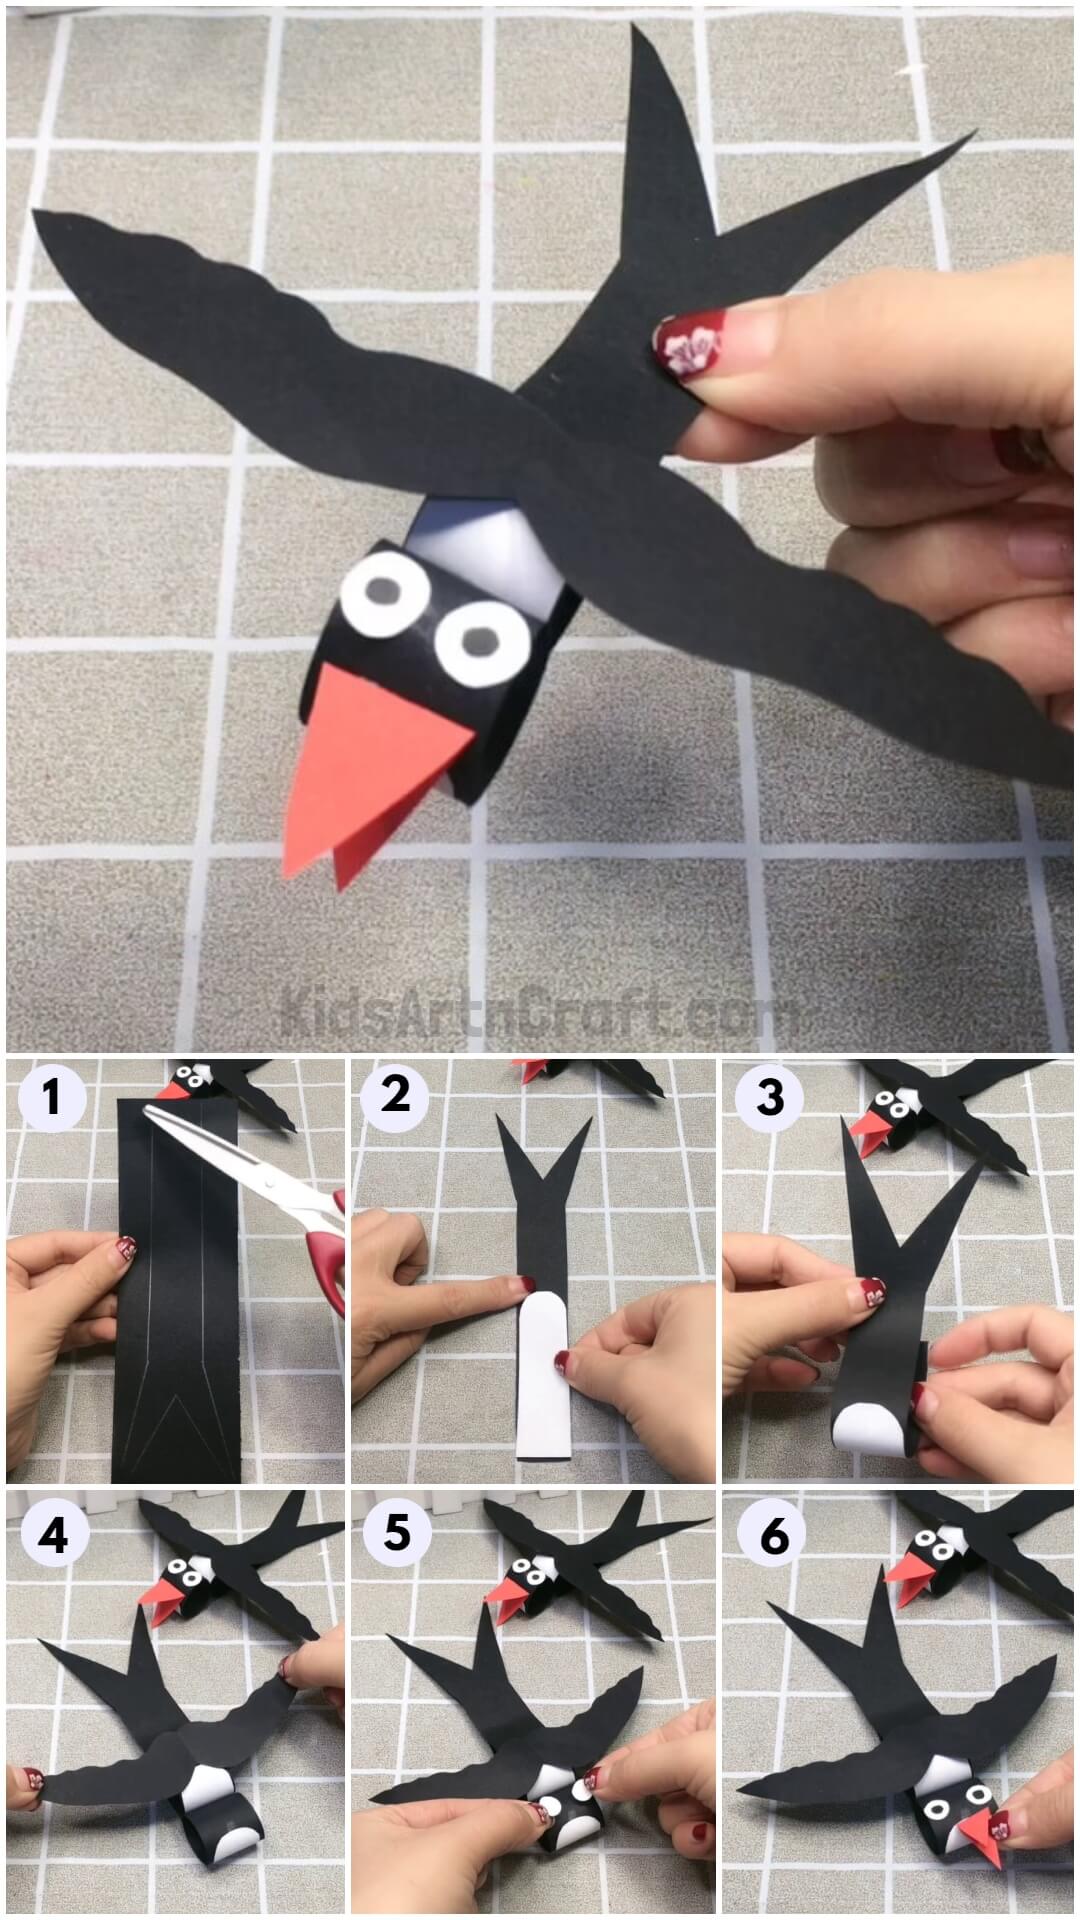
Step 1: Create the Sparrow’s Body From Black Color Craft Paper
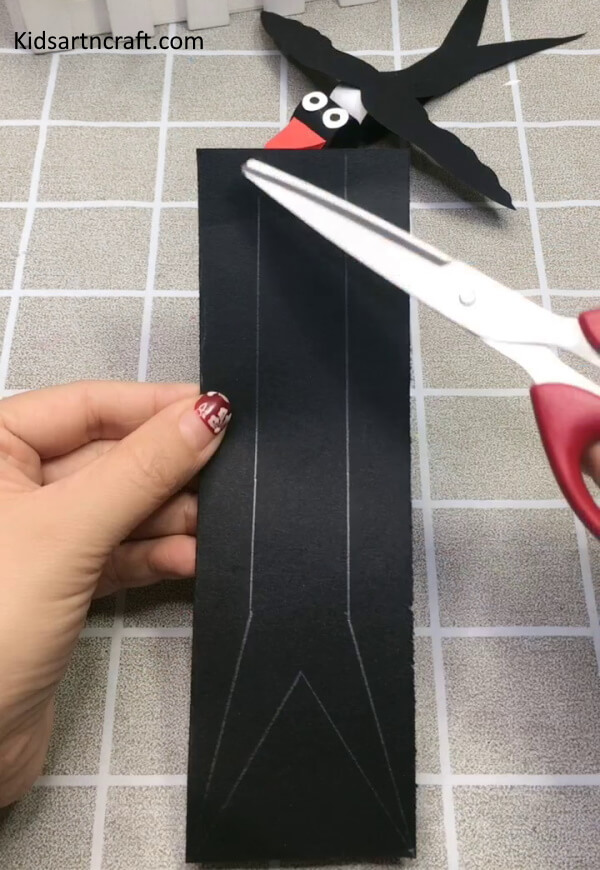
Let’s start making our sparrow by creating the body. Take the black craft paper and with the help of a pencil draw the outline of the sparrow’s body as shown in the image. Cut out the outline with the help of scissors.
Step 2: Create the Head Of The Sparrow
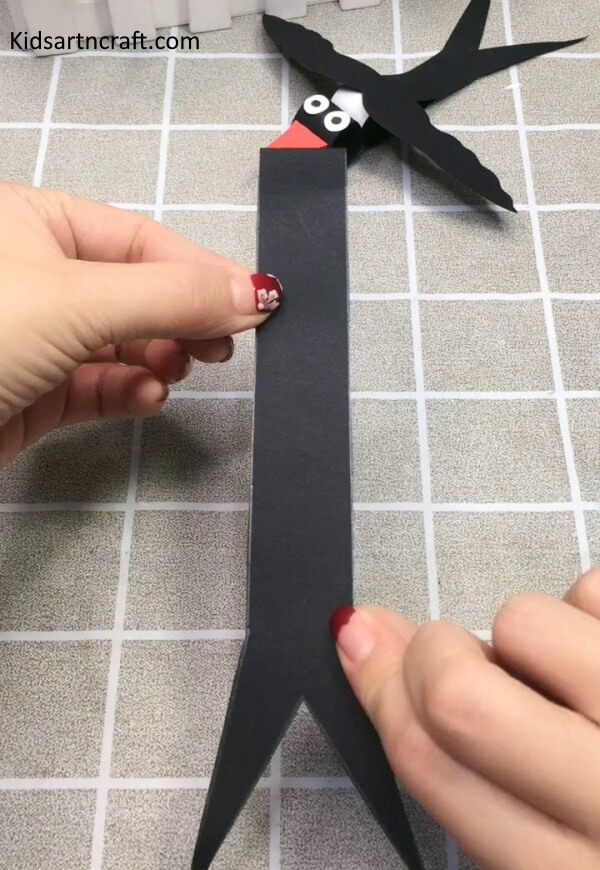
here, when you will cut out the outline you will get the shape of something like this. Now we will start by adding details in the body to make our sparrow.
Step 3: Create the Middle Part Of The Sparrow’s Body Using a White Sheet
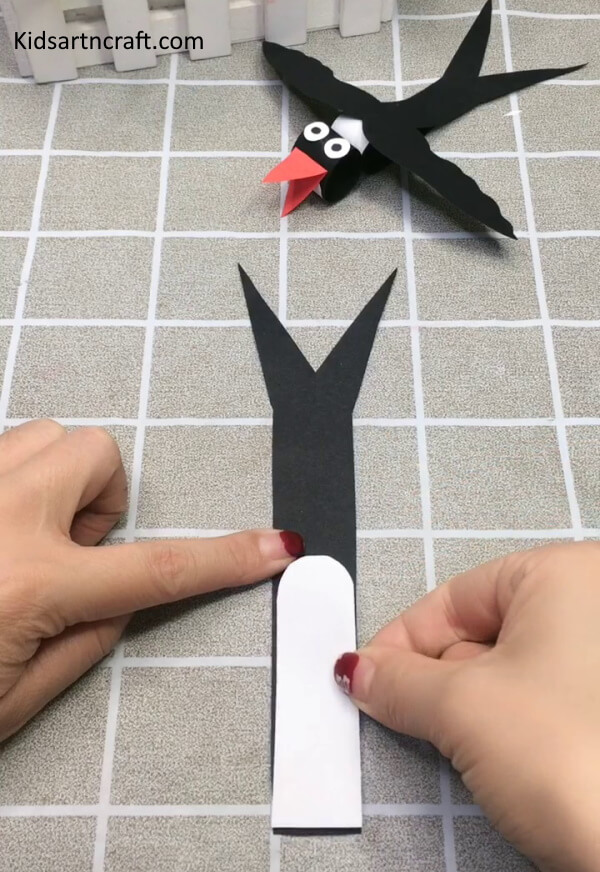
For this step, take the white sheet and cut out a rectangle half the length of the sparrow body. Cut one end of the rectangle in the circular form as shown in the image. Now hold the sparrow’s body with the tail side up, and with the help of glue stick the white rectangle we made by matching the end of the rectangle and the edge of the body.
Step 4: Creating a 3D Look
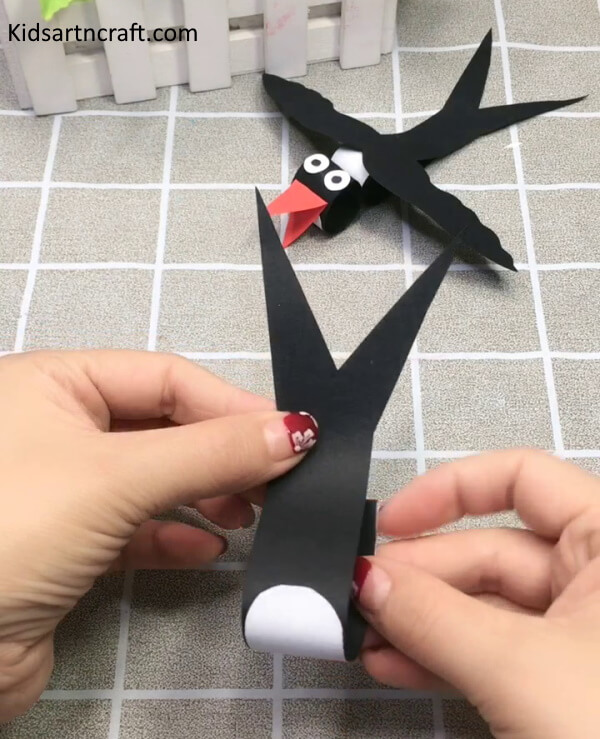
Now in this step. Fold the body from the head side inwards till it the half-length and stick it with the glue. Make sure not to crease or press it down as we need to make a hollow circular form.
Step 5: Creating the Heat Top of the Sparrow
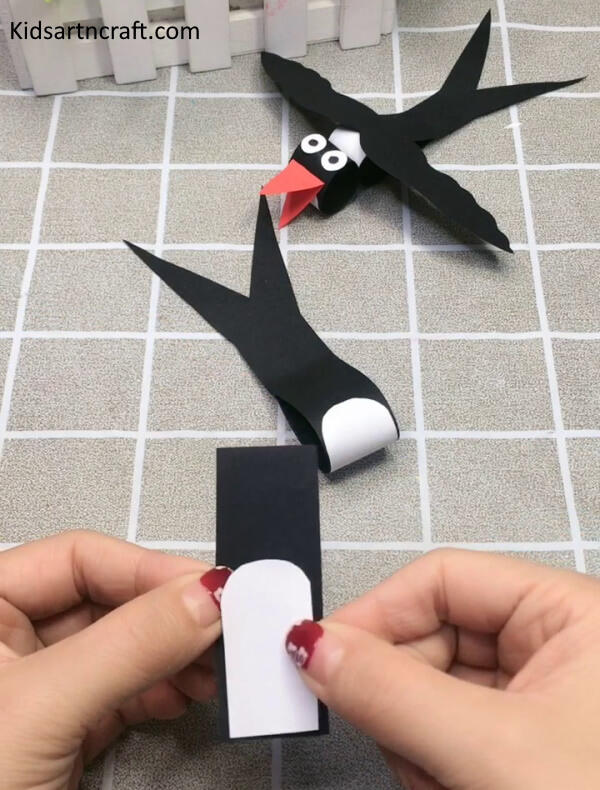
Now for making the head top, firstly cut out a rectangle from the black strip and then cut a white rectangle half the length of the black strip with one side circular. Glue both strips together with help of glue by sticky the white strip on top of the black strip.
Step 6: Giving Shape to The Head Top
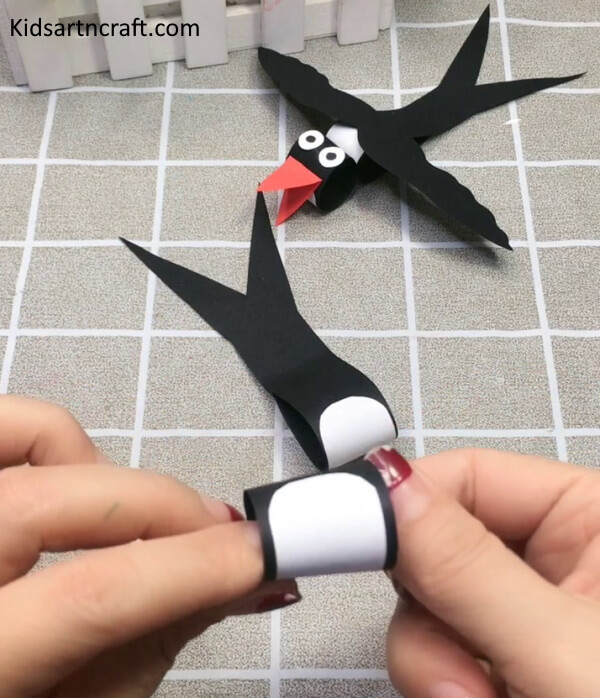
For this step, take the strip we made and with the help of figures roll it inward making a circular head. Adjust the size and secure it with the help of glue.
Step 7: Sticking The Head Top With The Body
Now stick the head top we made with the body aligning the circular portions and making sure the white strip part is facing the bottom face as shown in the image. Secure it with the help of glue.
Step 8: Creating The Wings For The Sparrow
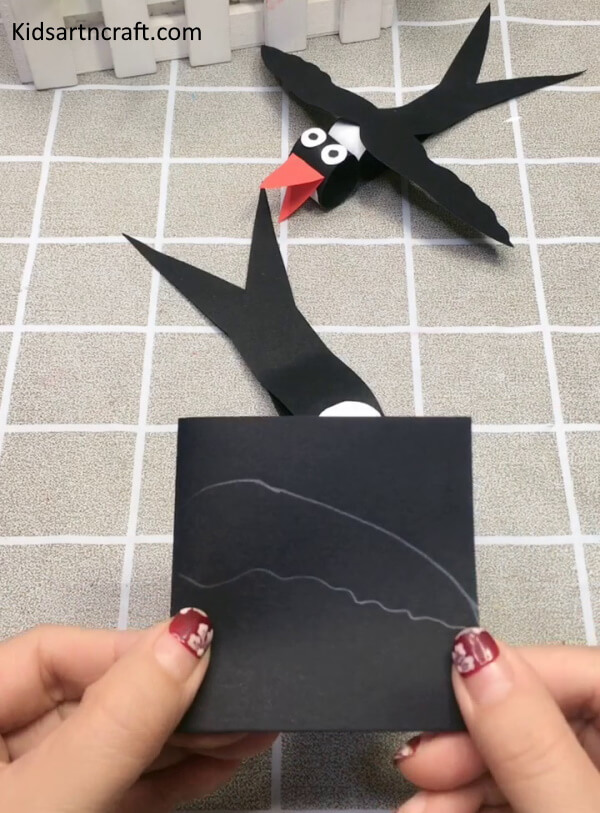
Now to make the wings, take a black sheet and fold it into a square. Make the wing sketch on the square, and when you cut it and open it, you get two wings out of it. Don’t cut the closed side of the square as the wings will not come out attached to each other.
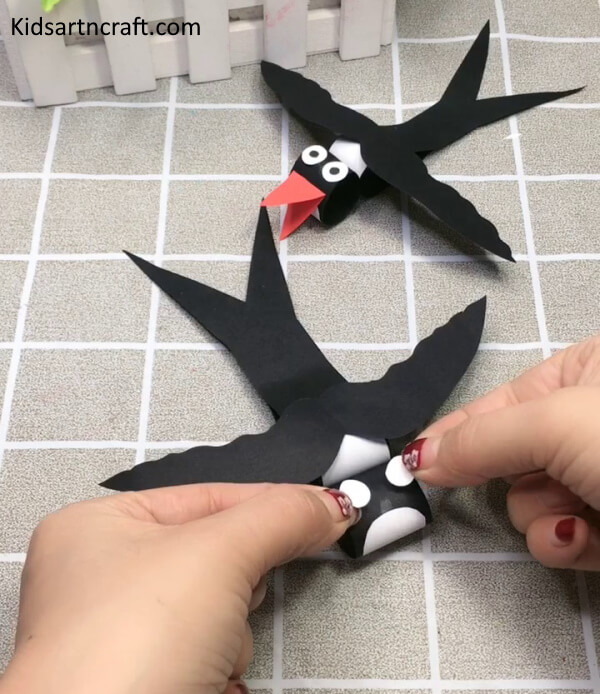
Step 9: Giving a Sparrow its Wings to Fly

You will get the wings something like this. Now Paste the wings on the top of the body with the help of glue making our sparrow fly!
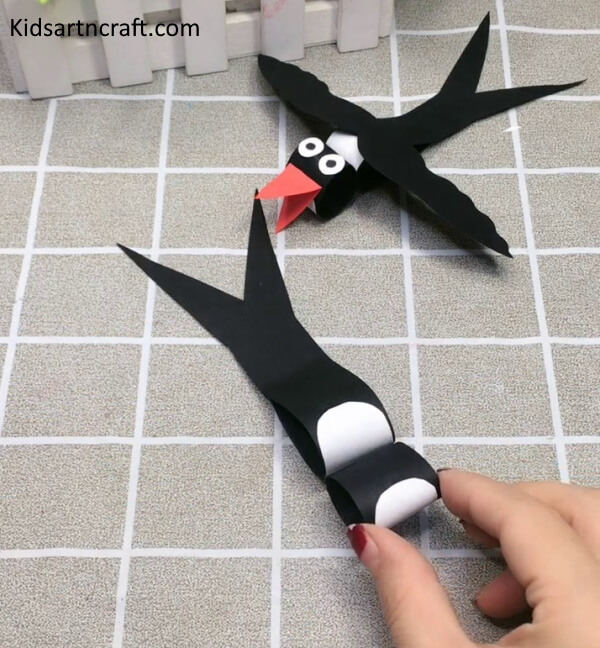
Step 10: Adding the Details To The Sparrow-The Eyes
Now for the yes first cut small circles out of the white sheet and paste them on the black part of the head top with the help of glue. Now when you paste the white circles, cut two small circles, from the black sheet smaller than the white circles to make the eyeballs and paste it in the center of the white circles you pasted before.
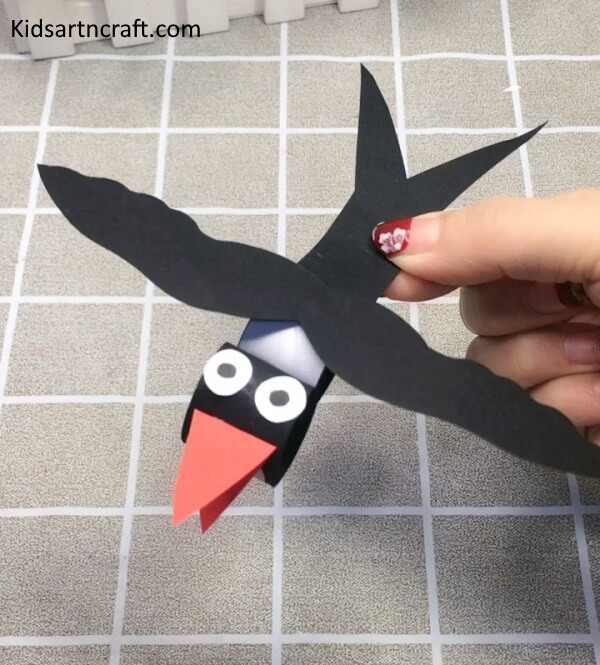
Step 11: Creating the Beak of the Sparrow
After adding the eyes your sparrow will look something like this. Now let’s add a beak to our sparrow. For this, take a rectangular strip cut out from red color craft paper and fold it in half. Now as we make the wings, in the same way, make a triangle shape on the folded strip with the tip of the triangle towards the open edge of the strip and cut it out . When you open the strip you will get two triangles attached to each other as shown in the image. With the help of glue strip the beak on the front side of the head top.
Remember not to cut the closed end of the strip!
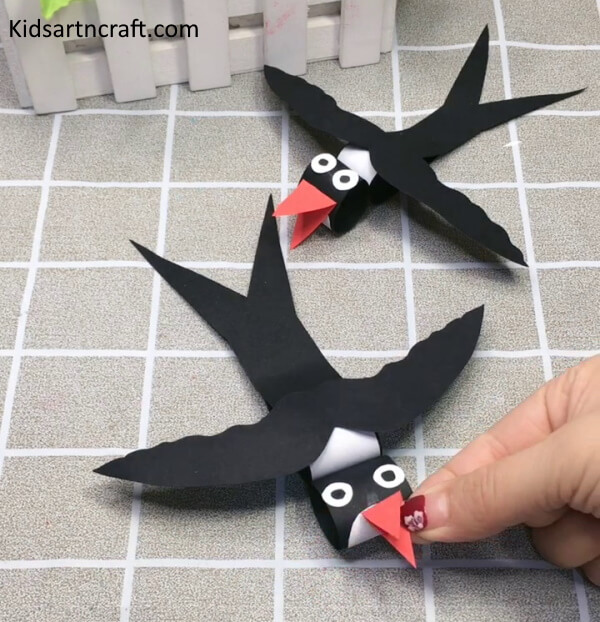
Final Step: DIY Paper Sparrow Craft For Kids: A Step-by-Step Guide
Voila! Your paper sparrow is now complete and ready to take flight. With just a few simple materials and steps, you can create a beautiful and playful addition to your craft collection. Whether you’re a beginner or a seasoned crafter, this project is sure to delight you. We encourage you to get creative and experiment with different colors and shapes to make your paper sparrow unique.
FAQs Related To DIY Swallow Paper Craft For Kids
1. What materials do I need to make a paper swallow craft?
You will need a piece of colored paper, scissors, glue, a ruler, a pen, and a black marker.
2. What is the best paper to use for this craft?
Cardstock or construction paper would be the best choice for this craft.
3. How long does it take to make a paper swallow?
Depending on the skill level of the crafter, it should take about 30 minutes to make one paper swallow.
4. Are there any special tools needed for this craft?
No special tools are needed, however, a craft knife or cutting mat may be useful for cutting.
5. What age is this craft appropriate for?
This craft is appropriate for children ages 5 and up with parental supervision.
This DIY Swallow Paper Craft For Kids Step By-Step Tutorial is a great way to get your kid’s creative juices flowing. With a few simple supplies and a bit of patience, you can have a beautiful paper craft in no time!
Follow us on Youtube for art and craft tutorials and much more.
More Articles from Kids Art & Craft
- World Parrot Day Coloring Pages For Kids – Free Printables
- Poppy Coloring Pages For Kids – Free Printables
- Lion Drawing & Sketches for Kids
- Crumpled Paper Animal Crafts for Kids
- Meditation Coloring Pages For Kids – Free Printables


