


Drawing
Easy Hand Outline Tree Making Drawing For Kids

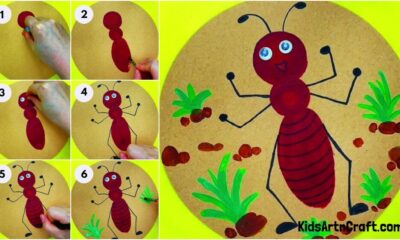
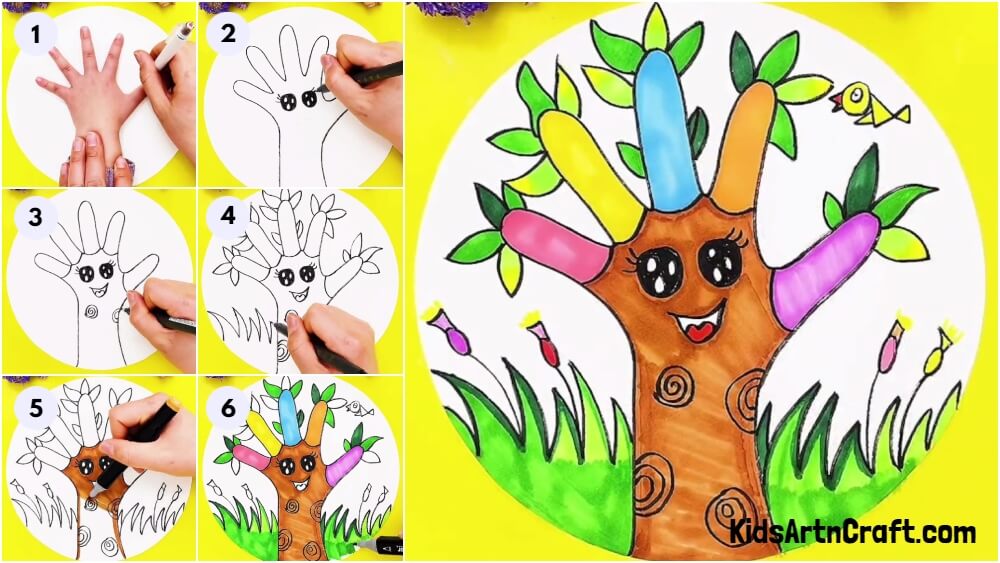
This tutorial is simple and easy to follow, so kids can learn how to make a hand-outline tree drawing. It includes step-by-step directions and helpful pictures to help children create a beautiful tree drawing quickly!
Hello everyone! Welcome! In this tutorial, we going to learn how to draw an easy-hand outline tree drawing. Kids always love to play with sketch pens, this is also a colorful craft using different colored sketch pens, which is perfect for your kids. Let’s start!
Easy Hand Outline Tree Making Drawing For Kids
Read More: Pretty Poppy Flower Garden Painting Art For Kids
Materials Required
- White sheet
- Pencil
- Sketch pens (Black, Yellow, Dark& light green, Orange, Violet, Blue, Brown, Red& Pink)
Procedure
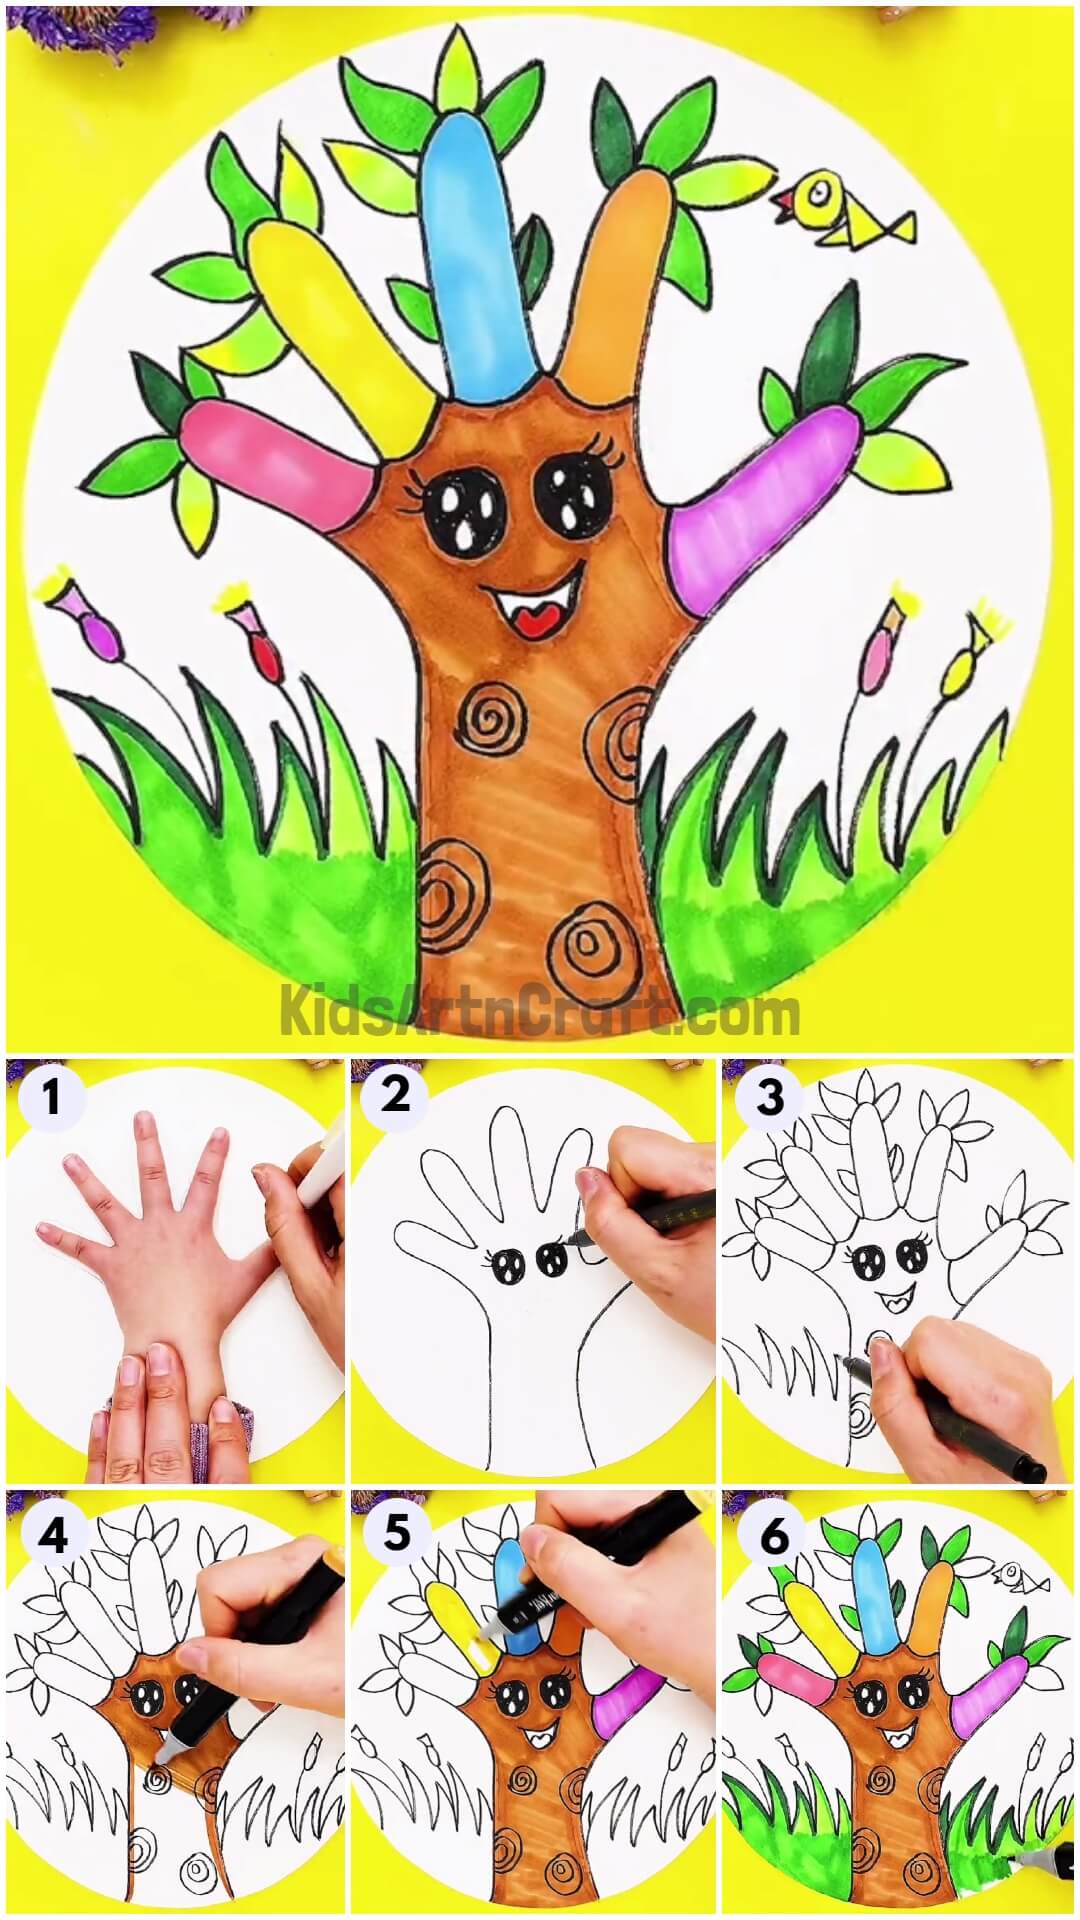
Step 1: Drawing Tree Outline Using A Pencil
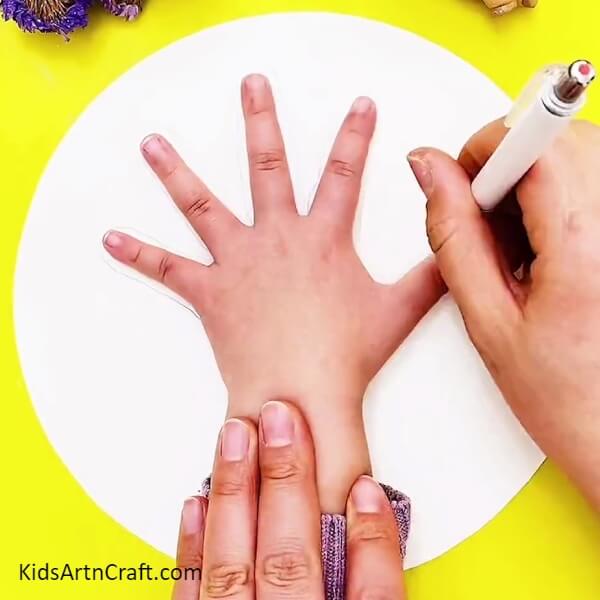
Put your white sheet on the table and place your kid’s small hand on a white sheet, then draw the outline of the hand till below the wrist with the use of a pencil. Then, highlight your hand outline using a black pen.
Step 2: Drawing Eyes For A Tree With The Use Of A Black Pen
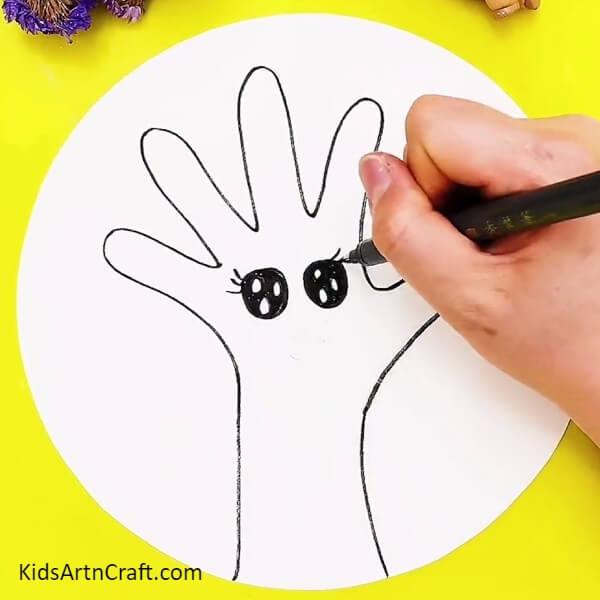
Fingers are the branches, draw 2 big circles under the branches and 3 small circles in that big circle, color those 2 big circles with black pen except for those 3 circles as shown in the image. Then draw 3 curvy lines above that 2 big circles to create eyelashes.
Step 3: Drawing Tree Mouth Using A Black Pen
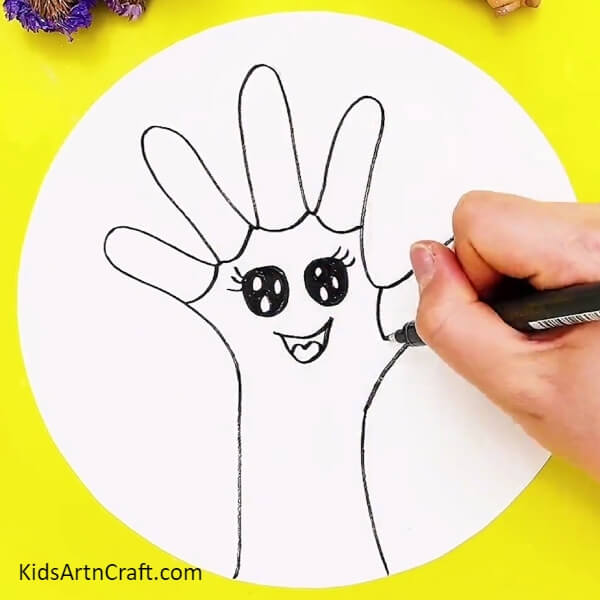
Draw a cute smiling mouth with a visible tongue under tree eyes using the black pen as shown. Under each branch draw a curvy line to differentiate the tree and its branches.
Step 4: Drawing Spirals On The Tree With A Black Pen
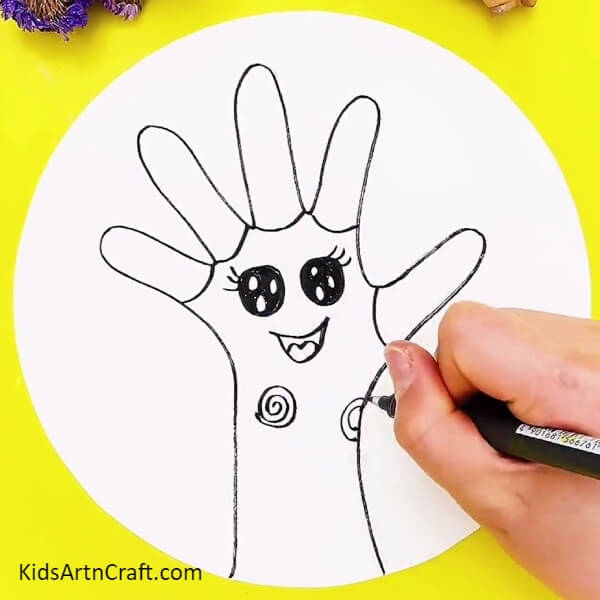
Draw some spirals randomly on the tree area using a black pen to highlight your tree.
Step 5: Drawing Leaves And Grass
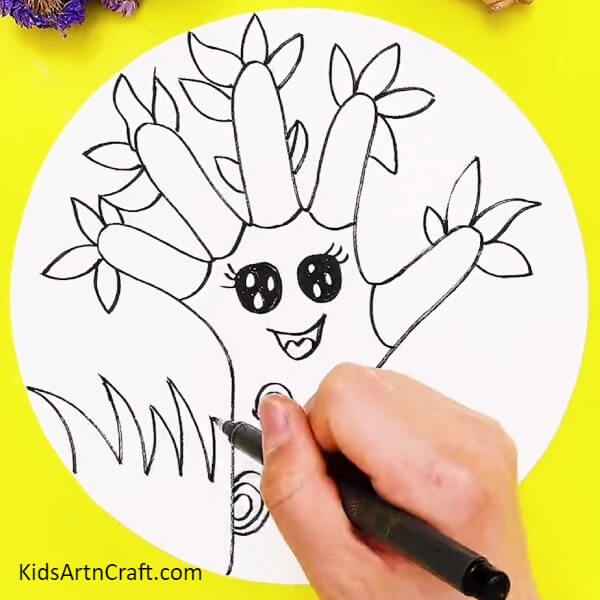
Draw 3 or more leaves on each and every branch. Draw curved grasses on the left and right sides of your tree.
Step 6: Drawing Flowers And A Small Bird
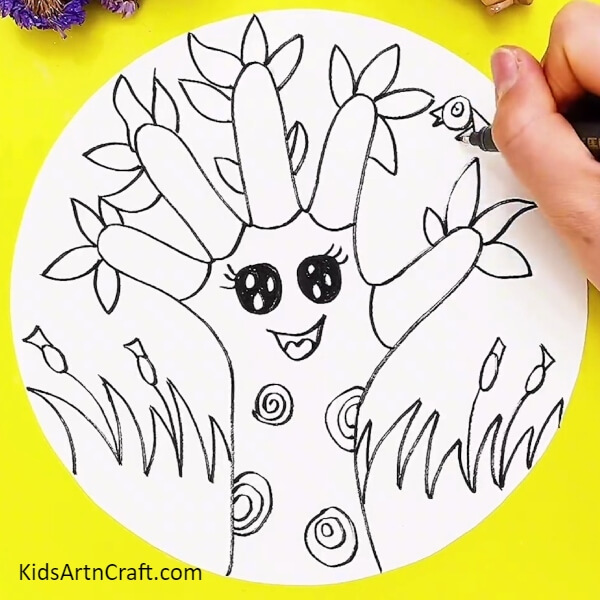
After drawing grass, draw 2 flowers in between grass on both sides and as shown in the image, draw one cute little bird at the top right side of the white sheet or where you have a gap.
Step 7: Coloring Our Tree With A Brown Color Sketch Pen
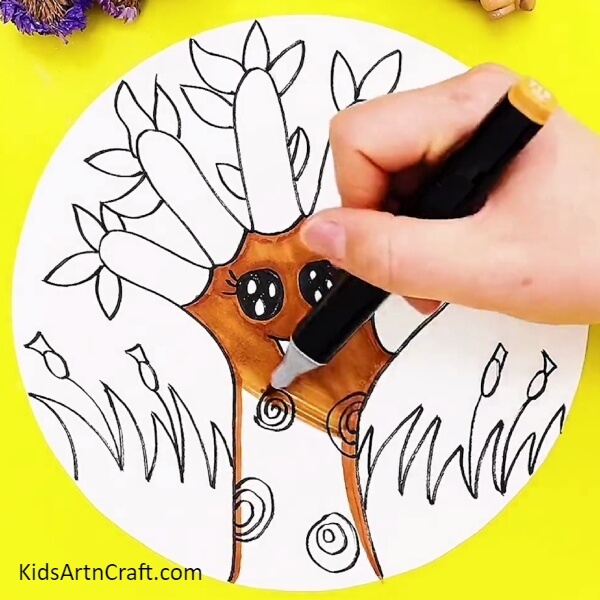
With the use of a brown sketch pen, color the wood area of your tree, except the mouth and eyes.
Step 8: Coloring Tree Branches Using Different Color Sketch Pens
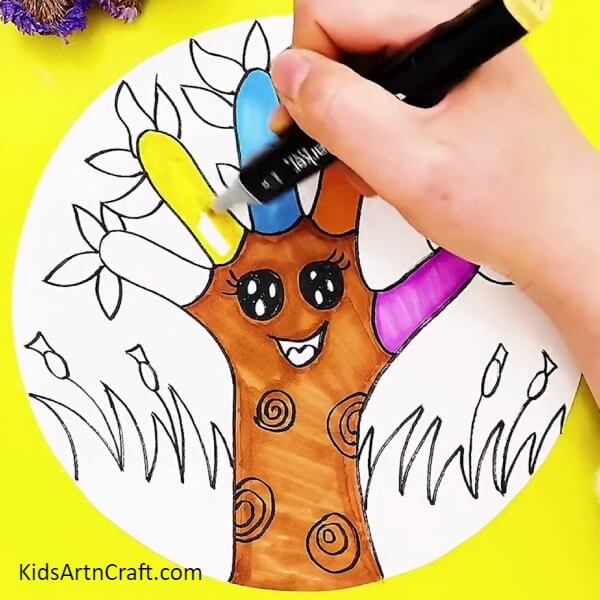
Use multiple colors for your tree branches, color the first branch with pink color, the second with yellow, the third with blue, the fourth with orange, and violet for the fifth branch.
Step 9: Coloring Tree Leaves And Grass
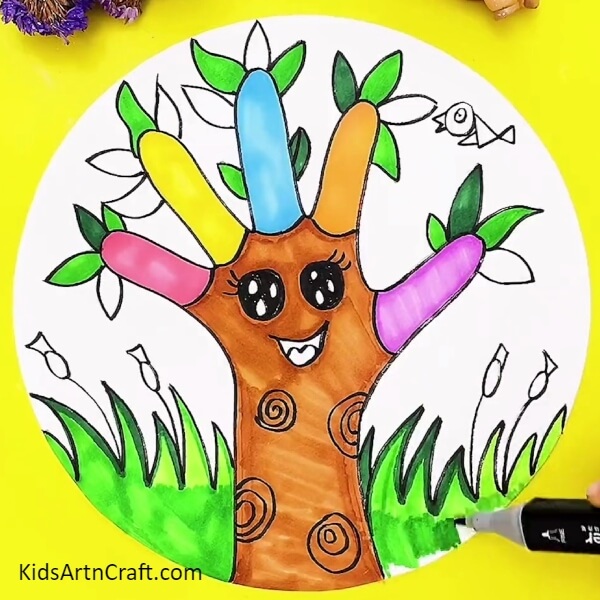
Color grasses with light green and highlight the border with dark green. Color some leaves with light green, some leaves with light green, and yellow for some leaves.
Finally, Finishing This Drawing By Coloring Flowers
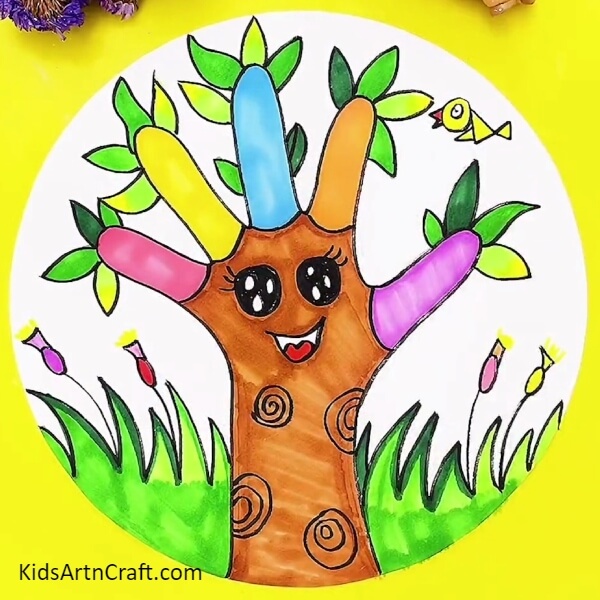
Color your cute little bird with yellow color and use red color for its peak. Now for flowers, use violet and red color for flowers on the left side, then use pink and yellow colors for the flowers on the right side. Draw small yellow lines at the top of each flower to create pollen.
We hope you found this step-by-step tutorial useful and share your thoughts in the comment box below. If you are looking for more easy arts and crafts, do visit our website.
Thank you for visiting our website!
Follow us on Youtube for art and craft tutorials and much more.
More Articles from Kids Art & Craft
- Easy House Tree Scenery Step-by-Step Drawing
- Easy Step-by-Step Drawing Ideas for Kids
- Mushroom Drawing Step-by-Step Tutorial For Kids
- Cute Butterfly Drawing Step-by-Step Tutorial for Kids
- Landscape Drawing Step-by-Step Tutorial for Kids