Fall & Autumn
Happy Spiders Leaf Artwork Tutorial For Kids

DIY Happy Spiders Leaf Artwork Craft
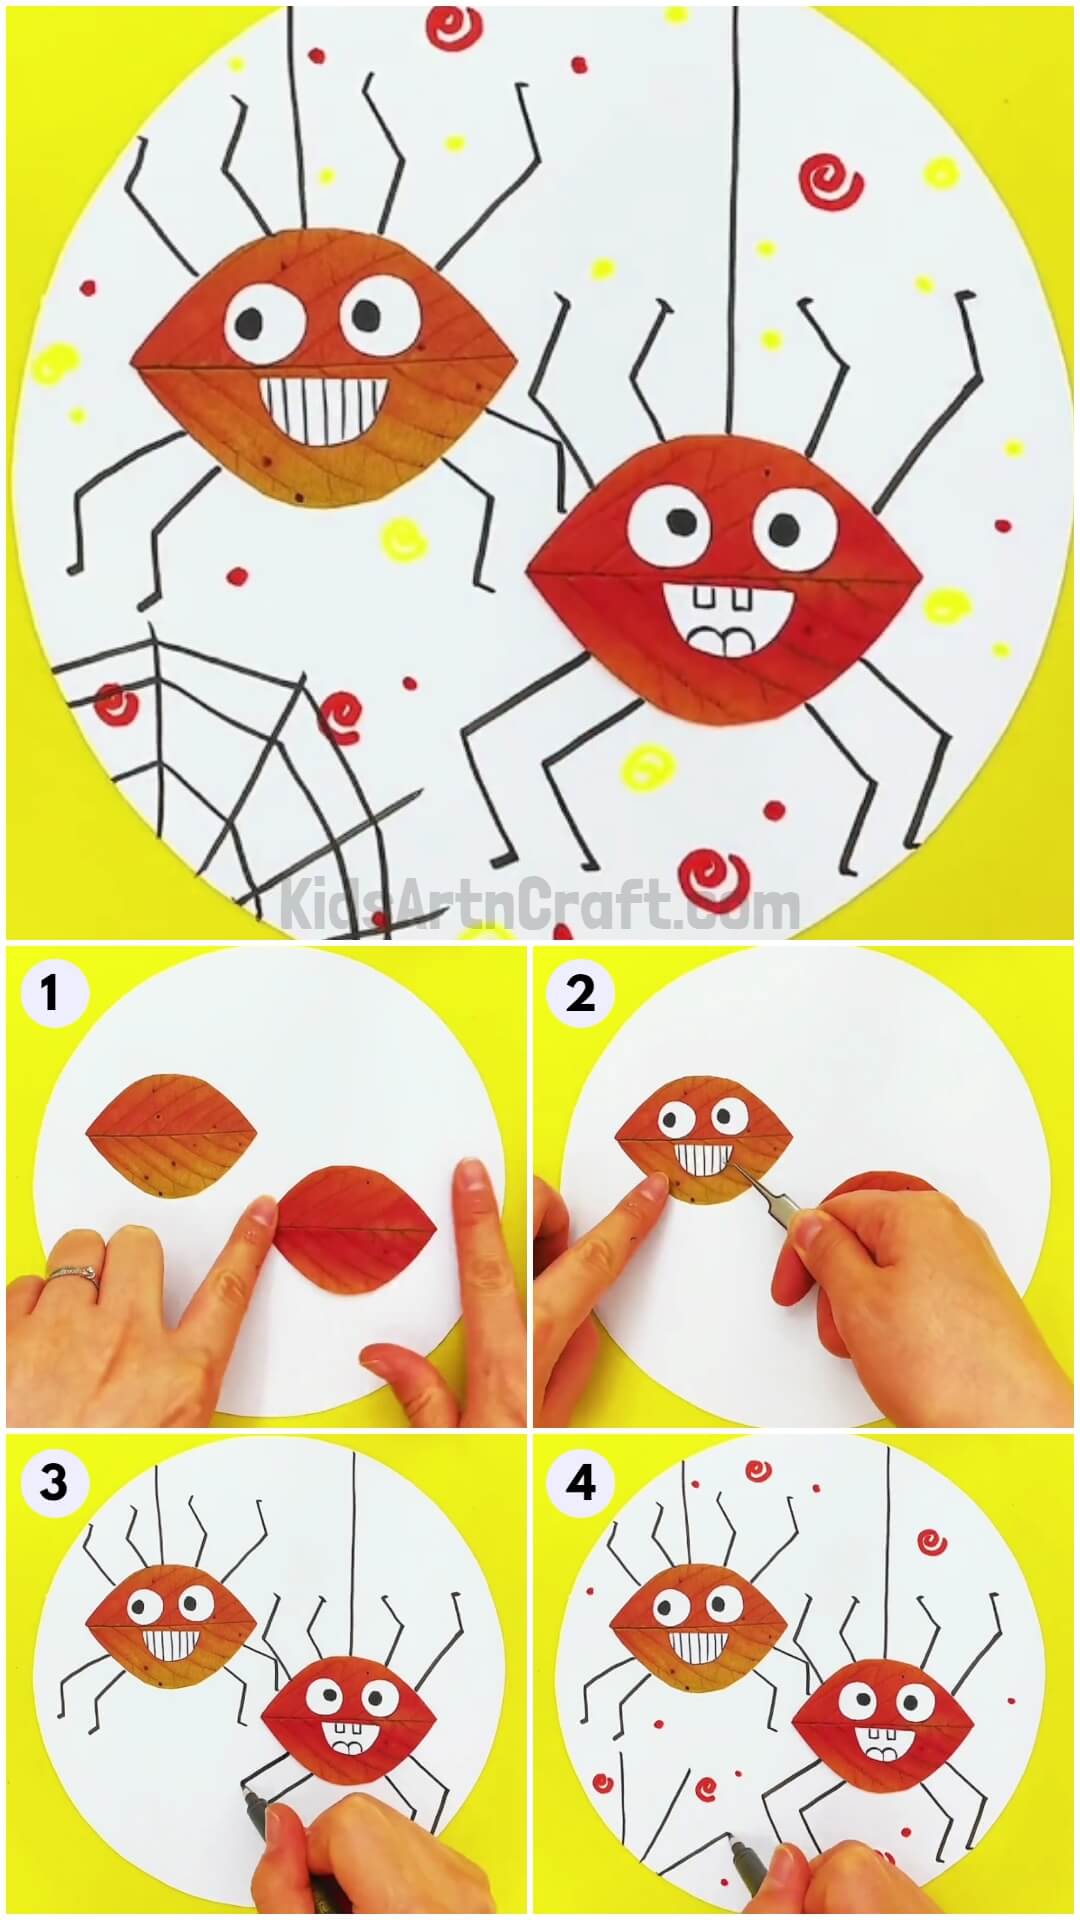
Materials Required
- A White Circular Sheet
- Fall Leaves
- Glue
- Craft Tweezers
- Black Marker
- A Pair Of Scissors
- Sketch Pens (Yellow And Red)
Procedure
Step 1: Making Bodies Of The Spiders
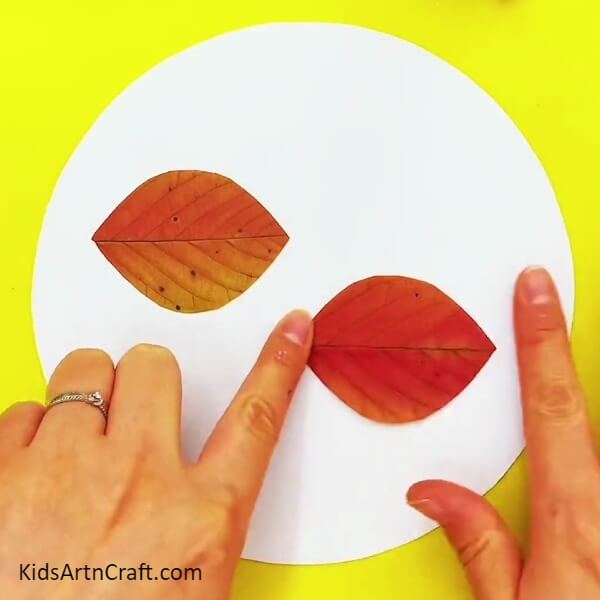
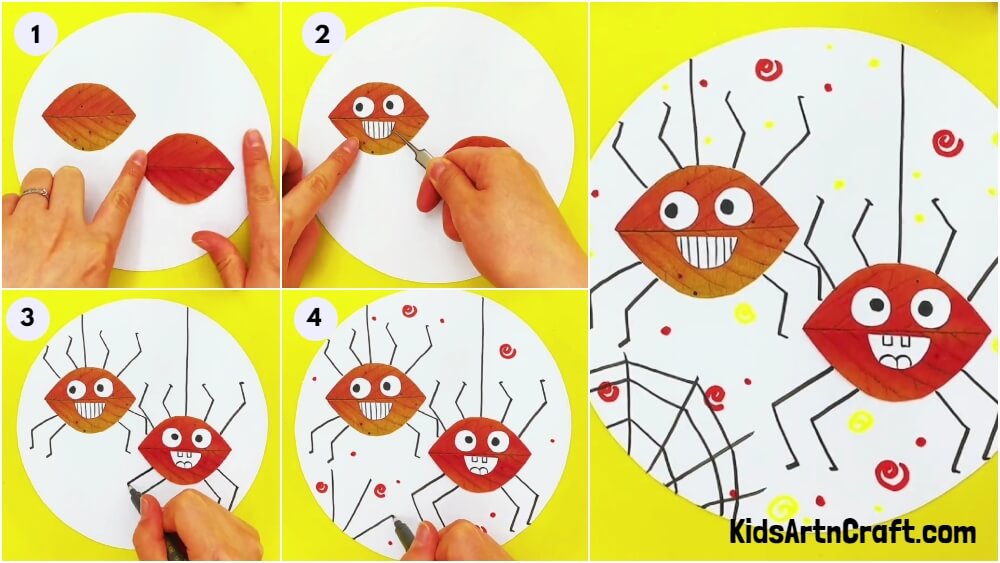
Begin this craft by taking a white circular paper sheet as the base and 2 fall leaves for their bodies. Paste these leaves over the base using glue horizontally as shown in the image.
Step 2: Pasting Eyes Of The Spider
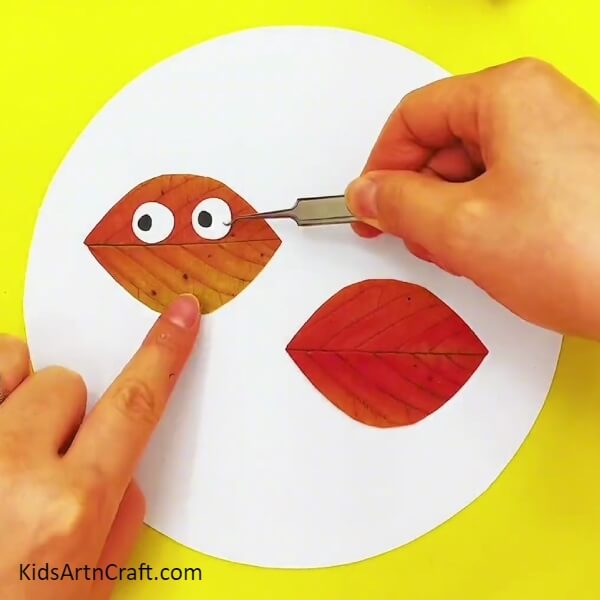
For the eyes, cut two small circles from the white sheet by using a pair of scissors. Carefully paste them on the spider’s body by using craft tweezers as shown in the picture. Draw eyeballs on them using the black marker.
Step 3: Making Mouth Of The First Spider
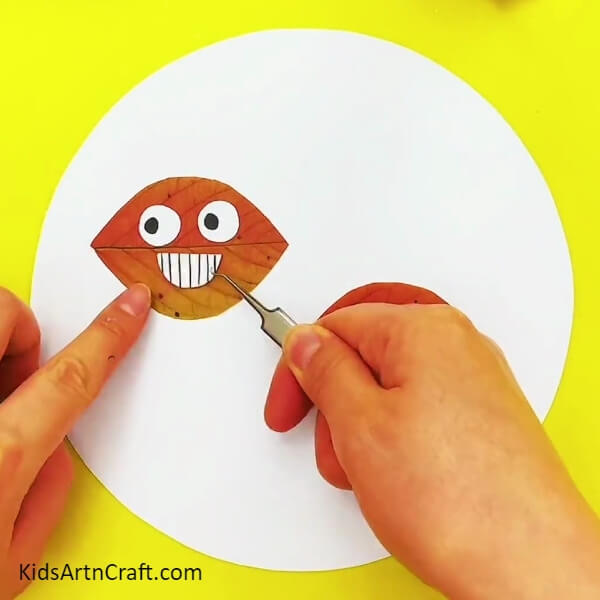
For the mouth, cut a semi-circle shape from the white sheet. Paste it on the spider’s body, and hold the piece of paper with the tweezers for accuracy. By using the black marker, draw the lines for the teeth of the spider.
Step 4: Drawing Legs Of The First Spider
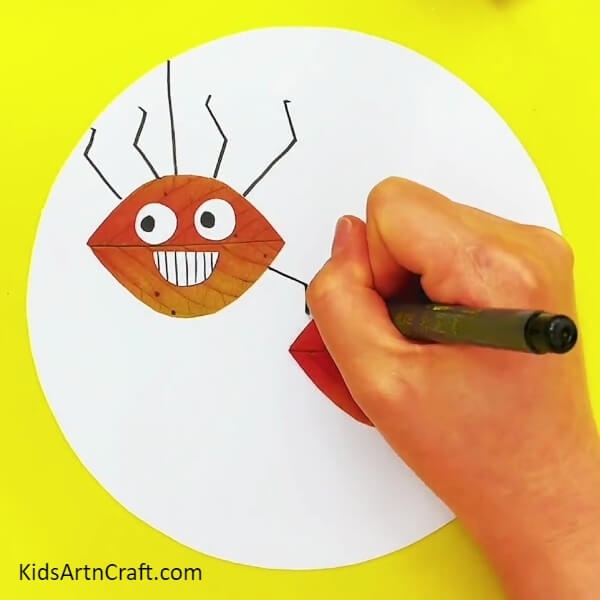
Draw the legs of the spider by using the black marker as shown in the picture and make them look hanging on the web by drawing a line from their top to the base top.
Step 5: Making Eyes Of The Other Spider
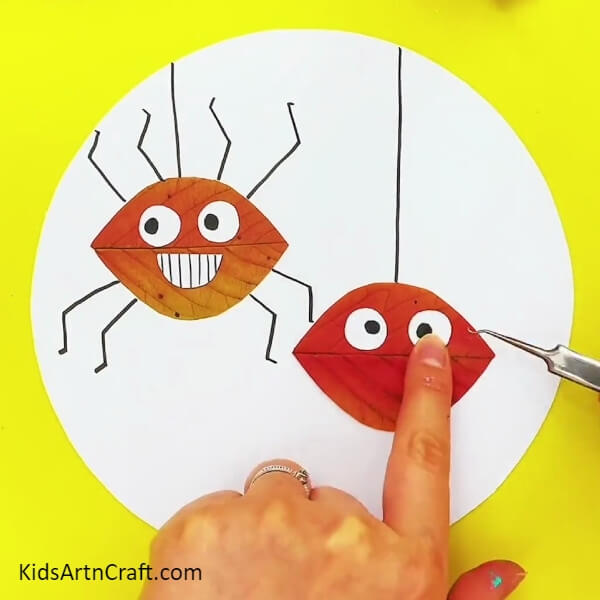
In the same way as before, make eyes of the other spider.
Step 6: Making Mouth Of The Other Spider
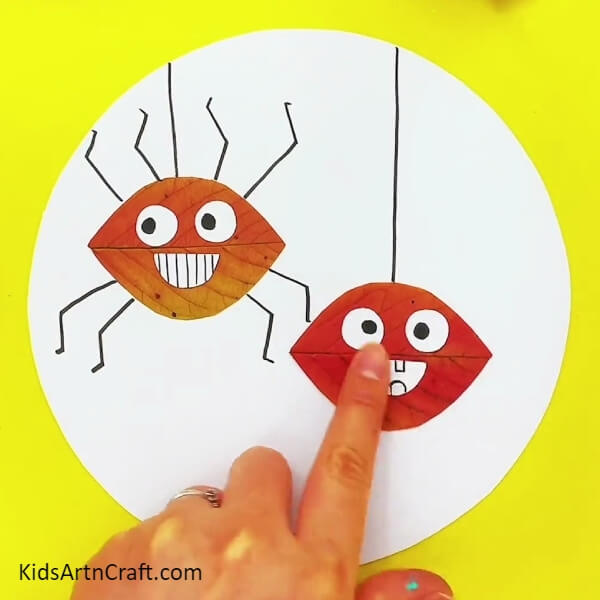
In the same way, cut out the semi-circled mouth and paste it over the other spider. This time make 2 rectangular teeth at the top and curvy teeth at the bottom of the mouth using a black marker.
Step 7: Drawing Legs Of The Second Spider
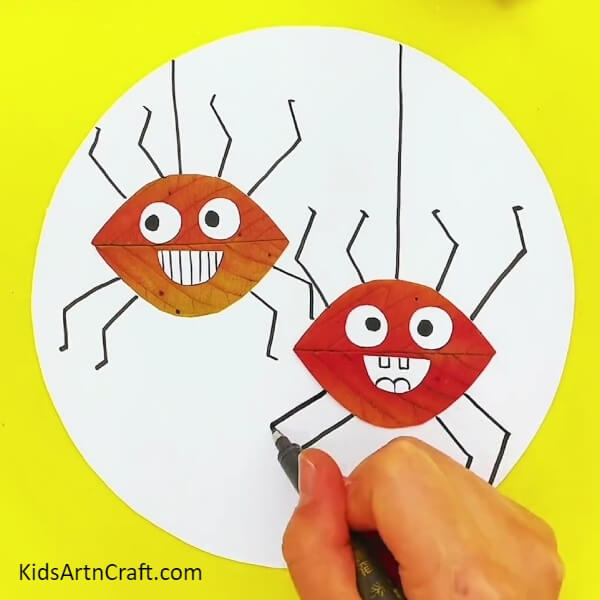
Draw the legs of the second spider by using the black marker as shown in the picture.
Step 8: Detailing Background Of The Artwork
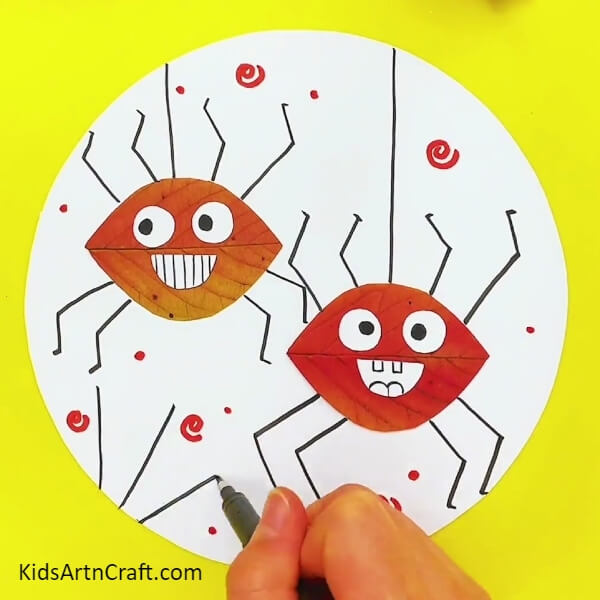
Using a red sketch pen, draw some spirals and dots randomly over the white base, and using the black marker, start to make 3 lines for a web at the bottom left corner of the base.
Step 9: Adding Some More Details
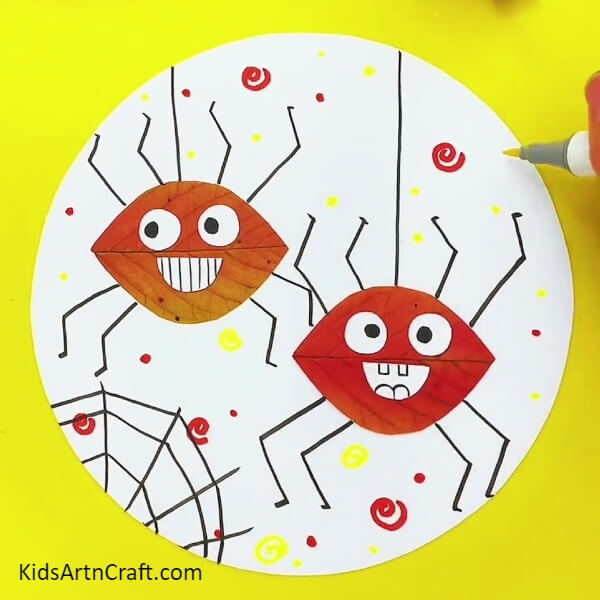
By using the yellow sketch pen, draw some more spirals and dots in the background and complete the web as shown in the image.
Your Cute Spiders Are Ready!
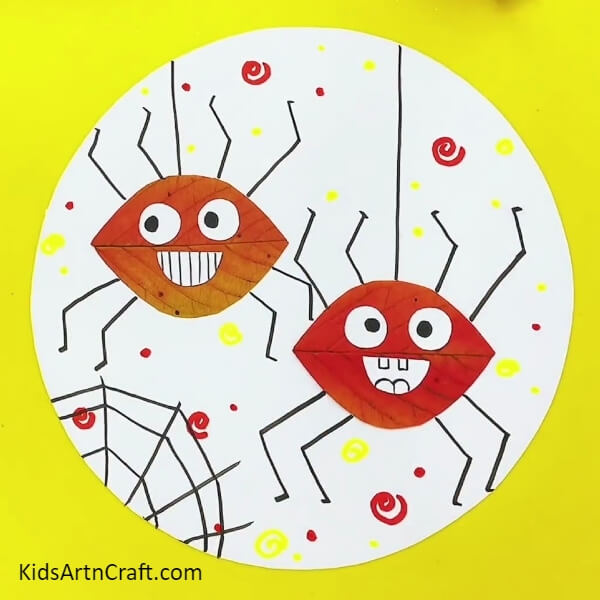
Congratulations! You have successfully completed your spider artwork craft!
This is an artwork that is made by using leaves. There are only two spiders in this artwork but if wanted more spiders of different sizes and colors could be added by adding different kinds of leaves. The spiders look more visually appealing when some webs and patterns are added. One may add some different patterns by using different colored marker pens. This art has taught children how they can use unwanted items, such as leaves to make creative artwork.
Hope that this tutorial has invoked your creativity and you are up to making more such artworks by using leaves! Let us know in the comment section about your experience.
Thanks for visiting our website.
Follow us on Youtube for art and craft tutorials and much more.
More Articles from Kids Art & Craft
- Handmade Fall Leaves Bird Craft Step-by-step Tutorial For Kids
- Easy To Make Fall Leaves Bird Craft Step-by-step Tutorial For Kids
- DIY Leaf Fish Underwater Scenery Craft Tutorial For Kids
- Easy Leaf Insect Craft Tutorial For Kids
- Giraffe and Bird Leaf Craft Tutorial For Kids


