Paper Crafts
How Do You Make A Beautiful Bouquet Craft With Paper?

Create a unique, personalised bouquet with paper! Learn tips and tricks for folding, cutting and gluing paper to make a stunning bouquet for a special someone. Perfect for birthdays, anniversaries and other special occasions.
Creating a special bouquet with paper is a unique and creative way to express your feelings and show someone you care. With a few simple supplies, you can make a special, handmade bouquet that will be treasured for years to come. Whether you’re making a bouquet for a special occasion or just for fun, this article will provide you with all the tips and tricks you need to make an extraordinary paper bouquet.
Fun To Make A Beautiful Bouquet With Paper For Kids
Read More: Super Simple Pine Cone Crafts For Kids
Material Used:
- Crafting Papers
- Glue
Instructions: –
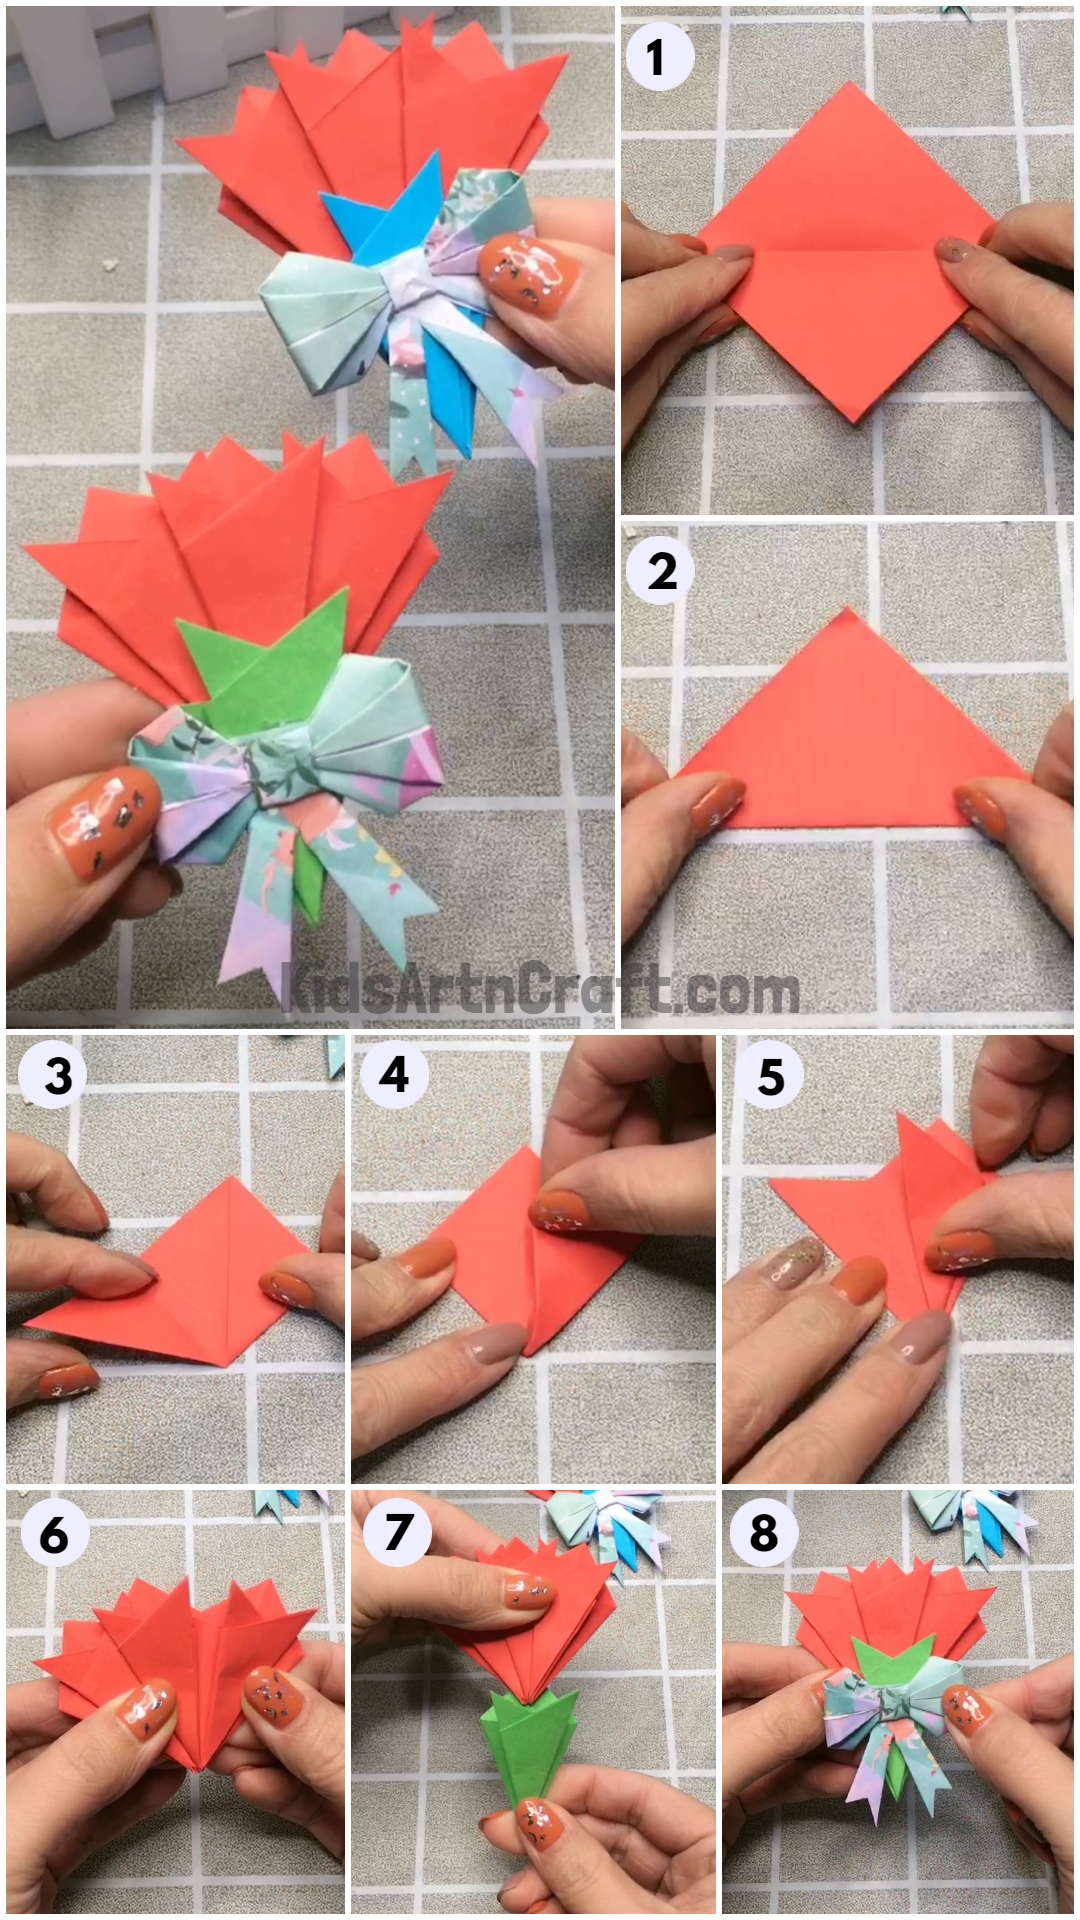
Step 1: Folding The Red Craft Paper In Two Halves
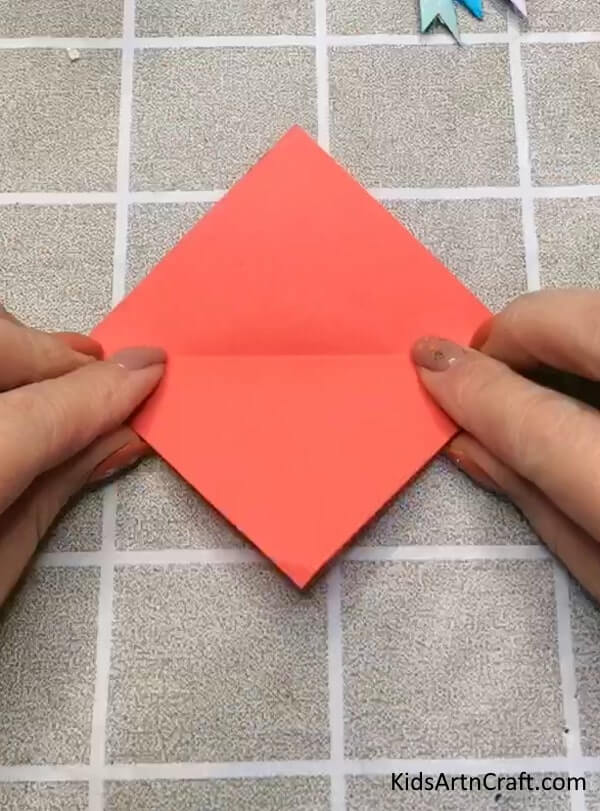
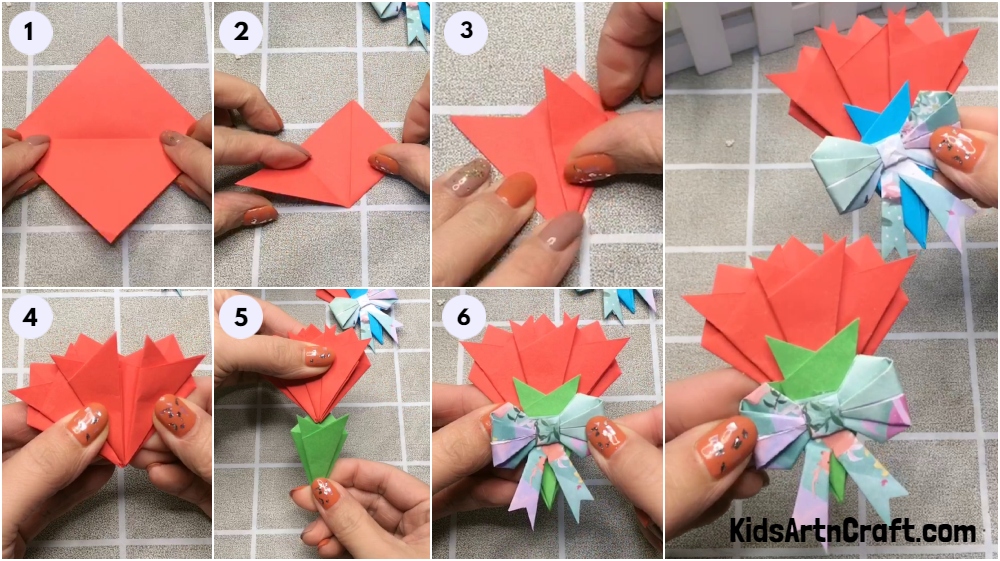
Take a red craft paper of 15X15 cm and fold the paper diagonally by touching the bottom part with the top part and creasing it well so as to get a horizontal line in the middle.
Step 2: Making The Triangle From The Red Craft Paper
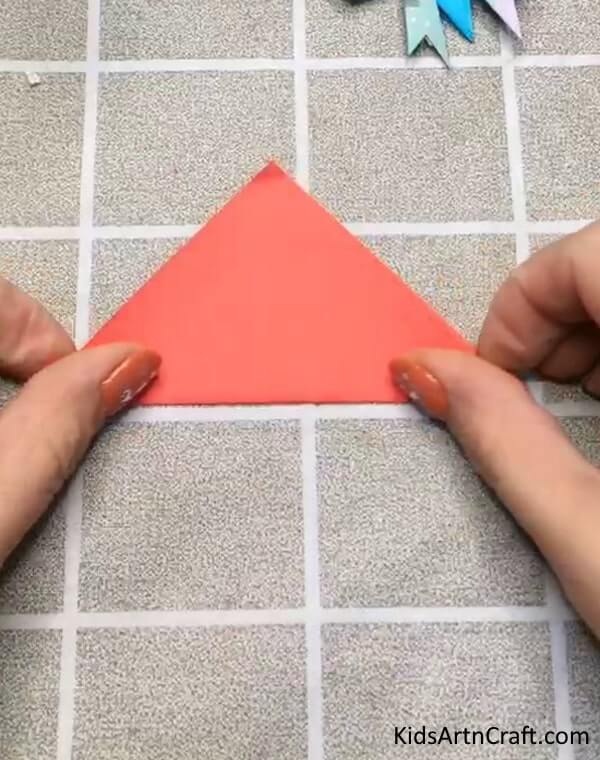
Fold the paper diagonally in half so as to form a triangle. Fold the triangle again by grabbing the right side and folding it upwards touching the tip of the triangle and creasing it.
Step 3: Folding The Right Side Of The Triangle
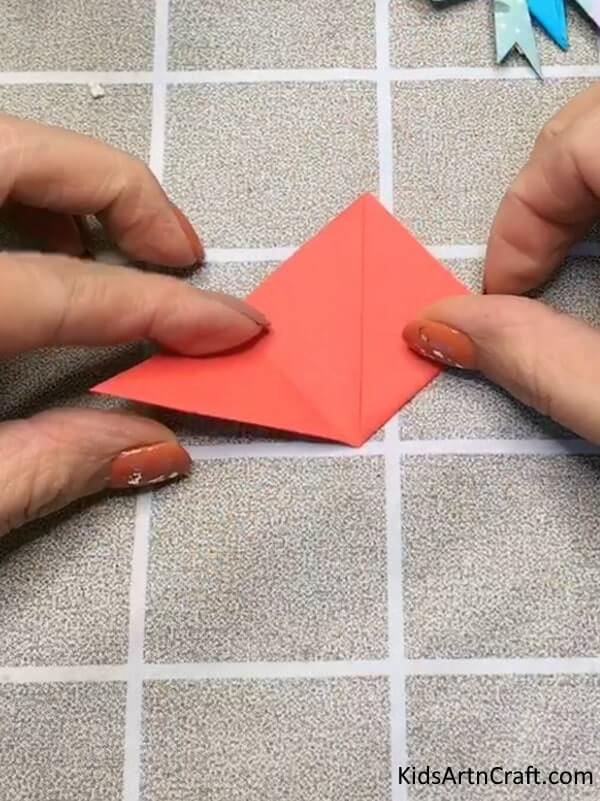
Now as we did for the right side. Grab the left side corner and fold it upwards to the tip of the triangle and crease it.
Step 4: Folding The Left Side Of The Triangle And Matching it With The Right Side
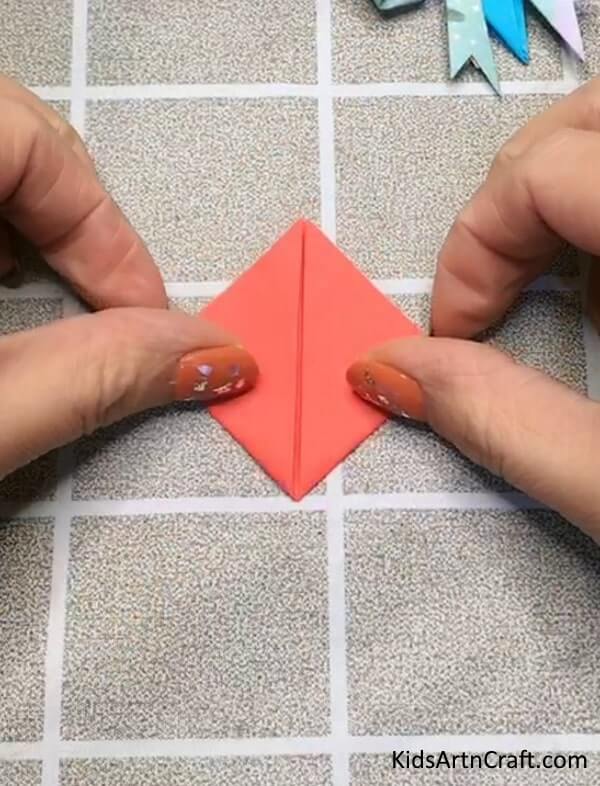
Now make sure both sides are touching each other at the center and crease the corners well.
Step 5: Folding The Right Corner Till Half Way
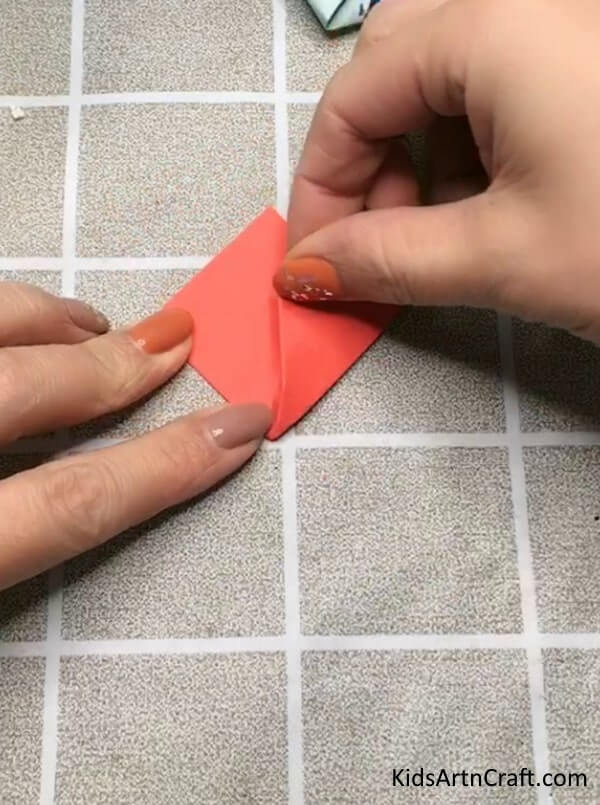
Here flip the triangle and will fold the corners. Grab the right corner and fold it till halfway by keeping your finger at the edge.
Step 6: Folding The Left Corner Till Halfway
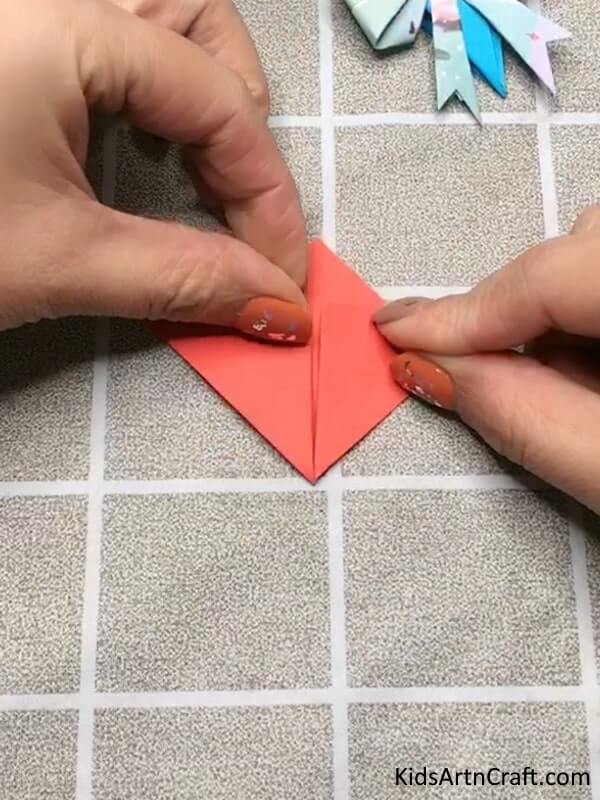
Now grab the left corner and fold it upwards till the halfway point.
Step 7: Folding The Right Side
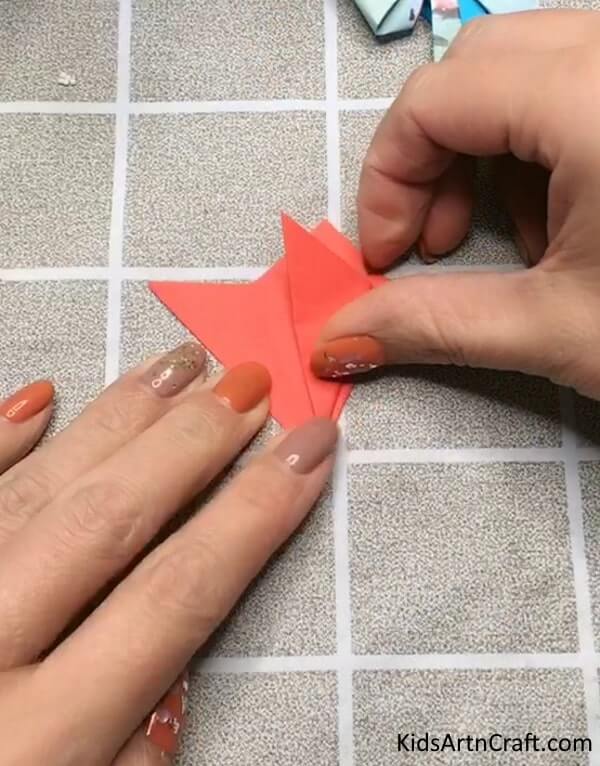
Now Fold the right edge upwards and crease it keeping the left side open.
Step 8: Folding the Left Side
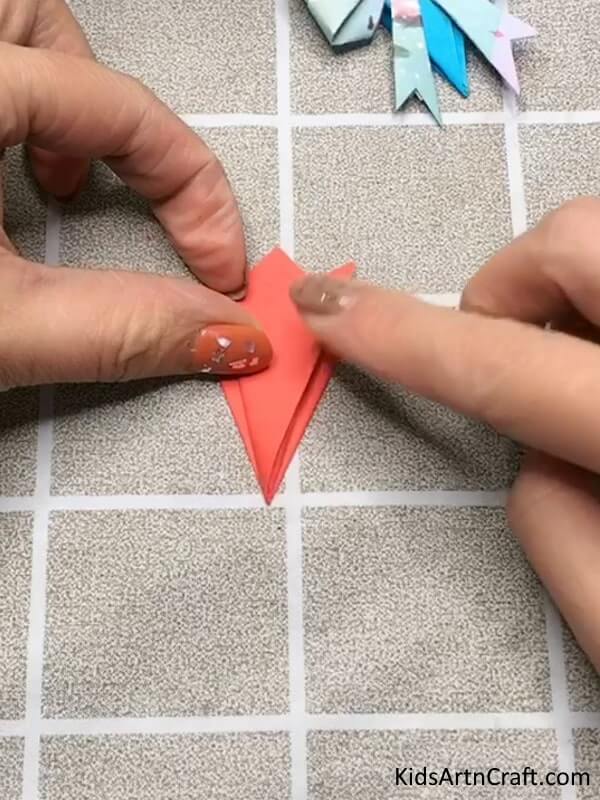
Now fold the left side upwards overlapping the right-side fold we made.
Step 9: Completing The Flowers
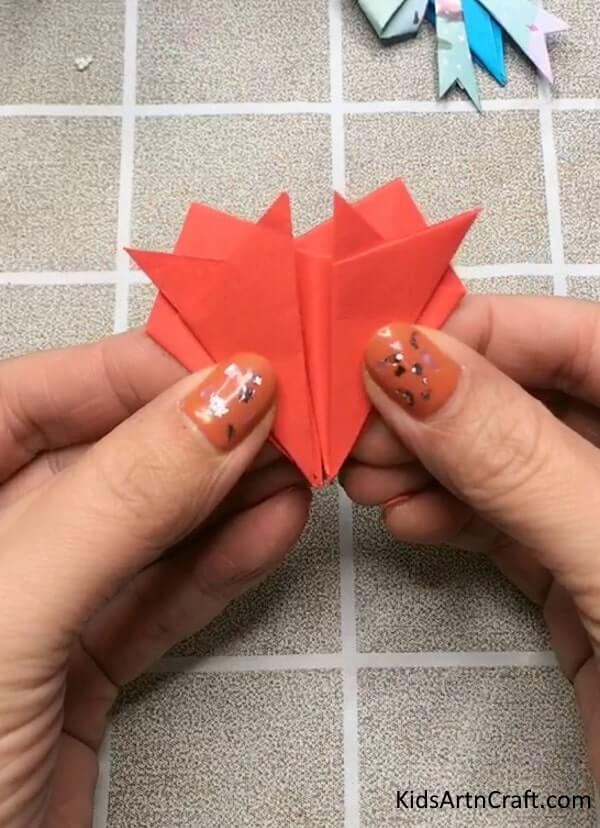
After completing the folds, you will get something like this. Make at least 5 to 6 flowers following the same steps.
Step 10: Gathering The Flowers To Make The Bouquet
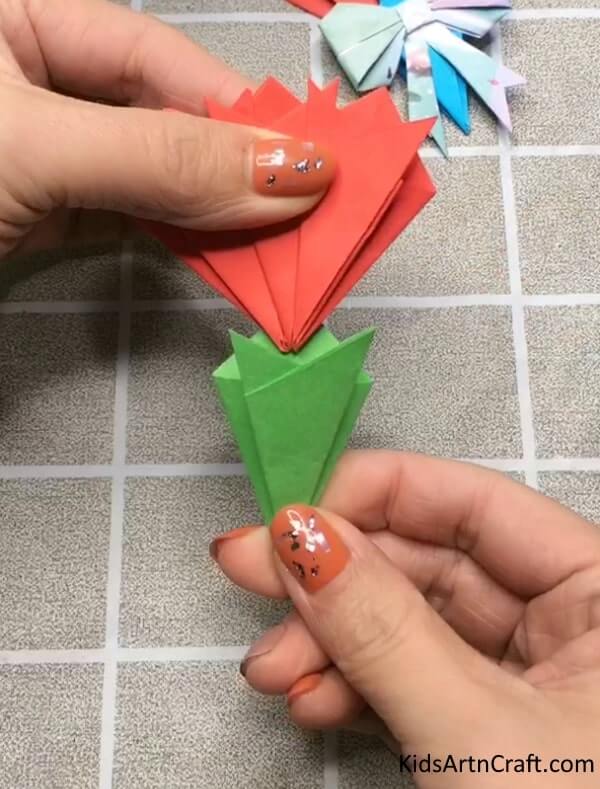
Now make a green flower following the same steps we used for making the red flowers. This green flower will act as a holder for our red flower bouquet. Gather all the flowers we made of the red craft paper and put them inside the green flower pocket. Secure them with glue so that it doesn’t come out or fall.
Step 11: Adding A Bow To Our Flower Bouquet
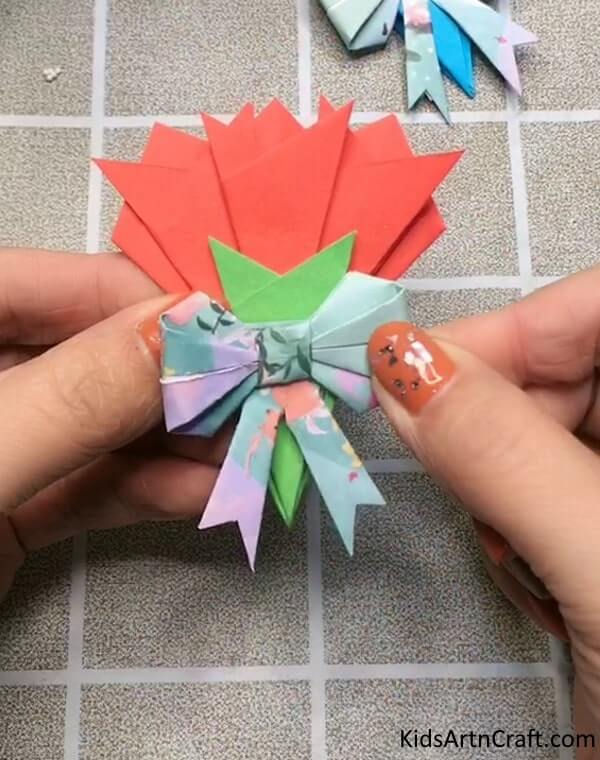
Now we will ad a little paper bow to our flower bouquet. to make the bow start with a square texture sheet of paper and fold it diagonally and crease it then unfold it.
Now fold the two opposite corners of the paper towards the center and crease it to create two triangles at the top and bottom of the paper.
Fold the top and bottom edges of the paper towards the center and crease it. This will create two smaller triangles at the top and bottom. Now flip the paper over and fold the two opposite sides towards the center and crease it to create two more triangles at the top and bottom.
Fold the top and bottom edges of the paper towards the center and crease it again to create two even smaller triangles at the top and bottom.
Now fold the paper in half along the center and crease to bring the two ends together. Use fingers to gently push the two ends towards the center to create a bow shape . Secure the bow in place with glue.
Final Step: “DIY Origami Flower Bouquet: A Fun and Creative Project for Kids!”
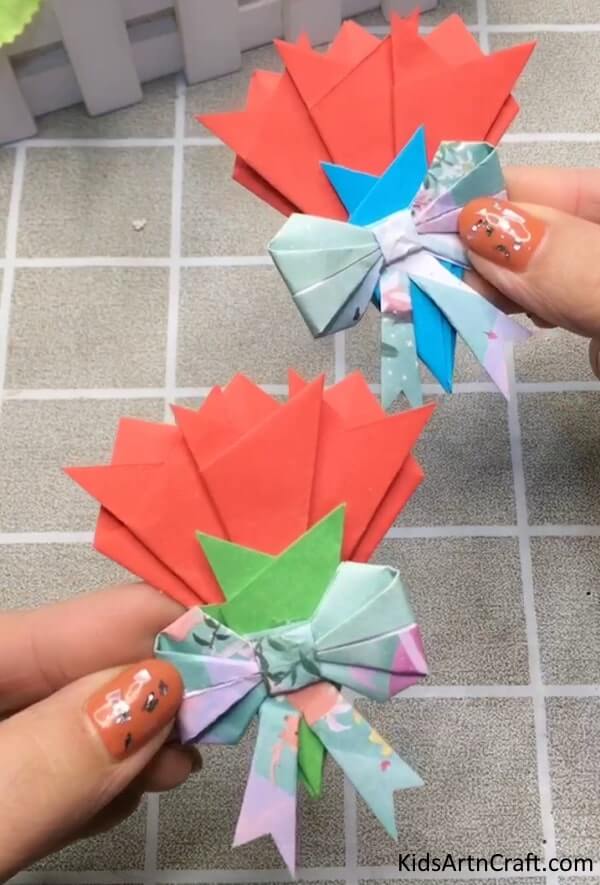
YAY! Your DIY origami paper flower bouquet is ready. Creating a DIY origami flower bouquet is not only a fun and engaging activity for kids, but it also allows them to develop their creativity, patience, and problem-solving skills. With just a few pieces of paper and some folding techniques, children can make beautiful and unique flowers that they can use to decorate their rooms or give as gifts to loved ones.
So, the next time you’re looking for a fun and educational project for your kids, give origami a try and watch their imagination bloom! Remember, with origami, the possibilities are endless, and the results are always stunning. Happy folding!
FAQs
What materials do I need to make a beautiful bouquet with paper?
You will need paper (either cardstock or regular printer paper will work), scissors, glue, and a straw or dowel for a handle.
What type of paper is best for a bouquet?
Cardstock is best for a bouquet because it is thicker and more durable than regular printer paper.
How do I cut the paper for a bouquet?
Use a scalloped edge scissors to give the petals a beautiful frilly edge.
How many petals should I make for each flower?
Depending on the size of the flower, you can make anywhere from 3-6 petals.
How do I attach the petals to the straw or dowel handle?
Use glue to attach the petals to the handle. Make sure the petals are evenly spaced out.
This unique craft is a great way to make a beautiful bouquet with paper. With just a few simple supplies and easy steps, you can make a stunning bouquet in no time!
Follow us on Youtube for art and craft tutorials and much more.
More Articles from Kids Art & Craft
- World Parrot Day Coloring Pages For Kids – Free Printables
- Poppy Coloring Pages For Kids – Free Printables
- Lion Drawing & Sketches for Kids
- Crumpled Paper Animal Crafts for Kids
- Meditation Coloring Pages For Kids – Free Printables


