


Drawing
Easy Peacock Drawing From Hand Outline Artwork Tutorial For Kids

This tutorial will show you how to draw a peacock starting from a hand outline. It is easy and perfect for beginners. Make your own beautiful peacock drawing by following a few simple steps!
Today, we will learn to make the most beautiful bird we all believe! Yes, you guessed it correctly! A peacock! Let your kiddos make a peacock on their own and let them be proud of their creation! This peacock drawing tutorial will guide you to the very simple steps to make a peacock using your hand outline! From drawing with a pencil to coloring and finishing, everything will be covered in this article! Flaunt your drawing skills in front of your friends and family with this peacock drawing! Let’s make it!
DIY Peacock Drawing From Hand For Kids
Read More: Step-by-Step Drawing Tricks Video Tutorial for Beginners
Materials Required
- White Paper Sheet
- Pencil
- Black Marker
- Colored Sketch Pens
- Yellow Paint Pen
Procedure
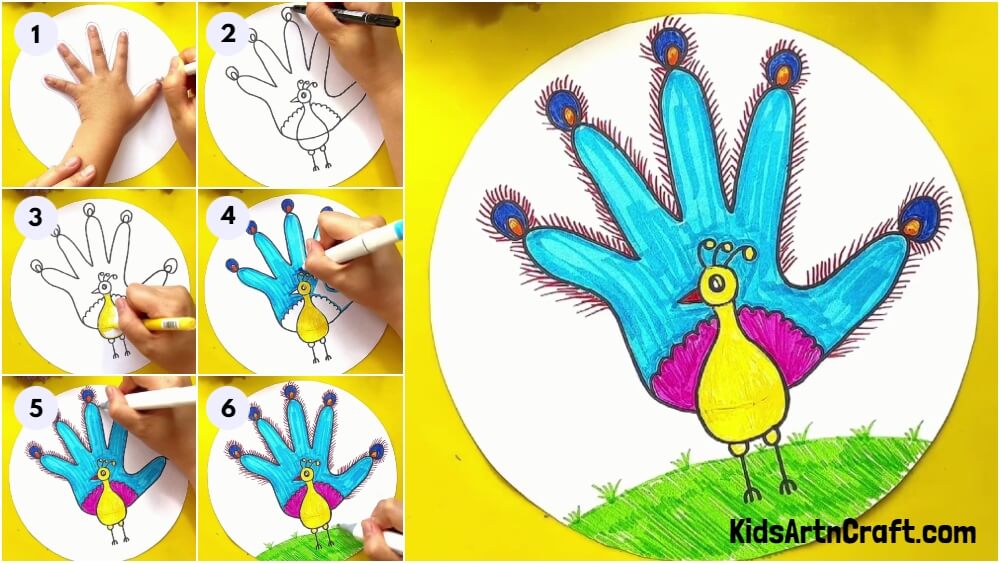
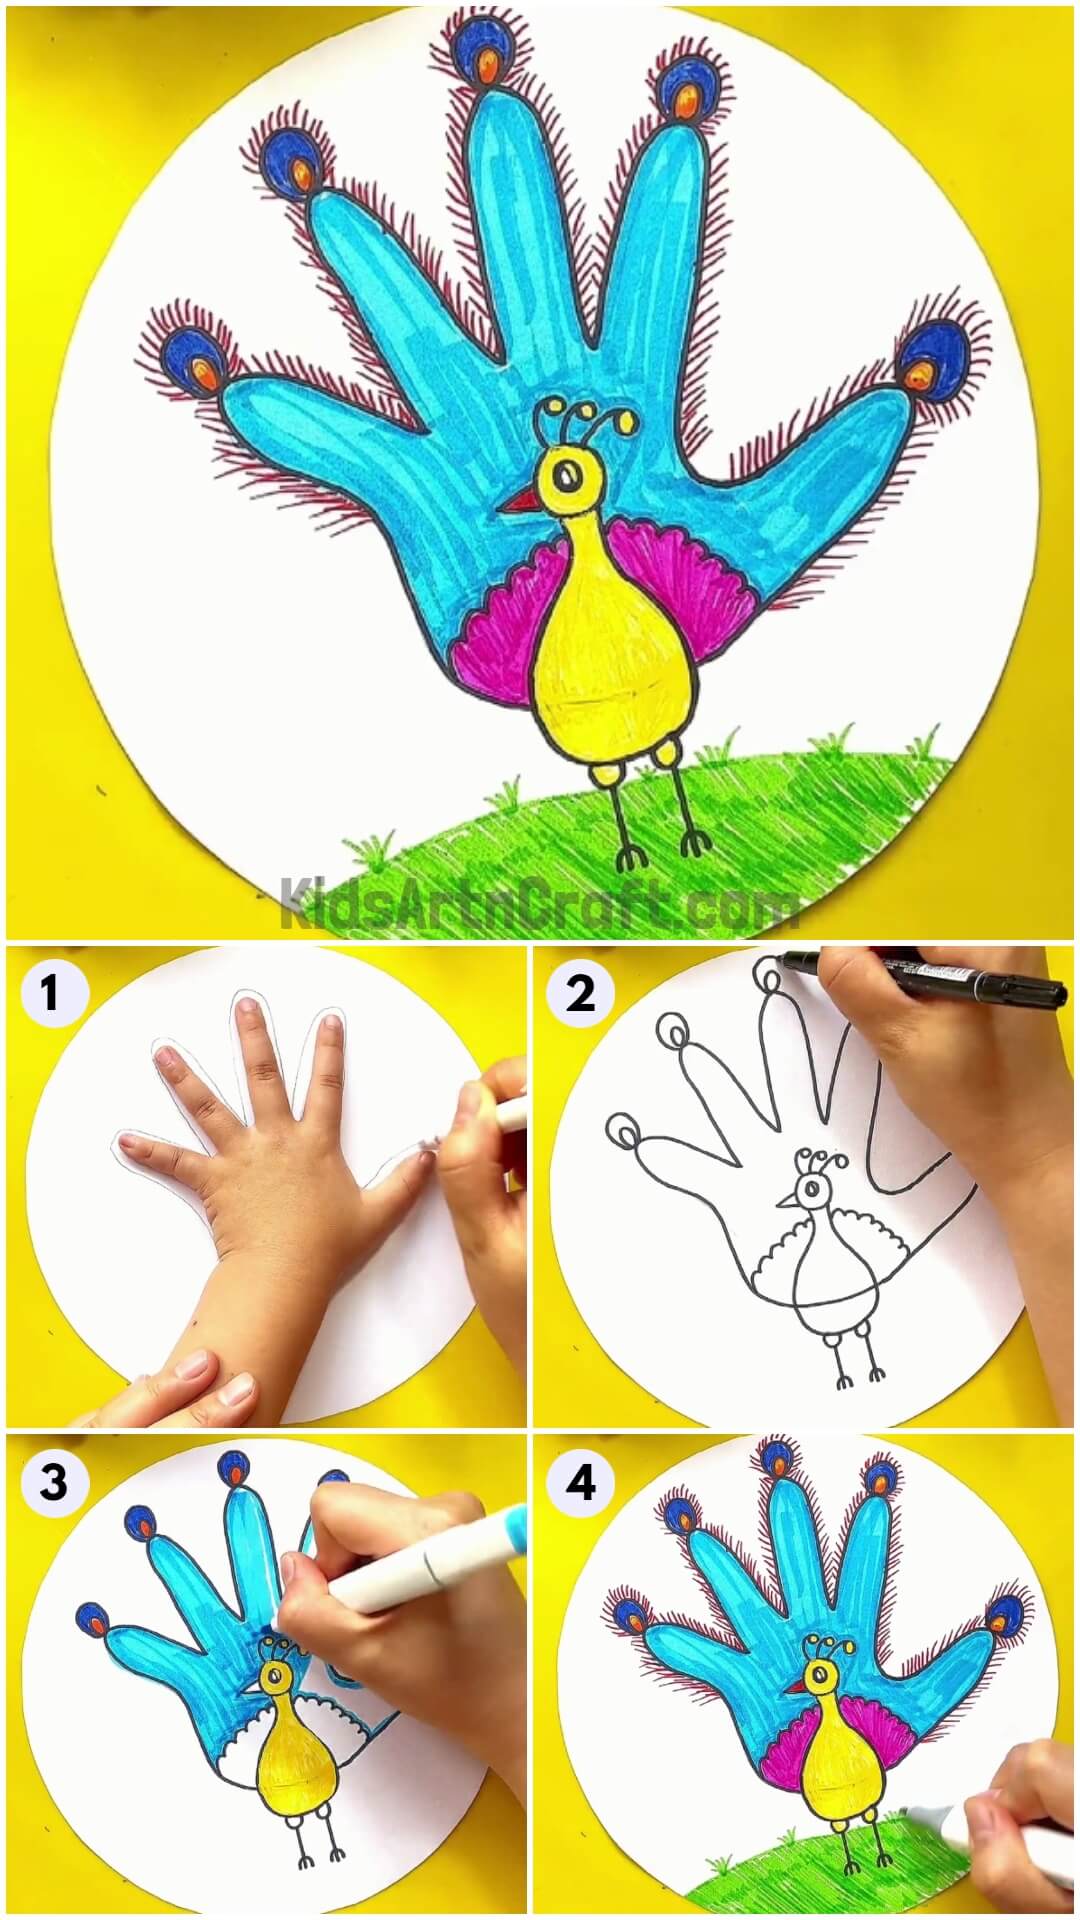
Step 1: Outlining The Hand/Palm
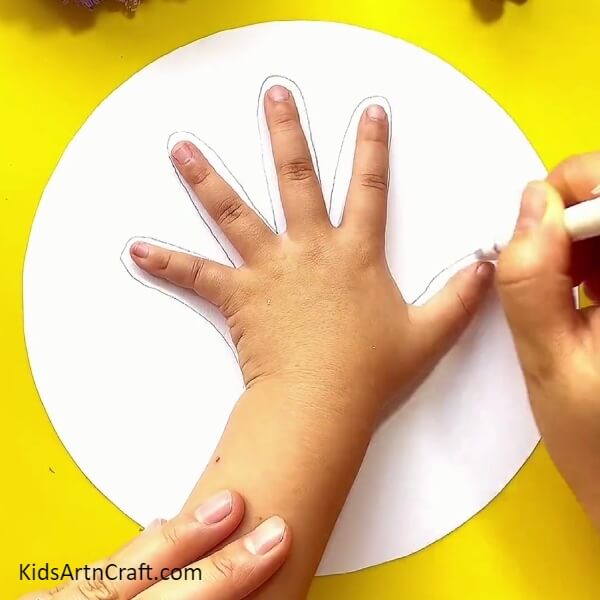
Let’s begin this craft by taking a white sheet, and cutting it out into a circle using scissors. Now, place your palm in the center of the circle and using a pencil outline it.
Step 2: Making A Peacock
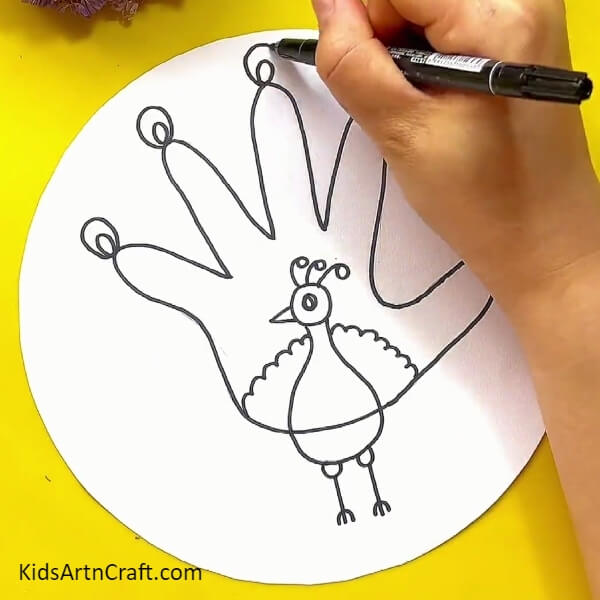
Take on a black marker and start tracing over the pencil. Now, make a peacock drawing as shown in the image and let the 5 finger outline be its train.
Step 3: Coloring The Body, Face, Antennas
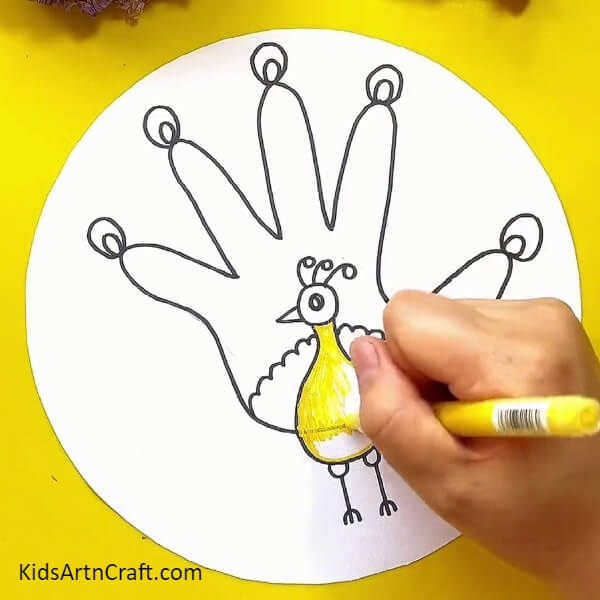
Using a yellow paint pen, color the body of the peacock, its face, and the antennas above its head. See the image for reference.
Step 4: Coloring The Feathers
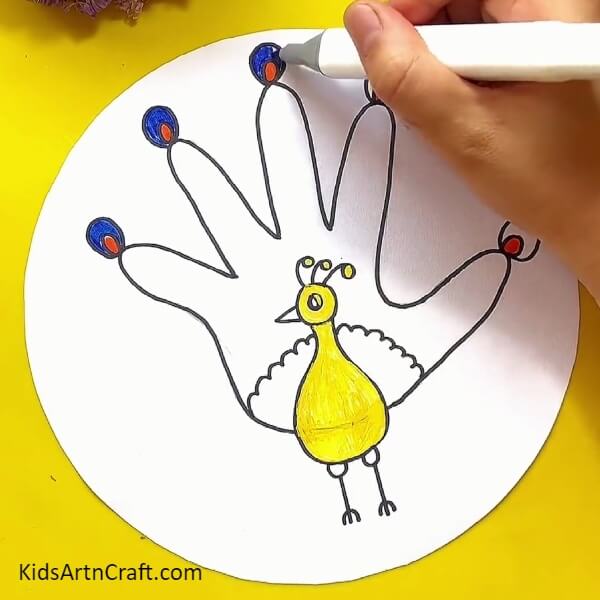
Using the red sketch pen color the inner circle of the feathers and using a dark blue sketch pen color its outer circle.
Step 5: Coloring The Train Of Peacock
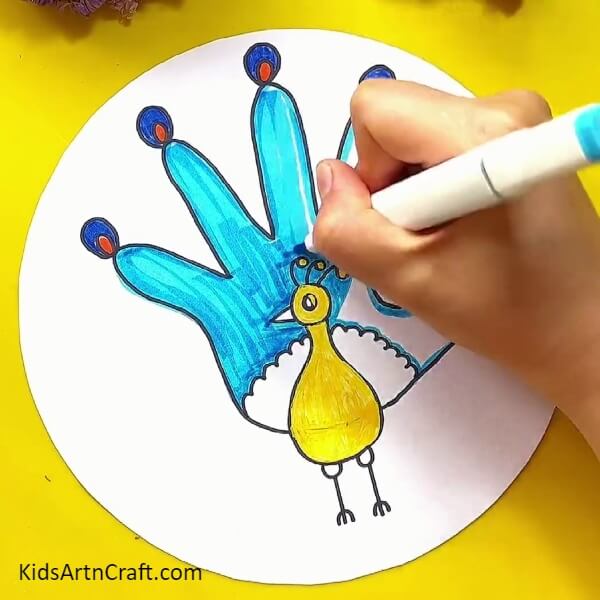
Color the train of the peacock using a light blue sketch pen.
Step 6: Coloring The Wings And Beak
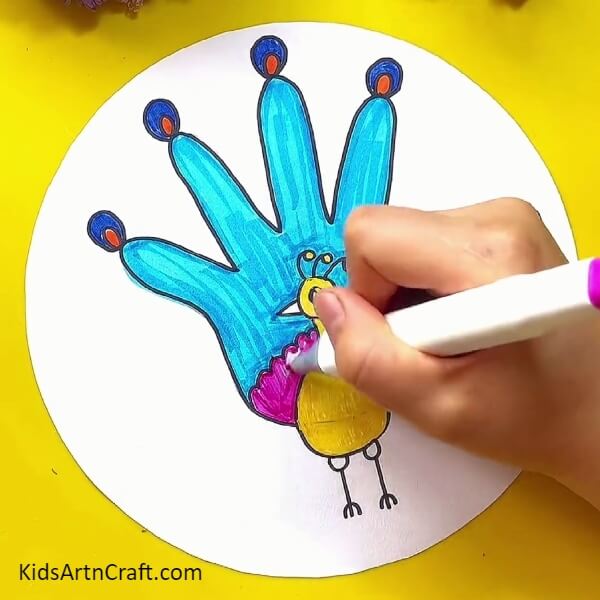
Color the wings of the peacock with a pink sketch pen, as shown in the image. Using a red sketch pen color then beak.
Step 7: Adding Details To The Feathers

Using a brown sketch pen, draw small lines on the finger surface and over the feathers.
Step 8: Making Ground And Grass
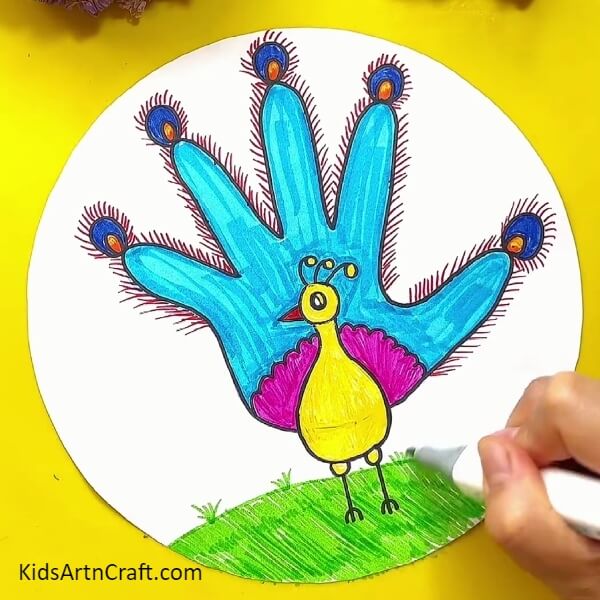
Using a light green sketch pen, make a slightly curved ground and some grasses over the top of it. Color the ground wholely.
The Final Look Of Your Peacock!
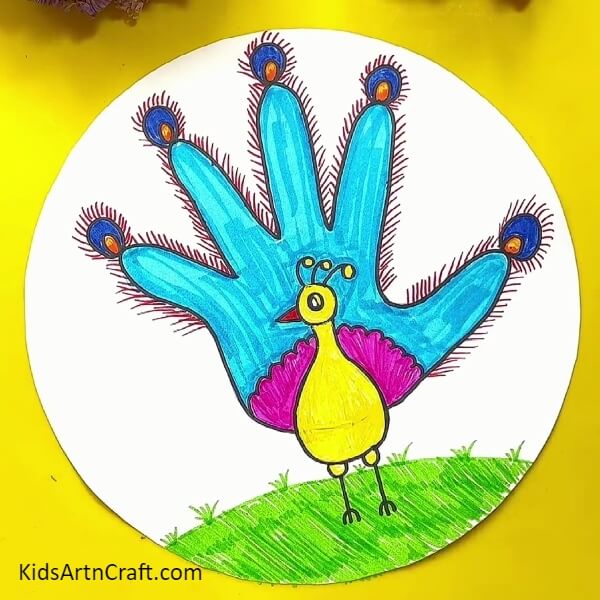
Voila! Your peacock drawing artwork is ready in no time! Hang this artwork over your wall to show it off to everyone! This brings to an end the tutorial, hope this article helped you out, and do leave a like and a comment to share your drawing journey through this artwork! Also, share this article with your friends so that you can have a competition who can make the most beautiful and unique peacock!
Follow us on Youtube for art and craft tutorials and much more.
More Articles from Kids Art & Craft
- How to Make Paper Cup Wrist Watch Tutorial for Kids
- Simple Animal Drawings Tricks Video Tutorial for Kids
- Easy Drawing Tricks Learn At Home Video Tutorial for Kids
- How to Make Ladybug Crafts tutorial for Kids
- Beautiful Tree Painting Using Leaf Impression Step-by-step Tutorial For Kids