


DIY and Crafts
Flower & Ladybug Paper Craft For Spring Season – Step by Step Instructions

This easy-to-follow tutorial provides step-by-step instructions to create a beautiful paper craft of a flower and a ladybug, perfect for the spring season. Get creative and make your own unique masterpiece with these simple supplies!
Welcome to this flower and ladybug paper craft tutorial! This fun and easy craft are perfect for the spring season, and it is perfect for kids and adults alike. In this tutorial, you will be guided step by step on how to create this cute and decorative paper craft. All you need are some simple materials and a few minutes of your time. So let’s get started and make this flower and ladybug paper craft together!
Easy To Make Flower & Ladybug Paper Craft For Spring Season For Kids
Read More: Super Simple Pine Cone Crafts For Kids
Material Used:
- Crafting Papers
- Googly Eyes
- Black Marker
- Colored Pens
- Scissors
- Glue
Instructions:-
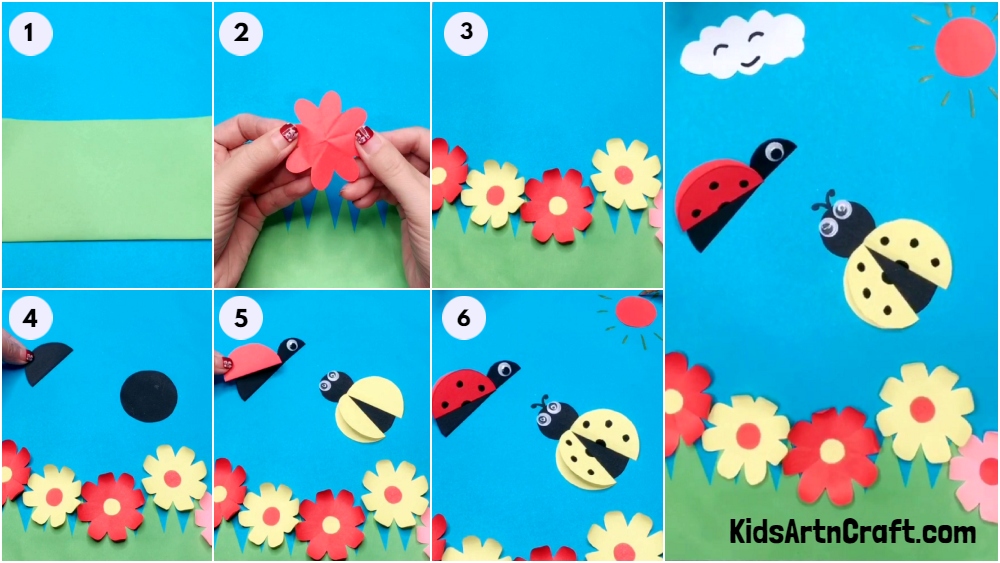
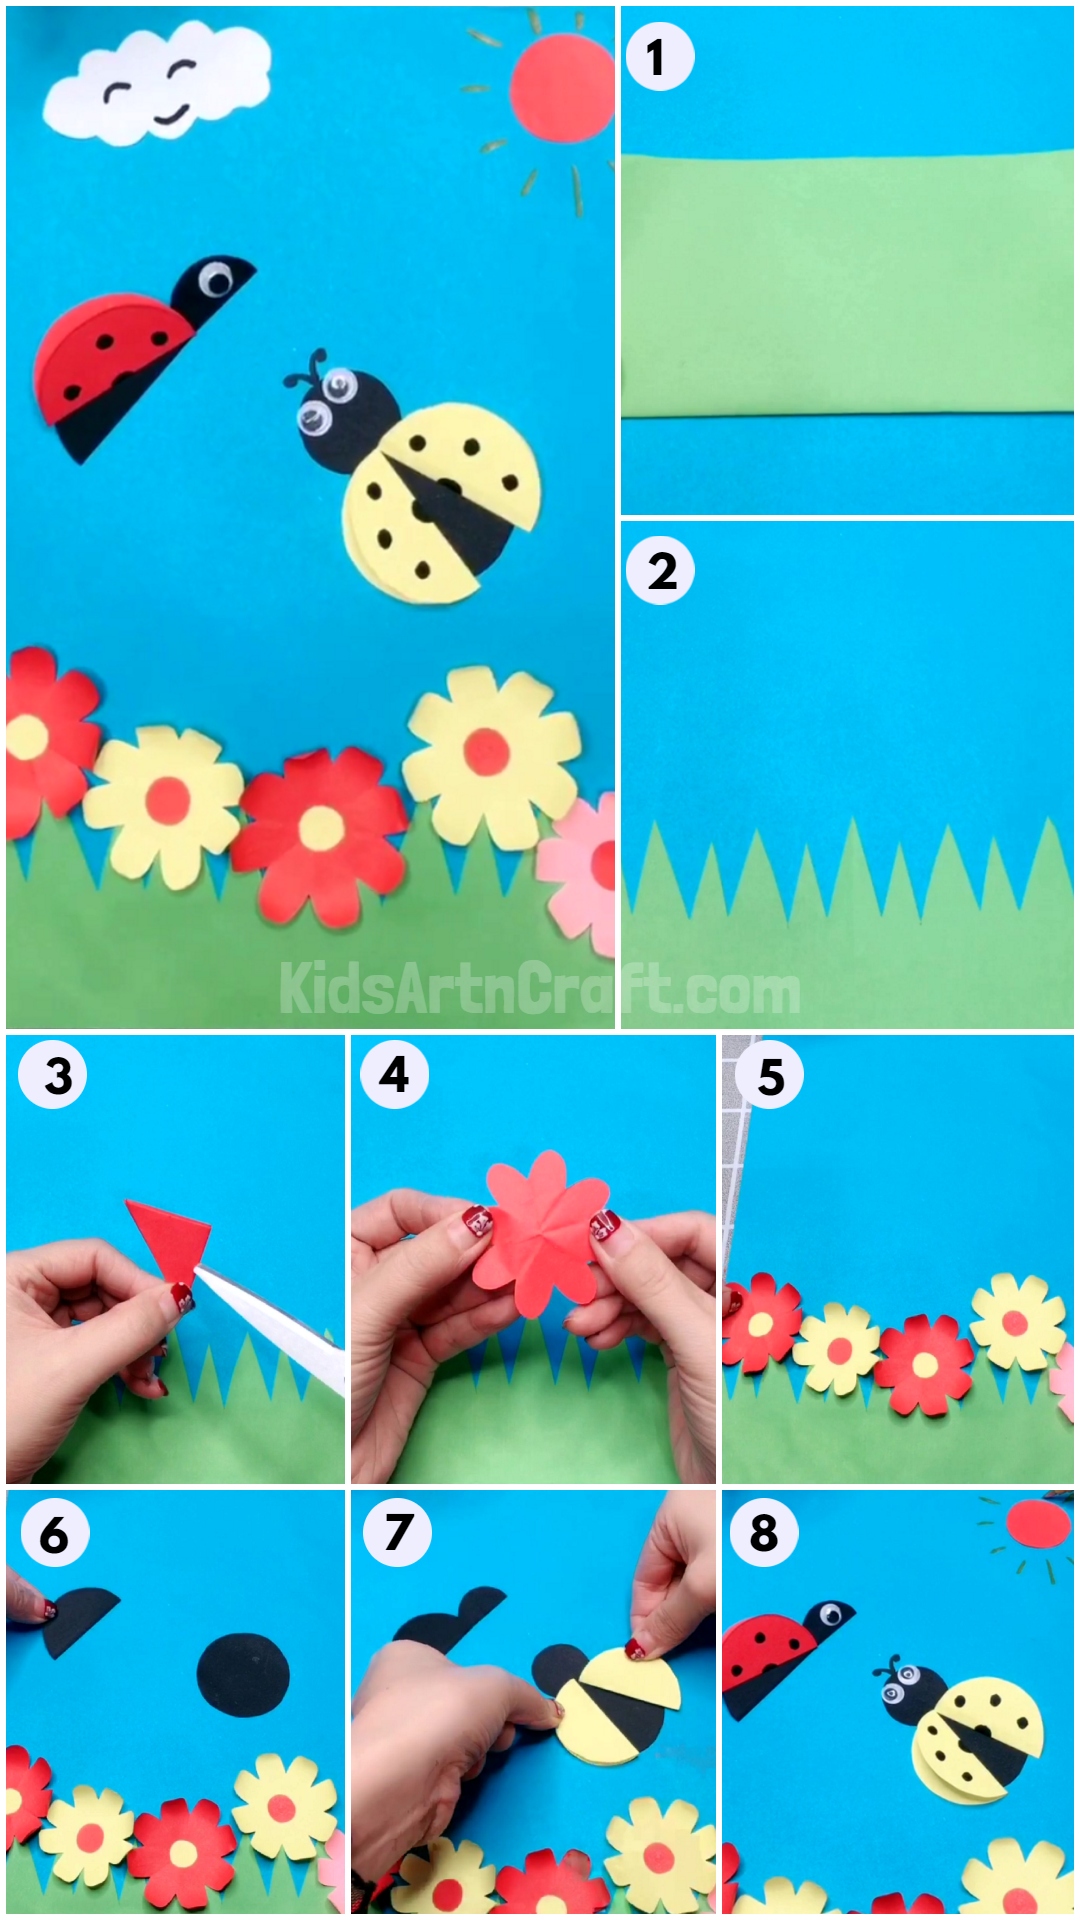
Step 1: Start The Craft By Taking Light Blue Color Craft Paper For Sky And Light Green Craft Paper For The Grass

Let’s start by taking a light blue color craft paper as the background. Now take a light green craft paper and make the outline of grass on it with help of a pencil.
Step 2: Adding The Grass From Light Green Craft Paper At The Bottom Of The Sheet
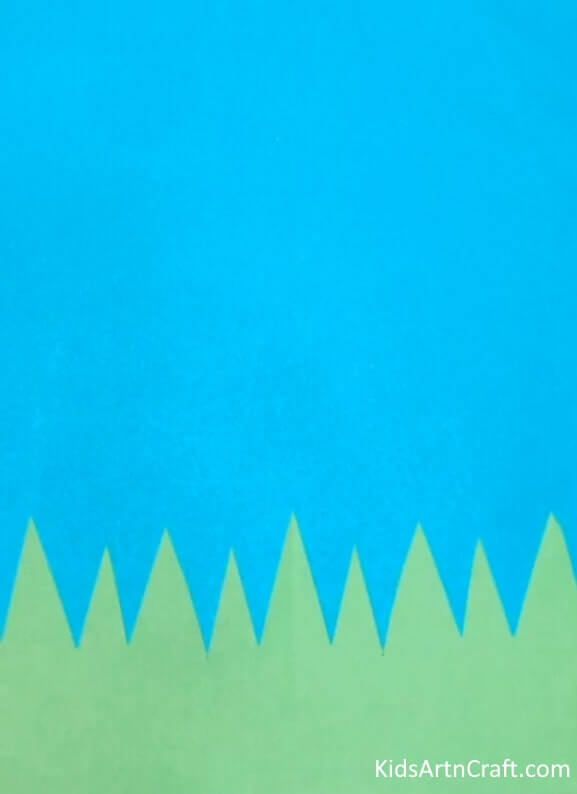
Now cut out the grass outline made on the light green craft paper and with the help of glue past it at the bottom of the paper.
Step 3: Making The Flower From Red Craft Paper
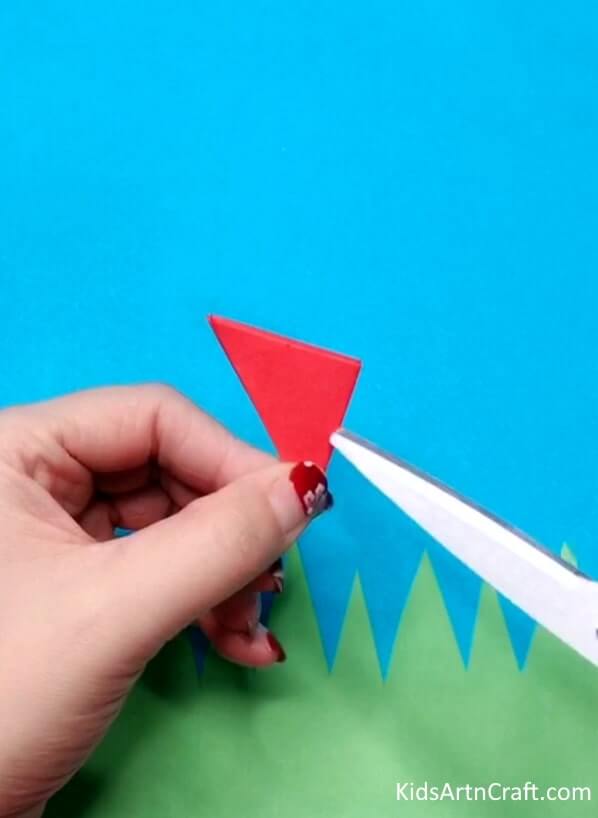
Now take a piece of red craft paper and fold it into a small triangle. Now cut it into a shape of a flower petal with the help of scissors.
Step 4: Creating The Red Flower
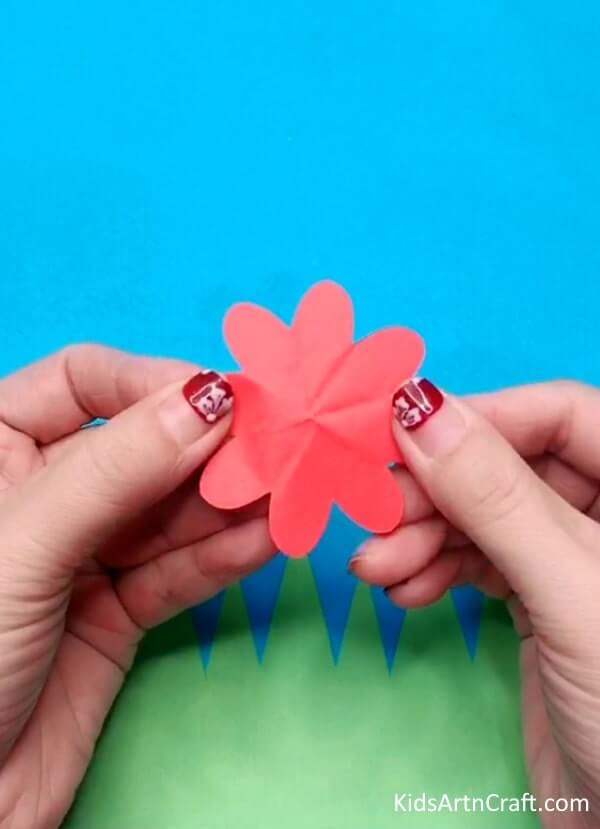
Now open the triangle and when you will open it you will get a flower something like this.
Step 5: Creating The Pistil Of The Flower-the Centre
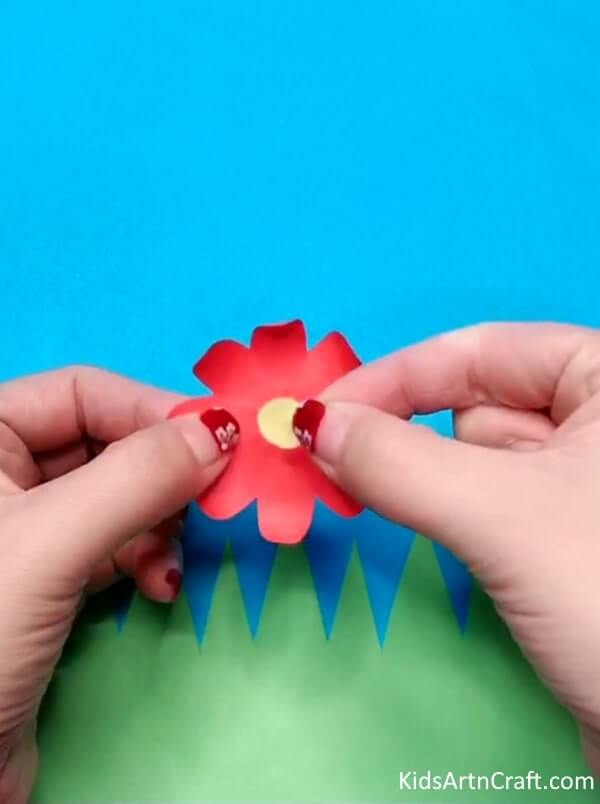
Now for the pistil of the flower, take a yellow craft paper and cut a circle out of it with the help of scissors. Now paste the circle with glue at the center of the red flower.
Step 6: Creating The Flower Bed At The Bottom Over The Grass From Red And Yellow Craft Papers.
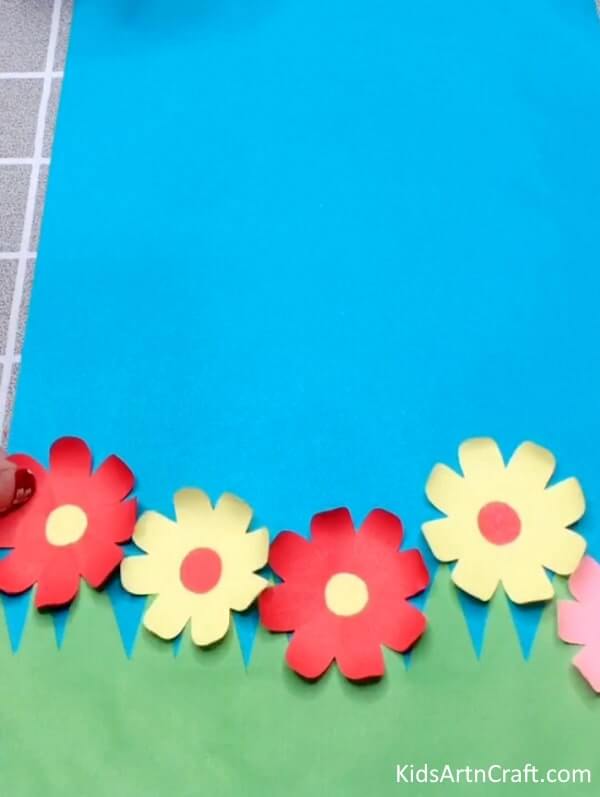
Repeat the 3,4 and 5 steps and make 2 red colors and 2 yellow colors and one pink color flower, With the help of glue, paste the flowers over the grass creating the flower bed.
Step 7: Making The Ladybugs From The Black Craft Paper
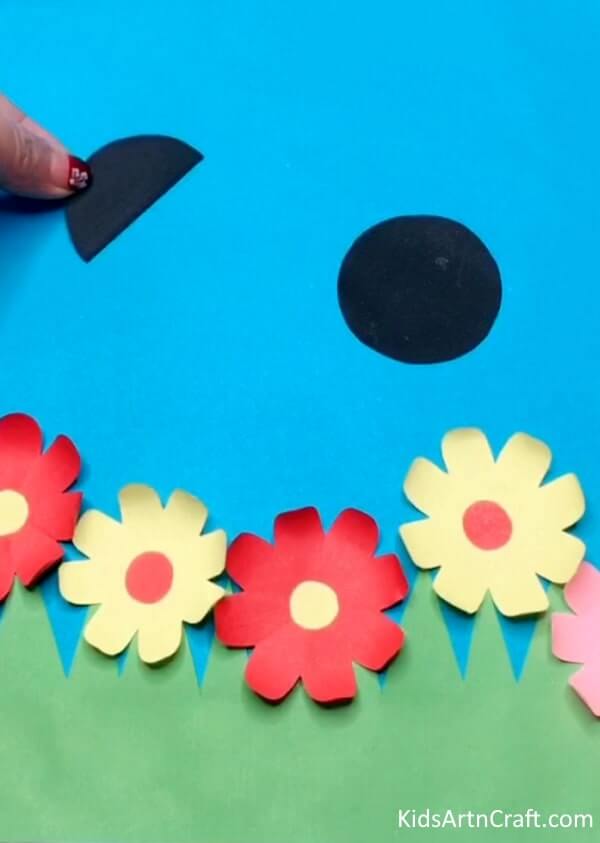
Now to make the ladybug’s body, cut a medium-sized circle and a semi-circle out of black craft paper and paste the circle on the right side and the semi-circle on the left side with help of the glue.
Step 8: Adding The Heads Of The Ladybugs From Black Craft Paper
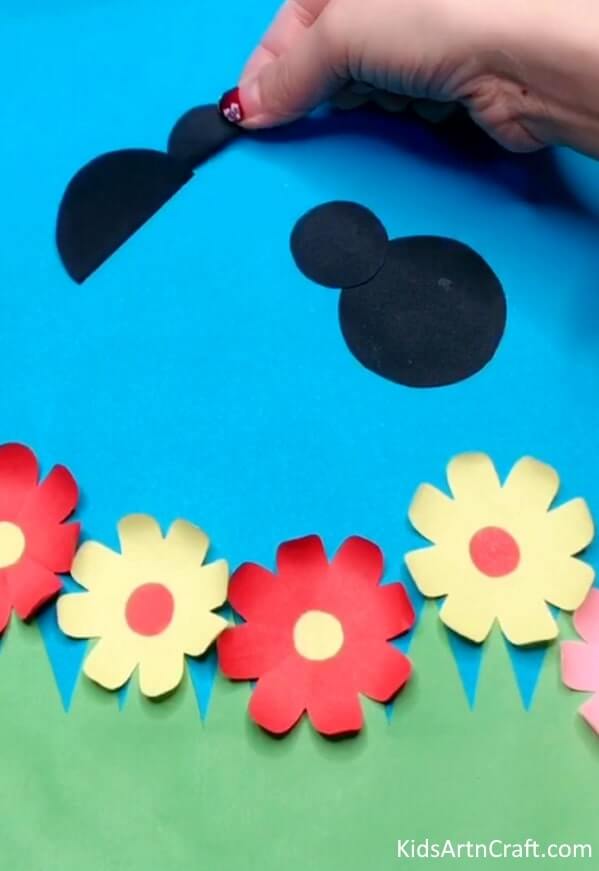
Now cut out a circle and a semicircle from the black craft paper. Paste the circle over the bottom ladybug and the semicircle over the side ladybug body we pasted on the sheet previously with help of the glue.
Step 9: Creating 3d Wings Of The Ladybug With Yellow Craft Paper

To create the wings, take the yellow craft paper and cut two medium-sized circles out of it. Fold the circles into half and crease them. Now paste the folded circles side by side at an angle on the ladybug creating 3D wings for the ladybug.
Step 10: Adding Googly Eyes To The Ladybug

Now to add eyes to the ladybug, take two googly eyes and paste them with the help of glue.
Step 11: Adding Details To The Other Ladybug With Red Craft Paper And Googly Eye.
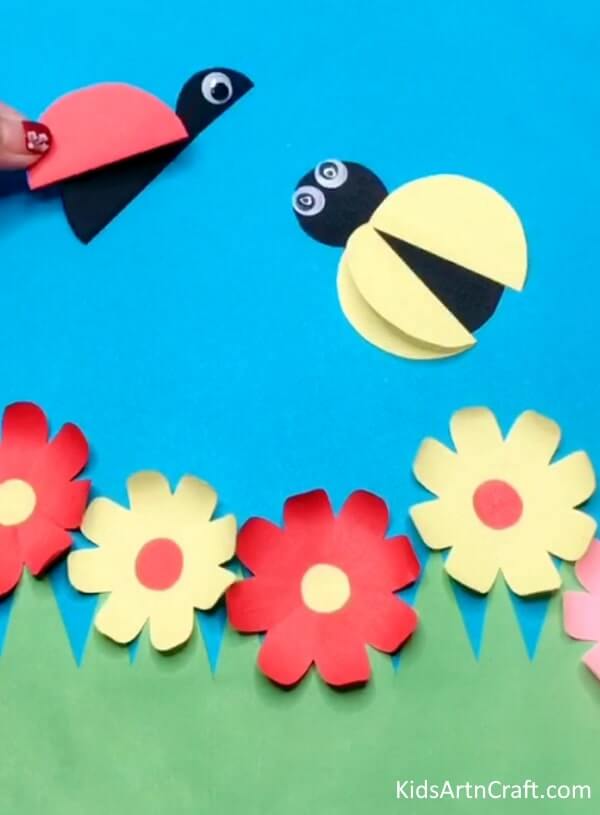
Now for the other ladybug, take the red craft paper and cut out a medium size circle with the help of scissors. Now fold the circle into half and paste one side on top of the ladybug creating the 3Dwind of the ladybug. Add one googly eye too on the head part of the ladybug.
Step 12: Making The Ladybug’s Antenna And Dots On the Wings With Black Marker.
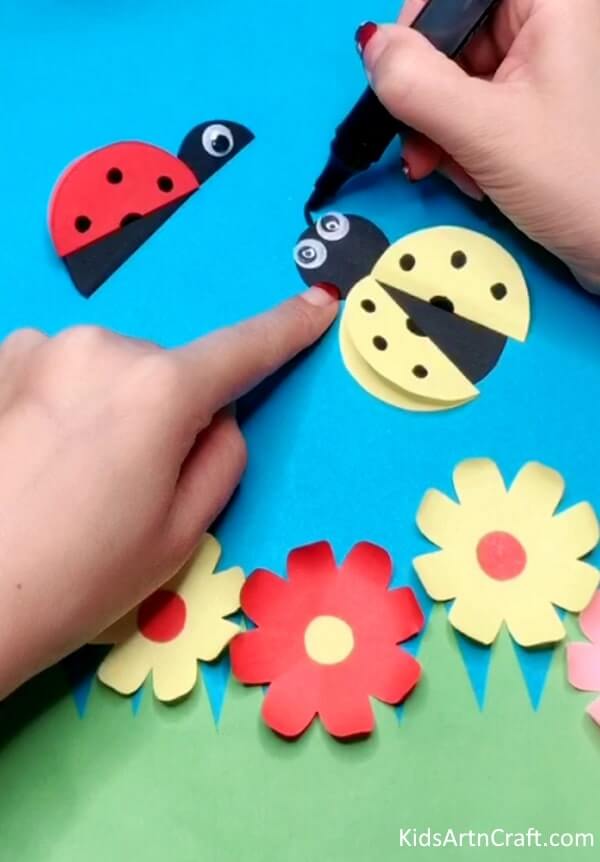
Take the black marker and on top of the yellow ladybug make the antenna by simply making small curve lines with the end rounded into a small circle.Also Add small dots on the wings of the ladybugs.
Step 13: Adding The Sun From Orange Craft Paper And Yellow Colored Pen
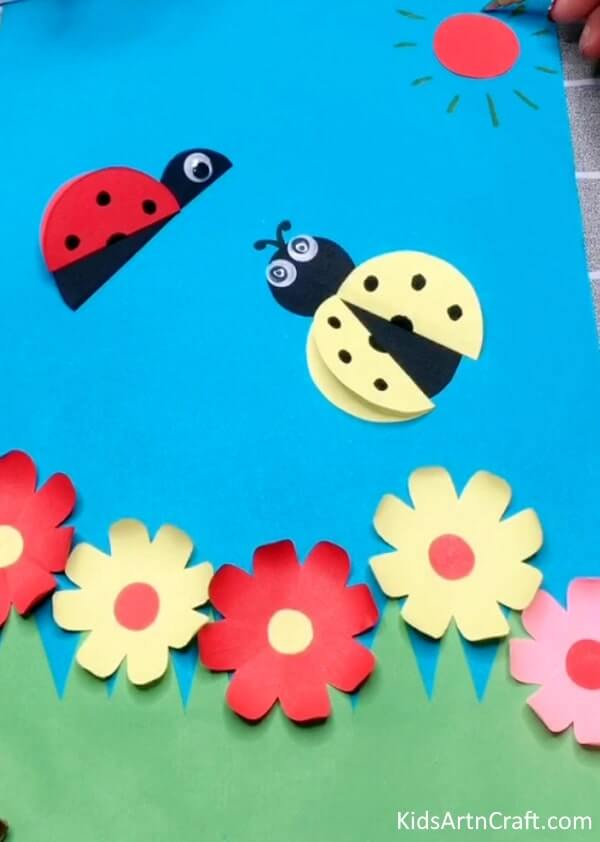
Now take an orange craft paper and cut out a circle from it .Now with help of the glue paste the circle at the top right corner of the scenery. With the help of yellow colored pen add the sun rays around the circle,
Step 14: Adding The Cloud With White Craft Paper And Black Marker
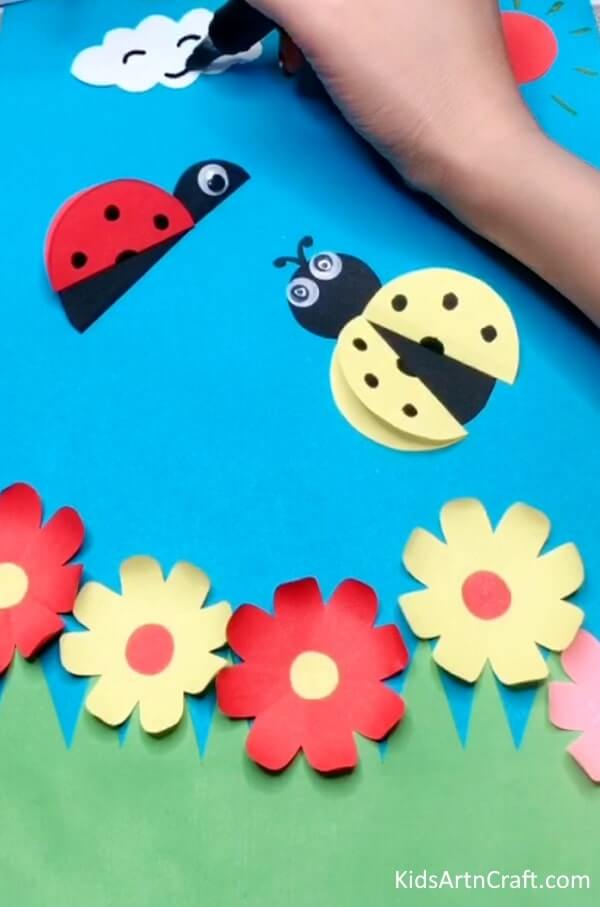
Now take a white craft paper and cut out the outline of a cloud from it. Paste the cloud on the top left corner of the scenery. With the help of black marker add the facial expressions to the cloud.
Final Step: “DIY Flower and Ladybug Paper Craft: A Fun and Colorful Springtime Activity for Kids”
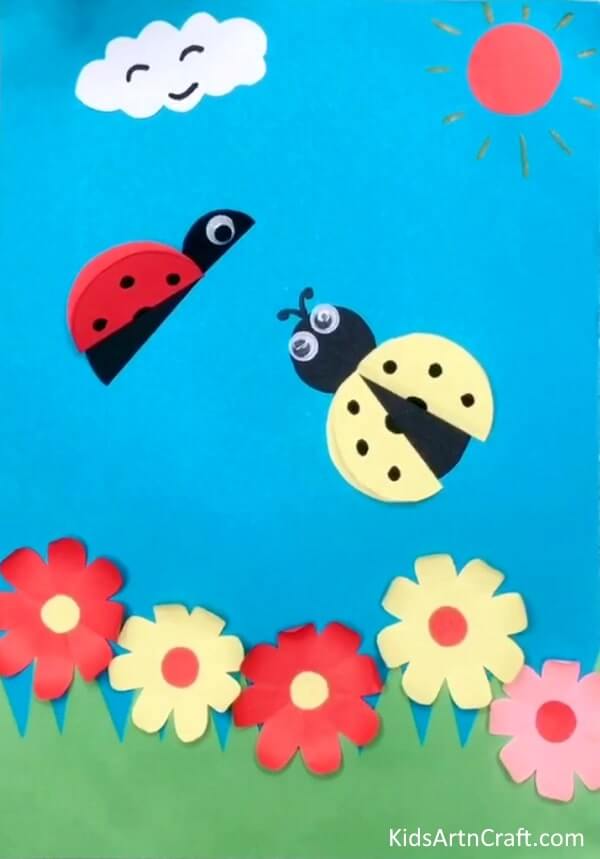
YAY! The “DIY Flower and Ladybug Paper Craft: A Fun and Colorful Springtime Activity for Kids” is ready. With this DIY flower and ladybug paper craft, kids can embrace the spirit of spring by creating their very own colorful garden full of blooming flowers and friendly ladybugs. With just a few materials, such as paper, scissors, and glue, kids can create their very own garden of paper flowers and friendly ladybugs. The step-by-step instructions make it easy for kids of all ages to follow along, and they’ll love seeing their creations come to life.
Not only is this craft a fun way to spend time, but it also helps kids develop important skills such as hand-eye coordination, spatial awareness, and problem-solving. Plus, it’s a great opportunity for parents or teachers to teach kids about the importance of nature and the role of flowers and ladybugs.
This fun and easy craft is a perfect way to spend a sunny afternoon with friends or family, and it’s sure to brighten up any room with its vibrant colors and cheerful designs. So let’s get crafting and welcome the joys of spring!
Some More Recycled Ladybug Craft
Make a Ladybug Artwork from an Reused Egg Tray For Kids
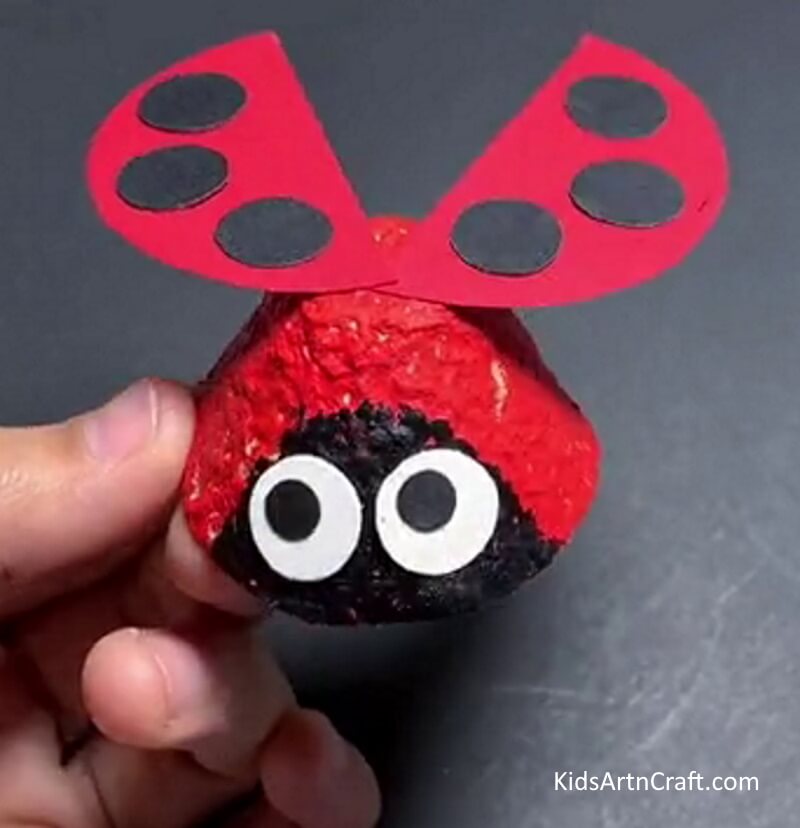
Image Source/Tutorial: Kids Art & Craft
This fun and creative project is perfect for kids! With a few simple supplies, you can turn an old egg tray into a beautiful ladybug artwork. This is a great way to reuse materials, while teaching children a valuable lesson in sustainability.
Making Ladybug Crafts with Leaves
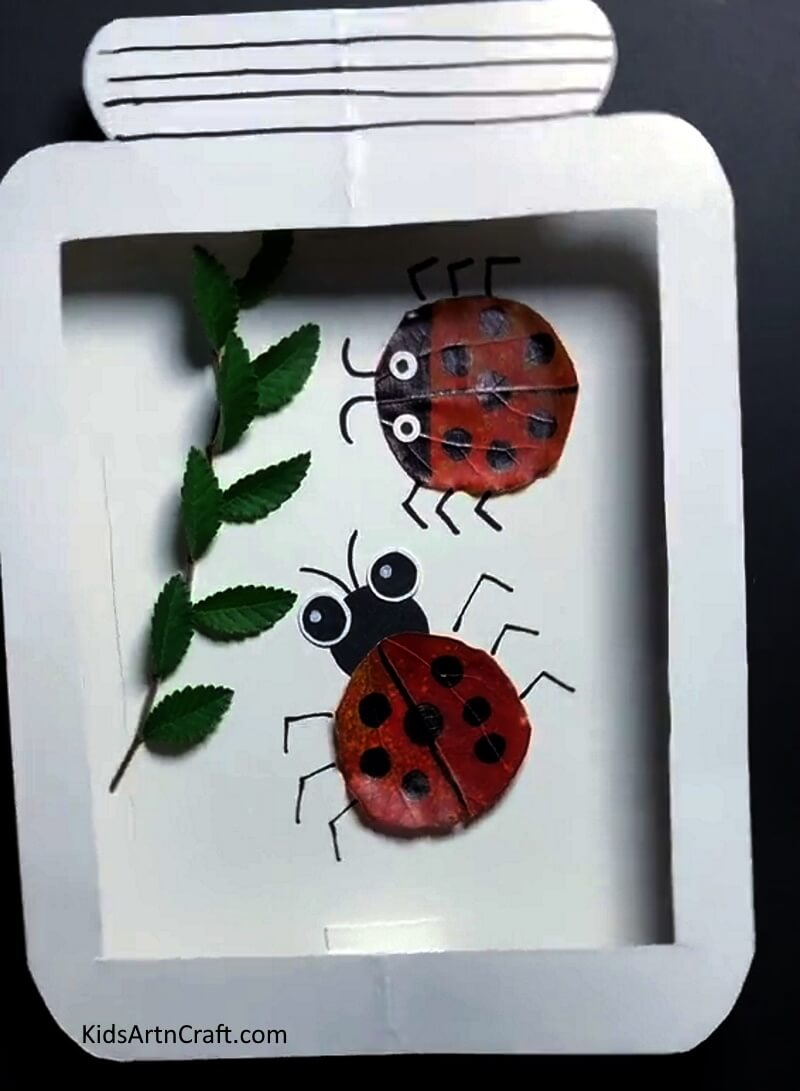
Image Source/Tutorial: Kids Art & Craft
Making ladybug crafts with leaves is a fun and creative way to spend an afternoon. This activity can be done with all ages and provides a great opportunity for bonding with family or friends. Plus, it’s a great way to get outside and enjoy nature!
Simple Paper Ladybug Craft For Preschoolers

Image Source/Tutorial: Kids Art & Craft
This craft is perfect for preschoolers! It’s a super simple paper ladybug craft that they can make with minimal help and have lots of fun. All you need is paper, glue, and some colorful pens and markers to make these cute little bugs.
FAQs
What kind of paper should I use for the flower and ladybug paper craft?
You can use any type of paper you have on hand. However, for the best results, you should use cardstock or construction paper for a more durable paper craft.
Do I need to use special tools to make this craft?
No, you don’t need any special tools. All you need are scissors, glue and some basic craft supplies.
How long does it take to make this craft?
Depending on your skill level, this craft can take anywhere from 30 minutes to 1 hour to complete.
Are there any safety precautions I should take when making this craft?
Yes, you should always be careful when using scissors or other sharp tools when crafting. Also, younger children should always have adult supervision when crafting.
What is the best way to display the finished craft?
You can display the finished craft on your wall or in a window, or you can hang it from ribbons or string.
This flower & ladybug paper craft is a great way to introduce the fun of crafting to your kids as the temperatures start to rise and the spring season approaches.
Follow us on Youtube for art and craft tutorials and much more.
More Articles from Kids Art & Craft
- World Parrot Day Coloring Pages For Kids – Free Printables
- Poppy Coloring Pages For Kids – Free Printables
- Lion Drawing & Sketches for Kids
- Crumpled Paper Animal Crafts for Kids
- Meditation Coloring Pages For Kids – Free Printables


