
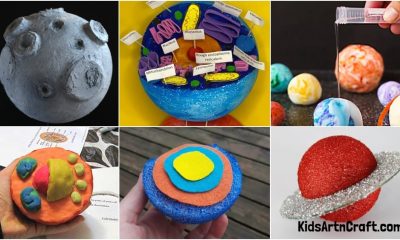
Kids Activities
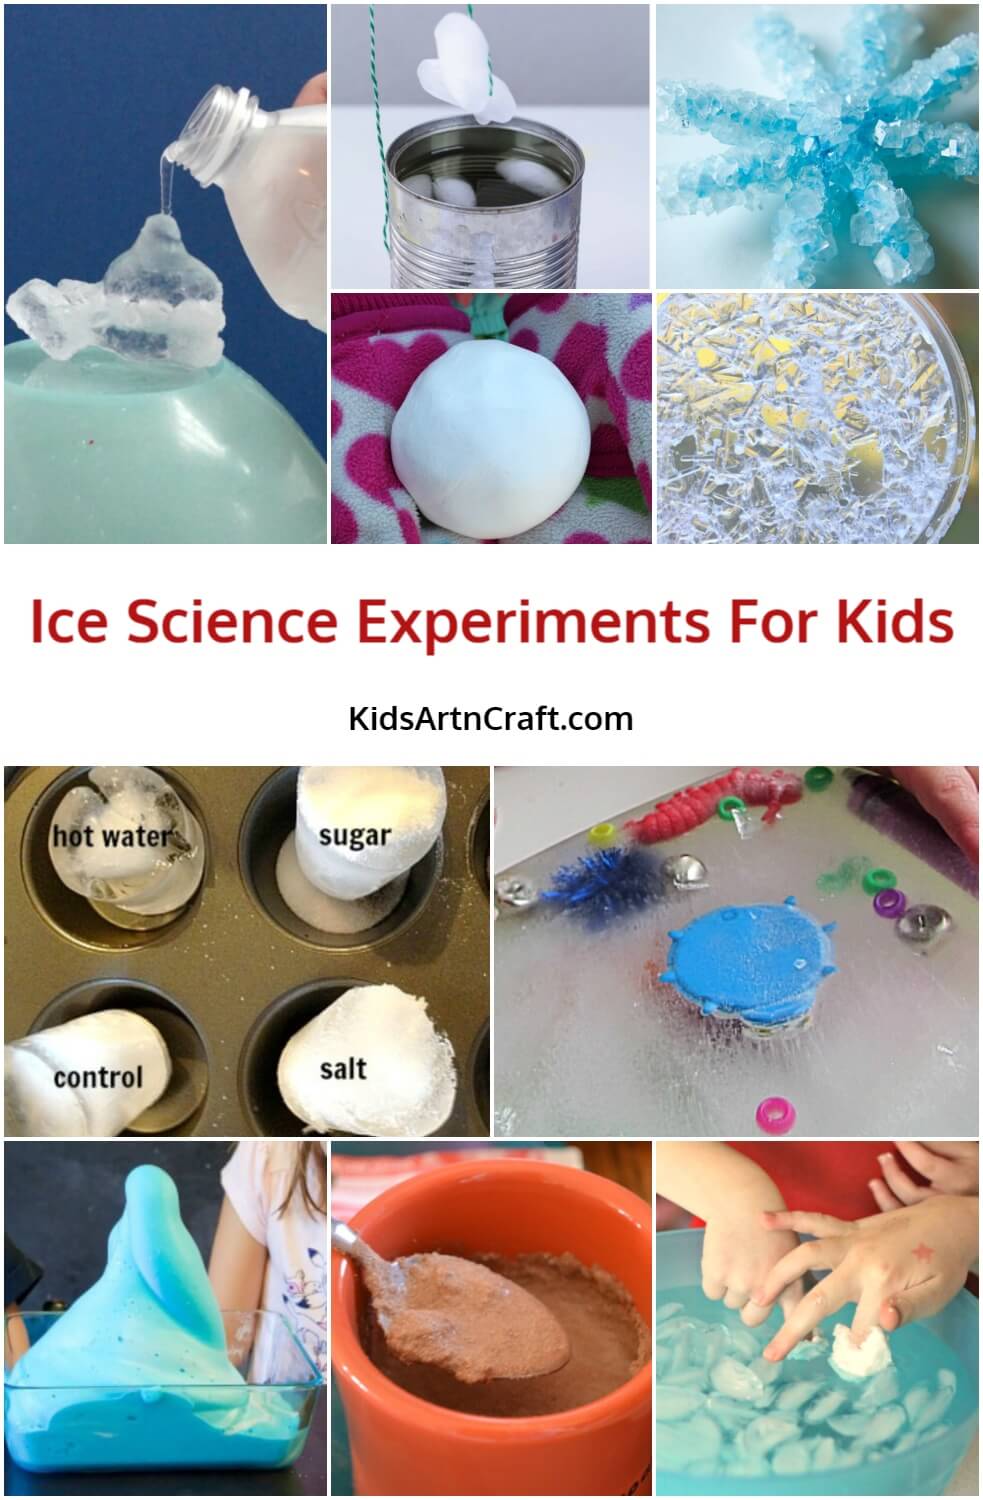
Ice Science Experiments For Kids

Today’s article is somewhat different. Are you bored with your science books and you don’t wanna read them? We are here to save from the boring lessons of science. Here we are going to discuss some mind-blowing experiments that will clear your concepts and we will also have fun while performing these experiments. Once you’ll perform these crazy experiments, then you don’t need to cram anything from your textbooks. It’s important to understand things well rather than cramming anything from books only for getting good grades.
Clearing your concept is the main purpose of studying so that you can become a good scientist in future and serve society well. We believe in building your basics strong and clearing every doubt that comes to your mind. Take the help of your guardian while performing these experiments at home for precautions. Most of the experiments in this article are associated with the solid form of water that is ice. These are easy experiments and less time consuming So let’s begin.
Read More: 15 Fun Balloon Science Experiments for Kids
Ice Science Experiments For Kids
Pseudo iceball
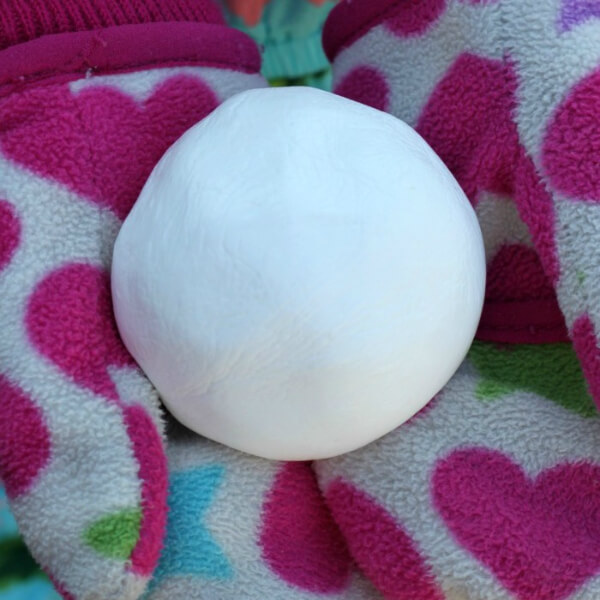
Image Source/Tutorial: Coffee Cups and Crayons
Materials required:
- Starch
- Glue
- Warm water
- Container
- Spatula
Experimental procedure:
- Take starch, glue in a container and mix them properly using a spatula.
- Add some warm water to it.
- Mix all the ingredients properly by stirring continuously with a spatula.
- Using your hands, make the shape of the snowballs as shown in the image.
Ice can
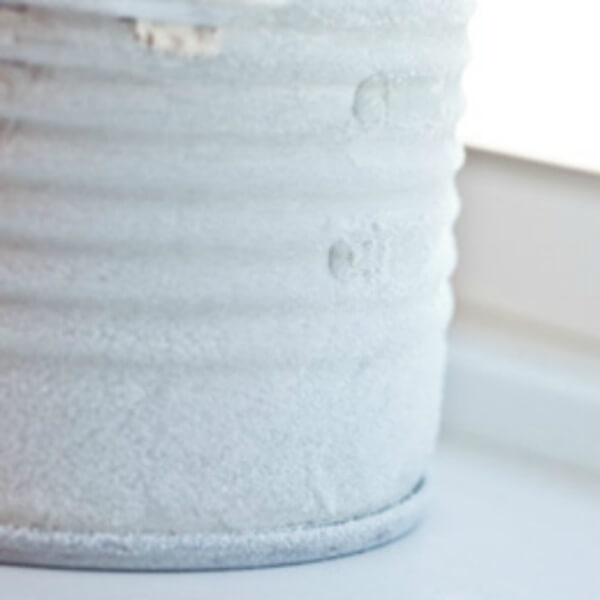
Image Source/Tutorial: 123 Homeschool 4 Me
Materials required:
- Tin
- Crushed ice
- Salt
Experimental procedure:
- Take a metallic tin and get some crushed ice.
- Coat the outer surface of the tin with salt but in less quantity.
- Now apply the crushed ice around the outer surface of the tin.
- The ice will stick to the metallic tin as the salt has helped in melting some ice and the freezing temperature of the metallic tin has helped Ice to get stick to its surface.
Snowflakes
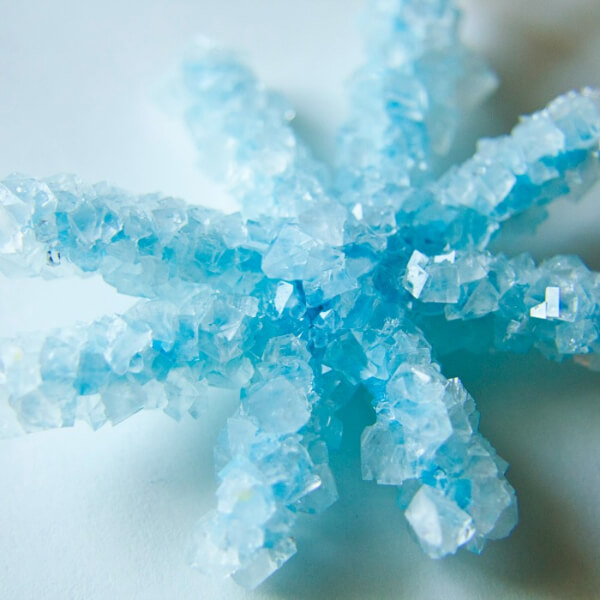
Materials required:
- Borax
- Boiling water
- Jar with a broad mouth
- Pipeline cleaners
- Yarn
- Pencil
Experimental procedure:
- Take pipeline cleaners and tie them together to make the shape of the snowflakes using yarn strands.
- Take some borax powder in boiling water. Let it boil for some time.
- Now transfer this mixture into a container with a broad mouth.
- Dip the pipeline cleaner into this solution and take it out.
- Let this pipeline cleaner dry. After some time we will observe the crystals growing on the pipeline cleaner and our DIY snowflakes are ready.
Read More: Explosion Experiments For Kids
Ice crystals
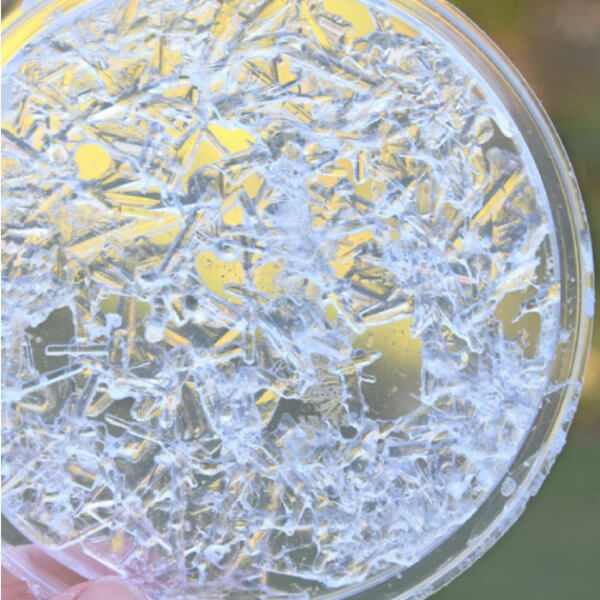
Image Source/Tutorial: Babble Dabble Do
Materials required:
- Epsom salt
- Water
- Lids
- Tray
- Microwave oven
- Jar
Experimental procedure:
- Take a jar and fill it with water and Epsom salt in the ratio of 1:1.
- Now heat this solutionanotherther even for a few seconds.
- Transfer this solution into a flat tray.
- Place the plastic lids dipped in this tray and keep this tray in sunlight.
- Let the lids dipped in the solution dry completely in the sunlight.
- Once the lips are dry, you can observe the formation of crystals.
Artificial snow
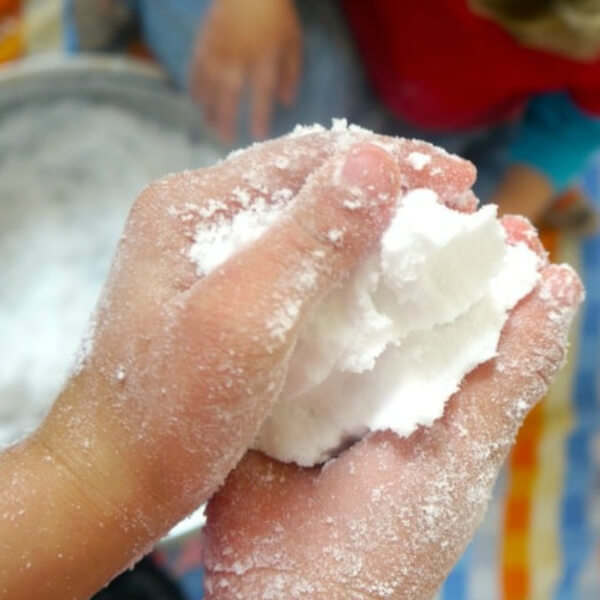
Image Source/Tutorial: Playtivities
Materials required:
- Baking soda
- Lavender essential oil
- Shaving cream
- Container
- Spatula
Experimental procedure:
- Take baking soda, shaving cream in a container and mix them properly using a spatula.
- Add some lavender essential oil to it.
- Knead all the ingredients properly using your hand.
- Your artificial snow is ready.
Catching the ice cubes
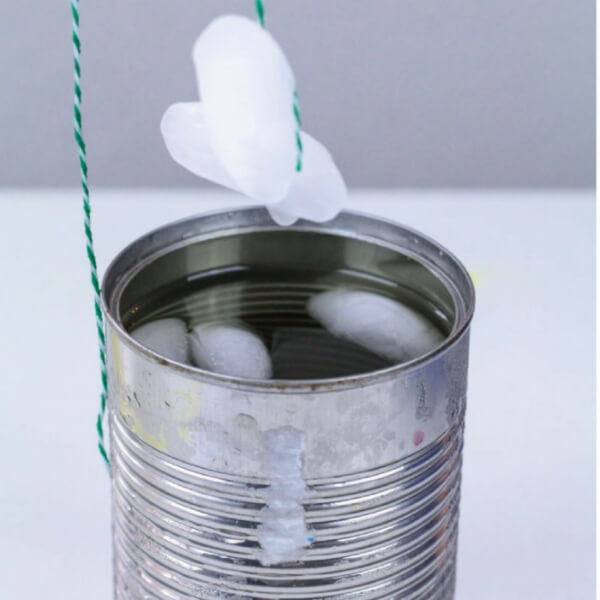
Image Source/Tutorial: A Dab Of Glue Will Do
Materials required:
- Tin
- Water
- Ice
- Yarn string
- Salt
Experimental procedure:
- This experiment helps us to understand the relationship between Ice and temperature.
- Fill the tin with water and add a few ice cubes to it.
- Now get the string and try to pick the ice cubes out of the tin using the yarn string.
- You will notice that you wouldn’t be able to catch any Ice cubes.
- Now sprinkle salt but in very little quantity around the ice cubes and then try again to catch any Ice cube.
- This time you’ll successfully catch some ice cubes.
- The science behind this is that due to the addition of salt the melting temperature of the icecubes decreased but the surrounding temperature was freezing so water froze again when in contact with the string and due to which we were able to pick some ice cubes with y
Frozen bubbles
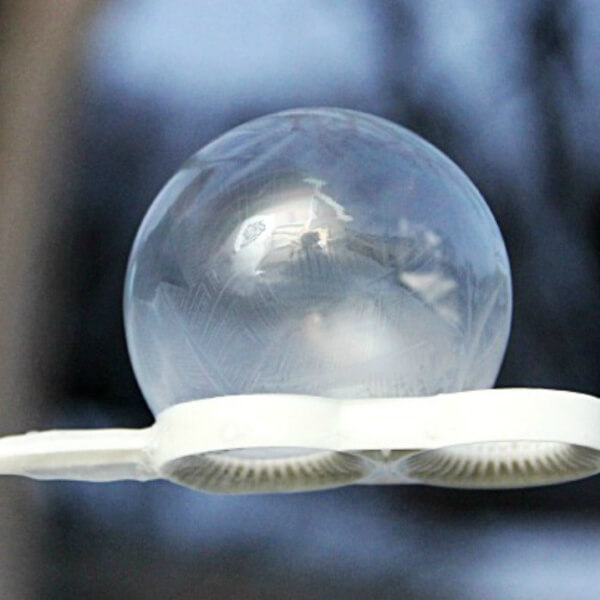
Materials required:
- Water
- Detergent
- Bubble blowing ring
- Very cold weather (-30° F)
Experimental procedure:
- We can perform this experiment only during the winter season when the temperature is as low as – 30°F.
- Mix the water and detergent properly in any bottle. Dip the bubble-blowing ring into the detergent solution and blow it at a less temperature as said above.
- At -30°F, the bubbles created will freeze in a few mins and we will get our frozen bubble crystals.
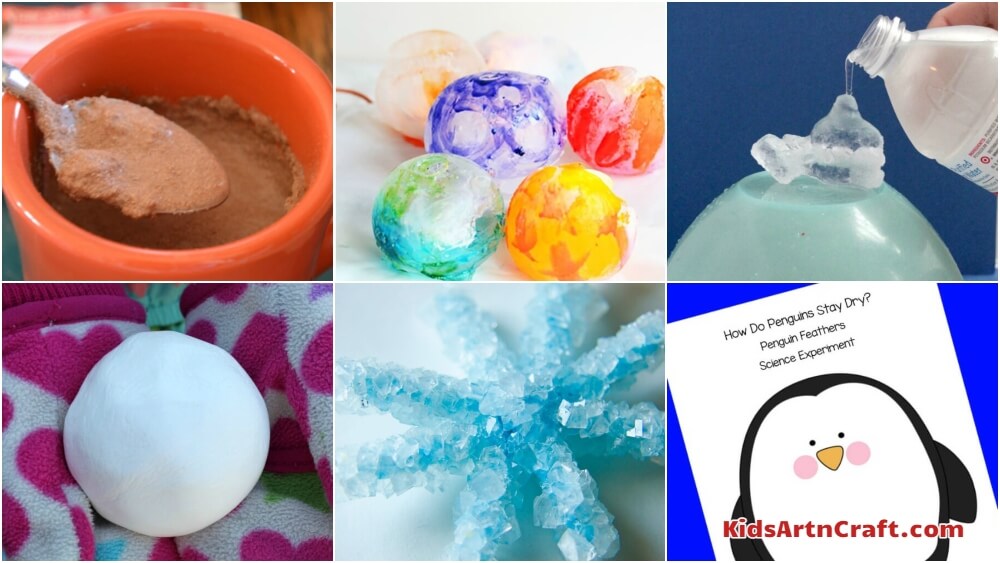
Molten chocolate
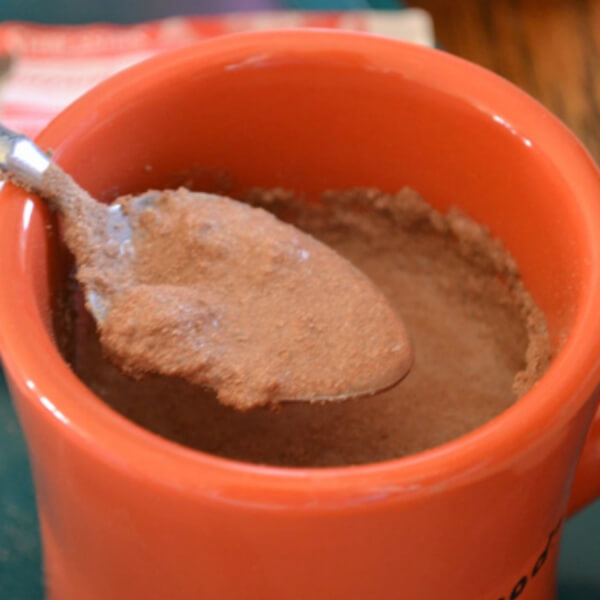
Image Source/Tutorial: Creative Family Fun
Materials required:
- Mugs
- Hot chocolate packets
- Notebook
- Stopwatch
- Measuring cup
- Water
- Kitchen thermometer
Experimental Procedure:
- Take some mugs and pour the hot chocolate into them.
- We will add water of different temperatures to different mugs and we will observe the time taken by each mug to melt the hot chocolate having water of different temperatures using Stopwatch.
- You can note down the temperature using a kitchen thermometer.
- Also, note down the time taken for melting chocolate.
- It was found that as the temperature increased melting process occurred in less time.
- It means that hot water has more energy which will be utilised for melting the Hot chocolate quickly.
Read More: 10 Simple Science Experiments for 3-5 Year Olds
Towel experiment
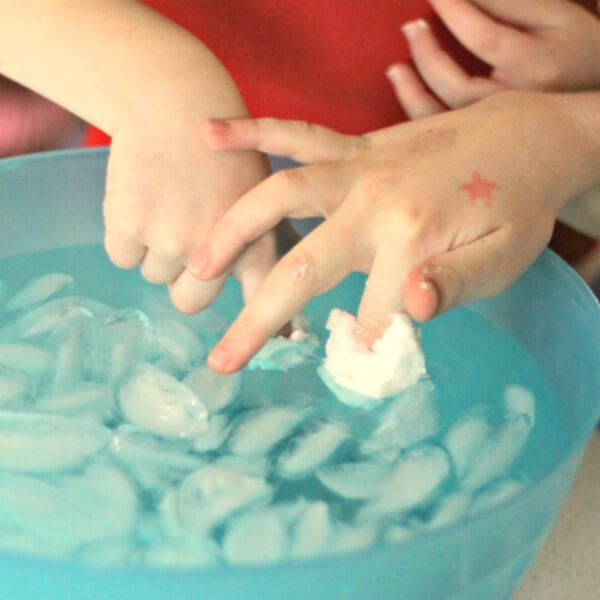
Image Source/Tutorial: The Science Kiddo
Materials required:
- Paper towel
- Ice water
- Shortenings
- Bowl
Experimental Procedure:
- Take some ice-cold water in a bowl.
- Tell your kid to place his/her hand in the bowl.
- Don’t forget to note down the time your kids keeps their hand inside the water.
- Now cover the hand of your kid with some shortenings and again observe the time he/she keeps his hand in the water.
- You’ll find that this time your kid will keep the hand in the water for a longer time than the first attempt.
- This shows how animals in the arctic survive in extremely cold water. Their body is covered with blubber which helps them to tolerate ice water.
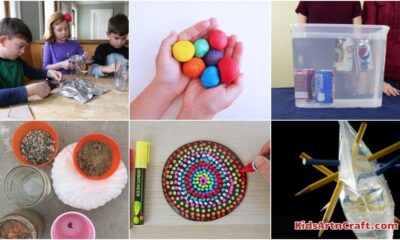
Penguin
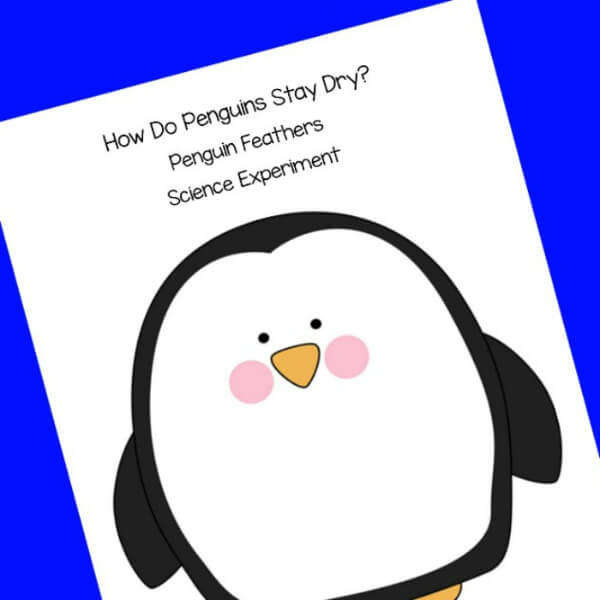
Image Source/Tutorial: Raising Little Superheroes
Materials required:
- Paper
- Crayons
- Water
Experimental Procedure:
- This experiment helps us to understand how penguins survive in extremely cold water.
- Take two different sheets of paper. Keep one sheet as it is and take another sheet and colour it with crayon colours.
- Now sprinkle some water on both the paper sheets.
- Observe both the sheets properly and you will find that the uncoloured sheet will become wet and the coloured one will be dry.
- The one Coloured is dry because the water molecules were not able to interact with the paper directly due to the hindrance created by the wax/ crayon colours.
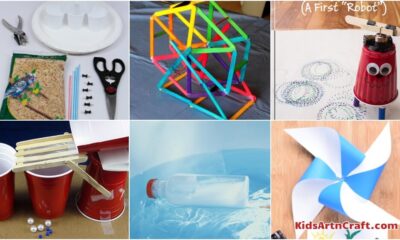
Colourful Coloured Ice crystal lanterns
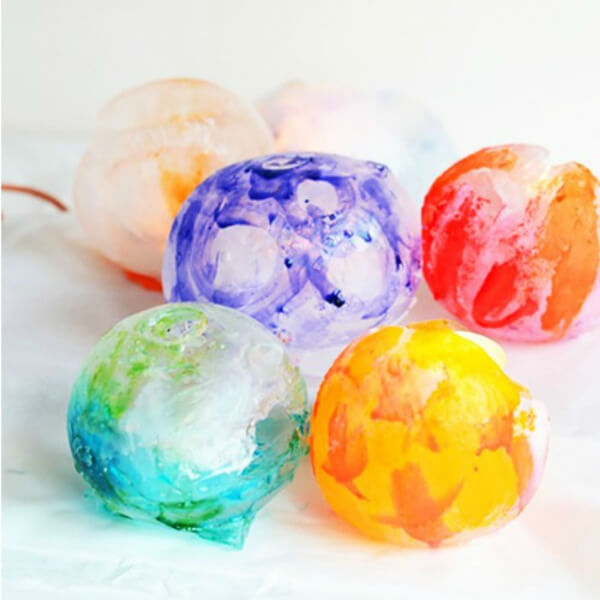
Image Source/Tutorial: Willow Day
Materials required:
- Circular containers
- Water
- Refrigerator
- Colours
Experimental Procedure:
- Take some circular containers and fill them with water.
- Now refrigerate these containers till they will freeze.
- Once they are frozen, they will attain a circular shape.
- Get them out of the fridge and spread colours over these circular ice balls.
Melting of ice
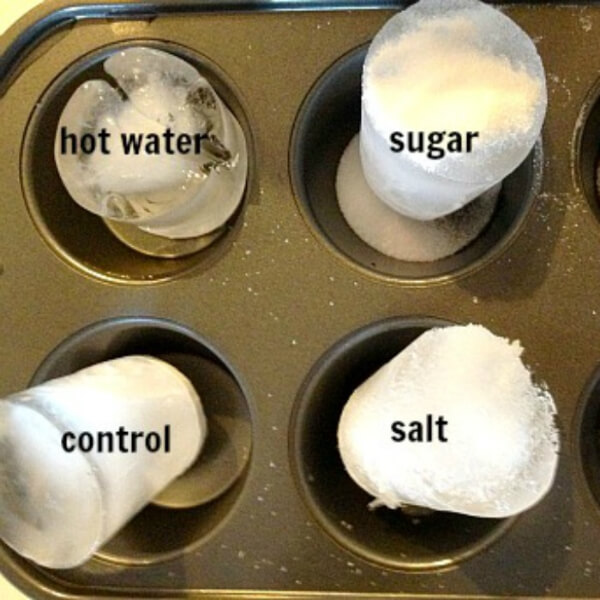
Image Source/Tutorial: The Chaos and the Clutter
Materials required:
- Muffin baking tray
- Water
- Fridge
- Salt
- Sugar
- Hot water
Experimental Procedure:
- Fill the muffin baking tray with some water.
- Place the muffin baking tray in the fridge.
- Let the water freeze.
- Take out the tray from the fridge.
- Add salt, hot water, sugar to different compartments of the baking tray. Keep one compartment as it is. Don’t add anything to it and name it as control.
- Wait for a few minutes and observe each compartment.
- We will find that Ice will start melting in each compartment at different rates.
- The one in which we added hot water will start melting more quickly than the others.
Read More: Activities for your kids to practice colors
Sink or float
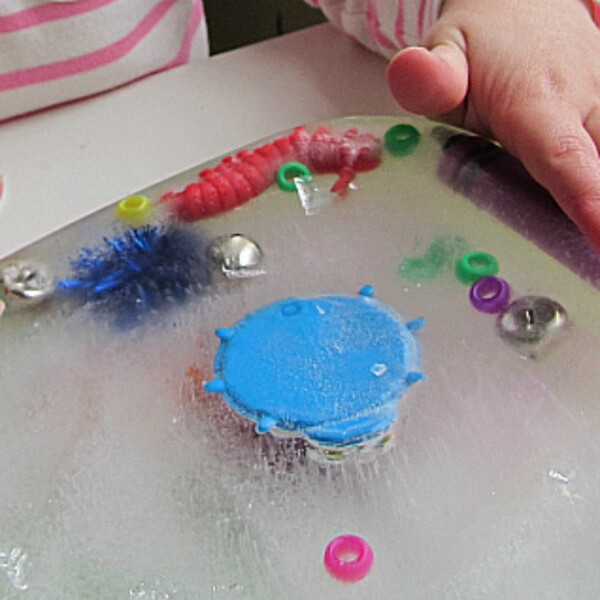
Image Source/Tutorial: PBS
Materials required:
- Toys
- Water
- Refrigerator
- Plastic container with lid
Experimental Procedure:
- Take a plastic container and fill it with water.
- Add different types of toys to it.
- You will notice that some toys will float and some toys will sink.
- Put the lid over it and place this container inside the fridge.
- Let the water inside the container freeze.
- Take out the container and observe that some toys will be frozen at the top and some will be frozen at the bottom.
- This shows that different things interact with water differently.
Winter science
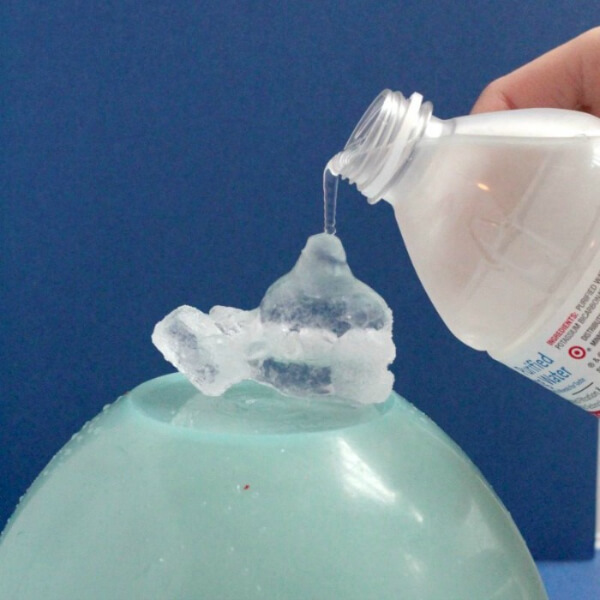
Image Source/Tutorial: Raising Lifelong Learners
Materials required:
- Water bottles
- Ice cubes
- Small bowl
- Towel
Experimental Procedure:
- Fill water in some bottles and place some of them upright and some flat on the fridge shelves.
- Keep them for at least 2 hours.
- After 2 hours, take out the one bottle which was placed upright and smash it on the counter. You’ll observe that the bottle was not stiff from the outside and the water inside this bottle was not that cold.
- Now take another bottle Which was kept flat and smash it on the counter. We will feel that the bottle is stiff and the water inside it is very cold.
- Get a bowl and place it over the towel upside down.
- Place an ice cube over it and you’ll add some cold water to it And we will see frozen water will create a column of water.
Repeat this trick for other bottles as well.
Lights

Image Source/Tutorial: Education
Materials required:
- Light bulb
- Wire
- Battery
- Electric tape
Experimental Procedure:
- Take an old fairy light and cut one light along with the two terminals of the bulb as shown in the image from it.
- Now connect the two end wires of the light to their respective electrodes that saree the positive and negative sides of the battery.
- To keep the wire connected properly to the battery, we can use electric tape as shown in the picture above.
- Once the wires are connected properly to the battery we can observe that the light bulb will start glowing.
- This experiment helps us to learn about the importance of a complete circuit so that energy can pass through the wire in the form of electricity.
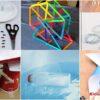
Melting Ice
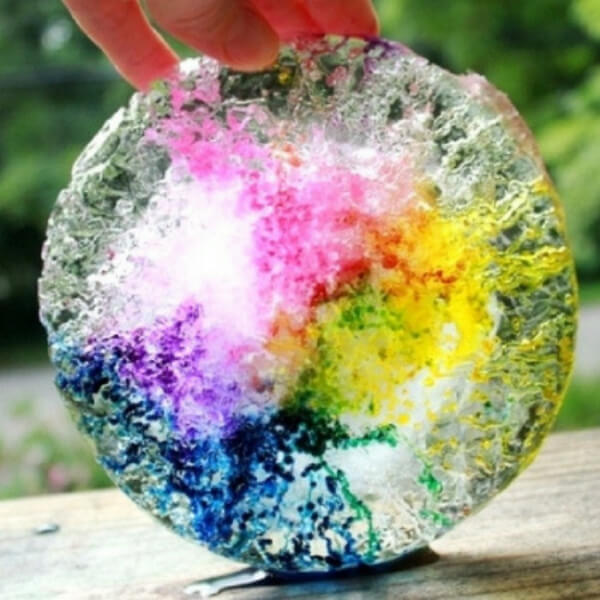
Image Source/Tutorial: Artful Parent
Materials required:
- Bowls
- Tray
- Salt
- Colours
- Dropper
- Refrigerator
- Warm water
Experimental Procedure:
- Take bowls of different sizes and pour water into them.
- Keep these bowls inside the fridge that the water will freeze.
- After the water has frozen in all bowls. Get the bowls out of the fridge.
- Loosen the ice from the bowl with the help of warm water.
- Place the bowl-shaped ice fragments on the tray.
- Sprinkle some salt over the ice. You will observe that some small cracks will start developing around the region where I had sprinkled the salt.
- Pick up some colours using a dropper and squeeze the colours over the ice.
- You’ll observe the beautiful patterns that will be created on the ice when it enters through it.
- This experiment shows us how the salt starts melting ice and that’s why cracks are created.
Read More: Activities for your kids to practice colors
Cool Candy
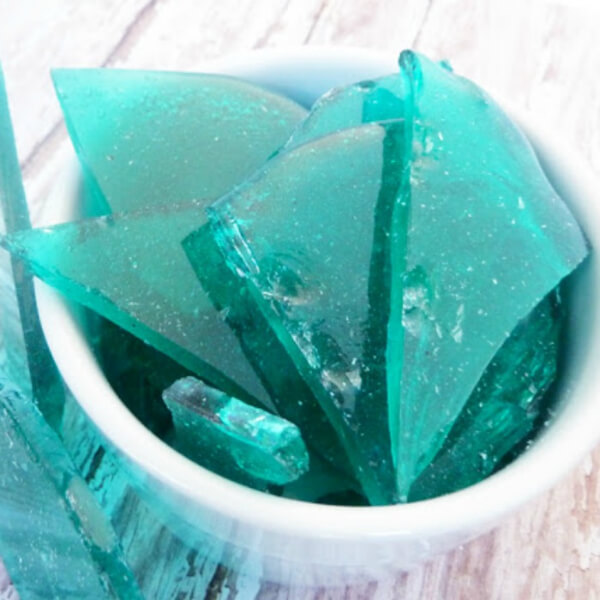
Image Source/Tutorial: Simply Designing
Materials required:
- Sugar
- Corn syrup
- Salt
- Peppermint extract
- Neon blue food colouring agents
Experimental Procedure:
- Take some sugar, corn syrup and salt in a pan and start boiling it but with constant stirring.
- First, boil at a low temperature, but with time increase the temperature.
- After it becomes vicious, add a food colouring agent to it and also add peppermint extract to it for giving it some flavour.
- Transfer this mixture to the plate which has been lined with parchment paper.
- Let it dry so that it solidifies properly.
- With the help of a knife make some cracks on the solidified candy and taste it and share it with your friends.
Chalk craft
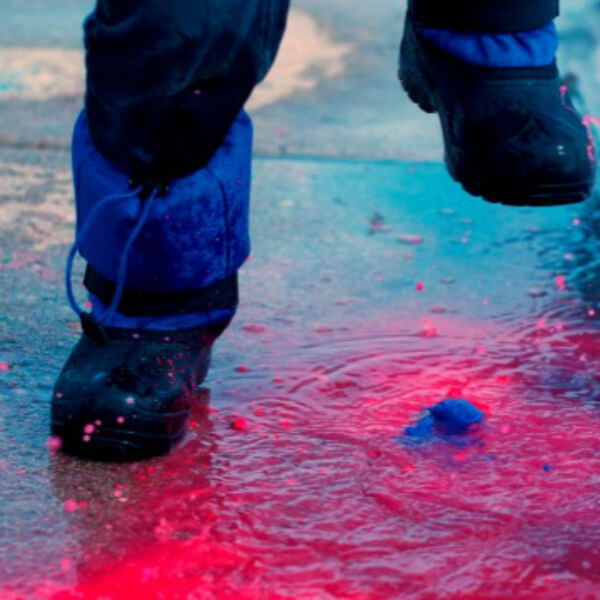
Image Source/Tutorial: Lemon Lime Adventures
Materials required:
- Puddle ( rainwater)
- Coloured chalks
Experimental Procedure:
- Using coloured chalks, colour the roads.
- When rainwater accumulates on that road a pattern is made.
- The pattern observed will be the same as shown in the image.
Playdough
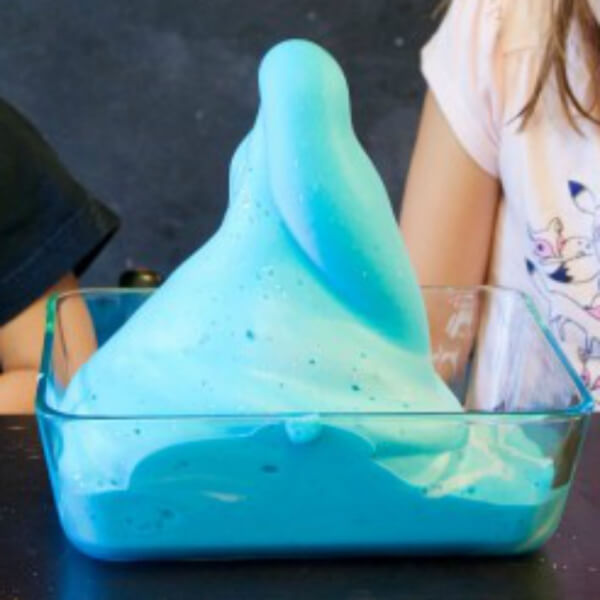
Image Source/Tutorial: Playdough To Plato
Materials required:
- Plastic bottle (with narrow opening)
- 1/2 cup of 20-volume (6%) hydrogen peroxide liquid ( Also called “developer”.)
- Dish soap
- Food colouring agent
- Plastic glitter
- Peppermint essential oil
- Active dry yeast
- Warm water
- Small cup or bowl
- Funnel (optional)
- Baking pan
- Safety goggles
Experimental Procedure:
- Get a plastic bottle and add warm water and yeast to it.
- Let the yeast bubble out a little.
- Meanwhile, we will make other preparations for the experiment.
- Take another bottle and add hydrogen peroxide, dish soap, colouring agent, plastic glitter, peppermint essential oil to it.
- Mix all the ingredients properly.
- Now transfer this mixture into the previous bottle in which we added water and yeast using a funnel.
- We will observe that in fractions of seconds foam will be formed and it will start coming out of the bottle and we will feel that the bottle becomes warm.
- Pour this foam into some tray and play with it.
- This experiment shows that the hydrogen peroxide reacted with water and other constituents in presence of yeast. Yeast acted as the catalyst for this reaction that’s why the reaction was too quick. Oxygen liberated was trapped by the foam molecules. The bottle became hot because it was an exothermic reaction and heat was liberated due to breaking down of hydrogen peroxide into oxygen and water.
I wish this article was knowledgeable for you all and it made your concepts clear. We have tried our best to make it fascinating and increase the curiosity among the kids so that they start showing interest in the field of science. Do share your experience with us while performing these experiments and also tell what you learnt out of these experiments in the comment section below. This article was only written to teach the kids with fun and enjoyment so that they will never feel any boredom while studying science.
Read More:
- 10 Simple Science Experiments for 3-5 Year Olds
- 10+ Activities To Get Your Preschooler Started On Numbers
- 10+ Fine Motor Activities for Toddlers
- 10+ Pi Day activities and Facts (You Need To Know)


