Drawing
Creative Cat Drawing Using Fall Leaves Tutorial For Kids

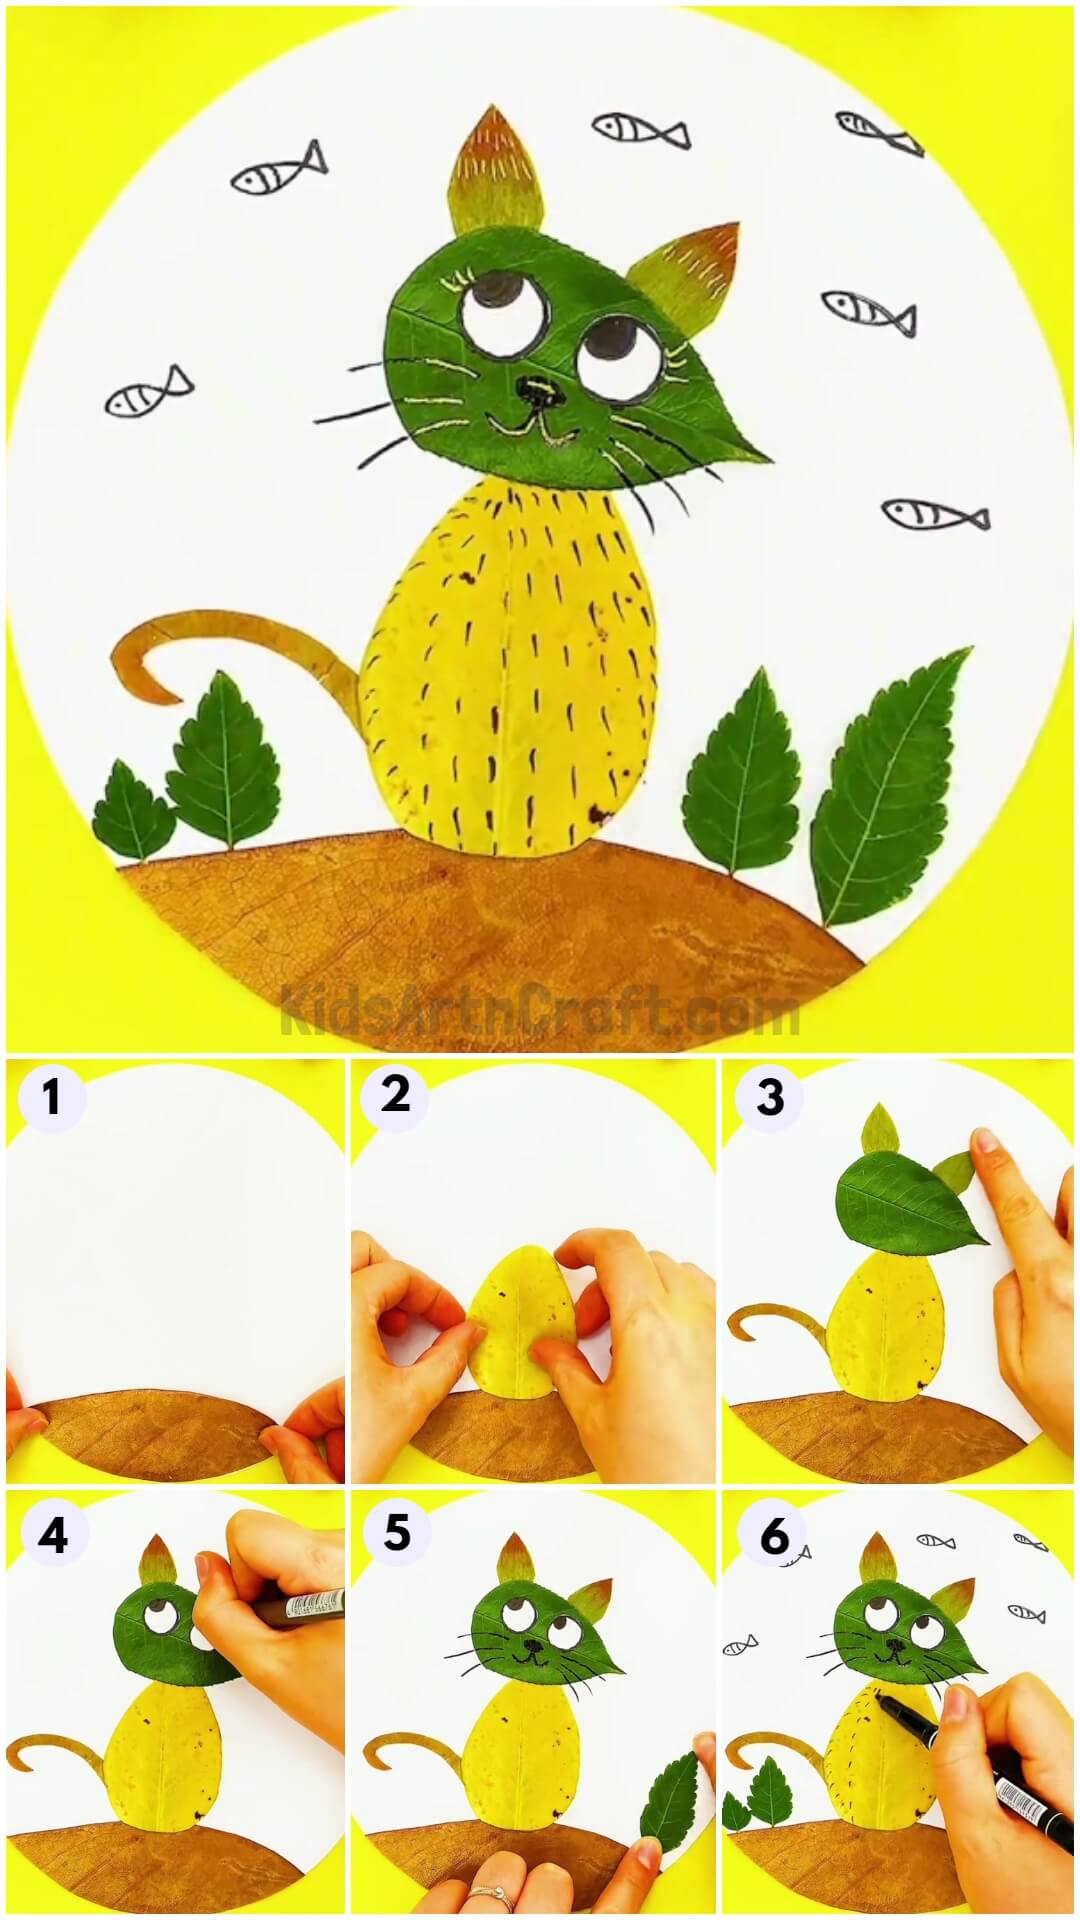
How about creating a cat using fall leaves? This tutorial is all you need to make one. Let us get started!
Easy Cat Drawing Using Fall Leaves
Read More: Easy To Make Fall Leaves Craft Tutorial For Kids
Materials Required
- A white circular sheet
- A bunch of fallen leaves collected from a nearby park
- Glue
- Two small white circular pieces paper for eyes
- A black marker,/li
- A pair of scissors
- A golden pen
Procedure
Step 1: Base of the Artwork
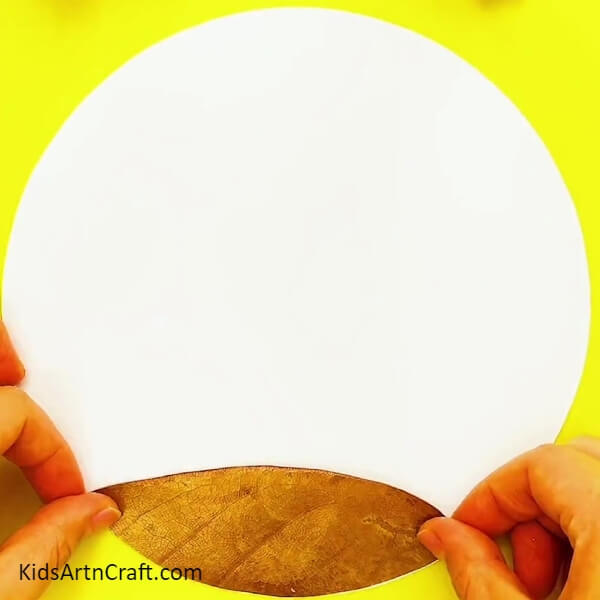
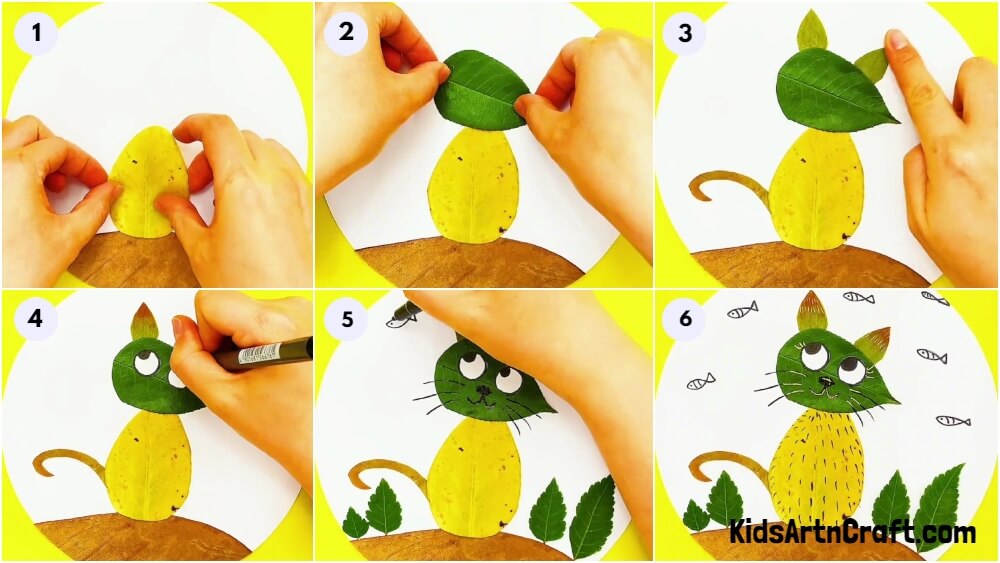
Start by finding an appropriate leave which could be pasted to make ground. Prefer a brownish leaf and paste it on the white circular sheet as shown in the picture.
Step 2: Body of the Cat
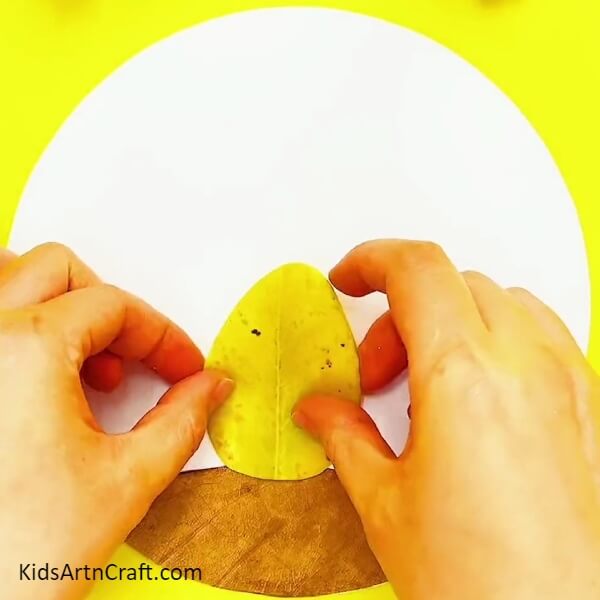
Next, find an appropriate leaf for the body of the cat. Prefer a leaf smaller than the leaf used for ground. The leaf could be of any color you like. After you have found, paste it on the white circular sheet as shown in the picture.
Step 3: Head of the Cat
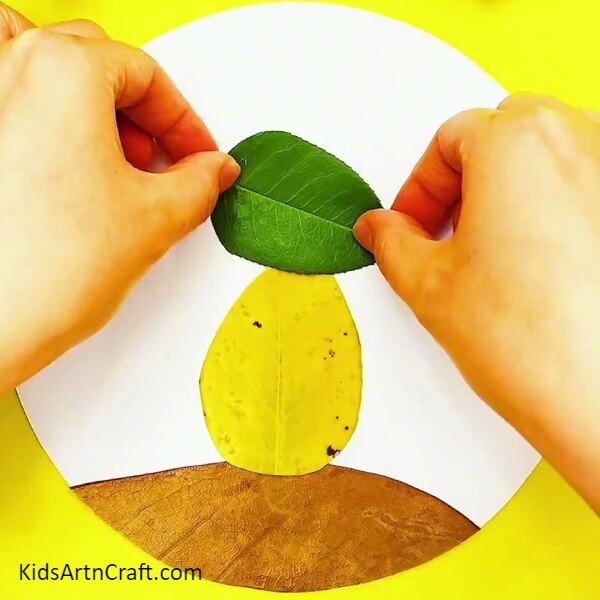
The cat’s head requires another leaf. The leaf should be of appropriate size that is smaller than the leaf used for the body of the cat. Once found, paste it on the top of the cat’s body.
Step 4: Tail of the Cat
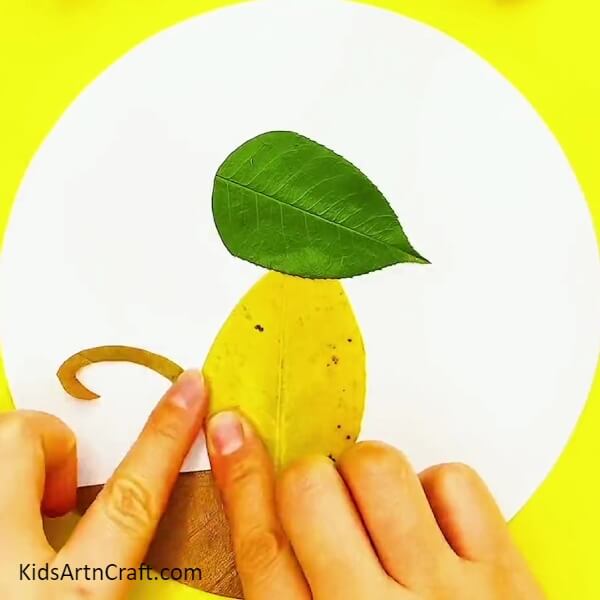
For the tail, any leaf could be used. Take a pair of scissors and a leaf. Cut the leaf in the shape of a tail. Paste the tail just beside the body of the cat. Look at the picture for better understanding.
Step 5: Ears of the Cat
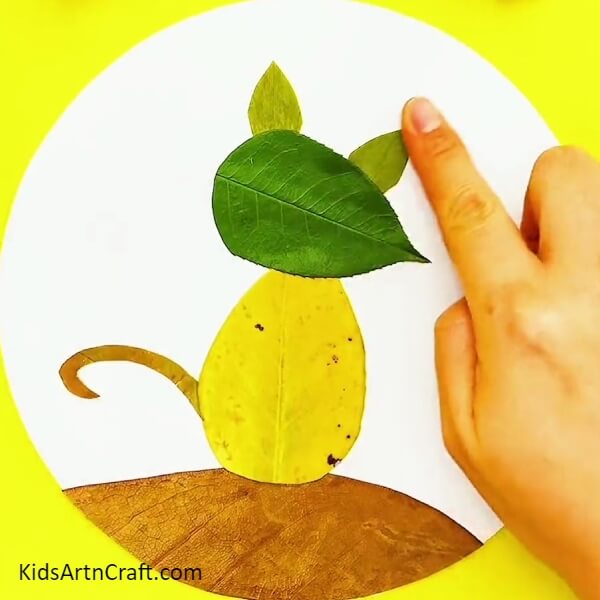
For the ears, take two small leaves of the same color. Paste them above the head of the cat.
Step 6: Face of the Cat
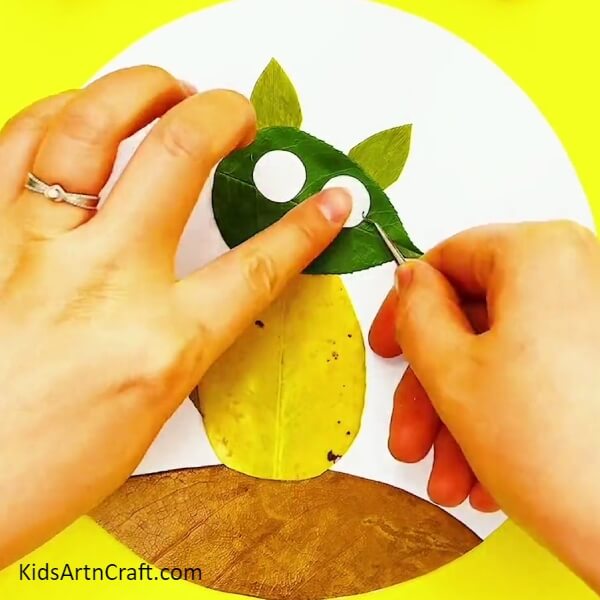
For the eyes, take two white circular pieces of paper and paste them at the place of the eyes. Also, don’t forget the mouth, nose, and whiskers. Draw all of them as shown.
Step 7: Adding Details to the Cat’s Eyes
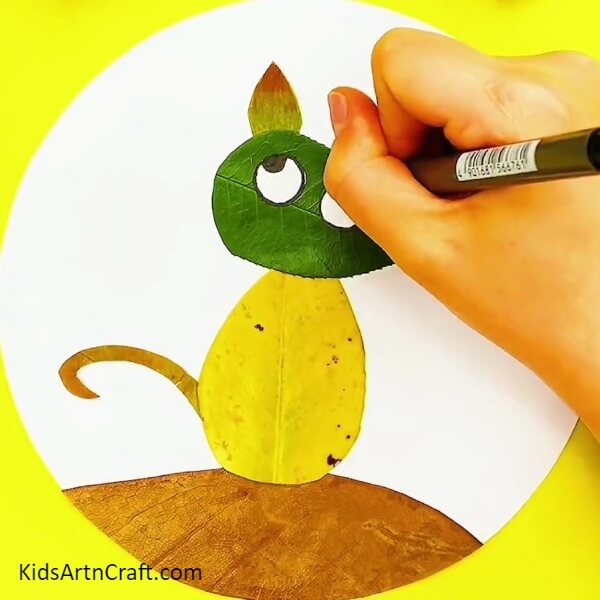
By using a marker, draw the eyeballs of the cat as shown in the picture.
Step 8: Adding Detail on the Right Side
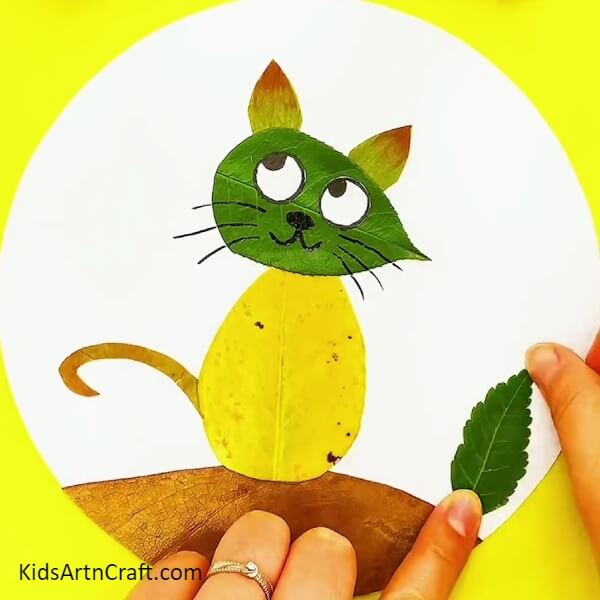
Take two leaves, one of medium size and other of small size. Paste them on the right hand side of the cat. Refer to the picture.
Step 9: Adding Details on the Left Side
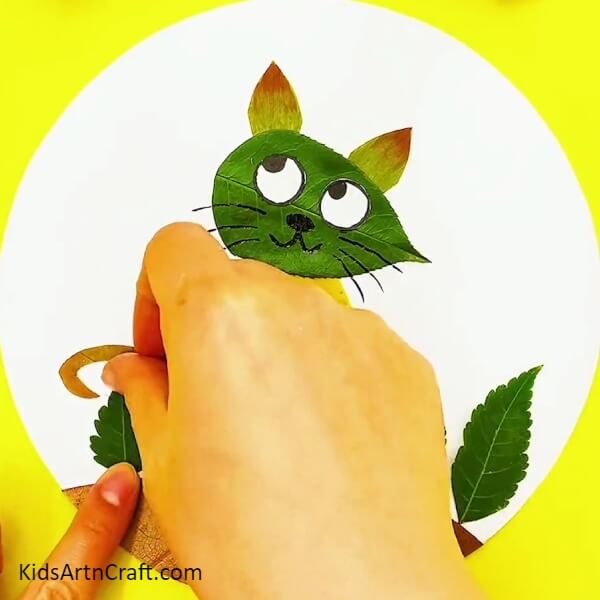
Take two leaves, one of medium size and other of small size. Paste them on the left hand side of the cat. Refer to the picture.
Step 10: Details in the Background
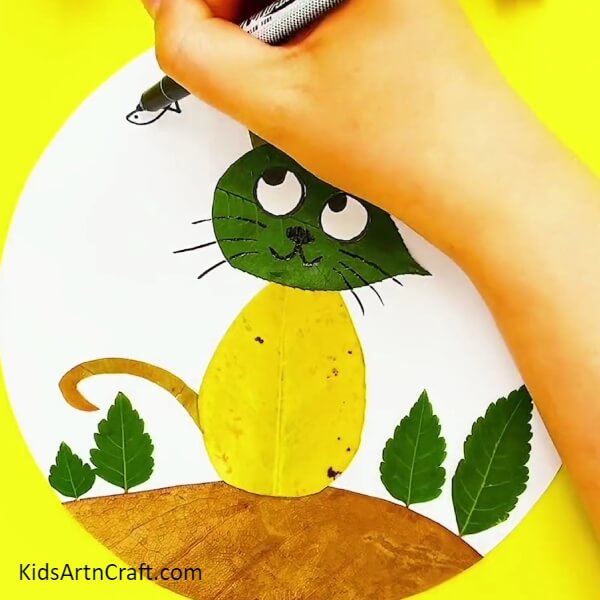
For the background, take a black marker and draw some fishes on the white sheet. Look at the picture.
Step 11: Highlighting Cat’s Body
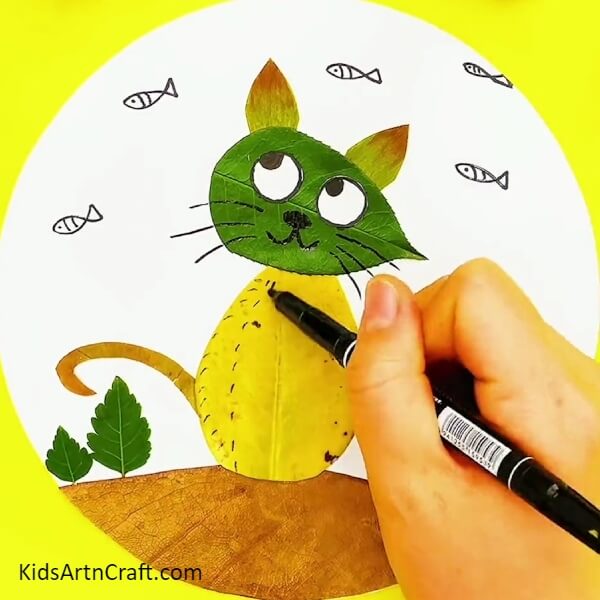
By using a black marker, draw fur on the cat’s body. Refer to the picture.
Your Craft Is Ready!!
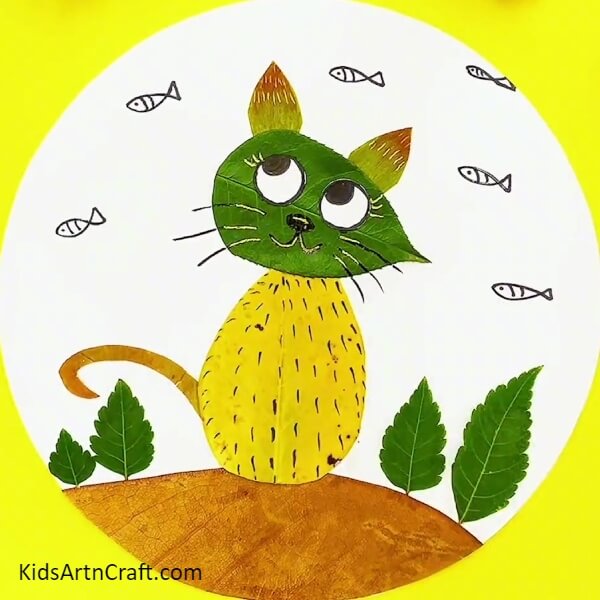
Though the cat has been made but still you can add some finishing touches by using a golden pen. Highlight the whiskers and make eyelashes of the cat. By adding more details the artwork is looking more visually appealing. This cat is made up of mainly fallen leaves which could easily be found in the nearby park or school ground. After doing this, children must have learned how they can use unwanted materials such as fallen leaves in a creative way. Indeed it was an amusing and interesting activity.
Hope that this tutorial has invoked your creativity and you are up to make more such artworks by using fallen leaves! Let us know in the comment section about your experience.
Thanks for visiting our website.
Follow us on Youtube for art and craft tutorials and much more.
More Articles from Kids Art & Craft
- Easy Leaf Insect Craft Tutorial For Kids
- DIY Ladybug Leaf Craft Step-by-Step Tutorial For Beginners
- Giraffe and Bird Leaf Craft Tutorial For Kids
- Easy Fall Leaf Artwork Tutorial For Kids
- Easy Leaf Fall Artwork And Craft for Kids


