DIY and Crafts
Homemade Toys You Can Make for Your Kids

Create fun homemade toys for kids using simple materials! Explore DIY ideas for puzzles, dolls, wooden cars, and educational games to inspire creativity.
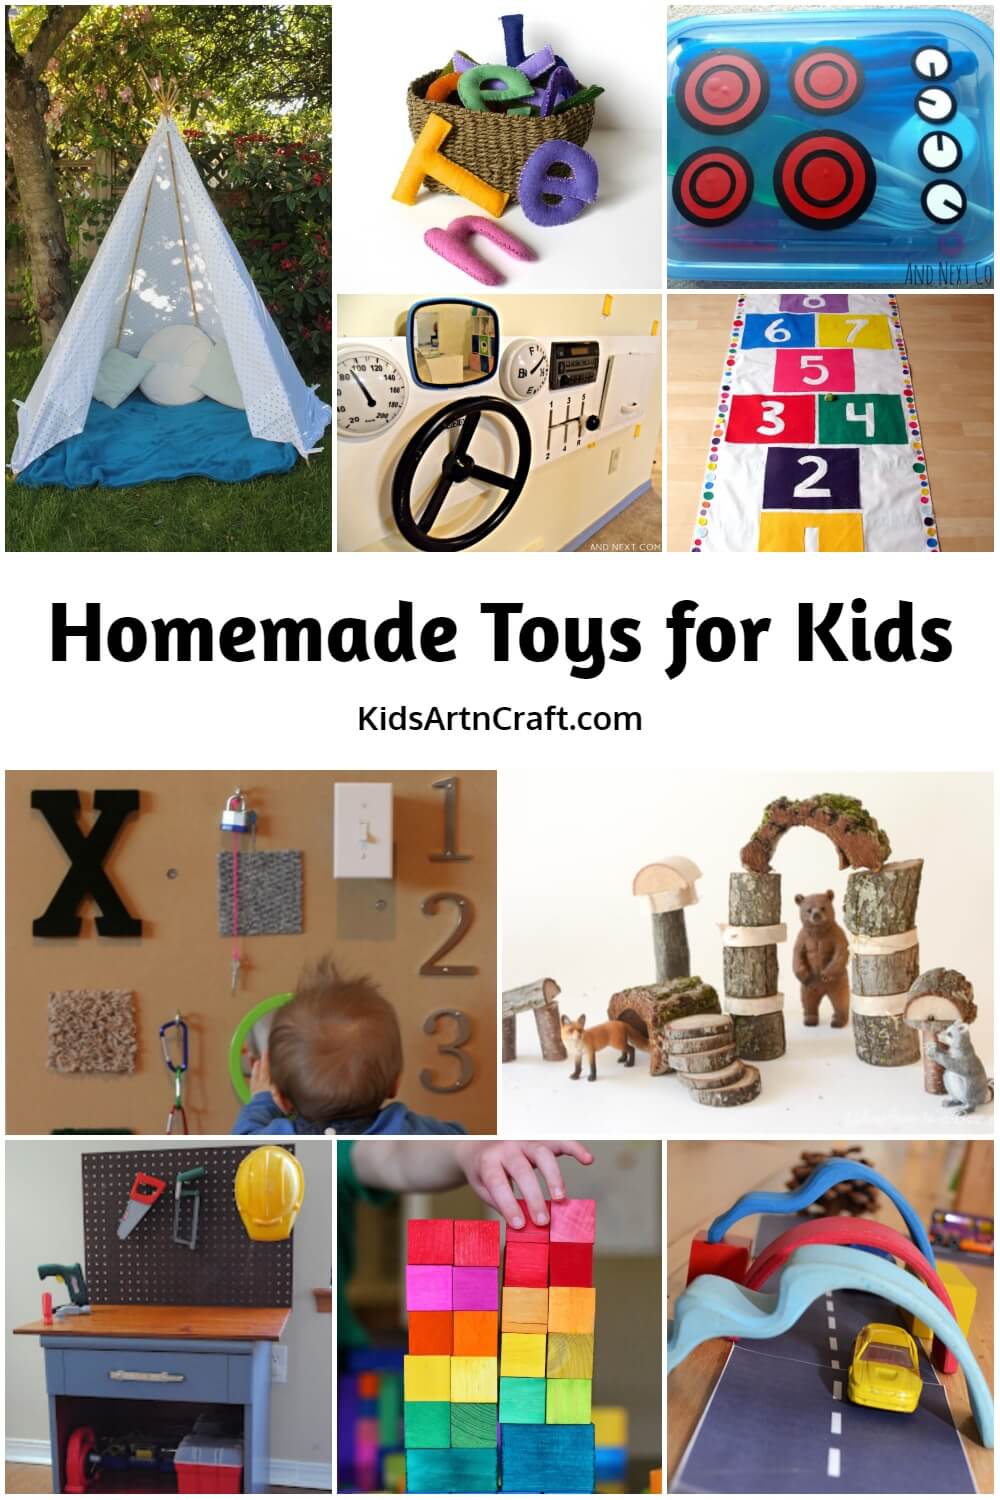
If you’re searching for homemade toys you can make for your kids to do at home, you’re in the right place! Keep your learning spirit alive with our curated list of homemade toys like frame lacers, foam lacing shapes, stuffed letters, pocket charts, head quiet book, DIY sensory boards, car-themed sensory boards, cardboard dollhouses, bookshelf dollhouses, homemade name stamps, workbench, kitchen homemade, tag blanket, cloth baby book, hobby horse, homemade parachute, quiet book, kiddo, and outdoor easel.
Homemade Toys You Can Make for Your Kids

Read More: Homemade Costume Ideas for Kids
Fine Motor Skills Activity: Frame Lacers

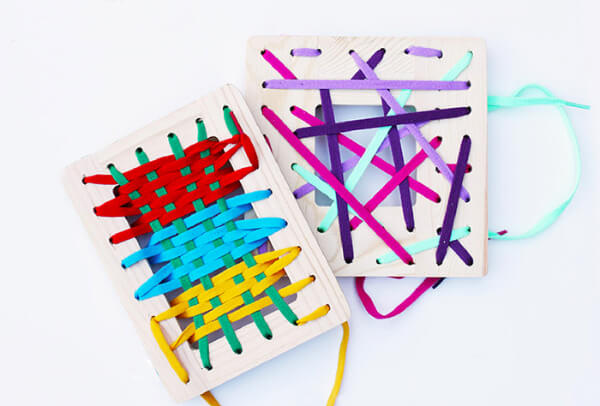
Image Source/Tutorial: Babble Dabble Do
Materials required:
Wooden frame
Pencil
Colorfulshoelacess
Drill
Sandpaper
Pliers
Take a drill machine and mark holes in the wooden frame. Now, take sandpaper and frame it on both sides of the hole. Roll the sandpaper and push it into each hole. Lastly, take the lace and knot it from one end to the other end of the frame. Repeat this process, and the frame is made. You can try this activity at home with your friends or any family member. You can do this activity in 20 min. I hope you like this creativity. This activity can be done mostly by kids or any age group of people.
Foam Lacing Shapes

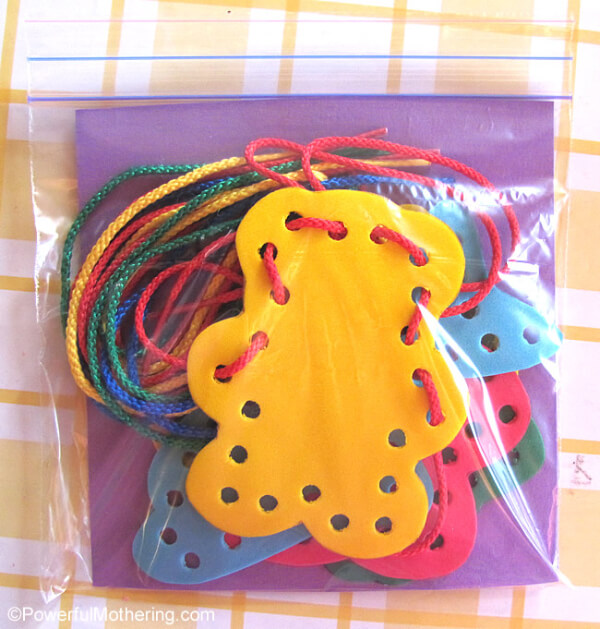
Image Source/Tutorial: Powerful Mothering
Materials required:
Scissor
Shape templates
Hole punch
Shoelace
You can make this foam into a lace shape at home within 20 minutes. Take a thick foam and start giving it the shape of your choice. Now, take a hole-punching machine and make a hole at the corner of the shape. Now, take a shoelace and place it in the hole systematically. Kids enjoy this activity while doing it. Now it’s your turn to show your creativity.
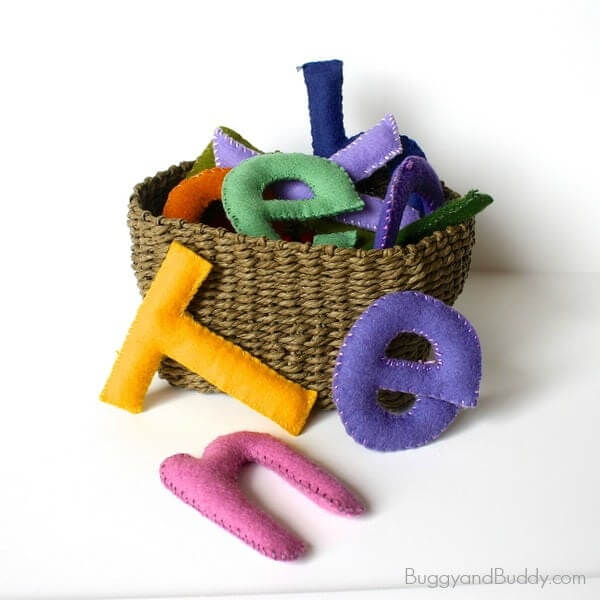
Stuffed Felt Alphabet Letters

Materials required:
Felt
Scissor
Embroidery thread
Pins
Needle
Letters print out
Let’s start this activity by taking a printout of the printable alphabetical letters. Cut the letters into the proper shape. Print two of each letter. Now, pin both the front and back letters together. Then, take the same color of embroidery thread that matches the letter. Stitch it around the corner. This is a simple and easy activity that you can try in your free time or in the evening. Also, it is budget-friendly, and materials are easily available at home.
DIY Alphabet Pocket Chart

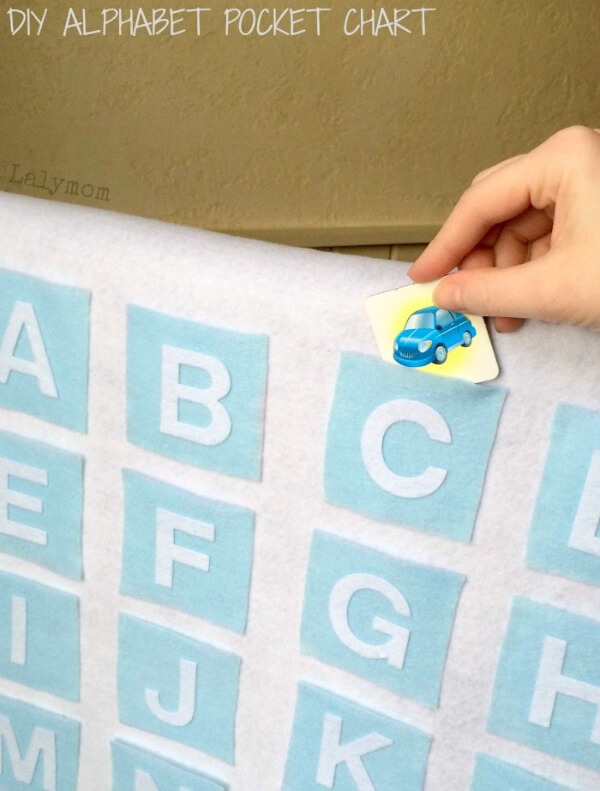
Image Source/Tutorial: Laly Mom
Materials required:
- Hot glue gun
- Scissor
- Felt
- Slash cutter
- Paper
- Scale
- Alphabet pocket chart
Let’s start this activity by cutting 26pieces of felt into a square shape of equal size. Now, take an alphabet pocket chart and cut it in alphabetical order. Then, take a hot glue gun and paste the alphabet on the felt. Repeat this process till the end. I hope you like this activity, and also you can do it on your own. It takes 15-20 min.
Mr. Potato Head – Quiet book

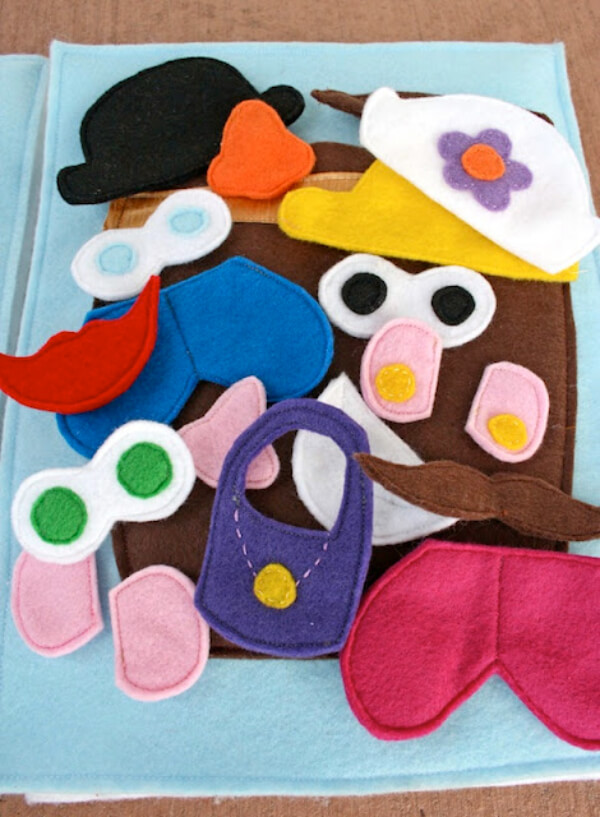
Image Source/Tutorial: Jocelyn And Jason
Materials required:
- Templates
- Scissors
- Hot glue
- Felt
- Different sets of eyes
- Mouth
- Lips
- Little circles
- Hat
Start this activity by printing the templates and cutting all the pieces that are required. Now, take the pieces of potato and other accessories and paste them on the felt. This is an easy and simple activity that you can just tell your kids to do at home. I hope you like this unique style of creativity. This is also budget-friendly and can be done by measure, and kids, but also the young age group.
Read More: 15+ DIY Homemade Wind Chimes Crafts for Kids
DIY Sensory Boards for Babies and Toddlers

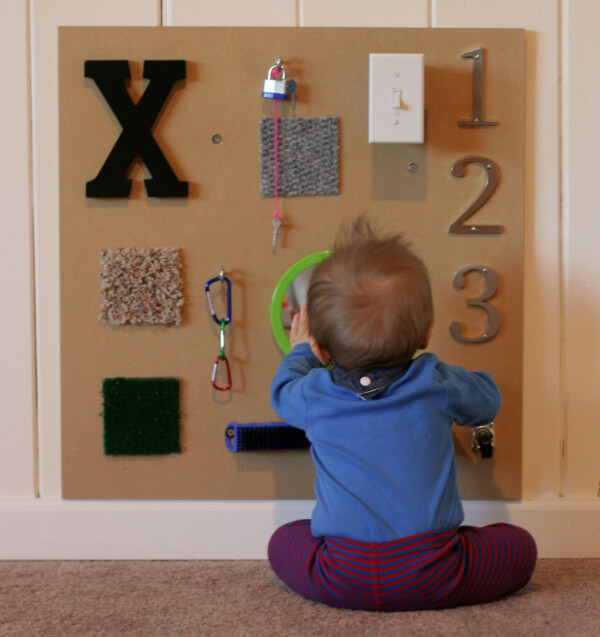
Image Source/Tutorial: Fun At Home with Kids
Materials required:
- Sensory board
- Screw
- Hot glue
To make these sensory boards for babies. Take the board and put it on the wall by attaching a screw to the wall. Now, take the hot glue gun and put the numbers, letters, locks, and other items on the board so that the child can run to play. Also, attach a mirror through which light gets in. You can also put another item as per your choice, which the child gets attracted to. This is very helpful and useful to kids for playing purposes.
Car Themed Sensory Board For Kids

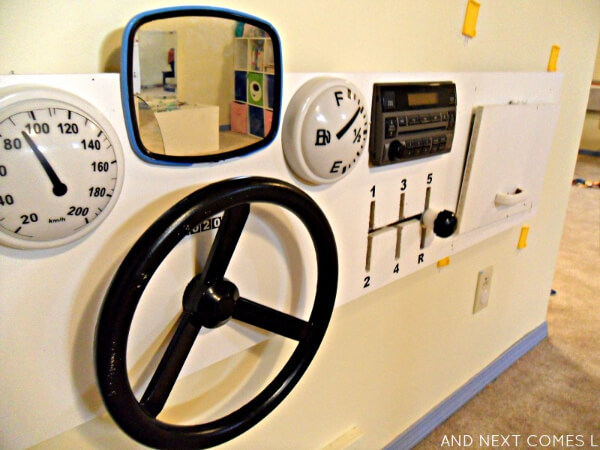
Materials required:
- Tape lights
- Mirror
- Glossy black spray
- Board
- Wood
- Clock
Cut the jigsaw, and after cutting, paint the board and the small pieces of wood. Now, spray black on the wheel. On the board, fix all these items. So that the sensory boards for kids are ready. You can also try with the waste material that is not useful to you for a long time. It takes 15 min to make all this.
DIY Cardboard Dollhouses Made By Kids

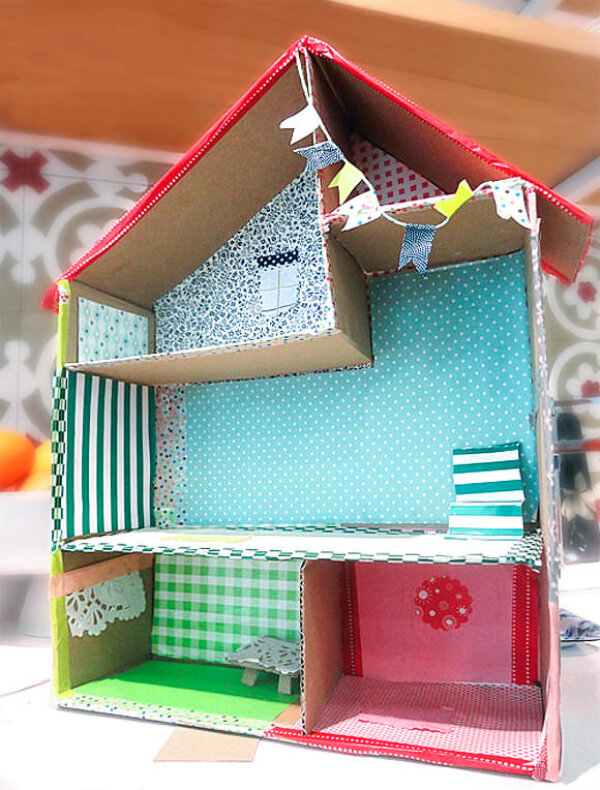
Image Source/Tutorial: Hand Made Charlotte
Materials required:
- One large cardboard box and some small cardboard boxes
- Hot glue
- Acrylic paint
- Printable paper
- Old fabric
To make this beautiful cardboard dollhouse. Firstly, take a large cardboard box. Then, make five basic rooms by using 2-3 small pieces of cardboard. Take the hot glue gun and paste different colors of printable paper into each room systematically. Cut the pieces into small folds from top to bottom and put them into the lower room and the middle room. Now cut the center wall of cardboard and sort it into the top with glue. Your amazing cardboard dollhouse is ready. You can make this in 15-20 minutes, and it is budget-friendly for you all.
A Bookshelf Dollhouse for Miss G
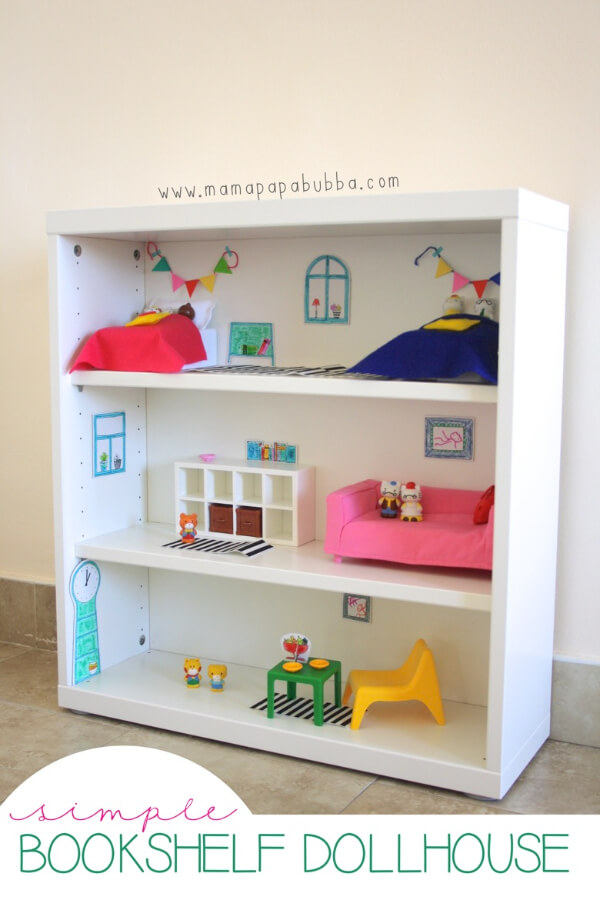
Image Source/Tutorial: Mama Papa Bubba
Materials required:
- Small shelf
- Doll furniture set
- Carpate
- Double-sided tape
- Carpet
Here we are making a beautiful bookshelf dollhouse for kids. Order or buy a mini bookshelf and place it accordingly. Now, on the bottom of the shelf, we put the furniture of the kitchen, like a table, a chair, etc. On the above kitchen floor, we made a living room where we put a sofa set, a shelf, books, a frame, etc. On top of the floor, there is a bedroom where there are two beds, windows, etc. Place furniture on a carpet on each floor. By using this inexpensive item, your bookshelf dollhouse is ready. It takes 15 min to make this beautiful shelf for a girl.
A Homemade Name Stamp
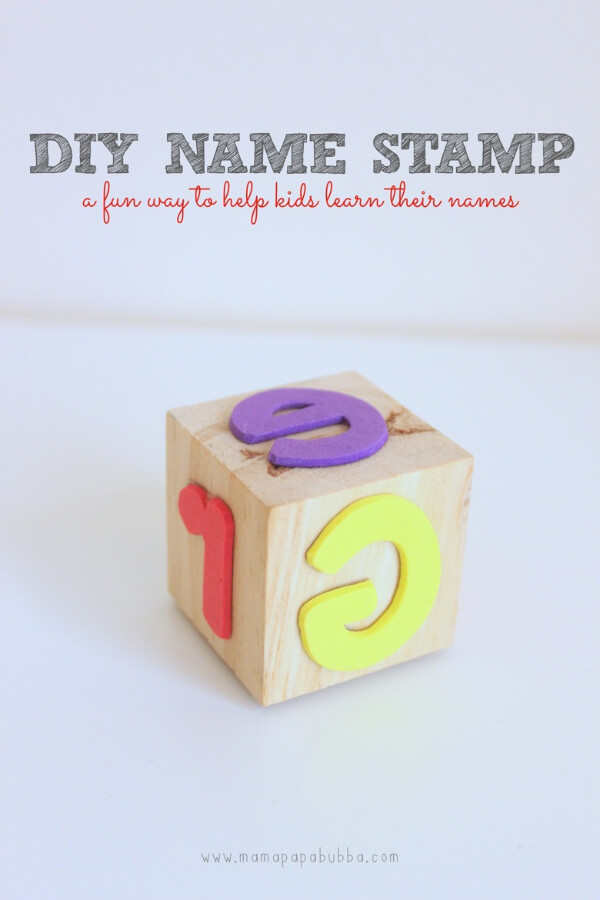
Image Source/Tutorial: Mama Papa Bubba
Materials required:
- Wooden blocks
- Marker
- Colorful stamp
- Scissor
- Glue
- Pieces of blank paper
To make this homemade name stamp. Take a colorful felt or stamp and write the letters of your name in different colors of the tamp. Now cut the letter stamp and glue the letters on each side of the wooden block. Dry the wooden stamp overnight or for 2-3 hours. Take ink and a piece of paper, dip the letter into ink, and paste it on the blank paper. By doing this, you can write your name. This is an easy and inexpensive activity that you can try at home.
Read More: Fruit & Vegetable Costumes for Kids – Homemade Fancy Dresses
AJ’s new workbench

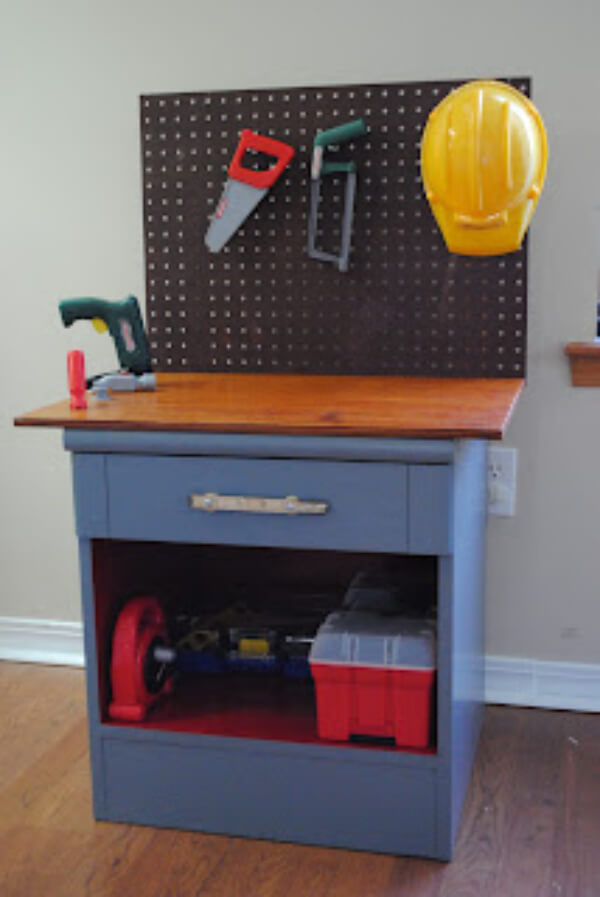
Image Source/Tutorial: The Frugal Granny
Materials required:
- Wooden dowel
- C-clamps
- Panels
Remove the components of the box and assemble it by yourself. Now take a C-clamp to assemble the workbench. Fit the panel into the hole. Put the wooden dowel inside the box and make support from both sides. Screw the panel from all sides tightly. It takes 30 min to complete this activity. Now it’s your turn to show your creative side in another way.
Fabulous Kitchen Homemade

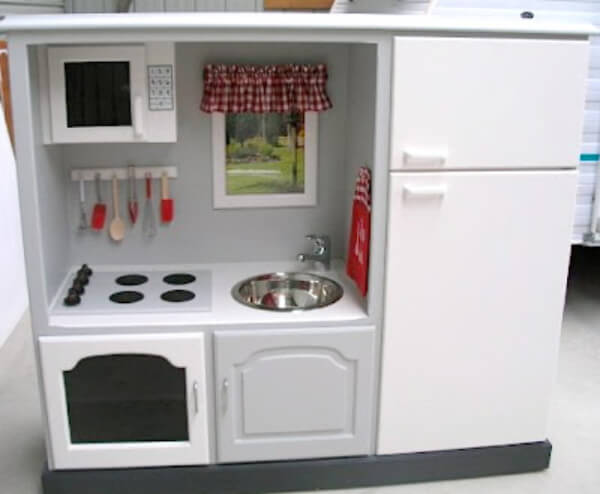
Image Source/Tutorial: Giggleberry Creations
Materials required:
- DVD player shelf
- Paint
- Tape
To make this fabulous kitchen. First, take a DVD shelf and paint it with white paint, and do a second coat if required. Now make a big hole in the shelf and tape it out properly. The fridge and freezer were fitted on the door of the DVD. Put the microwave at the top of a corner. Windows were also added by adding greenery photos on them. Put red curtains on the window. There, we made an electric cooker for food. Added some washing area and napkins. Your beautiful, homemade kitchen is ready. It takes 15 min to make this beautiful kitchen.
How To Make A Tag Blanket

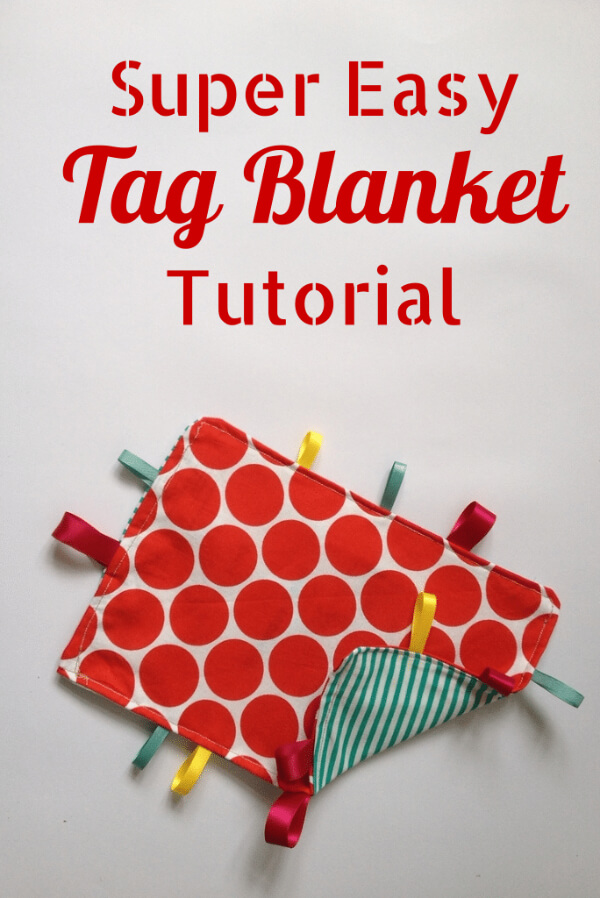
Image Source/Tutorial: Crafts On Sea
Materials required:
- Ribbon
- Pin
- Baby wipes
Take baby wipes and cut them as long as you want to make the blanket. Now place your material. Fold the ribbon and place it in the dot of the upper corner. Pin this ribbon and sew it all around it. Leave that much gap so you can turn it around. Now turn the blanket and push the corner by using a pencil or pen. Pin the material and sew it around all edges. Your handmade tag blanket is ready in 10 minutes, and it is budget-friendly for you all.
Make Your Own Cloth Baby Book
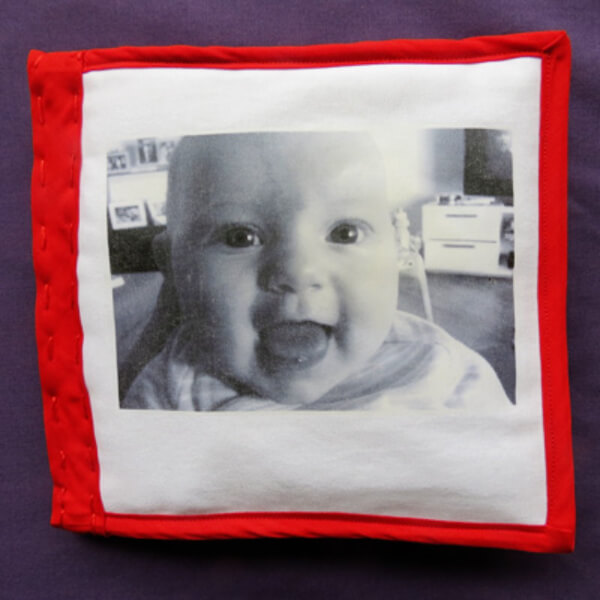
Image Source/Tutorial: Childhood 101
Materials required:
- Cotton fabric
- Lightweight wadding
- Transfer paper
- Bias binding
- Deskjet ink printer
- Computer
- Cotton
- Scissor
- Ruler
- Sewing machine
- Pin
- Needle
Select the image and print the photo on the transfer paper in black and white. Now take a fabric and cut it into rectangular shapes and sizes. Iron the transfer paper onto your fabric. Take the first two pages and pin them, and then the extra fabric and stitch the corner. Cut the lightweight wadding to size for an inside pocket to fit inside. Then add bias binding on each page. After completing all these stitches, it is from all the edges. It takes 25-30 min to make at your. Show your creativity by adding some extra effort and creativity to it.
Possibly the Most Glamorous Hobby Horse Ever

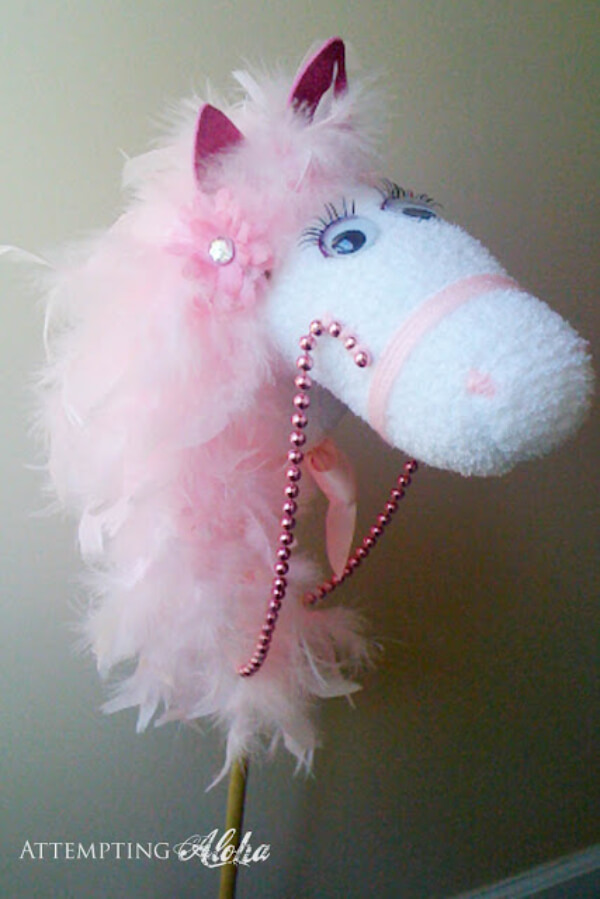
Image Source/Tutorial: Attempting Aloha
Materials required:
- Fluffy sock
- Needle
- Yarn
- Googly eye
- Filling
- Eyelashes
- Glitter forms
- Wooden dowel
- Feather
- Beats necklace
- Hot glue
Take a fluffy sock and thread a needle with yarn on the two external sides of it. Then take a googly eye and eyelashes and thread a needle through the fluffy sock. Take glitter from the paper and make ears in a shape and size. Pinch the ears together by applying hot glue in the center and attach them to the fluffy socks. Lastly, start binding the socks with pieces of pink yarn and put the Beats necklace on the neck. Then take a pink feather and pinch it into the fluffy sock. Your glamorous hobby horse is ready to play. It takes 10 min to make this beautiful yarn.
Read More: DIY Homemade Stamp Making Ideas For Children
How To Make A Big Homemade Parachute For Kids
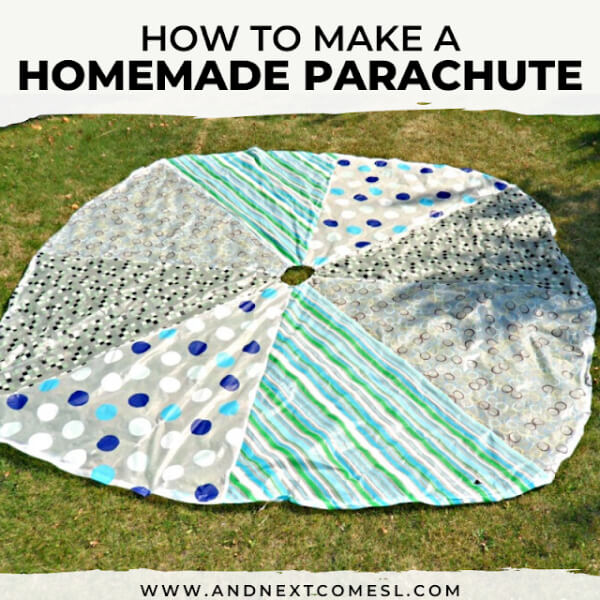
Image Source/Tutorial: And Next Comes
Materials required:
- Curtains
- Scissors
- Sewing machine
- Threads of different colors
Cut the 4 curtain hooks from the top. Now lay the curtain on the floor. Fold it diagonally and cut along it. Now lay all the pieces on the floor in their respective order. Now, take the neighboring piece to start the assembly. Sew the right side and repeat up to 8 pieces to form a large rectangular shape. By doing this, your parachute is ready in 2-3 hr. But it is a simple and inexpensive activity for you all.
The Cover of the Quiet Book

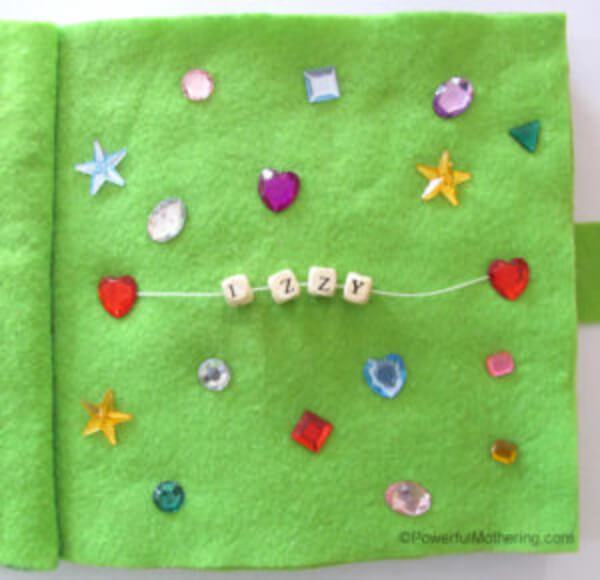
Image Source/Tutorial: Powerful Mothering
Materials required:
- Woven fabric
- Mini ornaments
- Glue
To make this cover quite a book. Take a woven fabric and paste it on the book on which you want to cover the fabric. Decorate the fabric with some mini ornaments like hearts, stars, ovals, circles, [shape], letter bands, etc. This creative takes only 5 minutes to cover the quiet book.
Create Kiddo: Magnetic Alphabet Board

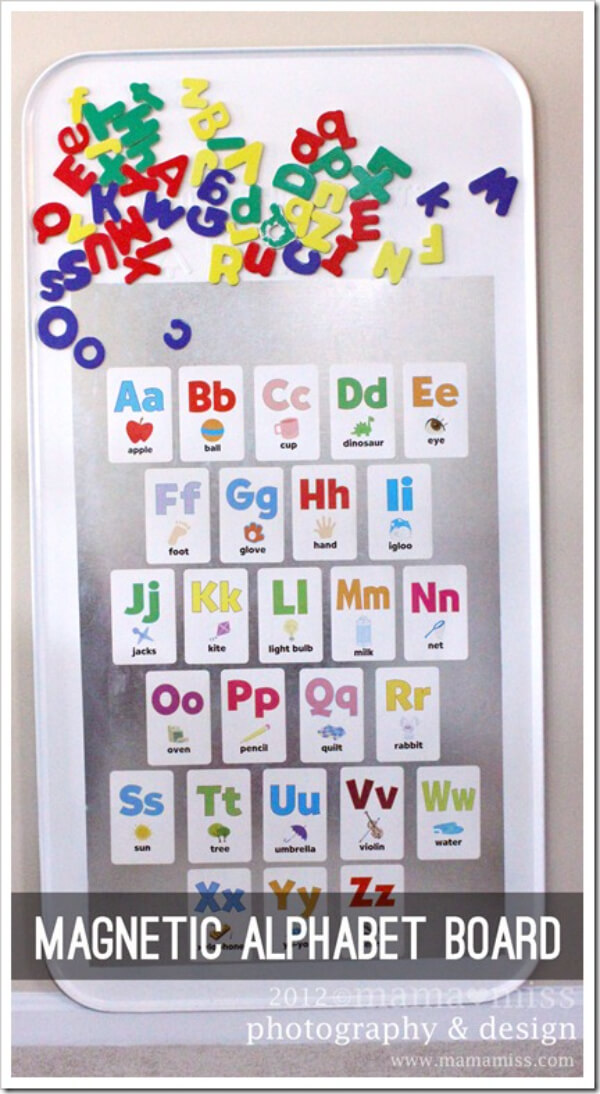
Image Source/Tutorial: Mama Miss
Materials required:
- Oil drain pan
- All-purpose cleaner
- Painters tape
- Glossy white spray
- Double-sided tape
- Command strip
- Alphabetical flashcards
- Magnetic letters
Spray the pan surface with a purpose-cleaner. Arrange the flashcards and lock them in the board as per your wish. Mark the cards from the top, bottom, and sides. After this, remove the cards. Cover the inside section with painter’s tape. Now spray the paint on the pan and dry for a minute. Apply a second coat if required. Now, apply double-sided tape on all 26 alphabetical cards. After this, attach the command strip to the back panel from all sides. At last, add magnetic letters on the board, and your board is ready. This is a simple and easy activity, and you can play with your kiddos. Hope you like this activity.
Outdoor Easel

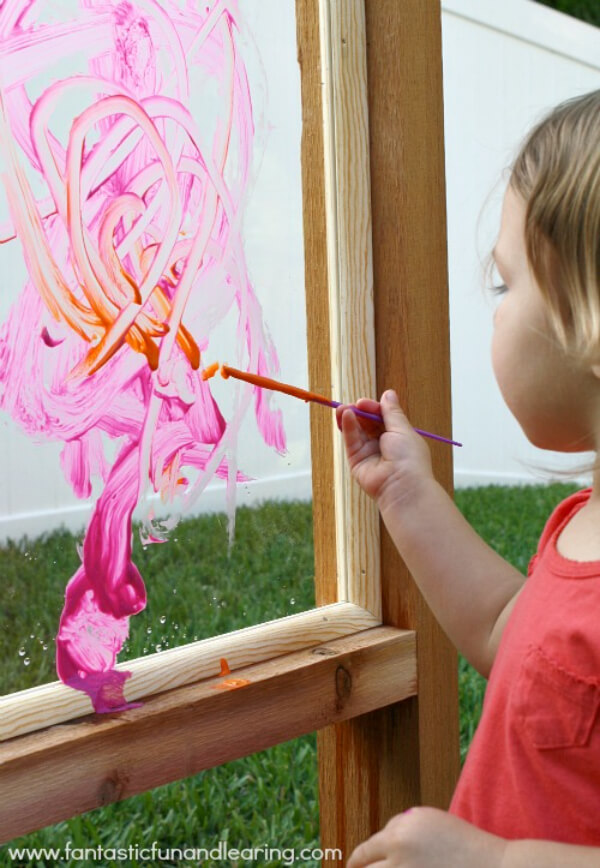
Image Source/Tutorial: Fantastic Fun And Learning
Materials required:
- Acrylic sheet
- Wood
- Connected screw
- Steel nails
- PVC quarter round
- Painting color and brush
- Tray
- Plexiglass
Take a piece of wood and shape it into the frame, and screw it tightly. Now put the acrylic sheet into the frame. After a few days, paint the plexiglass on the frame and spray it off. On other days, tape paper to the easel, or we can use a window marker and a spray bottle. This is an easy-to-do activity and an outdoor easel. You can make this for your kid to do some creativity on it.
Quick and Easy Inexpensive DIY Felt Board
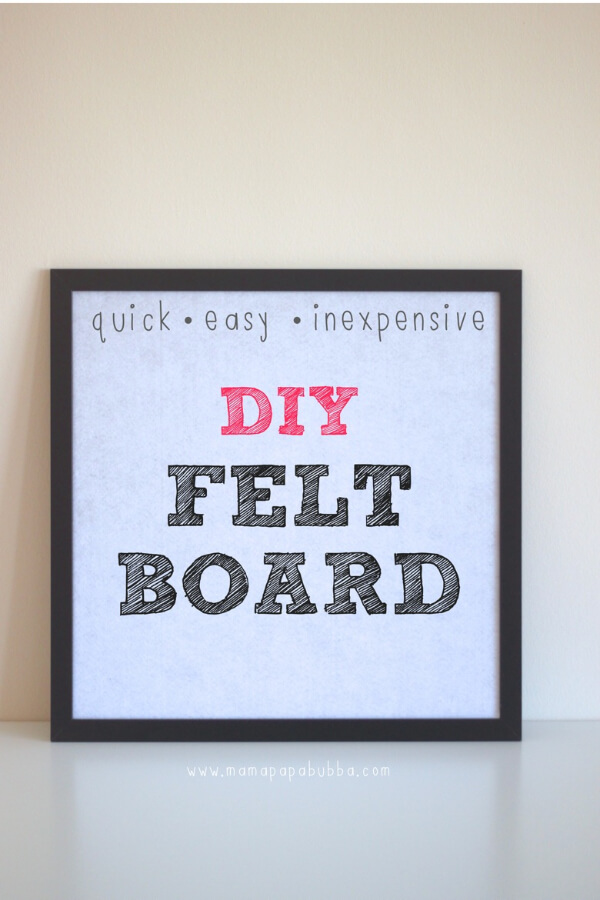
Image Source/Tutorial: Mama Papa Bubba
Materials required:
- Craft glue
- Mod podge
- Rotary cutter
- Frame
- Brush
Take a frame and remove the plastic from it. With the rotary cutter, remove the edge of the frame that is not required. Now felt the piece on the top of the frame, half over it. Now take a Mod Podge and do a thin layer on it, and make sure the corners are lined up. Glue it, insert it, and dry it for an hour. This is a quick but inexpensive felt board for you guys. You can try this activity and make children do it at home.
Read More: DIY Toys for Kids – Perfect Gift Ideas
The Secret to Cutting Felt & Making Felt Storyboards

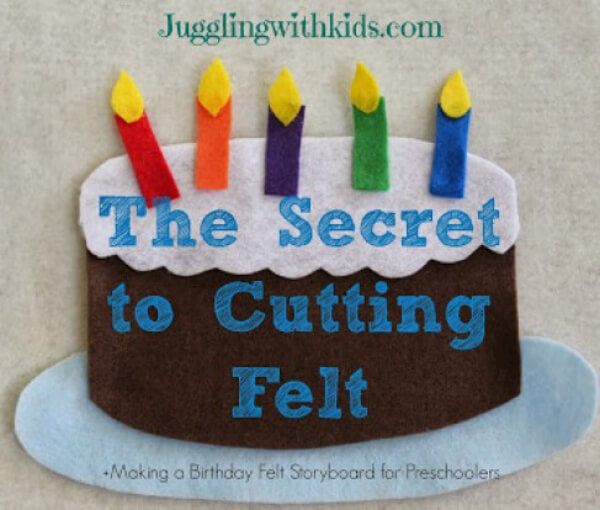
Image Source/Tutorial: Juggling With Kids
Materials required:
- Felt
- Freezer paper
- Marker/pencil/pen
- Iron Board
- Iron
- Scissor
- Hot glue gun
To make this felt cake board. Print the cake from the printer and start coloring. Take the glossy side of the freezer paper and iron it onto the felt. Now trace the art, put the paper on top of the photo, and trace the mark on it. Once you are done with this process, cut the felt and iron it. Temporarily glue freezer paper on the felt, and cut the felt into the shape of the paper. Once you do the process, you can do the art on the cake by using other materials. I hope you like this creativity, and also, you must try it. It takes 20-25 min to complete the whole process.
Alphabet Peg Dolls – Alphabet For Starters

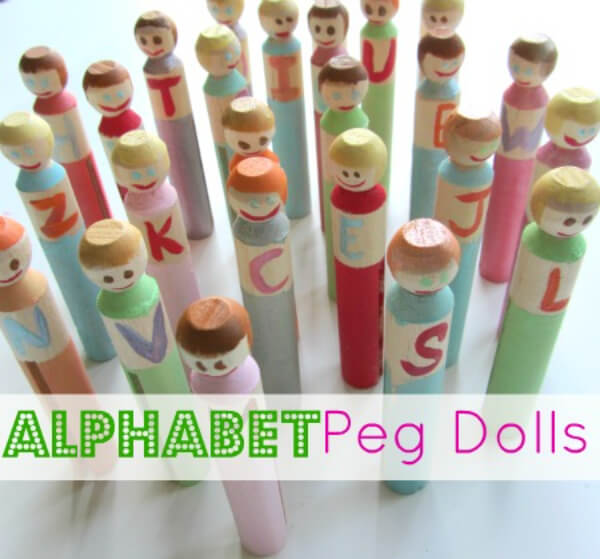
Image Source/Tutorial: No Time for Flash Cards
Materials required:
- Painted tape
- Wooden peg clothespin
- Brushes
Let’s start this activity by taping the section of the doll to the wooden clothespin. Now paint the batches from where you want to. Now add hair and body color to it. Remove the tape and dry the wooden clothespin. Now, remove the letter from where you removed the tape and let it dry for 5 -10 min. Now it is time to play with the alphabetical peg doll. This is the simplest and easiest activity that you can try on your own.
Homemade silly putty

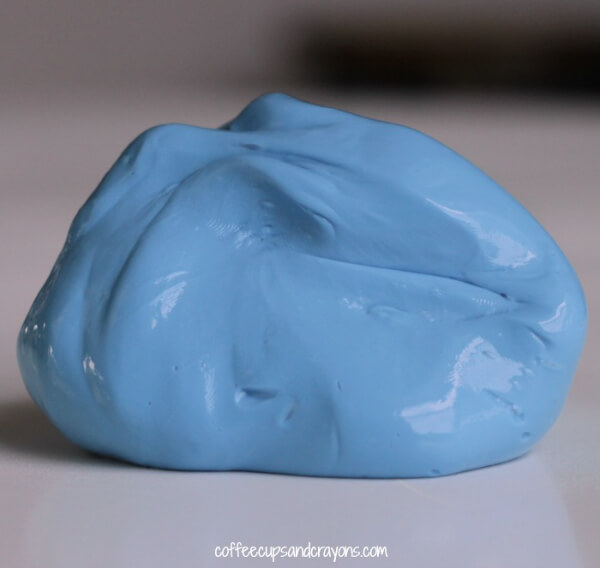
Image Source/Tutorial: Coffee Cups And Crayons
Materials required:
- Sta-Flo liquid starch
- 4oz glue
- Food coloring
To make this homemade silly putty. Let’s take two glue 4oz, liquid starch, and blue food coloring. Take the liquid starch and mix it. Once it is thickened, knead for 5 -10 min. Your silly putty is ready in a maximum of 10 min. Also, this activity is budget-friendly. You can try this activity at home.
Hopscotch Mat…ot Glue!

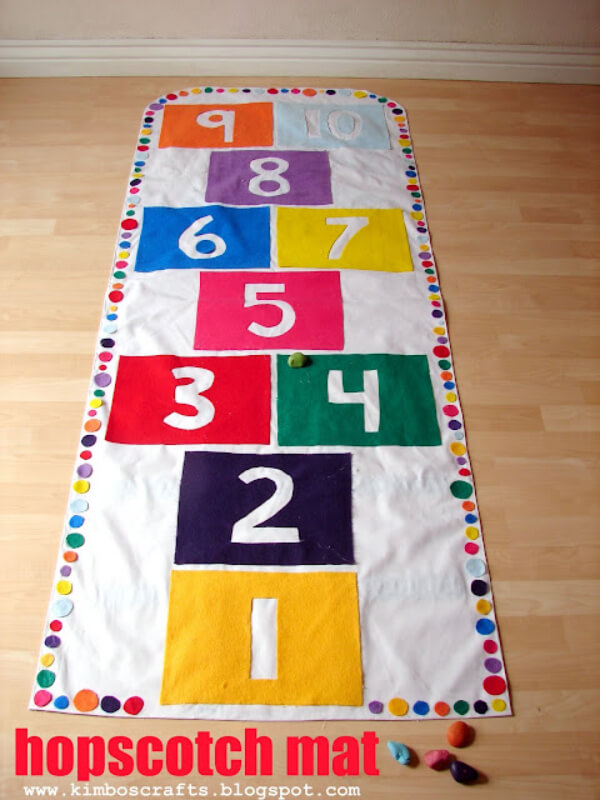
Image Source/Tutorial: A Girl And A Glue Gun
Materials required:
- Felt sheet
- Scissor
- Mat
- Hot glue gun
- Marker
- Rock
Take a different color of felt sheet and cut it into shapes and sizes. Now hem the edge by using a hot glue gun. Then take a marker and write numbers up to 10 on the felt sheet, and cut it out. Then take a hot glue gun and stick it on the white mat on the floor. While using a leftover felt, decorate the border by cutting circles in circle shapes of different sizes. Lastly, take some rocks and paint different colors on each rock. Now your hopscotch mat is ready to play with your friends or siblings. Also, it is budget-friendly and can be done in 10 minutes.
Super Simple 5 Minute Backyard Teepee
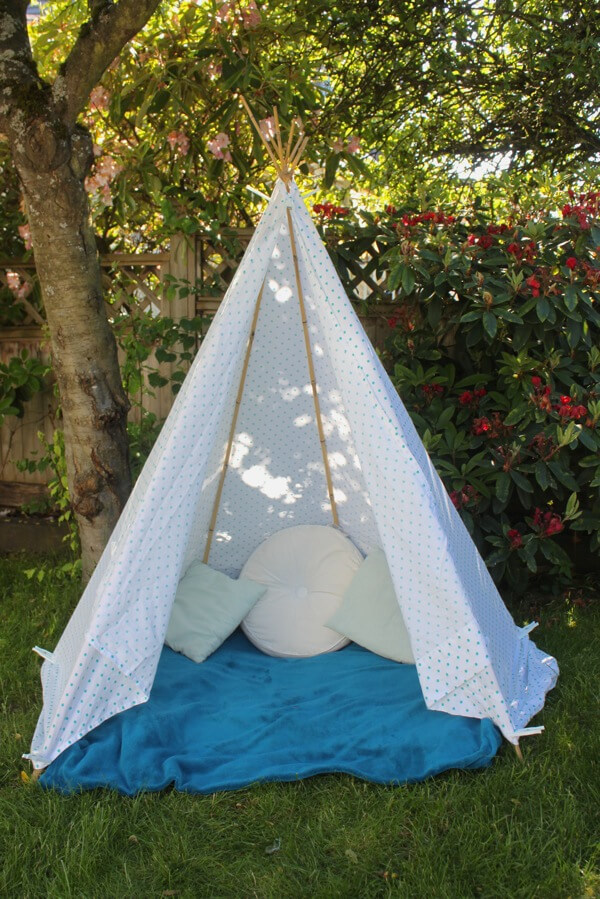
Image Source/Tutorial: Mama Papa Bubba
Materials required:
- Bamboo sticks
- Sheet
- Jute
- Clothespin
- Blanket
- Cushions
To start this activity, take 7-8 bamboo sticks to form a circle with an open front and tie jute on the bamboo sticks. Now, take a long sheet and drape it around the bamboo sticks and attach a clothespin. Now take some extra fabric to tuck it properly. While completing the base, add blankets and cushions to relax and enjoy your time. Your backyard teepee is ready now. It takes 5 min to make, and it is also budget-friendly for you all.
Read More: Easy Kids Fun Butterfly Craft
DIY: A-Frame Tent

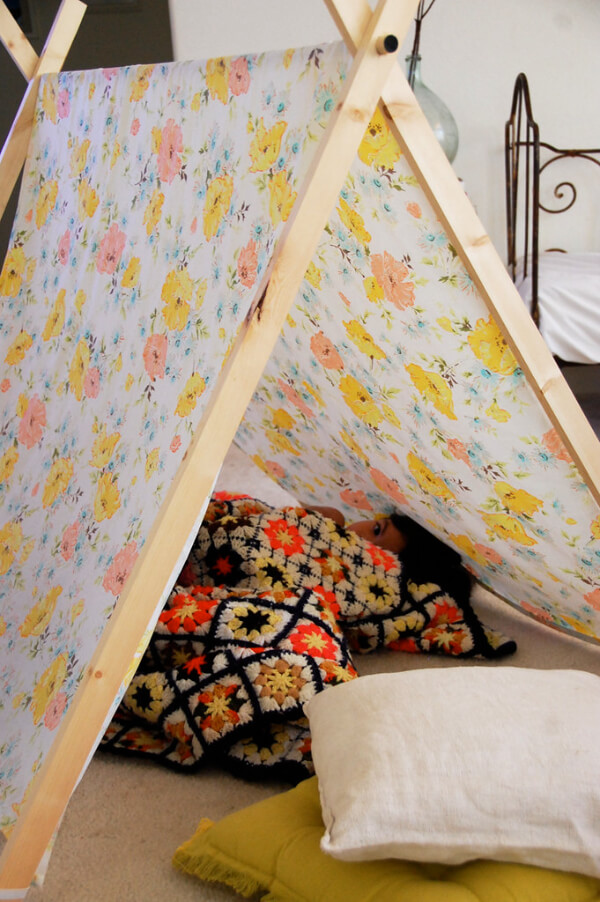
Image Source/Tutorial: My Cakies
Materials required:
- Whitewood moulding
- Drill
- Poplar dowel
- Pencil
- Coordinating thread
- Large fabric for the frame
- Elastic
- Scissor
- Measuring tape
Take a molding and measure and make 6 marks on each of them. Now take a drill machine and, where you mark the points with a pencil, drill a hole in it. Now, place 2 moldings next to each other, and ensure the holes are lined up. Then push the dowel into the hole tightly so it takes a grip and is exactly placed. Take the elastic and hem the perimeter of the rectangular fabric. Cut the elastic strip, fold it, and cover it in each corner of the tent. Drape the cover over A from bottom to top. Arrange the fabric according to the A-frame. It is easy to make an A-frame tent for your room or birthday. This is useful for you; you can spend your time there, too.
How to Make a Personalized Name Puzzle

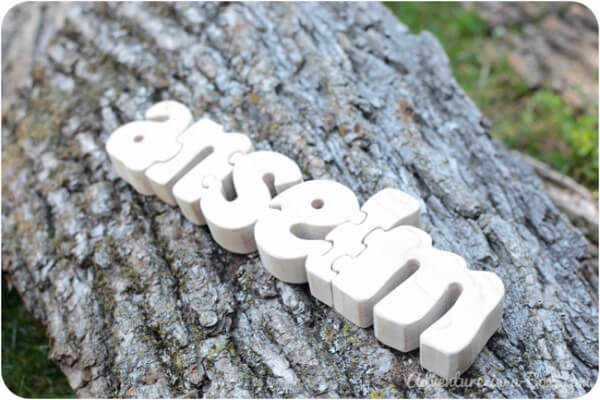
Image Source/Tutorial: Adventure In A Box
Materials required:
- Scissor
- Knife
- Cardboard
- Fretsaw
To make this unique personalized name puzzle. First, write your name on the computer, turn it into a puzzle form, and then print it. Now cut the name with scissors and a knife. After this, using a name template, I transfer the name onto wood. Using a drill machine, drill a hole in the name and cut the outer shape of the name. Take a fretsaw and separate the letter. This is a budget-friendly activity that you can try with any family member. I hope you like this activity. Now it’s your turn to do this personalized puzzle with your name.
Make Your Kids Into Interchangeable Blocks

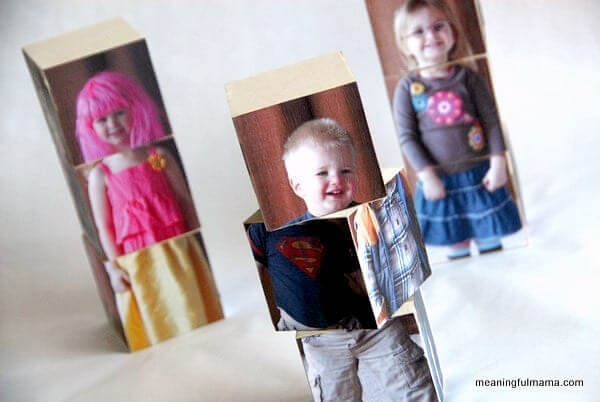
Image Source/Tutorial: Meaningful Mama
Materials required:
- Wooden blocks
- Handsaw
- Printed picture
- Silver shins
- Mod podge
- Plan on a piece of paper
Take a printed picture and cut it into the wooden sie blocks. Do silver trimming on the sides. Now it is time to do Mod Podge on two sides of each block and let them dry. After a drive, do the other two sides of each block. Take a piece of paper and put it on the top and bottom of each block. At last, put the printed image on the wooden block. Your interchangeable block is ready. Now it’s your time to make this block with different images. It is budget-friendly and only takes 15-20 min.
How To Make A Skate Balance Board
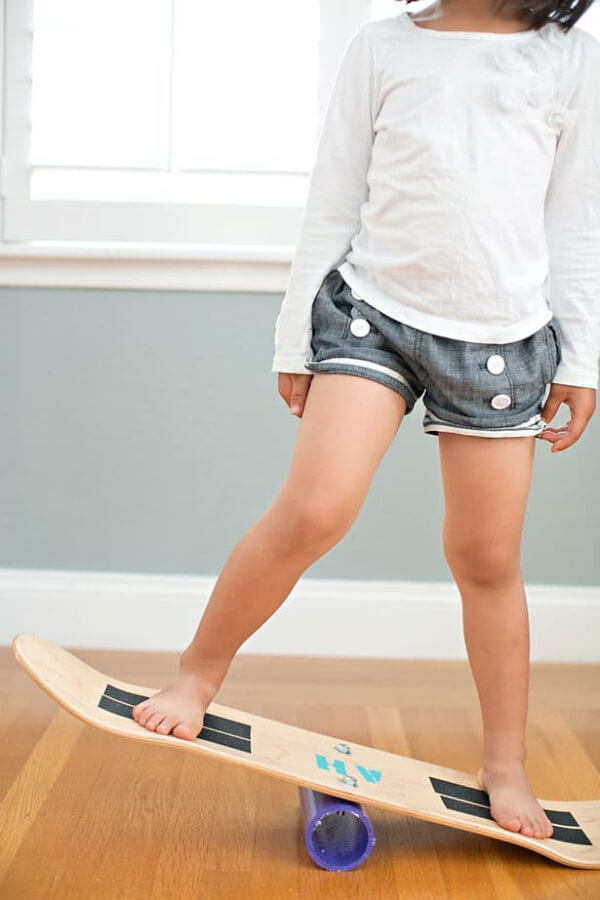
Image Source/Tutorial: Hello Wonderful
Materials required:
- Skateboard
- PVC pipe
- Bolts with locking nuts
- Drill
- Spray paint
- Grip tape
- Letter stencils
This is a simple and interesting activity that you must try during your holidays or in your free time. Take a PVC pipe and spray paint it if you want to, so it will be dry. Take letter stencils and write the letter on a skateboard, and paint the board. Once the paint dries on both the skateboard and the pipe, apply grip tape and a marker. Now take a drill machine and drill the pipe and board, and screw them together. Now you can balance on this skateboard. Hope you like this activity, and you can also try it at home.
How To Make Wooden Stilts
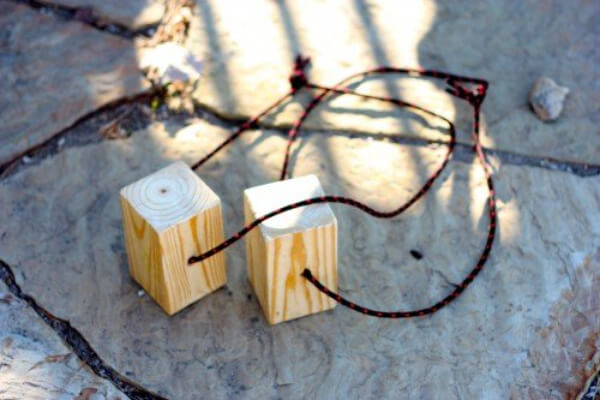
Image Source/Tutorial: I Can Teach My Child
Materials required:
- 2 pieces of wood
- Drill
- Strong rope
- Sandpaper
- Handsaw
To make these enjoyable wooden stilts, take a handsaw and cut the wood into the same shape and size. Now take a drill machine and drill each piece of wood from the center. Now cut the two pieces of long, strong rope and slide them into the hole of the wooden block. Your wooden stilts are ready. You can also try and walk with these stilts. In 15 minutes, you can make and enjoy this activity at your home, and it is budget-friendly for you all.
Read More: Ninja Craft Ideas For Kids
DIY Dyed Rainbow “Grimm” Style Wooden Blocks


Image Source/Tutorial: Fun At Home with Kids
Materials Required:
- Wooden blocks
- Watercolors
- Color tray
To make this beautiful rainbow-style wooden block. First, take a water tray and put the color into it. Now take a wooden block and dip it in watercolor from one side, flip it, and then continue to color the whole block. After doing each block the same, then put it on the wax paper to dry for one day. After a day, your rainbow color blocks are ready. Now you can play with the wooden blocks by arranging them in rainbow order.
Texture Blocks

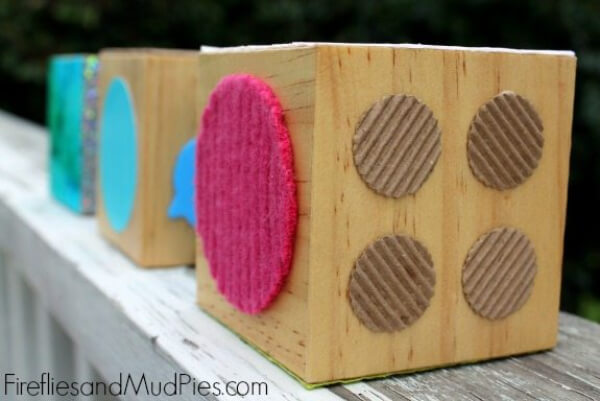
Image Source/Tutorial: Fire Flies And Mud Pies
Materials required:
- 3 equal-sized wooden blocks
- Scrapbook paper
- Wool felt
- Scissor
- Glossy Mod Podge
- Circular punch
- Acrylic paint and brushes
- Tacky glue
To make this amazing texture block. Take a block and work on one side of each block, and let them dry for 5 min. Cover every wooden block with glossy Mod Podge. Now take a paper punch, cut the circle with scissors, and glue it to the wooden blocks. Now take tacky glue to attach a wooden cutout or wool felt to the blocks. At last, let the block dry for 5-10 minutes, and your texture block is ready. It takes half an hour.
DIY Color Blocks For Kids
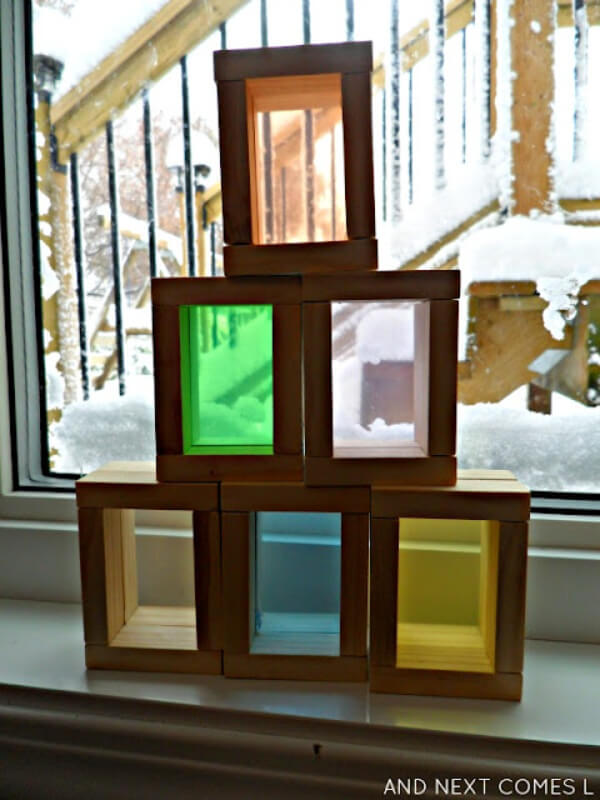
Image Source/Tutorial: And Next Comes
Materials required:
- 6 wooden blocks
- Hot glue gun
- Transparency
To make these amazing colored blocks for kids. Arrange the blocks into the hierarchical order and glue them together. Now take a piece of transparency and put it in the middle of each block, and lightly glue it. Your color-blocked frame is ready. This is an easy-to-make activity at home for your kids. It takes at most 10-15 minutes.
My First Sewing Basket

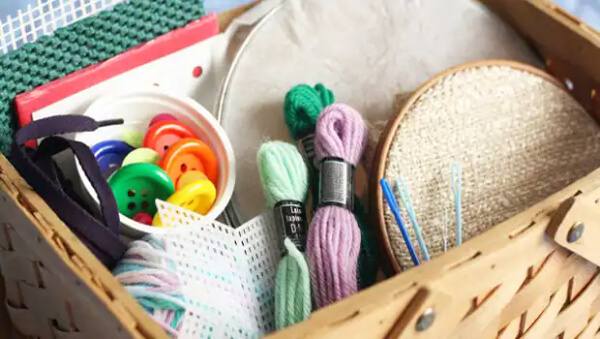
Image Source/Tutorial: Cbc.ca
Materials required:
- Embroidery hoops
- Yarn/thread
- Plastic sewing needles
- Polystyrene form
- Large button
- Shoelace
- Fabric
- Cardboard
- Straw
Cut the straw from the upper end. Now take a yarn, secure it in a straw, and place it. Now, make a hole in the cardboard and place the yarn there. After this, thread the needles and do simple stitches. This is a simple and easy activity for kids. You can do this activity with materials that are available at home.
DIY Geoboard With Fabric Loops
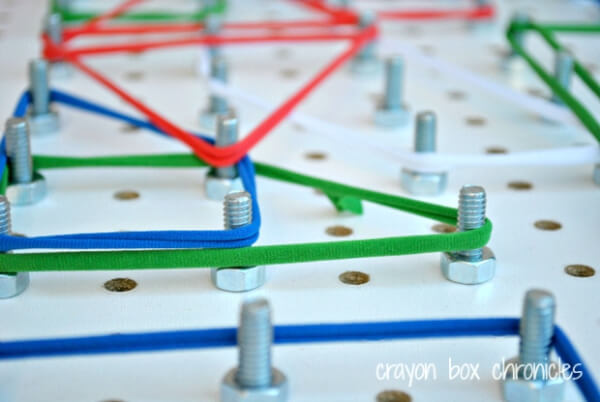
Image Source/Tutorial: Crayon Box Chronicles
Materials required:
- Geoboard
- Screw
- Nuts
- Fabric loops
This is a very interesting activity you must try. Fit the screw from the bottom of the geoboard and the nuts on the top of the board. Now repeat it, but skip one row and complete the geoboard. Once this process is done, take a fabric loop and create a shape from a different angle on the geoboard. Here you can show mathematical shapes like a right angle, a square, a rectangle, etc. Let’s try this geoboard activity at home in your free time and try to understand the shapes, too.
Read More: Rainbow Crafts for Kids
Tic Tac Toe

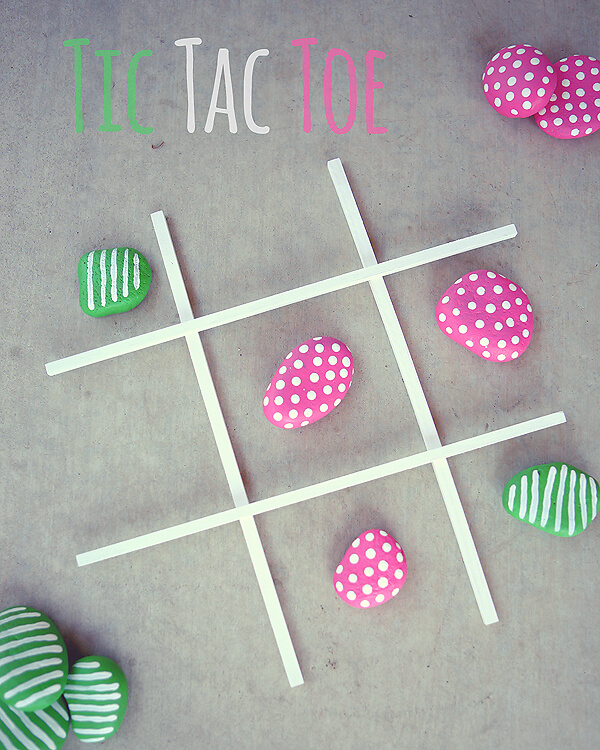
Image Source/Tutorial: Eighteen 25
Materials required:
- Rocks
- Woode square
- Paintbrush
- Painting color
Take an equal amount of rocks, assuming 10 rocks. Now, color the 5-5 rock with two colors, green and pink. Let them dry for a minute. Once the rock dries, then do dots on 5 rocks, and in the other 5 rocks, do lining with white painting color. Then take a wooden stick and make a square. Now start your game with your pattern and see who wins. I hope you like our creative tic-tac-toe idea. It takes 30 min to make, and it is also budget-friendly.
Color rock dominoes
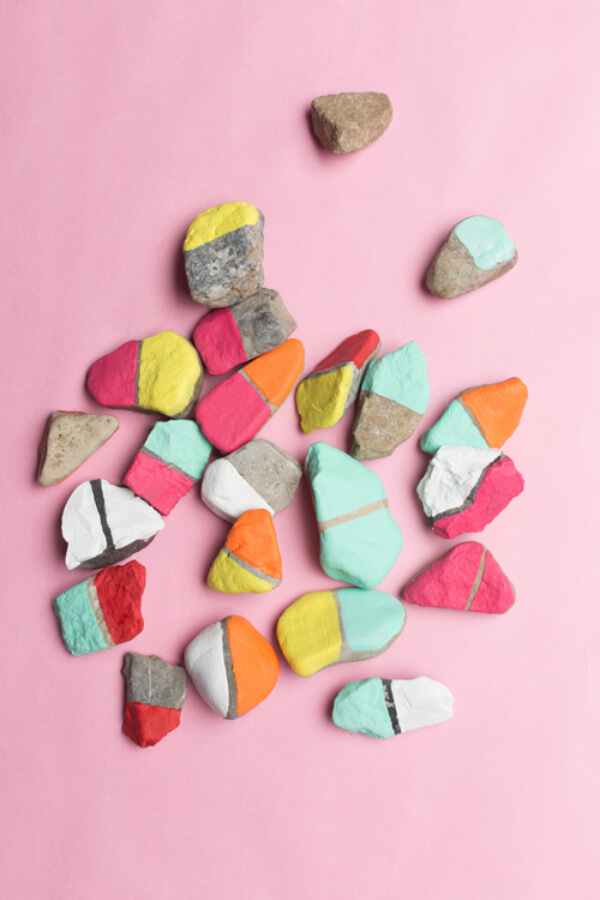
Image Source/Tutorial: The House That Lars Built
Materials required:
- Different shapes and sizes of flat rocks
- Acrylic colors
- Painting brush
This is an easy and simple activity that you can do in your free time. Take the pieces of rock and paint half of the dominoes with acrylic color, and in the other half,f do another color. Repeat this process for other rocks and show your coloring creativity here. This is a budget-friendly activity that you can tell your kid to try at home for once.
Homemade Fabric Roads
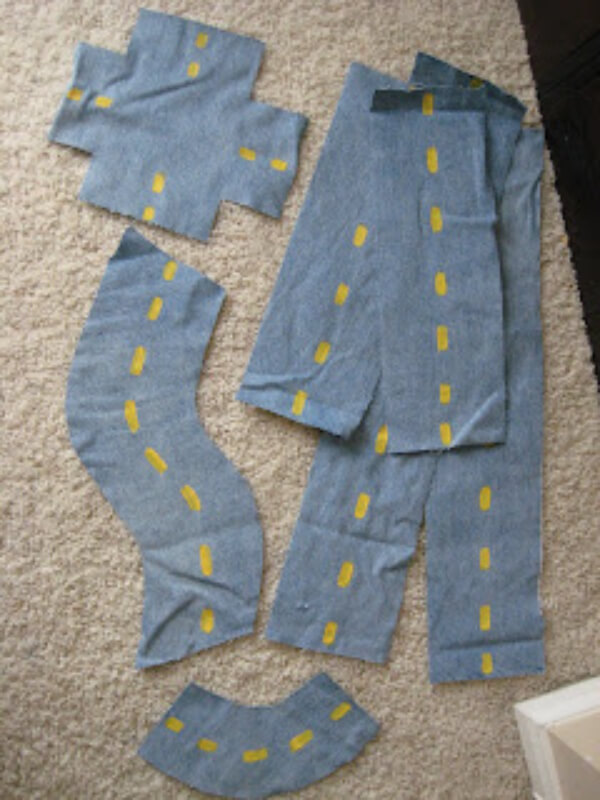
Image Source/Tutorial: Lil Mop Top
Materials required:
- Artificial cars/trucks
- Old jeans fabric
- Scissors
Take the old jeans and cut them into different shapes and sizes of roads, like zigzag, etc. Now set the pieces on the floor and make four ways. Now tell kids to take his/her cars or trucks and play on the homemade fabric road. It takes only 10 min to make this fabric road at home. I hope you like this budget-friendly activity.
Printable Roads for Awesome Imaginative Play

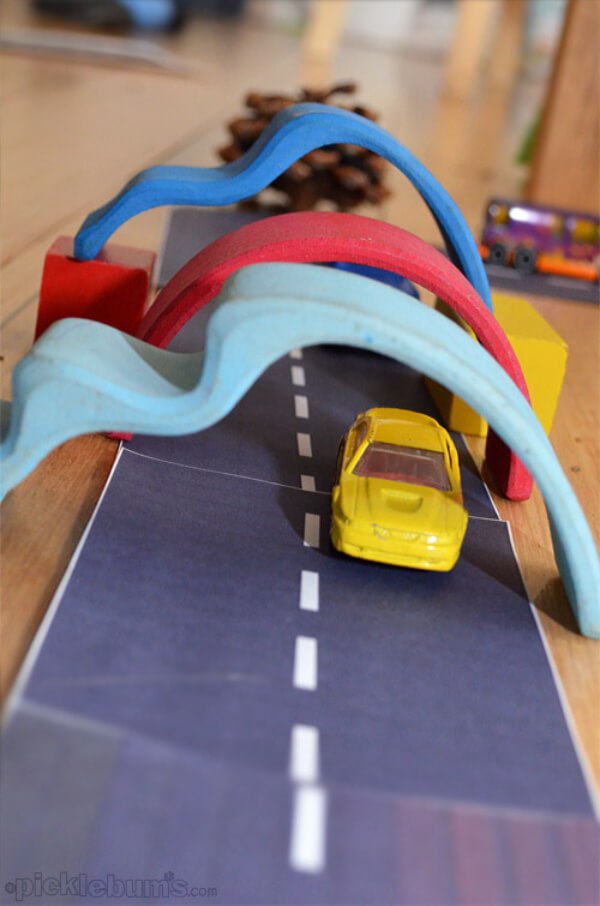
Image Source/Tutorial: Pickle Bums
Materials required:
- Printable roads
- Cars
- Natural material
- Tunnels
- Tape
To do this, print the road activity. Cut out the paper in different shapes and sizes to make the road, print it with black ink, and laminate it for further play. Now tape the paper on the floor, add some natural material, and put colorful tunnels. Now your road is ready; play this game with some different cars. It takes 15 min to do this activity at home.
DIY Wooden Roads and Ramps for Toy Cars
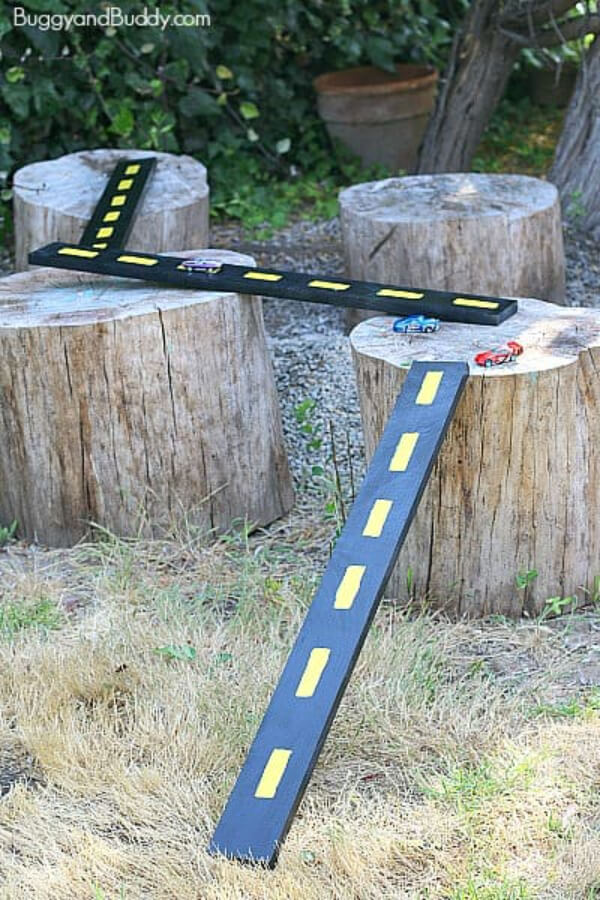
Image Source/Tutorial: Buggy And Buddy
Materials required:
- 3 wooden boards
- Black spray
- Painting color[yellow]
- Tape
This is a wooden ramp for kids to play with their friends. Take a wooden board, mark a tape on it, and apply the black spray. Apply a second coat if required. Let them dry for a minute. After this, remove the tape, color it, and let the yellow line dry. Your ramp road is ready to play with cars or bikes. Kids like this activity and can make the road ramp at home in 15-20 min.
Read More: Wiggly Jellyfish Crafts for Kids
Felt Play Food

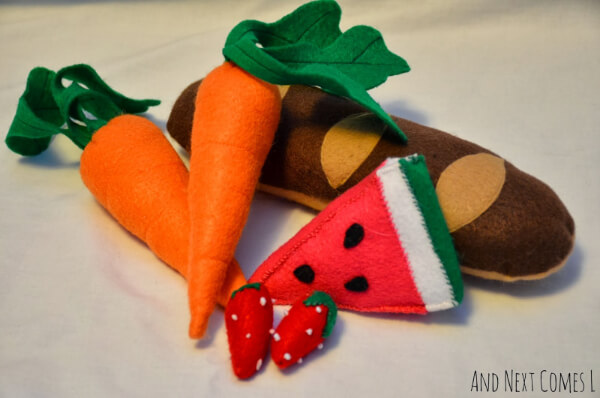
Image Source/Tutorial: And Next Comes
Materials required:
- Forms
- Scissor
- Pencil
- A piece of cloth
- Hot glue gun
Take a form and make the shape of the fruit or vegetable, and cut it with scissors. Then take a piece of cloth and stitch it with the machine systematically. After this, take a hot glue gun and glue the fruits or vegetables for the final touch. I hope you like this creative idea. You can also try this creativity at home; it takes only 15-20 min.
Pretend Sweets Made with Sponges!

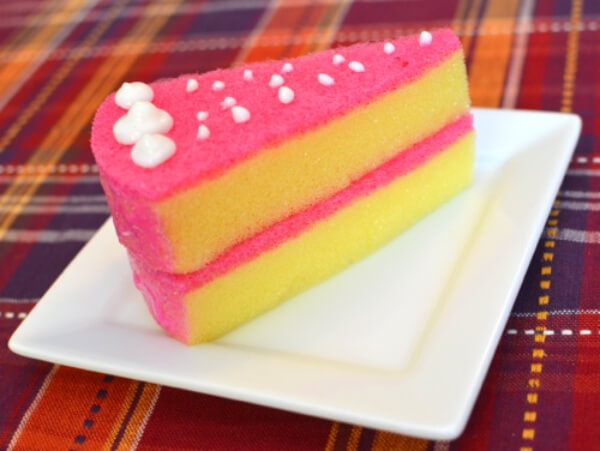
Image Source/Tutorial: Inner Child Fun
Materials required:
- Sponge
- Scissor
- Hot glue
- Fabric paint
To make this beautiful pretend sweet cake, use a sponge. Cut the sponge into cake slices, and slice it into two pieces. Use hot glue to layer the cake. Now, decorate the cake slice with an acrylic color of your own. This is the easiest way to make the sponge cake, and it is also budget-friendly. This can be made by those seven and above.
DIY Pack And Play Stove For Kids
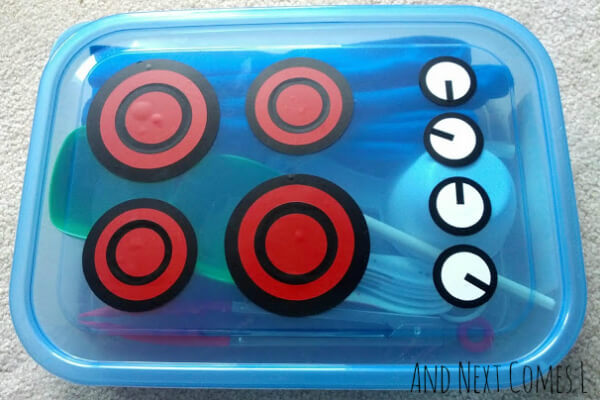
Image Source/Tutorial: And NextComesl
Materials required:
- Plastic container
- Pack of bowls
- Tongs
- 3 wooden spoons of different sizes
- Measuring cups and spoons
- Oven mitts
This is a pack of stoves for kids to play with. Cut out your shape, or you can use any template. Now, take a plastic container and fill it with the kitchen utensils. Place oven mitts into the felt, cut it, and then join it by using a machine. For cooking, take the help items that are stored in the container. Kids enjoy the tongs, oven mitts, and measuring spoons.
Homemade Light Bright
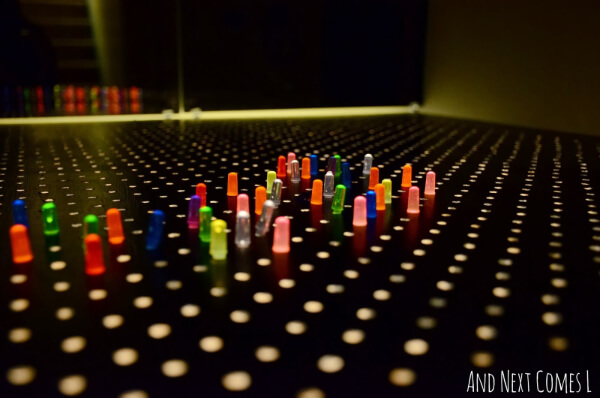
Image Source/Tutorial: And Next Comes
Materials required:
- Hardboard
- Light Bright peg
- Driller machine
- Mod podge
- Acrylic paint
- Pencil
- Scale
To make this light bright at your home, take a hardboard and cut it into the shape of a frame. Now, make a mark bsing a scale and a pencil on the hardboard. Then, take the drill machine and make a hole in the hardboard where you set a mark. Once it is done, paint the hardboard with acrylic paint and give two coats if required. After this, give Mod Podge coats. Then, put a light, bright peg into the hole. This is a very interesting activity that you must try. This activity can be done by those 7 and above.
DIY Light Table Tutorial

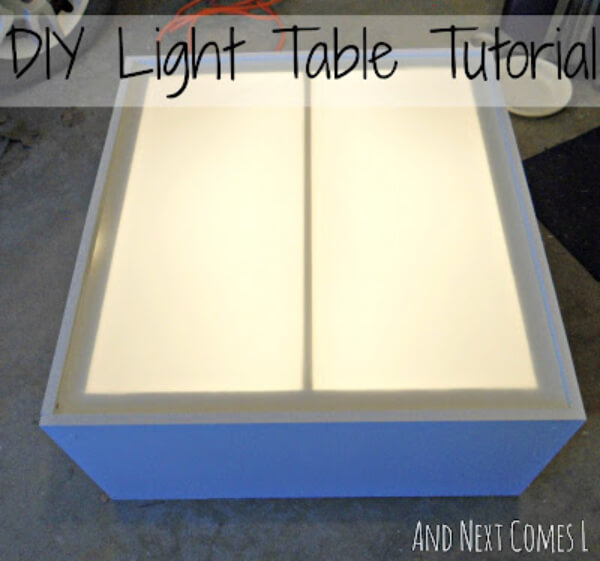
Image Source/Tutorial: And Next Comes
Materials required:
- Parchment paper
- Double-sided tape
- Interior paint
- Powder bar/ sugar protector
- Fluorescent light
- Wood
- Acrylic sheets
To make this light table tutorial. Make a frame by using an acrylic sheet. Then take another piece of acrylic sheet to put in the middle of the frame. Now, cut the wood from all sides perfectly to give the perfect shape. Attach the side pieces to the frame and the power or sugar bar. Make the base and then paint the color on it. Once the paint is dry, then set the light on it. Also, apply touble-sided tape on the top of the frame. Now, cut the parchment paper to the same size and put it on top of it, and then put the acrylic sheets on top of the parchment paper for waterproofing. Hope you like this activity, and also you can try this with any family member.
How To Make Your Own Mini Magnetic Blocks

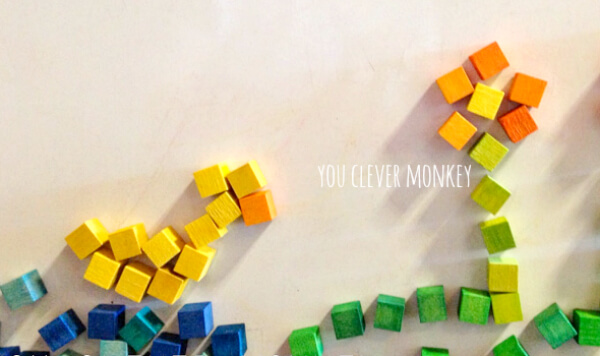
Image Source/Tutorial: You Clever Monkey
Materials required:
- Wooden blocks
- Painting colors[ yellow, dark/light blue and green]
This activity can be done on your own, and it is also an interesting activity to do at home during your holidays or in your free time. Take a wooden block and start painting it with the help of the painting colors. After painting the wooden blocks, let them dry for 10-15 min. Now, make the groups for the easier counter. Once this mini magnetic block is done, you can play. This is one of the easiest activities that you can do on your own or with your friends. It takes 20-25 min.
How to Make Waldorf-Inspired Nature Blocks
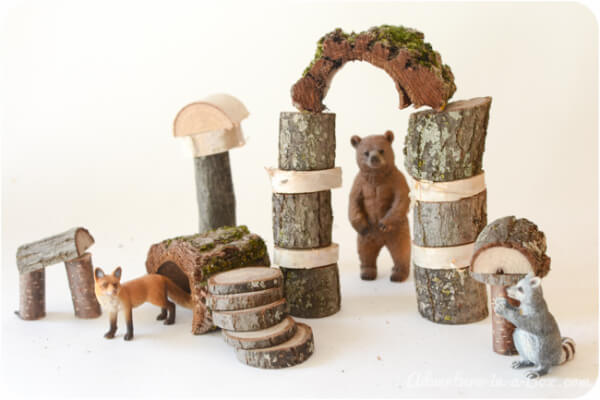
Image Source/Tutorial: Adventure In A Box
Materials required:
- Branches of different trees
- Branches cutter
- Artificial animals
Take the different tree branches and let them dry for a week. After a week, cut the branches into many blocks of different sizes and diameters. Cut some of the sticks into peculiar shapes. Lastly, give the proper shape or cut the rough edge if required. By using the nature item, your Waldorf Inspire nature block is ready, and you can put some artificial animals there. Kids will be excited while doing such an activity.
DIY Homemade Toys for Kids Step-by-Step Tutorial

Learn how to create fun and creative homemade toys for kids with this easy step-by-step tutorial. Discover simple DIY toy ideas using everyday household materials. Perfect for parents, teachers, and craft lovers who want budget-friendly toys that boost creativity, imagination, and learning through fun hands-on playtime activities.
Why Homemade Toys Are Beneficial for Kids
Homemade toys offer children a unique opportunity to learn, create, and play at the same time. Unlike many store-bought toys, DIY toys encourage creativity, imagination, and problem-solving while teaching children how everyday materials can be transformed into something fun and useful. Whether made from cardboard, paper, fabric, recycled containers, or craft sticks, homemade toys provide hands-on learning experiences that help children develop important cognitive, social, and motor skills. They also encourage sustainable play by reusing materials that might otherwise be discarded.
Educational Benefits of Homemade Toys
1. Encourages Creativity and Imagination
Creating and playing with homemade toys allows children to use their imagination freely. Kids can customize their toys, invent stories, and explore different ways to play.
2. Develops Fine Motor Skills
Cutting, folding, gluing, painting, and assembling toy parts help strengthen hand muscles and improve hand-eye coordination, which are essential for writing and everyday tasks.
3. Promotes Problem-Solving Skills
Building toys from simple materials encourages children to think critically, follow instructions, and find creative solutions when constructing their projects.
4. Supports STEM Learning
Many homemade toys introduce basic engineering, physics, and design concepts. Toy cars, spinning toys, puzzles, and moving crafts help children learn through experimentation and play.
5. Encourages Sustainable Play
Using recycled and household materials teaches children the value of reusing resources and helps develop environmentally friendly habits from an early age.
Tips for Making Homemade Toys with Kids
- Choose age-appropriate projects based on your child’s abilities.
- Use safe, non-toxic craft supplies and materials.
- Supervise children when using scissors, glue guns, or small parts.
- Encourage creativity by allowing children to personalize their toys.
- Reuse cardboard boxes, paper tubes, fabric scraps, and other recyclable materials.
- Focus on the fun of creating rather than achieving perfection.
- Allow children to experiment and modify designs independently.
Popular Materials for DIY Homemade Toys
- Cardboard boxes and cereal boxes
- Paper towel and toilet paper rolls
- Popsicle sticks and craft sticks
- Paper cups and paper plates
- Fabric scraps and felt pieces
- Plastic bottles and bottle caps
- Construction paper and cardstock
- String, yarn, and pipe cleaners
Safety Tips for Homemade Toys
- Check all materials for sharp edges before use.
- Avoid small parts for toddlers and young children.
- Use child-safe paints, markers, and adhesives.
- Regularly inspect homemade toys for wear and damage.
- Ensure toys are sturdy enough for safe play.
- Always supervise younger children during both crafting and playtime.
FAQs
Q1. What are the easiest homemade toys for kids to make?
Answer: Some easy homemade toys include cardboard cars, paper spinning tops, finger puppets, sensory bottles, paper airplanes, toy trains, and simple puzzles made from recycled materials.
Q2. Why are homemade toys good for child development?
Answer: Homemade toys encourage creativity, problem-solving, fine motor development, imaginative play, and independent thinking while providing engaging hands-on learning experiences.
Q3. What materials can be recycled into homemade toys?
Answer: Cardboard boxes, paper tubes, bottle caps, plastic containers, paper cups, fabric scraps, and craft sticks can all be transformed into fun DIY toys.
Q4. Are homemade toys safe for toddlers?
Answer: Yes, when made with age-appropriate materials and proper supervision. Avoid small parts and use non-toxic supplies to ensure safety.
Q5. Can homemade toys be educational?
Answer: Absolutely. Many DIY toys teach science, engineering, mathematics, creativity, and problem-solving concepts through hands-on exploration and play.
Homemade toys are a wonderful way to combine creativity, learning, and play. From cardboard creations and paper toys to sensory activities and imaginative play tools, DIY toys help children develop important skills while having fun. Making toys together also creates meaningful family experiences and encourages children to see the endless possibilities hidden within everyday materials. Make every day more creative with inspiring craft ideas and engaging activities. Join our growing community on Telegram, YouTube & Facebook.
Reviewed by Yash Sharma
More Articles from Kids’ Art & Craft
- Halloween Makeup Ideas for Kids
- DIY Wall Décor Ideas – Kids Room Decoration
- Independence Day Celebration Ideas for Kids
- Cute Animal Drawings for Kids
- Fruits Drawing for Kids