Paper Crafts
How to make a Paper Butterfly – DIY Folding Butterfly – Paper Craft


Hello readers! Today you’re going to make an amazing paper butterfly, right? Their colourful wings make us wonder how any creature can be so beautiful! Let me tell you something about butterflies: they are a kind of insect that everybody adores. They have different types of wings, which are really interesting!
Butterflies represent youth and beauty. That’s why it’s perfect to be done by a kid. But not the beauty outside inside also, as the butterflies first were a caterpillar, which is ugly to everyone, but then it broke that cover and transformed itself into this beautiful living being. Today, you will be making this beautiful creature in paper form. Kids will love the process. So, why are you waiting? Let’s learn it!
How to Make a Paper Butterfly
Materials:
- A green square paper of 16 cm.m/ 6.2 inch.
- Two red colour square papers of 13 cm/ 5.1inch.
- A coloured paper strip.
- Two small yellow circles.
- Two sky colours are smaller than the previous circles.
- Two very small point-like white circles.
- A very small paper strip of the same colour as the previous strip.
- A glue stick.
- Scissors.
Procedure:
- Take a red-coloured square paper of 13 cm/ 5.1inch, place it like a diamond shape on your desk, and fold it from up and down by making a triangle shape and a middle fold line.
- Fold the triangle from down to up by making another triangle shape.
- Do the same step with this triangle shape again.
- Cut the sharp corner edge of the triangle roundly with scissors.
- Open the piece, and a flower-like shape will be in front of your eyes.
- Cut the bottom of the flower a little straight with scissors.
- Apply glue on the cut areas with a glue stick, then put the cut portion over another.
- Fold the paper in half.
- Release, then a half flower-like shape will be ready.
- Take another red-coloured square paper of 13 cm/ 5.1inch, do the same by following this process.
- They will be the wings of the butterfly.
- Take a light colour, wide paper strip, fold it in half, and then attach the end with the glue stick.
- It will be the butterfly’s body.
- Take two very small point-like white circles, and draw two points on them with a black marker.
- They will be the butterfly’s eyes.
- Take these circles and attach them to the sides of the folded part of the strip with the glue stick.
- Take a very small paper strip of the same colour as the previous strip, fold it in half, and cut two pieces of the same size with scissors.
- Attach these pieces to the sides over the eyes of the butterfly.
- They will be the butterfly’s strings.
- Take the red wings you made previously, take the wings,s and apply glue on their sides with the glue stick.
- Take the butterfly body and attach it to the wings side-wise.
- Take another wing and attach it to the side of the body with the glue stick.
- Take two yellow colour small colour circles and two sky colours smaller than the yellow circles, attach them on the sides of the wings with the glue stick.
- Your butterfly is complete!
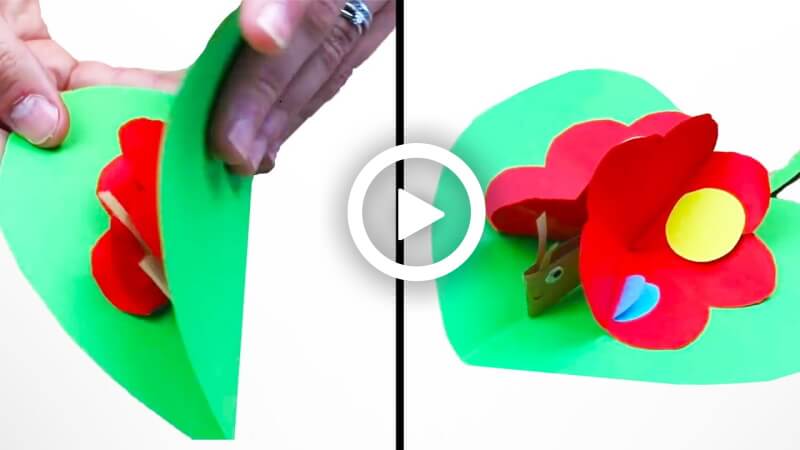
- Take a green square paper of 16 cm.m/ 6.2 inches, fold it in half sideways.
- Cut the non-folded part of the paper roughly like a half heart shape.
- Open the paper it will make a heart shape.
- Make a strip with the rest of the green paper and attach it to the upper middle of the heart shapes with the glue stick.
- It will look like a fruit.
- Take the butterfly and attach it to this with a glue stick.
- Attach the property with the help of your hand.
- Your paper butterfly will be ready!
P.S- You can use different coloured paper as per your help.
Easy Paper Butterfly Craft Step-by-Step Tutorial
Learn how to make a beautiful paper butterfly with this easy step-by-step tutorial. This DIY folding paper butterfly craft is perfect for kids, school projects, and home decorations. Using simple paper folding techniques, create colourful butterflies that can decorate cards, walls, or craft projects in just a few minutes.
Educational Benefits of Paper Butterfly Crafts for Kids
Paper butterfly crafts are not only fun and colourful activities for children, but they also help improve important developmental skills. Folding paper craft encourages fine motor skill development, hand-eye coordination, focus, patience, and creativity. Activities like folding, pressing, cutting, and decorating paper also strengthen finger muscles and improve concentration in young learners.
Butterfly crafts are especially beneficial for preschoolers, kindergarten students, and elementary school kids because they combine creativity with nature learning. While making butterfly wings and colourful patterns, children can learn about insects, symmetry, colours, and outdoor playfully and engagingly.
Parents and teachers can use this easy butterfly craft activity during spring themes, insect lessons, classroom art projects, homeschool activities, rainy-day crafts, or weekend DIY sessions. It is an affordable and screen-free activity that keeps kids creatively engaged while learning basic crafting techniques.
Tips to Make Your Paper Butterfly Craft Look More Beautiful
Here are some simple tips to make your DIY folding butterfly craft more creative and attractive:
- Use bright, colourful papers or printed craft sheets for vibrant butterfly wings.
- Add glitter, stickers, sequins, or sketch pen details for extra decoration.
- Try different wing shapes and folding styles to create unique butterfly designs.
- Use pastel colours for soft butterflies or neon colours for a bold craft look.
- Attach a thread to hang the butterflies as room decorations.
- Create multiple butterflies in different sizes for classroom wall displays or party decorations.
These simple craft customization ideas make the activity more fun for kids and encourage imaginative thinking.
Safety Tips for Kids During Paper Craft Activities
Adult supervision is recommended while children use scissors, glue guns, or sharp craft tools. For younger kids, use child-safe scissors and non-toxic glue to ensure a safe crafting experience. Keep the crafting area clean and organized to avoid losing small materials or making a mess.
Parents and teachers should encourage children to fold paper slowly and carefully to avoid tearing the paper. Simple guidance during folding activities also helps kids improve accuracy and patience while crafting.
Frequently Asked Questions (FAQs)
Q1. What age group is this paper butterfly craft suitable for?
Answer: This easy butterfly paper craft is ideal for preschoolers, kindergarten kids, and elementary school children. Younger kids may need adult assistance for the folding and cutting steps.
Q2. Which paper works best for making folding butterflies?
Answer: Colored craft paper, origami paper, construction paper, or lightweight cardstock works best for creating durable and colourful paper butterflies.
Q3. Can I use this butterfly craft for school projects?
Answer: Yes, this butterfly craft is perfect for school craft projects, spring season activities, insect learning themes, classroom decorations, and DIY art competitions.
Q4. How can I decorate paper butterflies?
Answer: Kids can decorate butterflies using sketch pens, paint, glitter, stickers, sequins, beads, or colourful patterns to make each butterfly unique.
Q5. Can paper butterflies be used for decoration?
Answer: Absolutely! Paper butterflies can be used for wall decoration, classroom displays, birthday party decor, greeting cards, scrapbook art, and DIY room decoration ideas.
Your beautiful butterfly is ready to fly! As you can see, this process is so simple that anybody could make them. Kids can easily make them by following this procedure. Use your creativity and make as many of them as you can. Use your skills to add more shine and beauty to the butterflies. Use them as gifts, the receiver will love them and will be impressed by their creativity. We all know butterflies roam around flowers, so the paper flowers perfectly suit the butterflies, and it looks great! You can also use them to decorate your room, house, office, and stuff. So, let’s take hold of your materials and make these precious butterflies.
Join our creative community for more fun activities! Get the latest updates on the Telegram group and enjoy amazing craft ideas and DIY projects on YouTube & Facebook
Reviewed by Yash Sharma
Read More:
- How to Create A Paper Toy- Spinning Top
- How to Make A Colorful Paper Cube
- How to Make an Origami Lotus Flower
- How to Make A Paper Rabbit
- How to Make A Moving Paper Toy- An Elephant