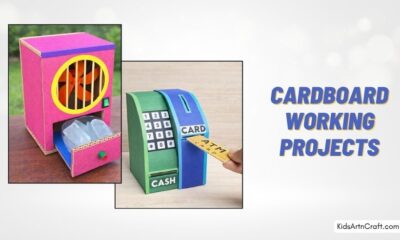


Cardboard Craft
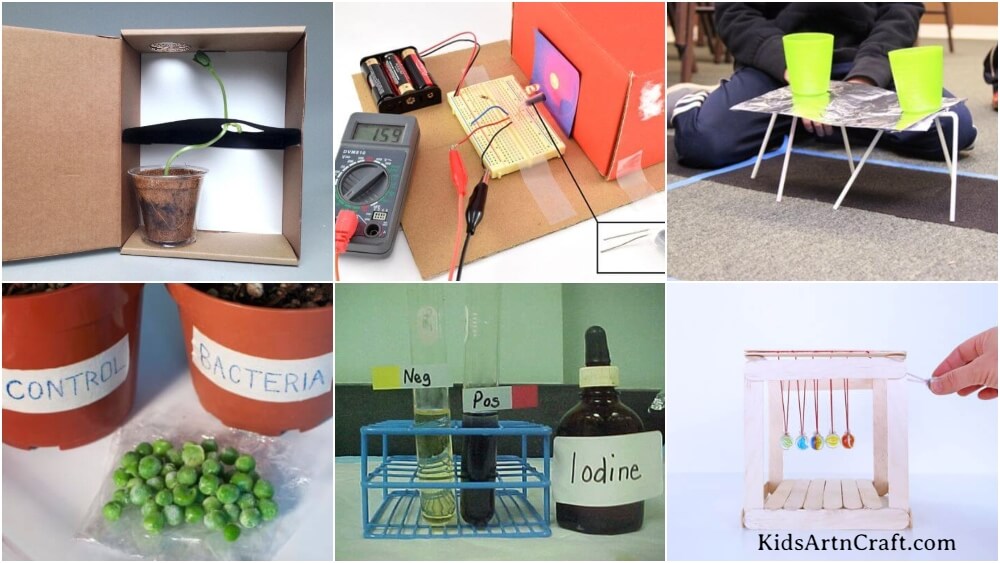
Science Fair Projects & Experiments for 8th Grade

Discover exciting 8th-grade science fair projects and experiments! Explore chemistry, physics, and biology with hands-on ideas to inspire curiosity and scientific thinking.
If you’re searching for science fair projects and experiments for 8th grade, you’re in the right place! We are here with science fair projects and experiments, like a plant growth experiment, a stem science project, and a robotic hand model.
As eighth-grade science is frequently focused on the science fair, we’ve compiled a list of fantastic project ideas for students to pursue. Teachers can discover ideas for hands-on activities and experiments that may be done in the classroom here as well. These hands-on activities will educate children a lot about science and the world around them! The Science Fair day is usually a highly anticipated and memorable event during the school year! If you, your child, or your pupils are looking for some motivation, read the article below and choose from the list of suggestions.
Science Fair Projects & Experiments For 8th Grade
Read More: Scientific Crafts for Toddlers Using Straws – Cool Science Projects
Effecting Plant Growth Experiment For Kids
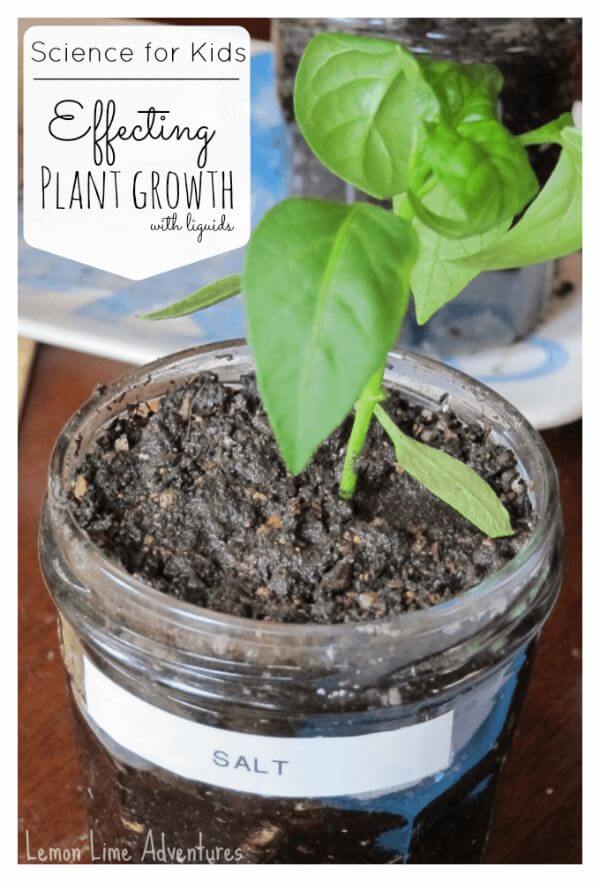
Image Source/ Tutorial: Lemon Lime Adventures
This activity is for 8th-grade students for their science projects or fairs. This activity shows what affects plant growth with different liquids. You can try this great experiment at home, and it’s for any age group.
Materials required:
- 6-7 same small plants
- 6-7 different liquids
- Measuring cup
- Blank paper and a pencil
- Planter
Procedure:
Take 6-7 plants and plant them into the planter and leave them for up to two to three weeks.
Now take a different liquid as per your choice, like water, salt water, soda, carbonate water, river water, etc.
Then take a measuring cup, take a liquid, and put the same amount of liquid into each planter.
Repeat it for two to three weeks.
Observation:
Now, what you see is that the saltwater plants shrivel. That plant does not grow from the first day. As with saltwater, the same soda planter plant also shrivels and doesn’t grow from the day soda is put in the soil.
Result:
You can see now that, from the tap water or normal water, river water, or carbonate water from this water, the plant grows and sees brighter. But from the other liquid that you use, the leaves of plants get shriveled. You can easily see the difference in a week. So let’s try this activity at your home with your friends in the perfect seasons. You enjoy this activity and learn things from it.
Light Bulb Science Project For Kids
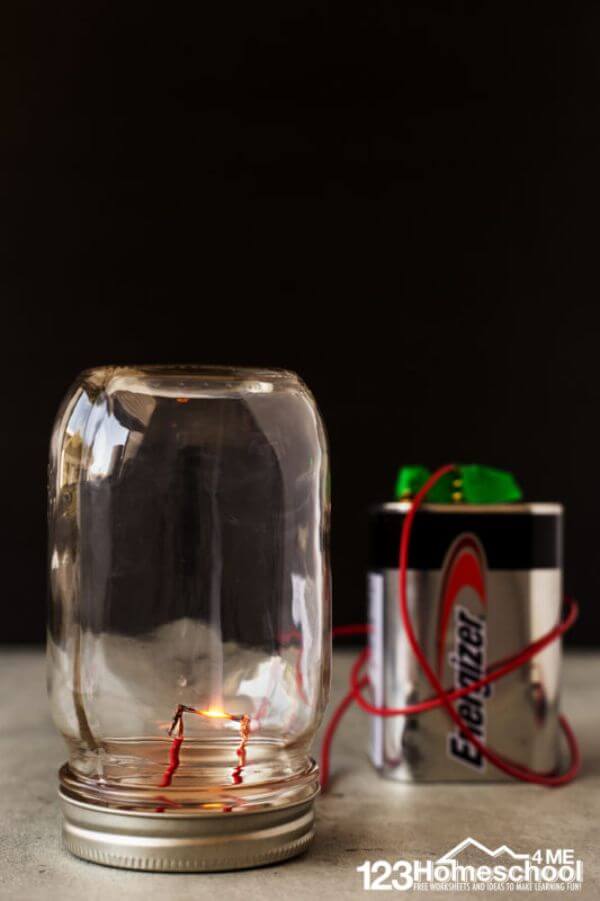
Image Source/ Tutorial: 123 Home School 4 Me
This is an electric light bulb project for 8th-grade students. This activity is useful for your projects, and also it is budget-friendly to all.
Materials required:
- Electric wire
- Glass jar
- Hammer
- Wire cutter
- Battery
- Nail
- Image hanging wire
- Copper wire
Procedure:
Take a jar with the lid on. Hammer the nail for two lid holes apart from the lid of the jar.
Now take a copper wire and cut it into two pieces.
Then take two sides of the wire and trim the plastic coating with both ends with an electric cutter.
After cutting the wire, take the wire and put it into the hole of a jar.
Now, take three strands of iron together and put them on the copper hook on the lid to form filaments.
Then, take a glass jar and turn it upside down. Then, use the electric tape to attach the copper wire lid with one terminal to the high-volt battery, and from the remaining terminal attach another wire.
Result:
You can see your light bulb on. On the blue up to when it burns out. This is an amazing activity; you can also try to suggest it to your classmates.
How to Make a Robotic Hand Model
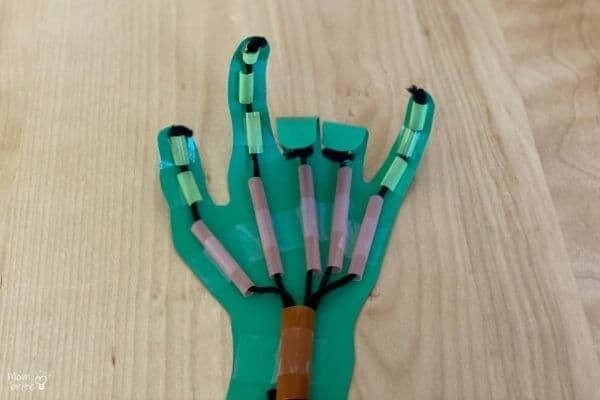
As you can see, this is a robotic hand model for a science experiment. There are different parts in hand, and they work together. It explains how our bones and muscles work individually. Let’s start this amazing activity.
Materials required:
- Pencil
- Straw
- Yarn
- tape
- Scissor
- Boba tea straw
- Cardstock paper
Procedure:
Take a piece of cardstock paper as per your choice. I chose the green cardstock paper, took the pencil, and traced your hand on the paper.
Take scissors and cut the outline of the hand.
After this, mark the location on the paper with a pencil so you can easily know where to put the item.
Now bend the paper from the join.
Now take a boba straw, cut it into smaller pieces of the same size, and tape the straw to each finger with some gap.
After this, take a normal straw and cut it into 5 longer pieces of the same size and tape them on the plate.
Now take a yarn and cut the pieces of yarn to put into the finger and palm straw, and knock the end of the yarn.
Repeat it up to 10 times for all the fingers
Now pull it to make the robotic hand move.
Electrolyte Challenge Science Project For Kids
Result:
Now try this robotic hand in your home, which is super fantastic as you can see. You can do this activity with your friends and learn how your hand system works.
Electrolyte Challenge Science Project For Kids
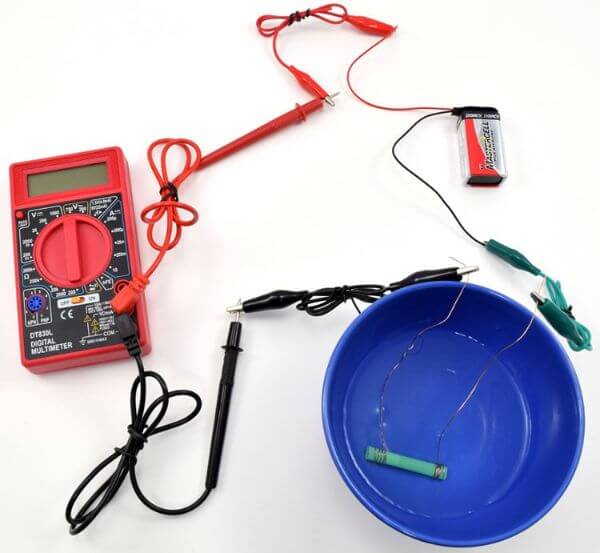
Image Source/ Tutorial: Science Buddies
This is an electrolyte challenge for the science experiment. The level of this experiment is hard for the students.
Materials required:
- Digital meter
- Battery
- Battery clip
- Copper wire
- Alligator
- Resistor
- Straw
- Scissor
- Bowl
Procedure:
Cut the straw equally with the scissors.
Now cut the pieces of copper wire and wrap pieces of wire at each end of the straw.
Connect the digital meter.
Now take an eight bowl and put masking tape and soapy water on it.
On the digital meter, place the sensor in distilled water.
Then place it in normal water and record the meter readings of both sensors.
Then, place the sensor dry for a minute, put it on the orange or lemon juice, and then check the meter.
Repeat this process 14-15 times.
Result:
Check which of these three liquids has a high conductance electrolyte.
Algae And Pollution Experiment Science Project For 8th Grade
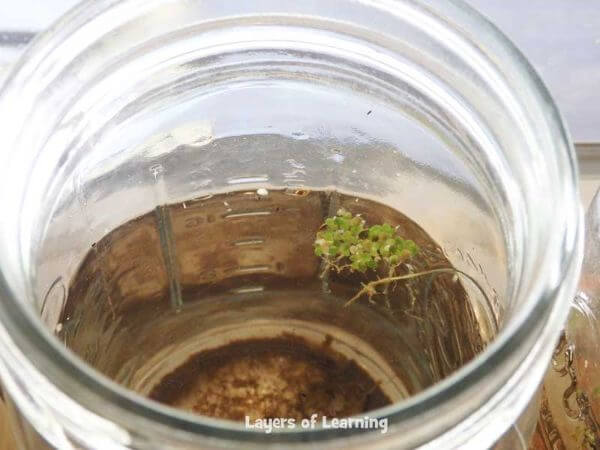
Image Source/ Tutorial: Layers-Of-Learning
This is an algae and pollution experiment. For the experiment, you only need a few items.
Materials required:
- River water
- Bone meal
- Planting and growing food
- Detergent
- Vinger
- Jar
Procedure:
Let’s fill the water in the jar.
Now label the jar and place the jar in the sunlight for one to two weeks.
After a week, you can observe different algae in the jar.
Result:
This is an algae pollution experiment for a science project that you can easily try at home, and see the difference in all the jars.
Read More: 1st Grade Science Projects for School
DIY Science Newton’s Cradle At Home
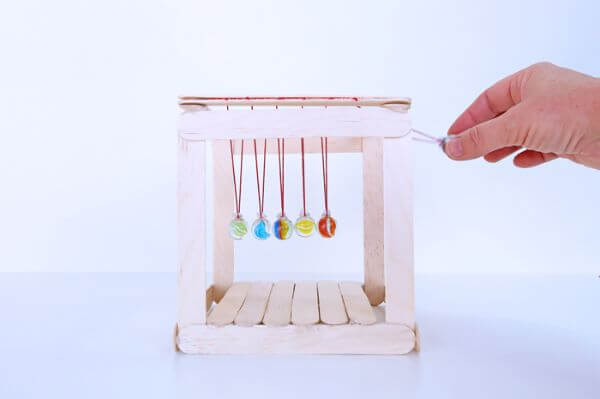
Image Source/ Tutorial: Babble Dabble Do
This is a Newton’s law experiment, which is a perfect example to show Newton’s law from this concept.
Materials required:
- Ice cream stick
- Pencil
- String
- Marble
- Hot glue
- Tape
- Scissors
Procedure:
Take the ice sticks and make the frame.
Now take a string and cut it into six equal pieces.
Then take a marble, hot glue it, and put it on the top of the center of the frame.
Now, separate the marbles in the string and separate them.
Lastly, tape the top end of a string of marbles.
Result:
Your science Newton cradle is ready. You can also try to learn from this activity at home.
Stem Science Project Experiment Activity For 8th Grade
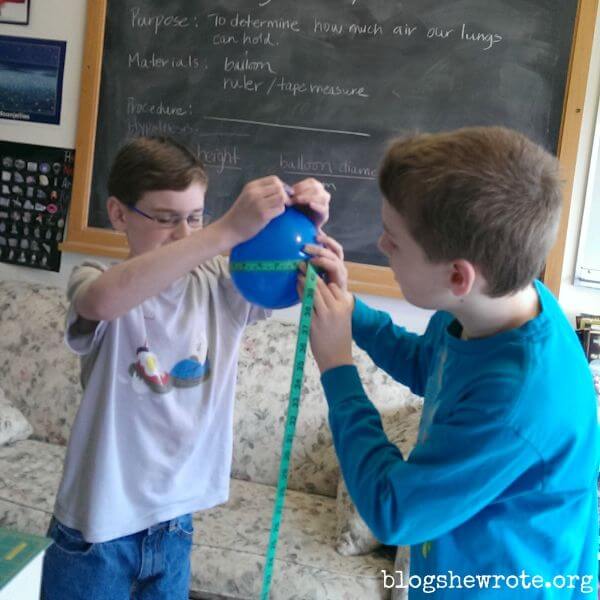
This is a simple and easy activity that you can try with your partner at home in 5 minutes. Also, this activity is budget-friendly to you all.
Materials required:
- Inche tape
- Balloon
Procedure:
Take one balloon and fill it with air.
Then measure the circumference of the balloon from the center.
Repeat it 2-3 times.
Lastly, record the number in centimeters.
Result:
This activity shows how many centimeter differences occur in each round. Let’s try this activity with your friend or any family member.
Crime Scene Fingerprinting Science Project Experiment for 8th Grade
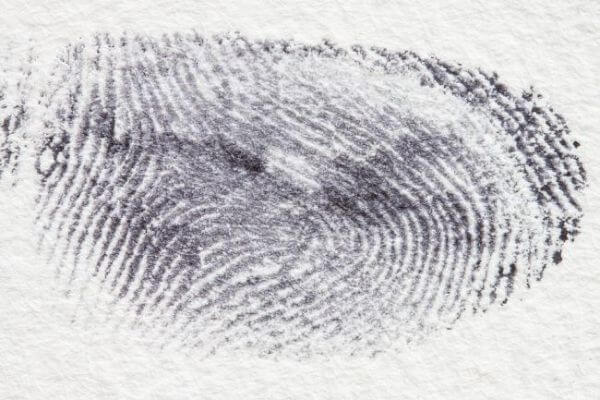
Image Source/ Tutorial: Learning-Center Home Science Tool
This is a crime fingerprint experiment that you can also try with your friend or any family member.
Materials required:
- Superglue
- A cup or bowl of hot water
- Aluminum foil
- Airtight jar
- Microscope slide
Procedure:
Touch your finger on the microscope slide.
Now take an aluminum foil and put it on top of the container.
Place the microscope in the container and the container in hot water.
Result:
After 15-20 min, you can see by using a microscope whether the print can develop or not.
Light Measuring Circuit Experiment For Students
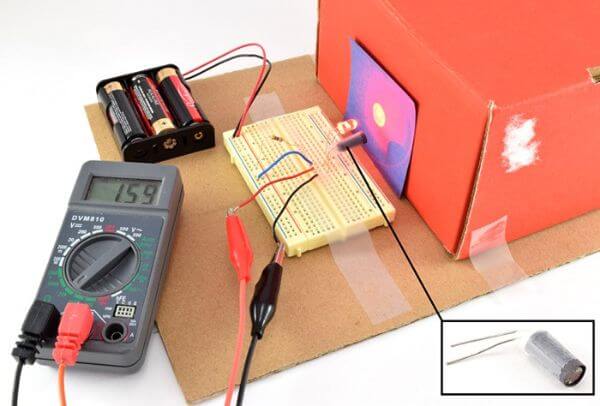
Image Source/ Tutorial: Science Buddies
This is the perfect experiment for the light-measured circuit. By this method, you can easily understand the concept.
Materials required:
- Colored construction paper
- Corrugated cardboard
- Red and green fruit or vegetables
- Small cardboard
- Tape
Procedure:
First, take a circuit and assemble it accordingly.
Now tape the circuit with cardboard.
Now, take the black construction paper and tape it around the edge of the cardboard.
Now, take different colored paper like green, blue, yellow, etc, and cut them into a square shape.
Create a data table.
Check the circuit and the battery.
Repeat it 7-8 times, then calculate ARV, which is the average resistance value.
Result:
You can see the difference in the resistance of the two colors and the colors of the resistance. Try this experiment at home with your friend. Hope you like this idea and concept of the perfect circuit activity.
How To Make a Lift Car with Two Phone Books

Image Source/ Tutorial: Science Buddies
This is a science experiment for the kids that can help you with the project in your school.
Materials required:
- Pack of sticky notes.
- Mini clamps
- Pocket scale
- Paper clip
- Larger binder clip
- Scale
Procedure:
Take sticky notes, pages, and write the number on them.
Now make a pair of the same number in different sticky notes.
Then set the range or level.
According to the level set, the clamp is on it.
Start weighing the sticky notes.
Use a scale to measure that.
Repeat this step 8-10 times.
Result:
Here you can calculate the page and make the graph on it.
Read More: Ice Science Experiments For Kids
DIY Plant Light Science Project Experiment For 8th Grade
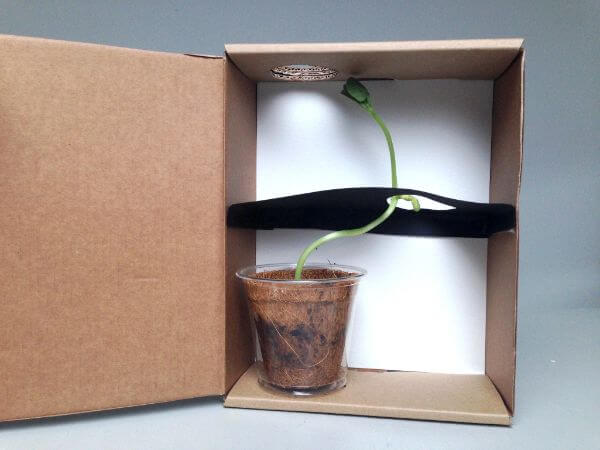
Image Source/ Tutorial: Kiwi Co
This is a plant light science project that you can make on your own for this experiment
Materials required:
- Seed
- Soil
- Small cup
- Cardboard shoe box
- Knife
- Pencil
- Ruler
- Paper
- Tape
Procedure:
Take a plastic cup and plant the seeds in it.
Add some water.
Now, create the light maze by cutting a large hole in the cardboard shoe box.
Add the border only on 3 sides.
Then, take a black cardstock and make a circle with a pencil.
Cut the circle with scissors and place it on the cardboard shoe box in the middle.
Lastly, close the box and put it into the window so that sunlight comes in
Result:
You can see that your plant is growing, and give water to your plant so that the plant gets hydrated.
Hydraulic Elevator STEM Project
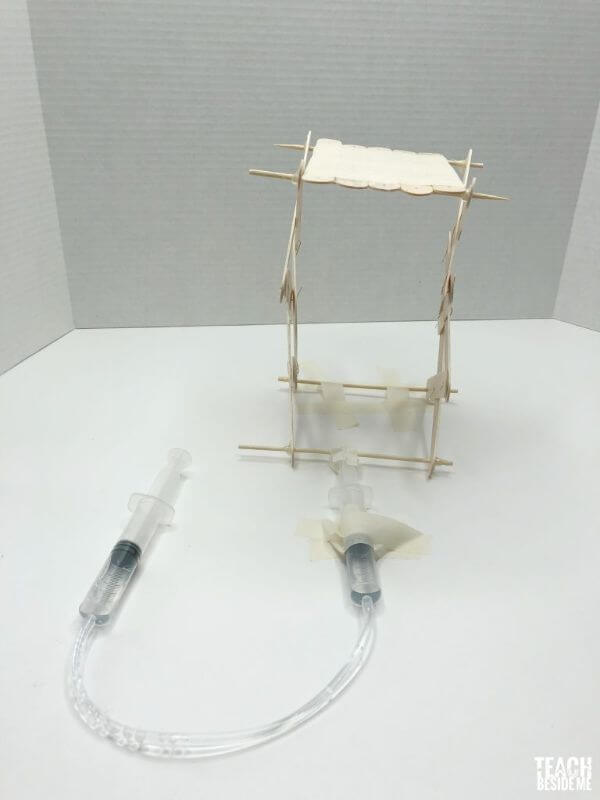
Image Source/ Tutorial: Teach Be Side Me
This is a perfect hydraulic elevator steam project for science. You can try this experiment at least once at home.
Materials required:
- Ice cream stick
- 2 injections
- Thin plastic tubing
- Doctor tap
- Hot glue
Procedure:
Take two ice cream sticks and make a hole in the center of them. In both sticks, make a mark in both the top and bottom corners.
Now connect the sticks with wires.
Connect each end of the stick with two wires by overlapping.
Once it is done, then connect the two sides of the corner and also use some hot glue on it.
Tape the stick so it takes a perfect shape.
Next, make the surface for the top by taking five sticks and joining them by tapping and putting them on top.
After it is ready, take a thin tube pipe, cut it equally from both sides, and add some water to it.
Lastly, tape down the table and press the injection.
Result:
Do this experiment on your own and see, and have fun while doing it. This is a perfect experiment for you guys for hydraulic elevators.
Nature STEM Science Project
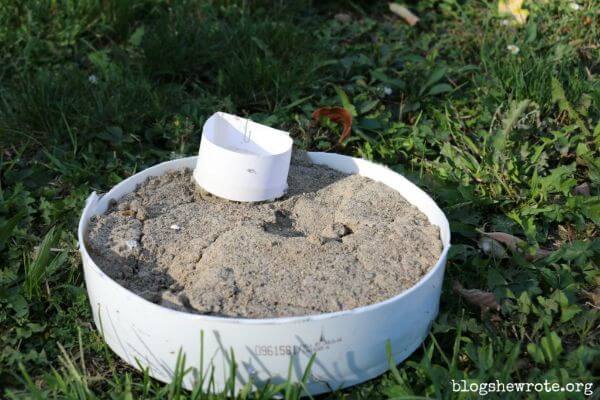
Image Source/ Tutorial: Blog She Wrote
This is a nature stream science activity or project.
Materials required:
- Cardstock
- POP
Procedure:
Cut the cardstock into a circle shape.
Now take POP, add water to it, and pour it inside the circle of the track.
Put it in sunlight so that POP gets harder.
Now remove the ring and label the track.
Result:
You can see the mold get ready, and you can also write on the mold anything that you want.
Infinity Mirror Science Project Experiment
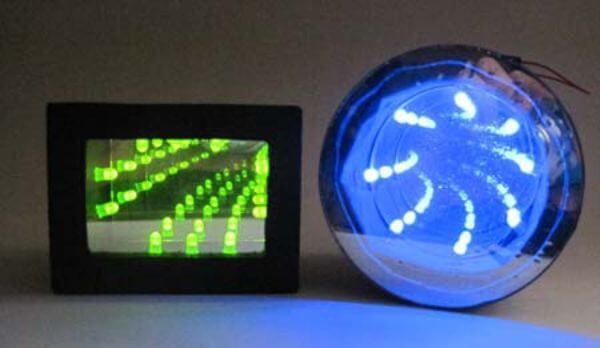
Image Source/ Tutorial: Science Duddies
Infinity mirror science project experiment. This activity allows 8th-grade students to learn how infinite mirrors can be made at home.
Material required:
- Mirror
- Cardboard box
- Power supply
- LEDs
- Safety glasses
- Cutting tools
- Tape
- Acrylic sheet
- Mirror window film
Procedure:
First, take a cardboard box of circular and rectangular shapes.
Now take a mirror of circular and rectangular shapes and put the corresponding inside the boxes.
Give LED wiring between the two boxes.
Now, take a plexiglass and cut it into the shape of the mirror.
Lastly, take LEDs of different colors and put them on top of the boxes.
Observation:
When you turn on the LED light, you can see an infinite mirror inside.
Result:
You can also try this infinite LED light mirror for a science experiment at home.
Cup Holder STEM Challenge
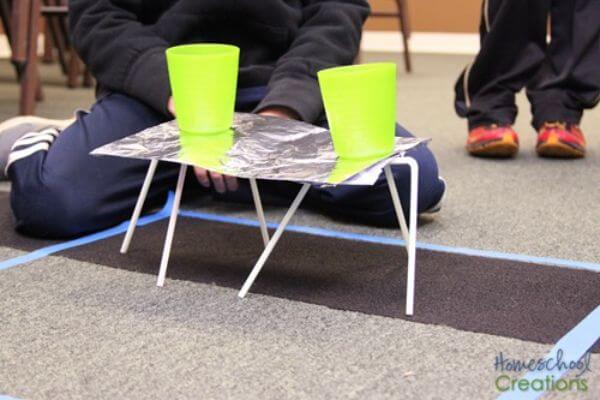
Image Source/ Tutorial: Home School Creations
This is a cup holder challenge in a team or group. You can challenge your friend and see who wins.
Materials required:
- Straws
- Piece of paper
- Tin foil
- Mailing labels
- Paperclips
- Pieces of string
- Envelope
- Pipe cleaners
- Pennies
Procedure:
Take a straw and make a leg of the cup holder.
Now take a tinfoil, wrap it in the paper, and add an envelope for extra support.
The pipe cleaner and string are for holding the leg so that it doesn’t fall.
Now take two cups and put the tops on them.
Result:
It was a solid structure, so the structure was balanced properly. You can also try this activity and see how much time it takes to complete this experiment.
Read More: Edible Science Experiments for Kids
Water Quality Testing Experiment
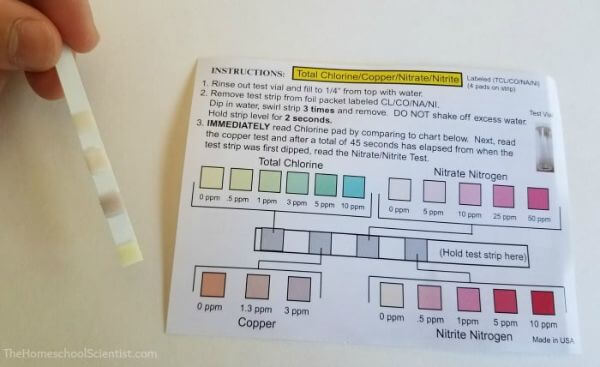
Image Source/ Tutorial: The Home School Scientist
This is a water quality testing experiment by children. The science teacher shows this experiment in the lab.
Materials required:
- pH
- Iron
- Chlorine
- Nitrate nitrogen
- Hardness
- Nitrite nitrogen
- Copper
- Total dissolved solids[TDS]
- Alkanitiy
Procedure:
First, take a container and put water in it.
Now take a pH strip and dip it into the water.
Then the TDS level determines the monitor.
Result:
In this experiment, you can see the multiple sources. If the level is low, then it shows the chlorine, nitrate/nitrite nitrogen. If the level is up, then it monitors the TDS. If we take a filter of water, we find that the upper layer of copper is removed.
Pepto-Bismol Tablet Science Project
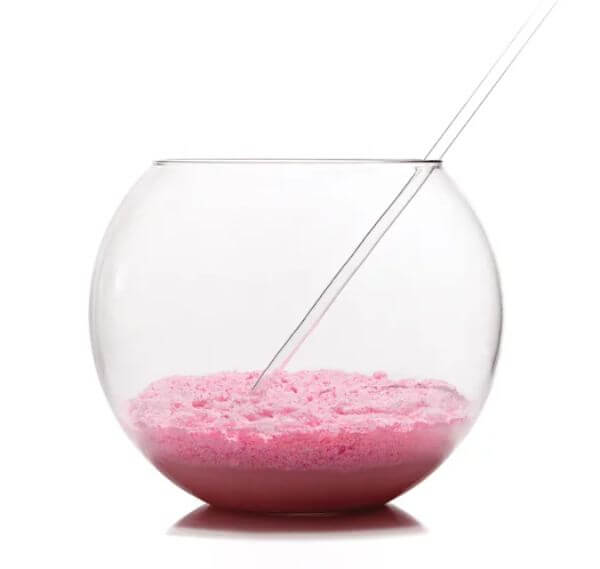
Image Source/ Tutorial: Popsci
This is the most modern method and experiment for students. Should make heavy metal in pink pills
Materials required:
- Pepto Bismol tablets
- Black granite mortar
- Fishbowl
- Hourglass
- Paper
- Charcols
Procedure:
Take a Pepto Bismol tablet and give a fine mix with the help of a black granite mortar.
Now, take a fishbowl and put the fine mix tablet into the bowl with some water.
After this, take an hourglass and put paper on it. Now the mixture in the fishbowl is put into the hourglass. So that the thick particles don’t go inside.
Heating some charcoal with the same method as reducing iron.
Result:
This is a budget-friendly activity that you can do at home with your friends. This activity can be done by any age group of students.
Solar Powered Water Desalination Experiment
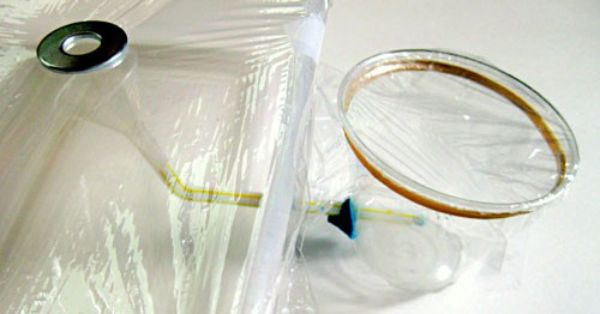
Image Source/ Tutorial: Science Buddies
This activity is for learning about solar water desalination. This is one of the hardest activities, which takes 5-6 days to complete. But this experiment activity is interesting while doing it.
Materials required:
- Plastic rectangular container with two holes
- Plastic jar with two holes
- Gratitude cylinder
- Thermometer
- Clay
- Funnel
- Straw
- Rubber band
- Black and white construction paper
- Tripor Beaker
- Steel washer
Procedure:
Fit the funnel inside the end of the straw and repeat the second straw as the same.
Now, put the funnel straw in the bottom of the container.
Now, take some modeling clay and put it around the hole outside the container.
After this, put the long end of the straw in the hole of a plastic jar.
Cover the opening side of the container with plastic cling wrap and then pull the wrap tightly in the open container, and repeat this process with another.
Then, set the washer in plastic cling wrap
After adjusting the cover, the plastic wrap with the jar and the container
Now cover the container from the outside with black construction paper and another with white construction paper.
After this, take saltwater for both containers.
Remove the plastic wrap gently and tap on the corner.
Leave the container in the sunlight for four hours.
Lastly, repeat this experiment 2-3 times.
Result:
In this experiment, check the color of the desalination. This experiment is hard for lower-grade kids, but 8th-grade students can try this activity at home.
Biology Starch Testing Experiment
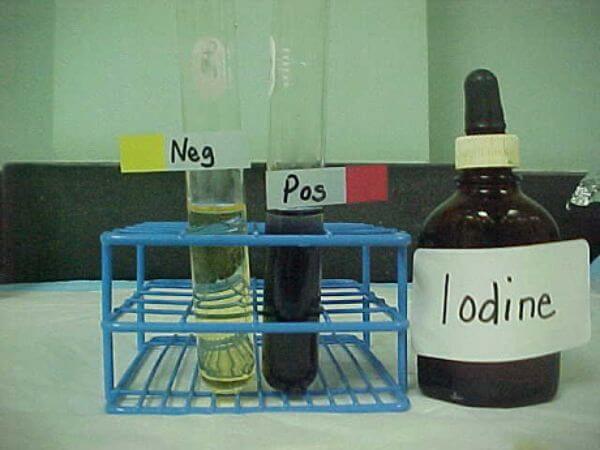
Image Source/ Tutorial: Biology-IGCSE Weebly
This is a biology experiment testing activity that you can do in your school biology lab. This activity shows starch testing for you all.
Strach test reaction:
Take an iodine solution and react with starch
The starch changes the color to blue-black.
Procedure:
Take a material like bread or a potato, and add iodine solution to it.
If the material has a blue-black color, then starch is present.
Result:
This is a simple and easy activity that you can show to students in the biology lab. This activity is for only 5-10 min to explain to the students whether starch is present or not in the material.
Science Project Middle School For Symbiosis
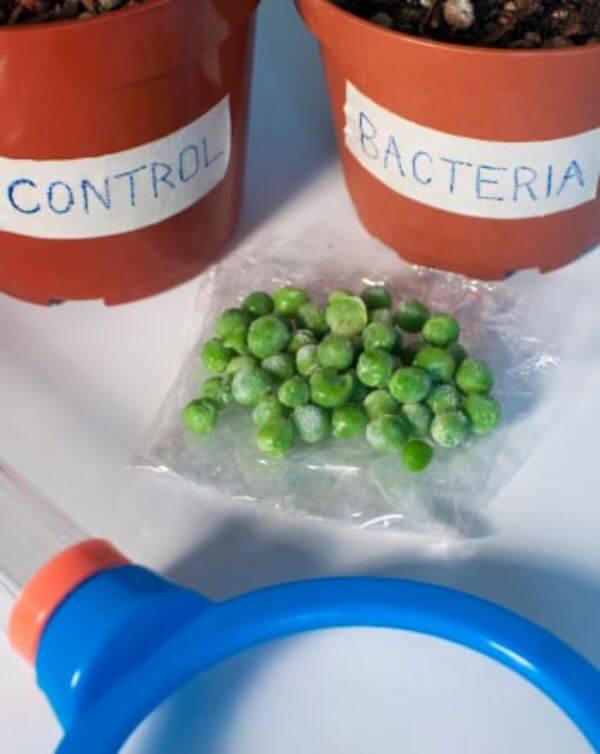
Image Source/ Tutorial: Education
This activity talks about plants and bacteria for a science project for middle school students.
Materials required:
- Clay pot
- Pea seeds
- Potting soil
- Magnifying lens
- Marker
- Camera
- Drawing paper or pencil
- Rhizobium leguminosarum
Procedure:
Take three pots of bacteria and three pots of control
Fill the potting soil in all six pots.
Plant the three Rhizobium leguminosarum seeds in the three bacterial pots. Put the rest of the nine seeds in the control pots as bacteria.
Put the water appropriately into the pots and set the pots in the sun.
After nine weeks, a pea grows.
Lastly, take out the pea and soil, take a magnifying glass, and observe the soil.
Result:
This is a fun-loving activity. You can try this activity and also observe the bacteria in the soil. This is a budget-friendly and helpful activity for your home, and also the plants grow.
Read More: 10 Simple Science Experiments for 3-5 Year Olds
STEM Car Crash Science Project
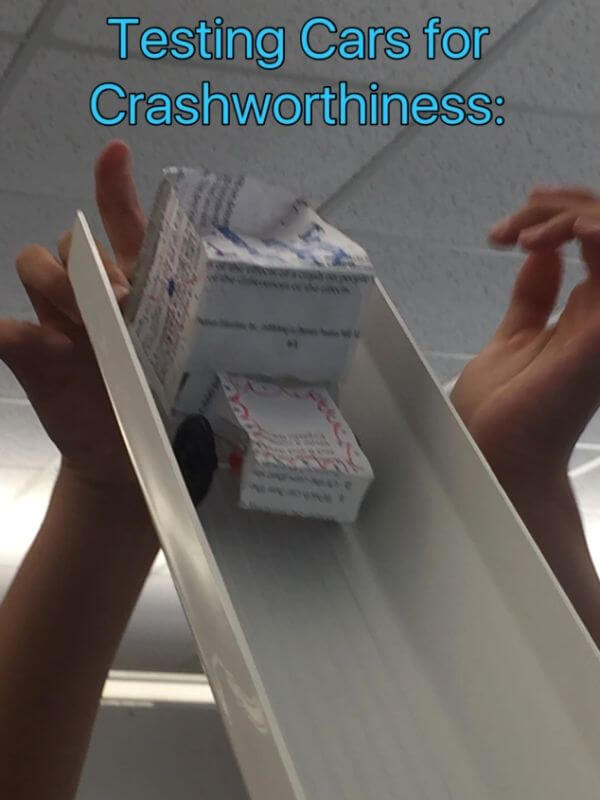
Image Source/ Tutorial: The Ardent Teacher
This is a steam car science project for children up to 8th grade. This activity is fun. Youu can try this activity at home.
Materials required:
- Car
- Slider
- White big screen
- Plastic layer
- Whiteboard
Procedure:
Take the car and the slider.
Take any item and put it into the car, like an egg or any fruit, etc.
Now, let the car go.
Check the car and the egg or fruits put into the car are injured by what percentage.
At last, take a whiteboard and write how much the car and the fruits were damaged.
Result:
Do this activity daily at home so you can understand the trick. This activity is about crashing cars and having fun while doing such activities. Let’s try to suggest to your friends these experiments.
Center of Gravity Experiment Science Project
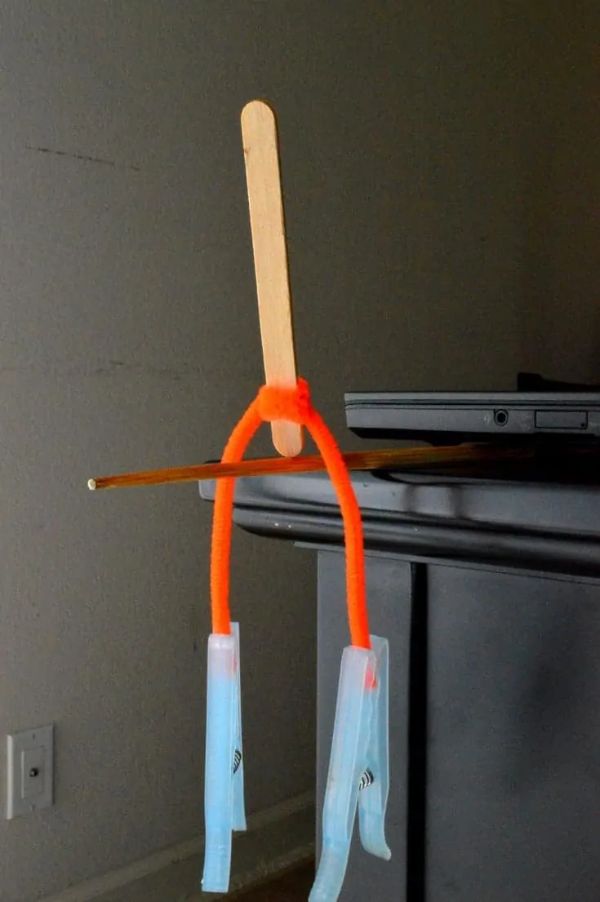
Image Source/ Tutorial: Rookie Parenting
Here is the gravity experiment science project. Through this experiment, you also understand what gravity is. This is the center of gravity, which you see in the image.
Materials required:
- Clothes pin
- Pipe cleaner
- Ice cream stick
- Chopsticks
Procedure:
Take a pipe cleaner on one end of the ice cream sticks
Now wrap it around the ice cream from both sides tightly.
Take two clothespins and a pin from both ends and balance the ice cream stick with chopsticks on both sides.
Finally, adjust the position of the stick.
Result:
This craft is on a balanced basis because it talks about the center of gravity. After the balance, this project is completed. This is a simple and budget-friendly experiment you can try at school or at home.
Homemade Battery Science Experiment For Kids
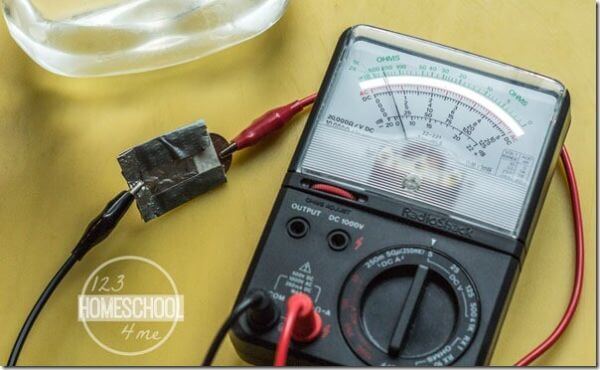
Image Source/ Tutorial: 123 Home School4 Me
This is a homemade activity for science experiments for 2nd to 8th-grade students. Do this activity by using some budget-friendly material.
Materials required:
- Duct tape
- Paper towels
- Aluminum foil
- Voltmeter
- Vinegar
- Pennies
Procedure:
Fold the aluminum foil into a square shape of the same size as or bigger than a penny.
Now take a paper towel of the same size and fold it like aluminum foil.
Then rip and take a duct tape of the same size as a paper towel, and a slightly bigger one.
Now, the penny with the aluminum square and the paper towel on top with duct tape.
Then, fold the duct tape together to make a battery.
Lastly, add some vinegar to the paper towel. If the voltmeter gets negative, then the black lead of the aluminum foil, or if it is positive, then the red lead of the copper.
Result:
Try this battery maker on your own; you’ll enjoy this activity. Light up your battery in your own way or style, and show your talent here. You must try this activity and have fun while doing it.
How To Make Green Flames
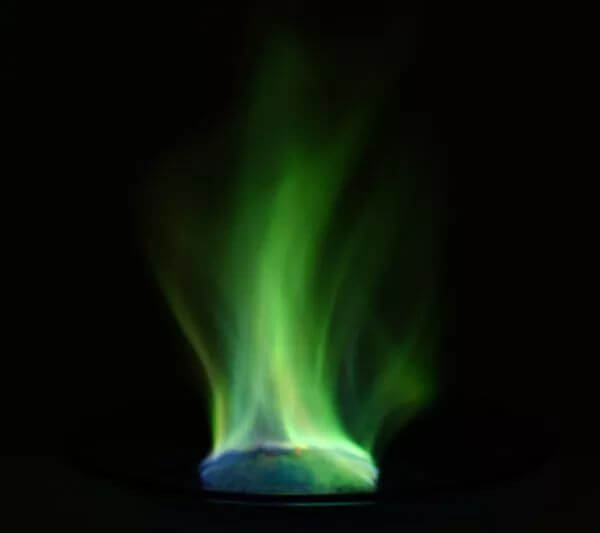
Image Source/ Tutorial: Thought Co
This is another science experiment you must try at home in your free time. This is easy to create green flames
Materials required:
- Alcohol
- Copper sulfate
Procedure:
Take a powder of the copper sulfate or liquid product
Now take a paper or wood, soak it, and allow it to dry for an hour.
Now take an alcohol to make a blue flame.
Now, take a copper powder and sprinkle it into the wood for the green flame.
Result:
As you can see, when you sprinkle copper sulfate powder in the flame, the green flame glows up. This is a simple and easy activity that you can try at home.
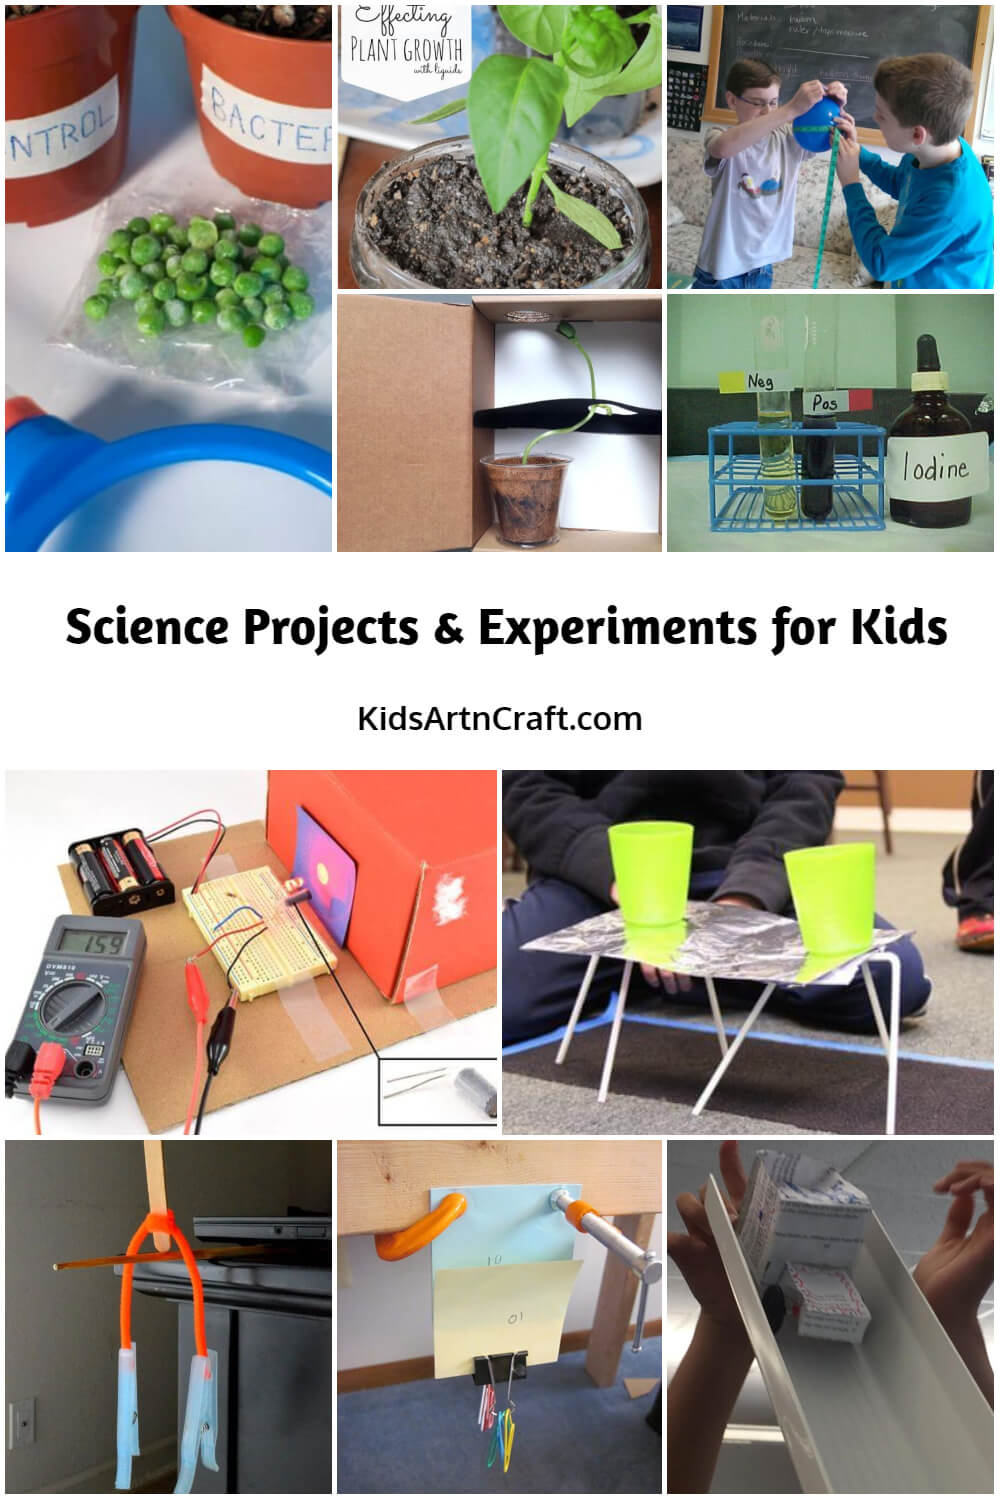
Step-by-Step 8th Grade Science Fair Projects Tutorial
Learn step by step how to create amazing 8th-grade science fair projects with easy experiments, scientific methods, and presentation tips. This tutorial walks you through every stage — choosing a topic, planning experiments, collecting data, and preparing your science fair display. Perfect guide for students, teachers, and parents.
How to Write a Science Fair Project Abstract
We all know the Science Project abstract plays an important role in any science project fair. But do you know what an abstract means? And why is it so necessary to make an abstract? Before moving further, let me tell you what an abstract means.
Meaning of Abstract
The abbreviated version of the final report of your science project is known as an abstract. Mostly science fairs put a word limit of up to 250 words. The science fair project abstract appears at the beginning of the report as well as on the display board.
These are the very important six pieces that most scientists and engineers agree that an abstract should have. These steps include:
1. Introduction
2. Motivate
3. Problem statement
4. Procedures
5. Results
6. Conclusion
Introduction: In this step, you have to describe the purpose of doing your science fair project or invention. This is a very important step, as in this step you will tell your visitors what special things you do in your project. You have to tell them what specialty your project or invention contains to attract the audience.
Motive: In this step, you have to motivate the reader to read the entire paper or display board so that they can understand your science project work more clearly.
Problem Statement: This step contains identifying the problem you solved, or the hypothesis you investigated.
Procedures: In this, you have to step through the approaches you’ve used to solve the problem. But don’t go into detail unless they are critical to your success.
Result: In this step, you have to mention the result obtained. Do not use vague terms like “most “or “some”.
Conclusion: This is the final step. In this step, you have to mention the science fair project or invention contribution to the area that you worked in, or did you get the desired result?
To make a good impact or to present your project in a proper way, the abstract is really important. Let us know why the abstract is so important.
Importance Of Abstract
A science fair project abstract helps people to quickly determine if they want to read the entire post or not. The Abstract also works as an advertisement for your project work. By working on an amazing abstract, you can easily impress judges and the public about the science fair project.
An Abstract is always short, so it’s better to choose words wisely and convey the important message.
Meeting the Required Word Limit
Sometimes it’s hard to summarize a very long topic in a very short description. You should keep in mind to include all the key information. Just look for ways to make your abstract full of valuable information related to your work.
With the help of these guidelines, you will definitely create an amazing science fair project. So be ready to impress your target audience. Happy learning!!
Why Science Fair Projects Are Important for 8th Graders
Science fair projects give 8th-grade students the opportunity to explore scientific concepts through hands-on investigation and experimentation. These projects encourage students to ask questions, test hypotheses, analyze results, and draw conclusions using the scientific method. Participating in science fairs helps students develop critical-thinking, research, and problem-solving skills that are valuable for future academic success.
Whether exploring physics, chemistry, biology, environmental science, or engineering, science fair experiments make learning more engaging and meaningful. Students gain practical experience while discovering how science applies to real-world situations.
Benefits of Science Fair Experiments for Students
- Develops critical-thinking and analytical skills.
- Encourages curiosity and scientific exploration.
- Strengthens research and observation abilities.
- Teaches students how to use the scientific method.
- Improves problem-solving and decision-making skills.
- Builds confidence through independent learning.
- Prepares students for advanced STEM education.
Tips for Creating a Successful Science Fair Project
- Choose a topic that genuinely interests you.
- Start planning and researching early.
- Follow the scientific method throughout the project.
- Keep detailed notes and record observations carefully.
- Conduct multiple trials for accurate results.
- Create clear charts, graphs, and visual displays.
- Practice presenting your findings confidently.
Common Materials Used in Science Fair Experiments
- Notebook or science journal
- Measuring tools and rulers
- Magnifying glass
- Batteries and simple electrical components
- Household science materials
- Poster board for presentations
- Lab safety equipment when needed
FAQs
Q1. What makes a good 8th-grade science fair project?
Answer: A good project investigates a clear question, follows the scientific method, includes data collection, and presents meaningful results and conclusions.
Q2.Which science subjects are best for science fair projects?
Answer: Biology, chemistry, physics, environmental science, and engineering are all excellent subjects for science fair investigations.
Q3. How long should an 8th-grade science fair project take?
Answer: Most projects take several days to several weeks, depending on the complexity of the experiment and the amount of data collected.
Q4. Why is the scientific method important?
Answer: The scientific method helps students conduct organized investigations, test ideas fairly, and draw evidence-based conclusions.
Q5. Can science fair projects use household materials?
Answer: Yes, many successful science fair experiments can be completed using simple household items and inexpensive supplies.
Science fair projects and experiments help 8th-grade students develop scientific knowledge, critical-thinking skills, and confidence through hands-on learning. These engaging STEM activities encourage curiosity, creativity, and problem-solving while providing valuable experience in research, experimentation, and presentation. Discover something new every day with fun crafts and exciting activities—follow us on Telegram, YouTube & Facebook.
Reviewed By Rachit Gupta
Read More:
- Science Projects for Grade 5 Students
- 1st Grade Science Projects for School
- Explosion Experiments For Kids
- Ice Science Experiments For Kids
- Easy Science Experiments for Kids