DIY and Crafts

DIY Easter Garland Ideas to Celebrate The Festival

Published on

Create a festive atmosphere this Easter with these easy DIY garland ideas! From bunny-shaped garlands to egg-inspired designs, these DIY decorations are the perfect way to celebrate the Easter festival. Get creative with your garland designs and create something unique for your Easter celebrations!

Garland is decorated on the walls and doors. Garland is basically used for decorating homes at times of festivals, especially during festivals. Easter is a joyous and festive occasion that is celebrated by many around the world. It is a great time to show your creative side and get crafty with some DIY Easter garland ideas!

Read More: DIY: 3D decorative Paper Heart Garland Tutorial

DIY Easter Garlands Ideas
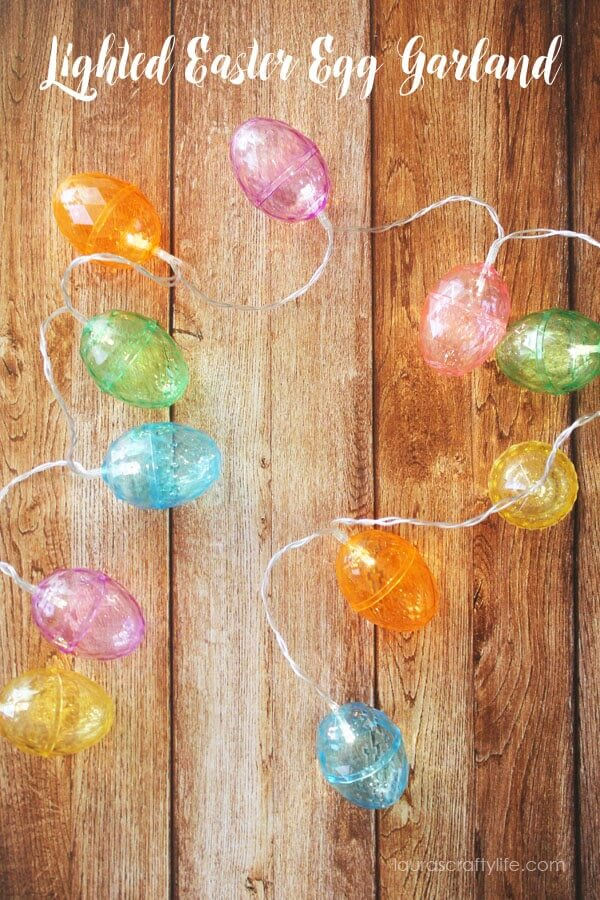
# Electric Garland

Image Source/Tutorial: by Lauras Crafty Life

Things required:

  1. Led light
  2. Colored transparent ball
  3. Drill bit

Procedure: 

  1. Drill the colored transparent ball from down.
  2. Now fix the LED light in it.
  3. The electric garland is ready. You can hang it on the door now

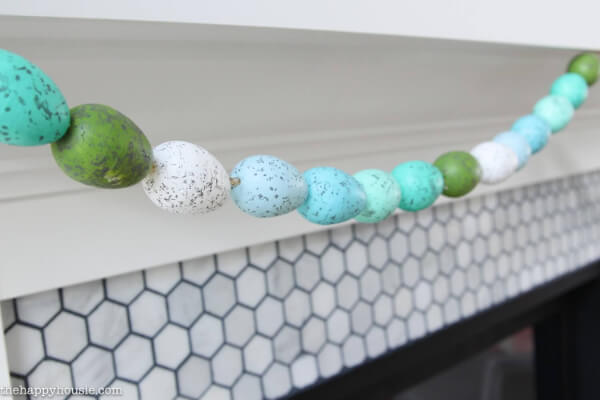
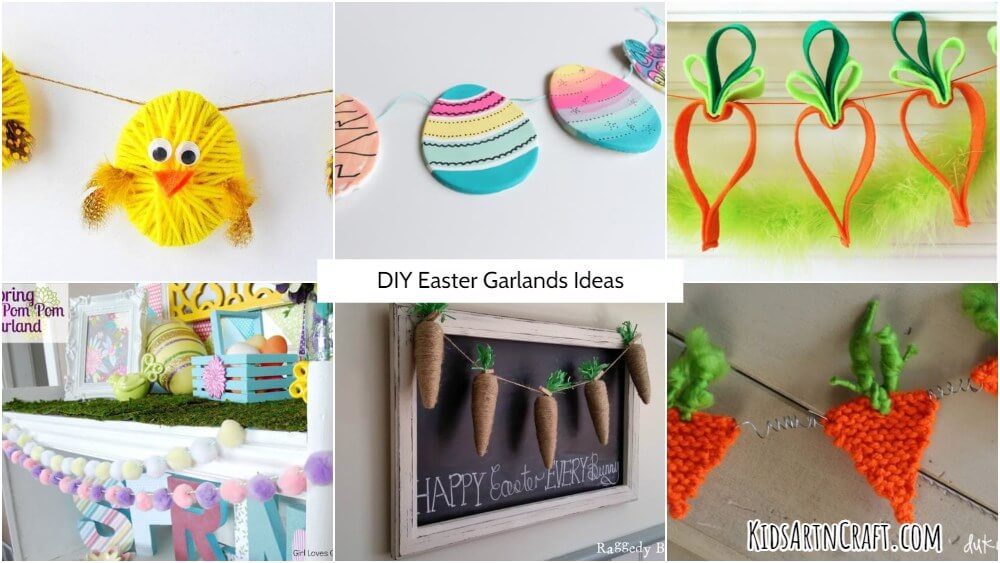
# Styrofoam Egg Easter Garland

Image Source/Tutorial: The Happy Housie

Things required:

  1. Styrofoam of egg shape
  2. Thin rob
  3. Needle
  4. Corn and sand

Procedure:

  1. Take corn in a bowl, put sand and water in it, and mix it well
  2. Now make a design on styrofoam from corn in the sand. Your styrofoam will get a dotted design.
  3. Now make a hole in every styrofoam and string them together in a thin rope.

And a simple garland is ready; you can put it anywhere you want.

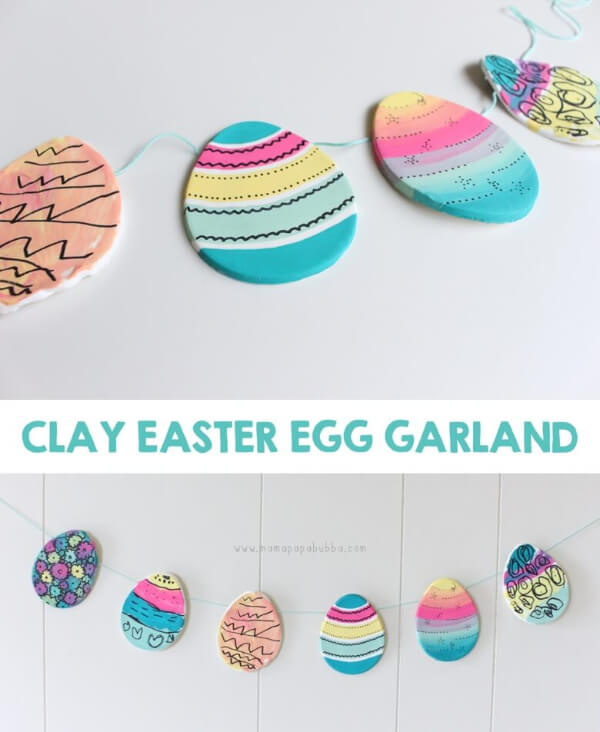
# Garland From Clay

Image Source/Tutorial: Mama. Papa. Bubba

Things required:

  1. White clay
  2. Paint color
  3. Paintbrush
  4. Thin rob
  5. Clay mode

Procedure:

  1. Roll the clay into a round and cut many egg shapes from that round clay with the help of the clay mold.
  2. Now paint all the shapes with the paint color of paint.
  3. And string them together in the rob.

And an amazing, attractive garland is ready.

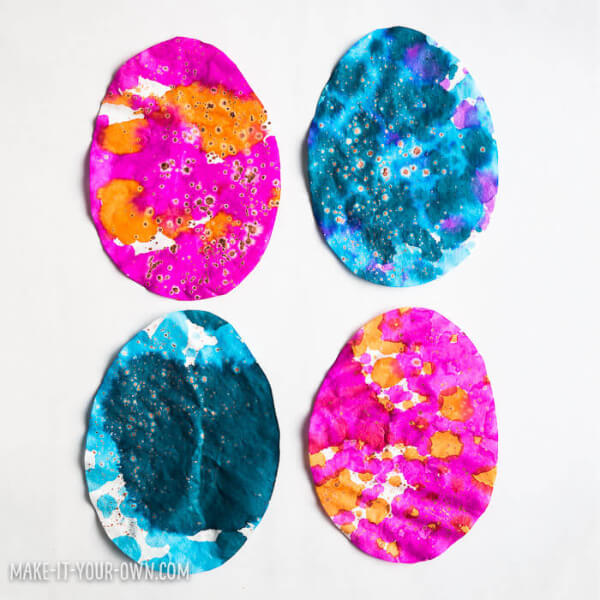
# Paper Made Garland

Image Source/Tutorial: Make It Your Own

Things required:

  1. Disposal plate
  2. Egg template
  3. Beats
  4. Thread
  5. Paint color
  6. Paintbrush
  7. Tape

Procedure:

  1. Put the egg template on a disposable plate and cut it into the shape of an egg.
  2. Now colour that egg cutting from 3 colours. Similarly, color all the eggs.
  3. Now string 3 beats into the thread and paste one egg on a thread with the help of tape, and repeat the same with all.

Your painted paper garland is ready.

# Paper-made garland
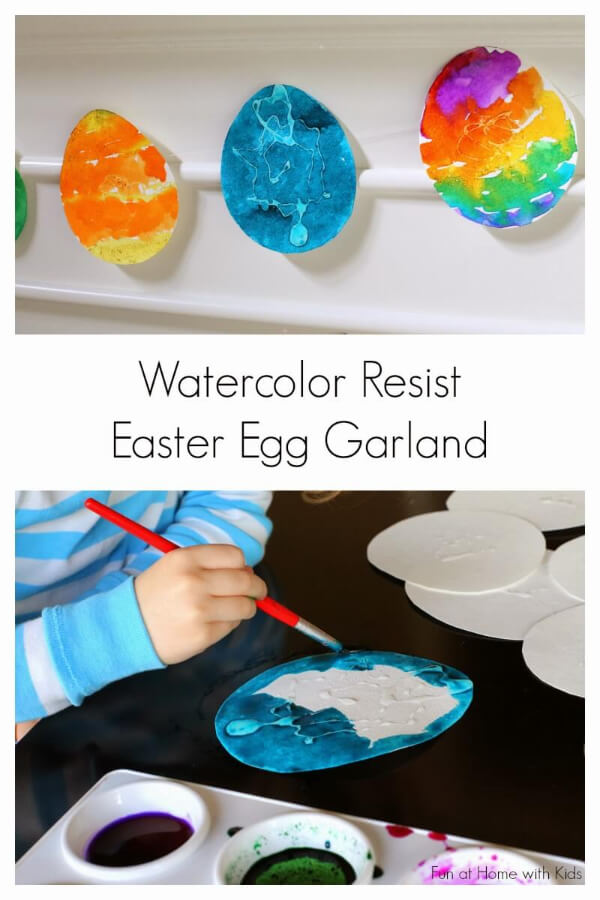
Image Source/Tutorial: Fun at Home With Kids

Things required:

  1. Paper
  2. Pain Color
  3. Paintbrush
  4. Thread

Procedure:

  1. Cut a drawing sheet in the shape of an egg.
  2. Now ask your children to paint it.
  3. Now paste them on the thread.

And the children’s handmade garland is ready.

Read More: DIY String Art Ideas For Home Decoration

# Bunny Face Pom-pom Garland
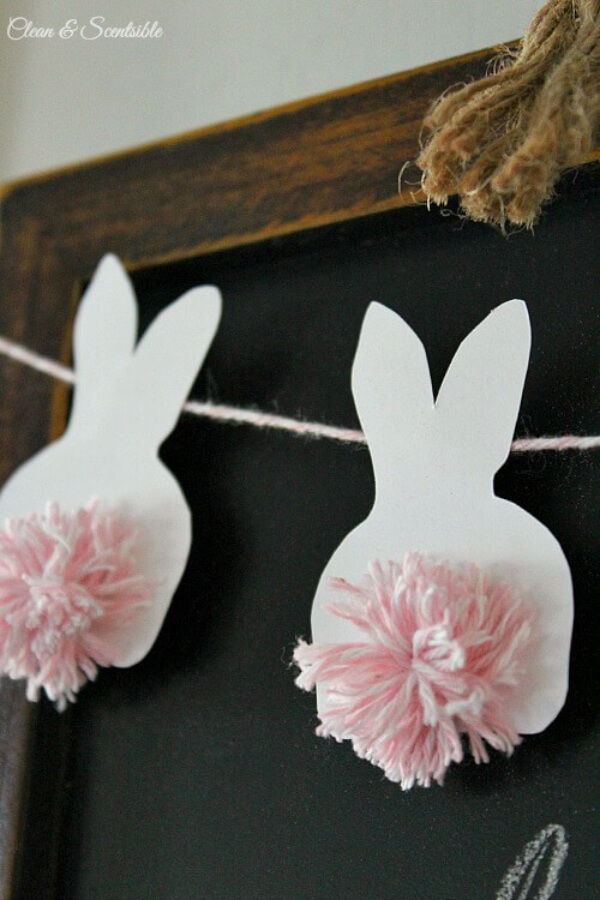
Image Source/Tutorial: Clean and Scentsible

Things required:

  1. Thread
  2. Pom pom ball
  3. Drawing sheet
  4. Tape

Procedure:

  1. Take a drawing sheet and draw many designs of a bunny face
  2. Now cut all of them.
  3. Put one pom pom ball on each face and string them on one thread.

And a fancy garland for your study room is ready.

# Rabbit Pom Pom Garland
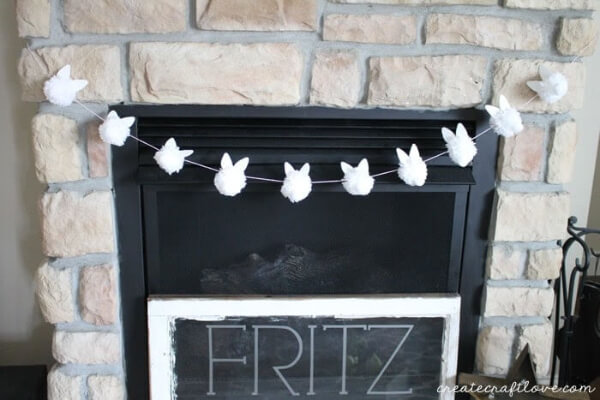
Image Source/Tutorial: Create Craft Love

Things required:

  1. Large-sized pom pom ball
  2. Drawing sheet
  3. Thread
  4. Glue

Procedure:

  1. Take a drawing sheet, draw several rabbit ears on it, and cut them.
  2. Paste those ears on each pom pom ball.
  3. And string them all into a thread.

Funky garland is ready.

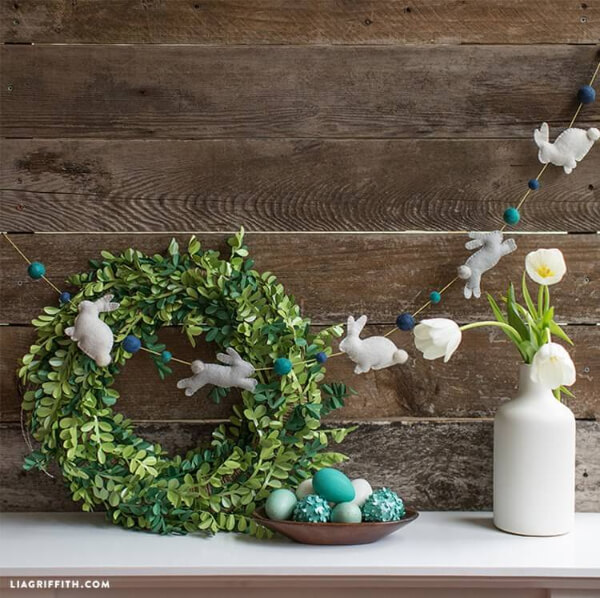
# Rabbit Garland

Image Source/Tutorial: Lia Griffith

Things required:

  1. Cloth
  2. Thread
  3. Needle
  4. Thin rob
  5. Little rob
  6. Cotton

Procedure:

  1. Take a cloth and make a template on it, and cut the cloth in the shape of the template.
  2. Put cotton in between and another template on the backside, and sew them.
  3. Now string all templates and beats in the thread.

And a cool garland is ready to decorate your door.

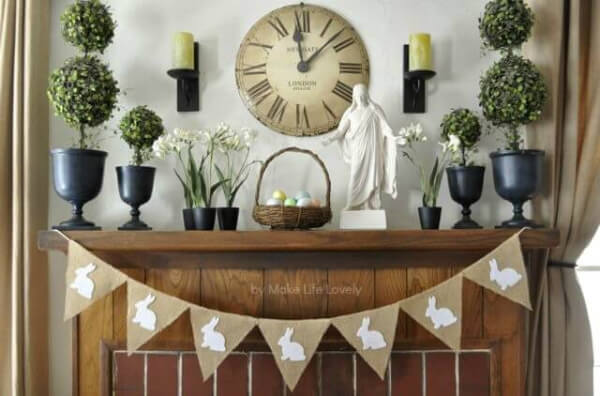
# Triangle Shape Garland

Image Source/Tutorial: Make Life Lovely

Things required:

  1. Colored Paper
  2. Drawing sheet
  3. Scissors
  4. Glue
  5. Thread

Procedure:

  1. Take a paper and make many triangles on it of equal measure.
  2. Now draw template designs on white paper and cut them. The number of triangles cut and the template cut should be the same.
  3. Now paste the templates on the triangle
  4. And string all triangles in the thread.

Lovely garland to decorate your almirah is ready.

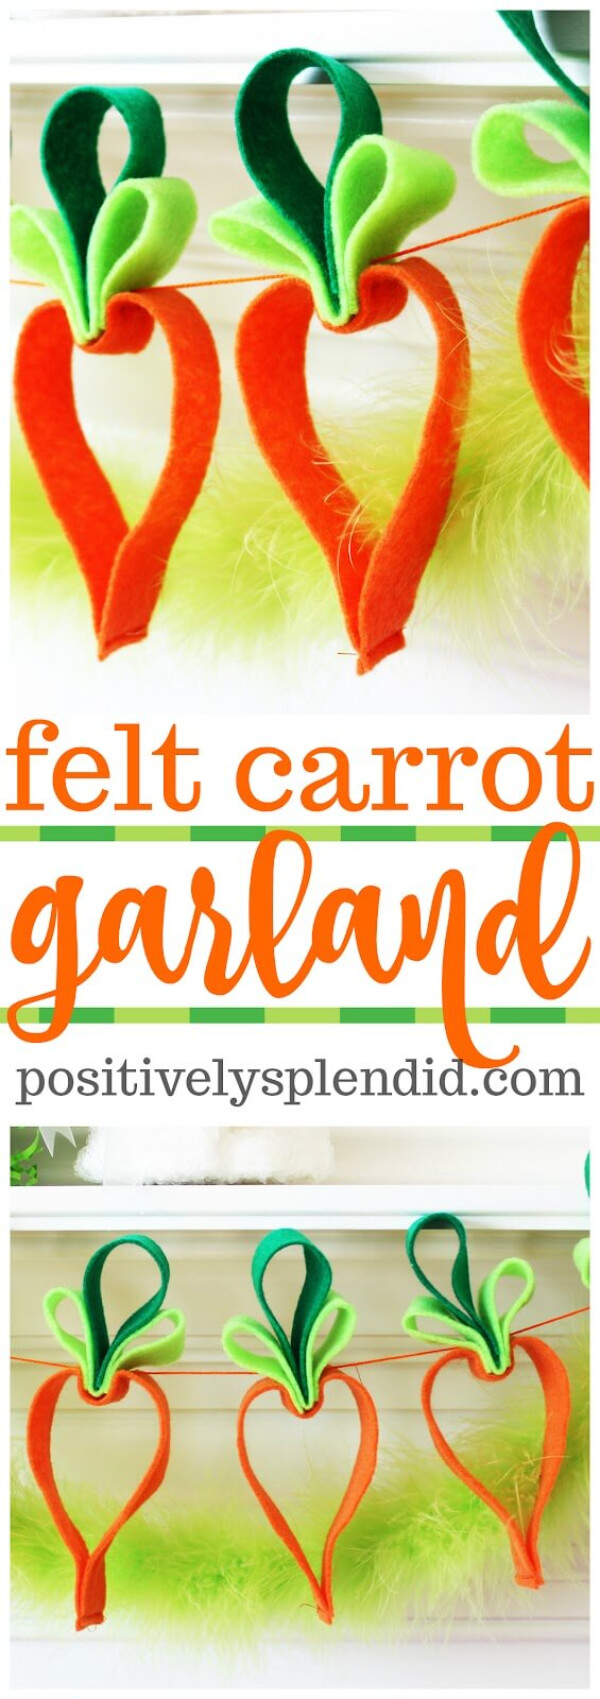
# Open Carrot Garland

Image Source/Tutorial: Positively Splendid

Things required:

  1. Feel of 3 colours: dark green, light green, and orange.
  2. Embroidery needle
  3. Shear
  4. Sewing machine

Procedure:

  1. Fold dark felt in half-width and sew it.
  2. Work with a light green felt strip, fold the piece in half width-wise.
  3. Tuck the dark green piece between the light green.
  4. Fold the orange strip in half width-wise and wrap it around the stacked green piece.
  5. Clamp them together safely with a mini clothespin.
  6. Fold the remaining edge of the orange and stitch it. And the carrot is finished.

Repeat it till the desired number is on the carrot.

Read More: 31 Beautiful Pom Pom Craft Ideas For You And The Kids

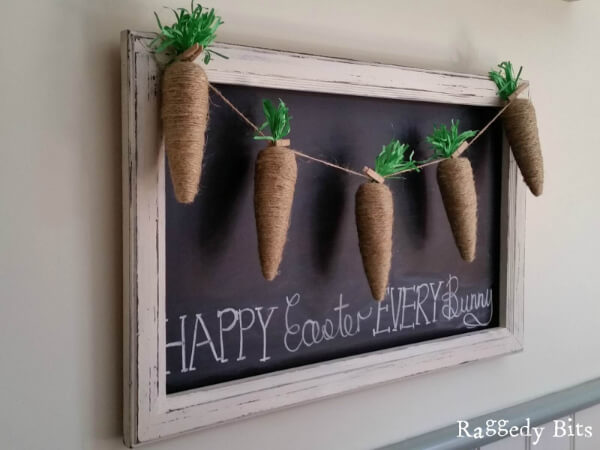
# Brown Carrot Garland

Image Source/Tutorial: Raggedy

Things required:

  1. 6 carrot foam
  2. Glue
  3. Scissors
  4. Jute
  5. Small wooden peg

Procedure:

  1. Cut white ribbon loops at the top of the carrot
  2. At the Carrot’s bottom, put the glue and stick the jute.
  3. And wrap the foam with jute
  4. Take a jute thread and attach your garland to the thread.

And a lovely, attractive garland is ready

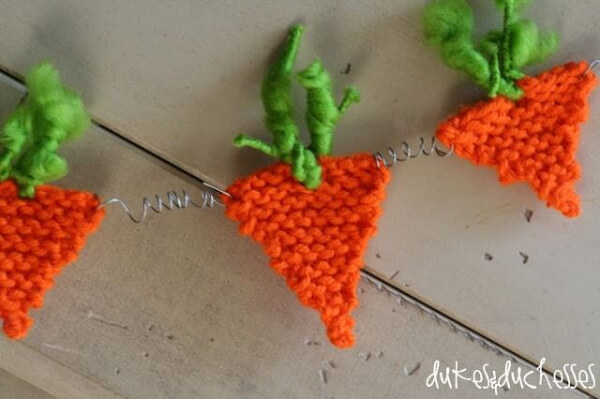
# Crosia Carrot Garland

Image Source/Tutorial: Dukes and Duchesses

Things required:

  1. Wool
  2. Spring
  3. Scissors
  4. Knit machine

Procedure:

  1. We will make it from the bottom. First 2 knit, 4knit, 6knit, 8knit, 10knit.
  2. Then, stack green wool at the top.
  3. Then string them in spring.

And the Crocus Carrot  Garland is ready.

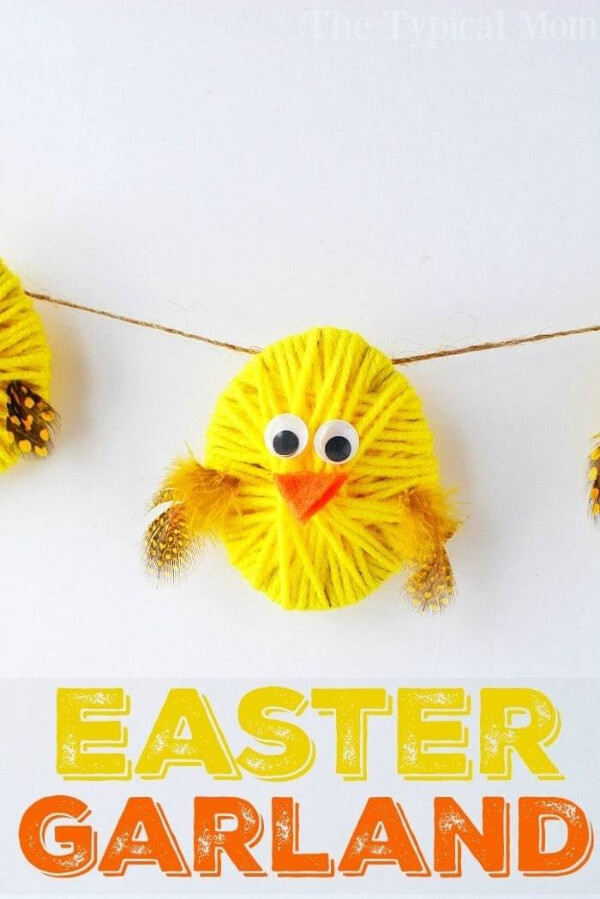
# Chicken Face Garland

Image Source/Tutorial: Temecula Blogs

Things Required: 

  1. Cardboard
  2. Googly eyes
  3. Wool (yellow colour)
  4. Feather
  5. Foam

Procedure:

  1. Cut a round figure, apply glue to it, and immediately cover it with wool.
  2. Now let the wool stick to the cardboard, then apply googly eyes to it.
  3. Cut foam into a triangle shape for the beak and apply feathers on the side of the face.
  4. Make the desired number of faces and string them together in wool

The amazing garland is ready.

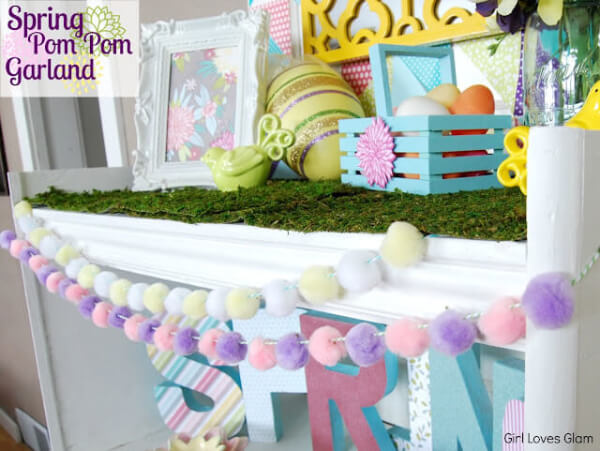
# Pom Pom Garland

Image Source/Tutorial: Girl Loves Glam

Making this garland is too easy.

Things Required:

  1. Pom pom ball of 2 colours
  2. Theard
  3. Needle

Procedure:

  1. Thread a needle and string all the pom poms in their color-wise, e.g., one pink, one purple, as shown in the figure.

And the garland is ready

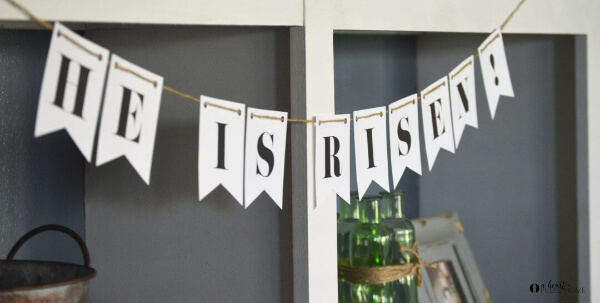
# Thoughtful Garland

Image Source/Tutorial: A Heart Filled Home

It’s cool looking, easy to make

Things required:

  1. Paper
  2. Rob
  3. hole maker
  4. Marker
  5. Scissors

Procedure:

  1. Take a piece of paper, cut it into any shape you want, like a square or a triangle.
  2. Cut it according to  how many letters come to your mind
  3. Now write one letter of your thoughts on each piece of paper. As shown in the image
  4. Now, make a hole with the hole maker at the top of the paper and string all of them in the robe. As shown in the image

And your cool, attractive garland is ready.

Easy Step-by-Step Easter Decoration Tutorial

Learn how to make a beautiful DIY Easter garland with this easy step-by-step tutorial. Perfect for festive home decor, this simple craft uses colorful paper eggs, bunnies, or carrots to create a cheerful Easter decoration. A fun DIY project for kids and beginners to celebrate the Easter festival creatively.

Materials Commonly Used for Easter Garland Crafts

Most Easter garland crafts can be created using affordable supplies already available at home or school. Here are some commonly used materials:

  • Colored craft paper and cardstock
  • Glue sticks and child-safe scissors
  • String, yarn, or ribbon
  • Pom-poms and cotton balls
  • Felt sheets and foam cutouts
  • Plastic eggs or paper egg templates
  • Markers, crayons, and watercolor paints
  • Wooden clips or mini clothespins
  • Glitter, stickers, and sequins for decoration

Using recycled materials like old newspapers, cardboard, or leftover craft supplies also teaches kids about eco-friendly crafting and creative reuse.

Educational Benefits of Easter Craft Activities

Easter garland crafts are not only decorative but also educational. Children learn pattern recognition, color coordination, counting skills, and creative problem-solving while making garlands. Teachers and parents can turn these DIY projects into interactive learning activities by asking children to arrange shapes, spell Easter words, or create themed color patterns.

Craft-based learning activities help improve concentration, patience, and self-expression in young children. Seasonal DIY projects are especially useful for preschool classrooms, homeschooling activities, spring camps, and holiday art sessions.

Why DIY Easter Garlands Are Great for Kids

DIY Easter garlands are a fun way to bring creativity and seasonal decoration together. Kids enjoy making colorful bunny, egg, chick, and flower garlands while improving their fine motor skills, hand-eye coordination, and imagination. These Easter craft ideas also encourage family bonding and help children explore colors, shapes, and patterns through hands-on learning activities.

Homemade Easter garlands are budget-friendly, easy to customize, and perfect for decorating classrooms, bedrooms, windows, mantels, and party spaces. Using simple materials like paper, felt, pom-poms, recycled cardboard, ribbons, and cotton balls makes these crafts suitable for preschoolers, kindergarten kids, and elementary students. Seasonal DIY decorations are also becoming increasingly popular for spring home décor and festive celebrations.

FAQs

Q1. What colors should I use for my Easter garland?

Answer: For a festive Easter garland, you can choose from a variety of colors that reflect the season. Popular choices include pastel shades like yellow, pink, blue, and green, as well as vibrant hues like purple and orange. You can also incorporate traditional Easter colors like white, brown, and black to give your garland a classic look. Choose a combination of colors that will coordinate with your Easter decor and bring a cheerful touch to your home.

Q2. What type of Easter decorations can I use for my garland?

Answer: You can use a variety of Easter decorations to make a beautiful garland. Some popular options include colorful Easter eggs, paper bunnies, and pastel paper flowers. You can also use fabric strips cut into the shapes of carrots, butterflies, or chicks. If you have any extra Easter cards or wrapping paper, you can cut out shapes like Easter eggs, bunnies, and chicks to make your garland even more festive. You can also add ribbons, bells, and other trinkets to make your garland even more unique. Have fun and get creative with your Easter decorations!

Q3. How long should my Easter garland be?

Answer: The length of your Easter garland will depend on where and how you plan to display it. For example, if you are hanging it on a wall, you may want to measure the wall space and adjust the length accordingly. If you plan to hang it over a doorway, you may want to make it long enough to reach from one side of the doorway to the other. If you are using it to decorate a table, you may want to measure the length of the table and add a few extra feet to allow the garland to drape down.

Q4. What type of string should I use to hang my Easter garland?

For hanging Easter garland, you should use a thin, durable string such as twine or cotton rope. Twine is a great option because it is strong, lightweight, and easy to tie knots with. Cotton rope is also a good choice because it is strong and versatile, but it may be too thick for certain decorations. Whichever type of string you choose, make sure it is long enough to hang the garland in your desired spot.

Q5. How do I store my Easter garland?

Answer: When storing your Easter garland, it is important to wrap it up securely to prevent damage. Start by gently folding the garland in half. Wrap it up in a piece of cotton or muslin cloth and secure it with a string or rubber bands. Place the wrapped garland in a box or other container and store it in a cool, dry place away from direct sunlight. Be sure to label the box with the contents and the date it was stored. This will help you keep track of your garland and ensure that it remains in good condition for years to come.

Q6. Can I use artificial flowers for my Easter garland?

Answer: Yes, you can use artificial flowers for your Easter garland. Artificial flowers can be a great way to add color and texture to your Easter decorations. Artificial flowers come in a range of colors and sizes and can be tailored to match any holiday or season. They are also a much more affordable option than fresh flowers, and can be reused again and again.

Q7. What is the best way to display my Easter garland?

Answer: The best way to display your Easter garland is to hang it in a prominent place that is visible to everyone. You can hang it above the doorway, along the stairway banister, or even on the wall. If you have a mantel, you could also hang it there. Be sure to use a secure mounting system that will not damage the walls or the garland. For a more creative look, you could also hang it from the ceiling or wrap it around furniture or other decorative items. Whichever way you choose, make sure it stands out and adds a cheerful touch to your home this Easter.

DIY Easter garlands are a creative and joyful way to celebrate the spring season with kids. From colorful paper eggs to adorable bunny banners, these handmade decorations add a festive touch to homes, classrooms, and Easter parties. Whether you are a parent, teacher, or craft lover, these easy Easter garland ideas provide fun learning experiences and memorable family moments. Try different colors, textures, and themes to create unique Easter decorations your kids will love making and displaying every year.

Explore fun DIY crafts, easy school projects, and creative activities for kids — all in one place! Join our Telegram and follow us on YouTube & Facebook for daily creative ideas.

Reviewed by Yash Sharma

More Easter Crafts from Kids’ Art & Craft

Sponge Painting Ideas for Both Christmas and Easter Celebrations

Discover sponge painting ideas for celebrating both Christmas and Easter. These creative art projects bring together elements of both holidays, offering fun and festive crafts for all ages.

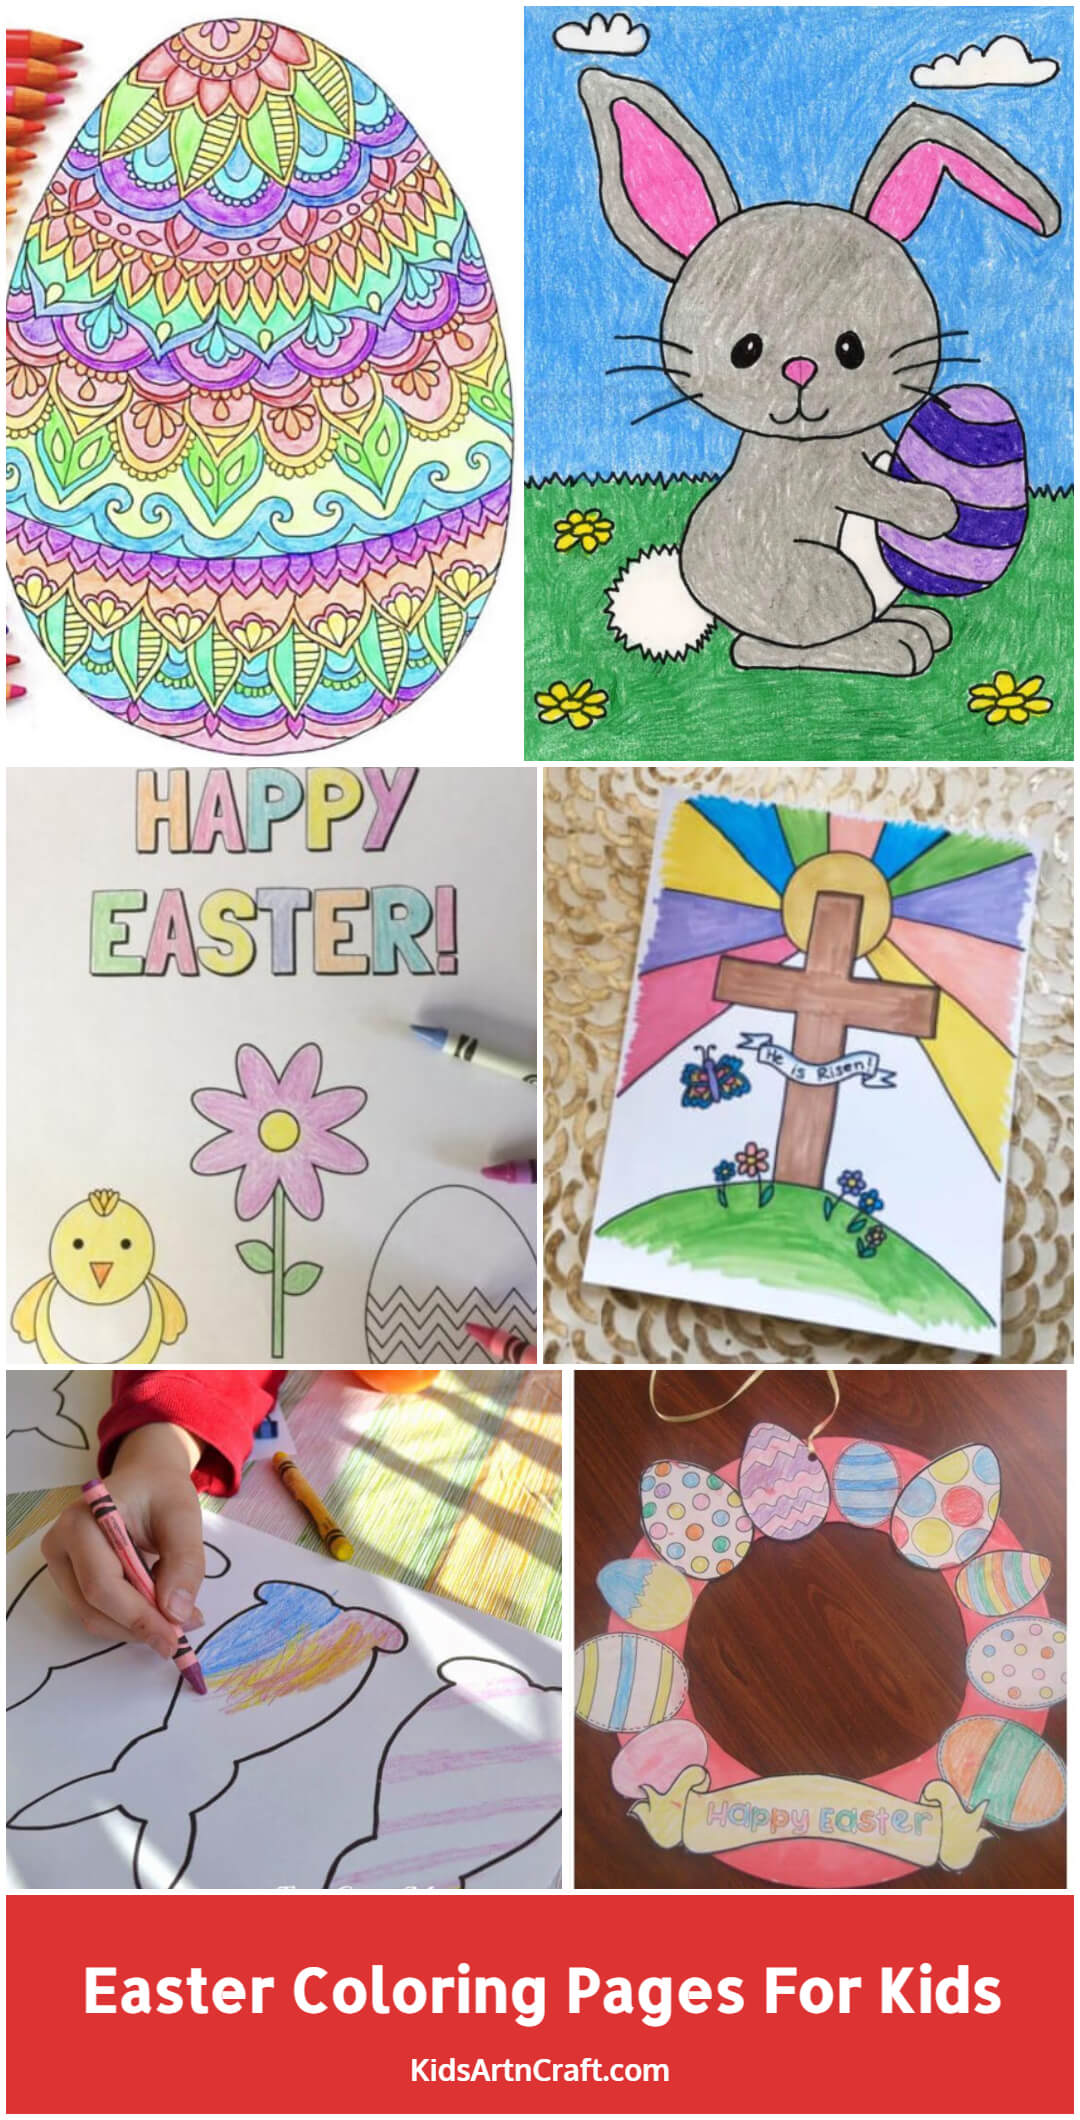
Creative Easter Coloring Pages for Kids

Encourage creativity with these fun Easter coloring pages for kids. From cute bunnies to decorative eggs, these printable designs provide hours of artistic holiday fun.

How to Make Beautiful Easter Wreaths for Your Home

Learn how to make beautiful Easter wreaths for your home with step-by-step instructions. Create eye-catching decorations using flowers, greenery, and Easter ornaments to celebrate the season.

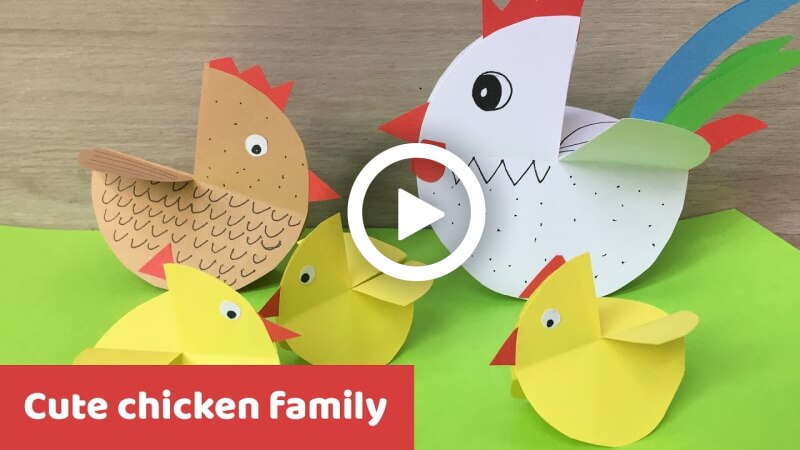
Best Easter Chicken Family Craft Projects for Kids

Discover the best Easter chicken family craft projects for kids. These fun and creative activities allow children to make adorable chicken families, perfect for Easter decorations or gifts.

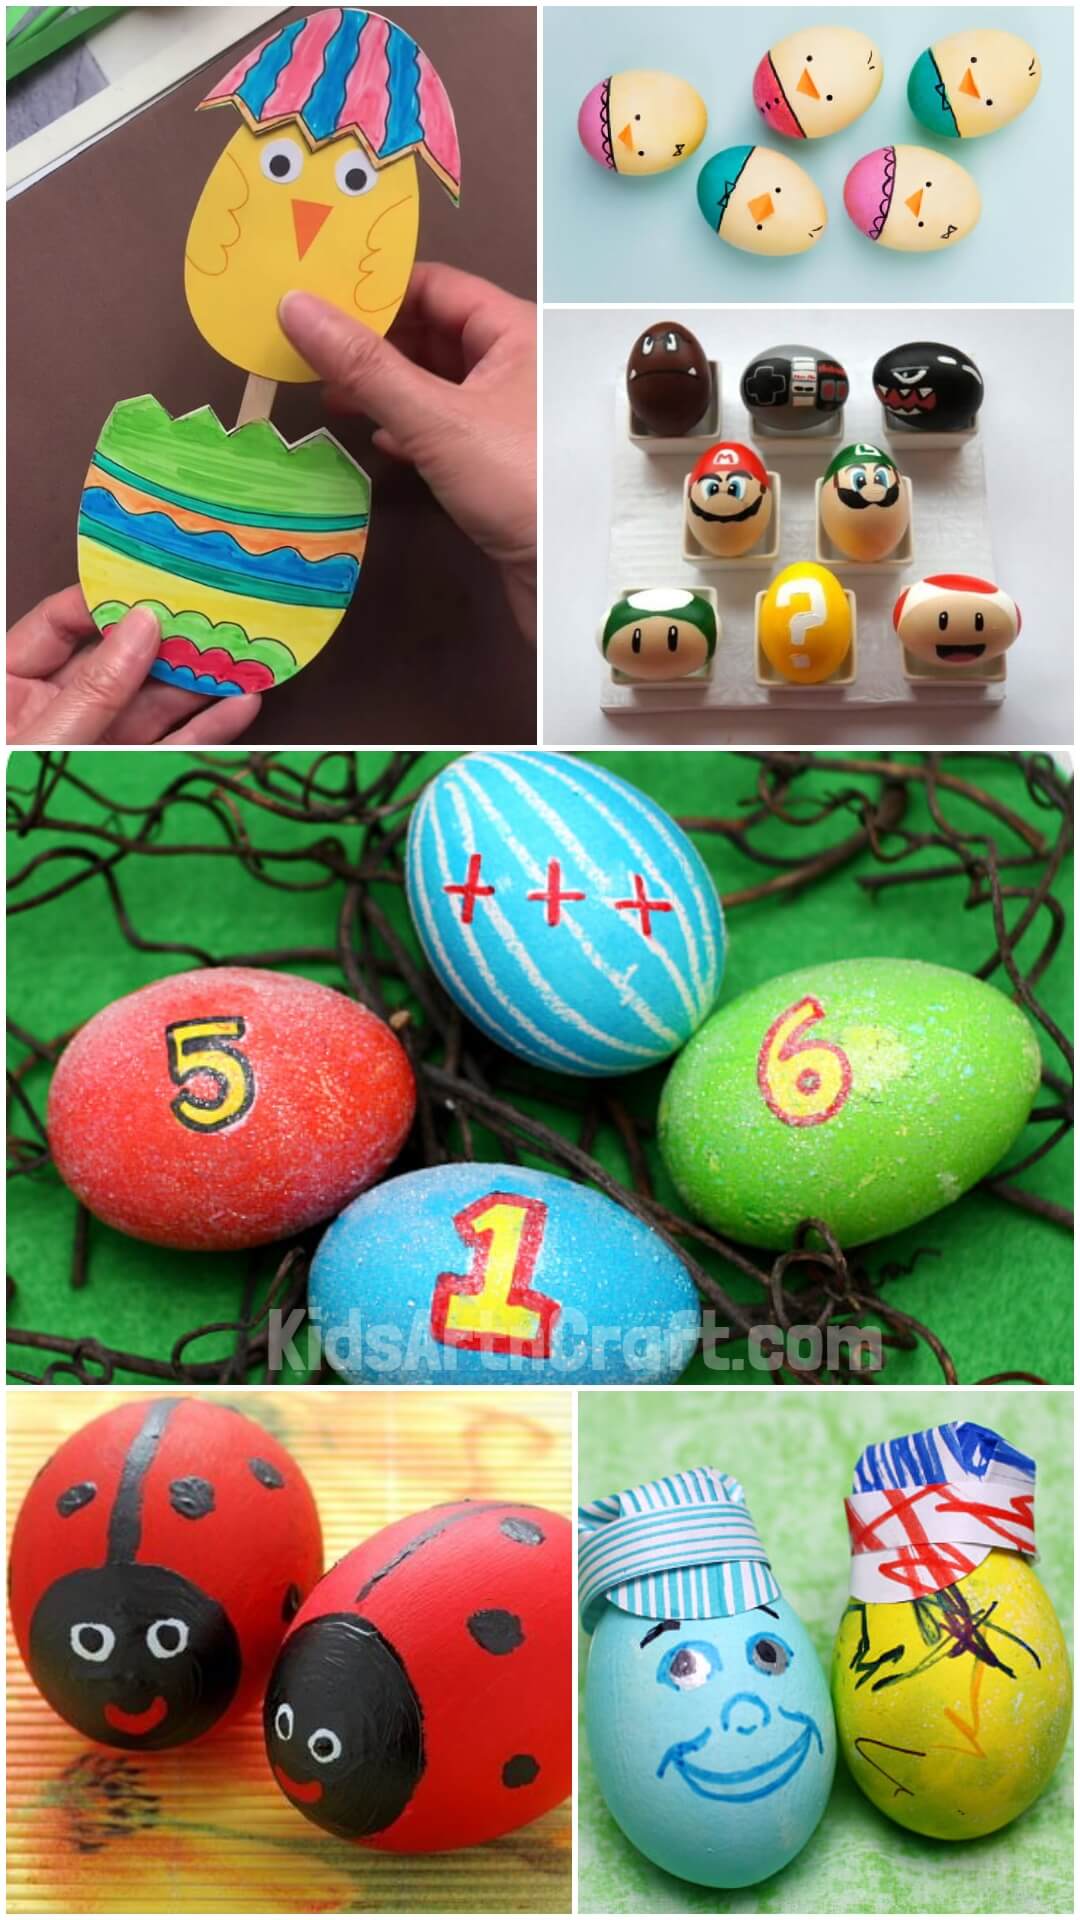
Simple and Fun Character-Themed Easter Egg Ideas

Explore simple and fun character-themed Easter egg ideas. These easy projects are great for kids and allow them to bring their favorite characters into the Easter festivities.

Click to comment

Exit mobile version