


Kids Activities
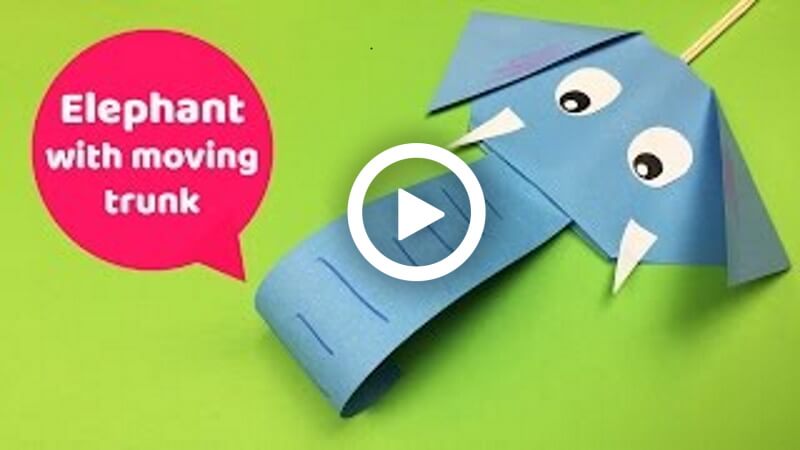
How to Make a Paper Elephant with a Moving Trunk

Let’s bring the elephant into the room! You all might hear this English idiom! Today’s craft is related to this idiom. You all might guess it right! We are going to learn how to make an origami elephant. But it’s going to move!! How? Then go through it. Children love this animal so much for its calm and friendly nature. They love to see elephants at zoos. In Hindu culture, elephants are worshipped as Lord Ganesha. So, we all kind of realize the impact this kind of creature has. So, let’s grab your stationery and bring life to your new friend.
How to Make a Paper Elephant with a Moving Trunk
Materials:
- A big sheet of grey paper.
- A white paper.
- Colour crayons.
- A black marker pen.
- A glue stick.
- A pencil.
- Scissors.
Procedure:
- Take a big, grey coloured paper, cut out two big, same shape triangles and a wide, long paper strip with scissors.
- Take a triangle-shaped paper, fold the top-middle angle tip of it a little by making a converse triangle.
- Grab a glue stick, apply glue on this page, attach the folded tip part, and also glue the whole piece.
- Take a straw and attach it over the folded part and in the middle of the piece.
- Take the wide, long paper strip and attach it partly over the straw and the folded glue part.
- The strip’s tip should be over the Straw.
- Attach them properly with the glue stick.
- It should be the trunk of the elephant.
- Take another triangle-shaped piece of paper, and do the same fold on it.
- Attach the fold within the piece with glue.
- Apply glue all over the piece.
- Attach this piece over the straw added properly.
- The elephant’s base will be ready.
- Fold the two sides of the edges into the piece by making an arrow-like shape.
- The folds should be in front of the piece.
- These folds will be the elephant’s ears.
- Take a white paper, draw two circles of the same size on it.
- Take a black marker pen, draw two cute eyeballs on the circles.
- Cut out the circles with scissors.
- Attach them to the front of the elephant’s face with the glue stick.
- Take the white paper and draw two small elephant teeth, and cut them out with scissors.
- Attach the teeth in the front, bottom sides of the elephant’s face.
- Take some coloured crayons and highlight the elephant.
- Turn over the elephant, take a pen, and roll the long trunk with it from the end.
- Pull out the pen from it.
- Blow the wind from the straw, then you will see a moving elephant trunk.
- Your elephant will be ready!
P.S- You can use different coloured paper as per your help.
Just look at the trunk!! Your friend is ready for a piggyback ride! You should use your own creativity and add something extra to this origami elephant. So, let’s hurry up, make these cute friends, and decorate your room and stuff.
FAQs on How to Make a Paper Elephant with a Moving Trunk
Q1. What materials do I need to make a paper elephant with a moving trunk?
Answer: You will need 2 sheets of construction paper, scissors, glue, a ruler, a pen or marker, and a small piece of stiff cardboard.
Q2. How do I fold the paper to make the elephant?
Answer: Fold one sheet of the paper in half lengthwise. Make sure the fold is as straight as possible. Fold the other sheet in half widthwise.
Q3. How do I make the trunk?
Answer: Draw a curved line on the fold of the paper that is folded lengthwise. Cut along the line. This will be the trunk of the elephant.
Q4. How do I attach the trunk to the body?
Answer: Cut a small piece of stiff cardboard and glue it to the trunk. This will create a hinge so that the trunk can move.
Q5. How do I make the legs?
Answer: Cut four strips of construction paper. Make sure they are all the same length. Fold each strip in half and glue the ends together to make a loop.
Q6. How do I attach the legs to the body?
Answer: Glue the loops to the underside of the elephant body. Make sure the legs are evenly spaced.
Q7. How do I make the ears?
Answer: Cut two large oval shapes out of the folded paper. Make sure the oval shapes are even in size.
Q8. How do I attach the ears to the head?
Answer: Glue the ears to the top of the head. Make sure the ears are even and symmetrical.
Q9. How do I make the eyes?
Answer: Cut two small circles out of construction paper. Glue the circles to the head of the elephant.
10. How do I finish the elephant?
Add any extra details, such as a tail or tusks, to make the elephant look more realistic.
This paper elephant with a moving trunk craft is a fun and educational DIY activity that children will love making and playing with. It combines creativity, learning, and hands-on interaction in one exciting paper craft project. Whether used at home, in classrooms, or during holiday craft sessions, this adorable elephant craft helps kids develop important skills while enjoying imaginative play.
Turn playtime into learning time with creative crafts and fun activities for kids! Connect with us on Telegram, YouTube & Facebook
Reviewed By Jatin
Read More:
- Simple Appealing Paper Craft Ideas For Next DIY Greeting Card
- 15 Easy Tissue Paper Crafts For Kids
- Paper Crafts for Kids to Make Using Daily Materials
- Learn A Magic Trick with Paper Craft
- How to make a Paper Butterfly – DIY Folding Butterfly – Paper Craft


