


DIY and Crafts
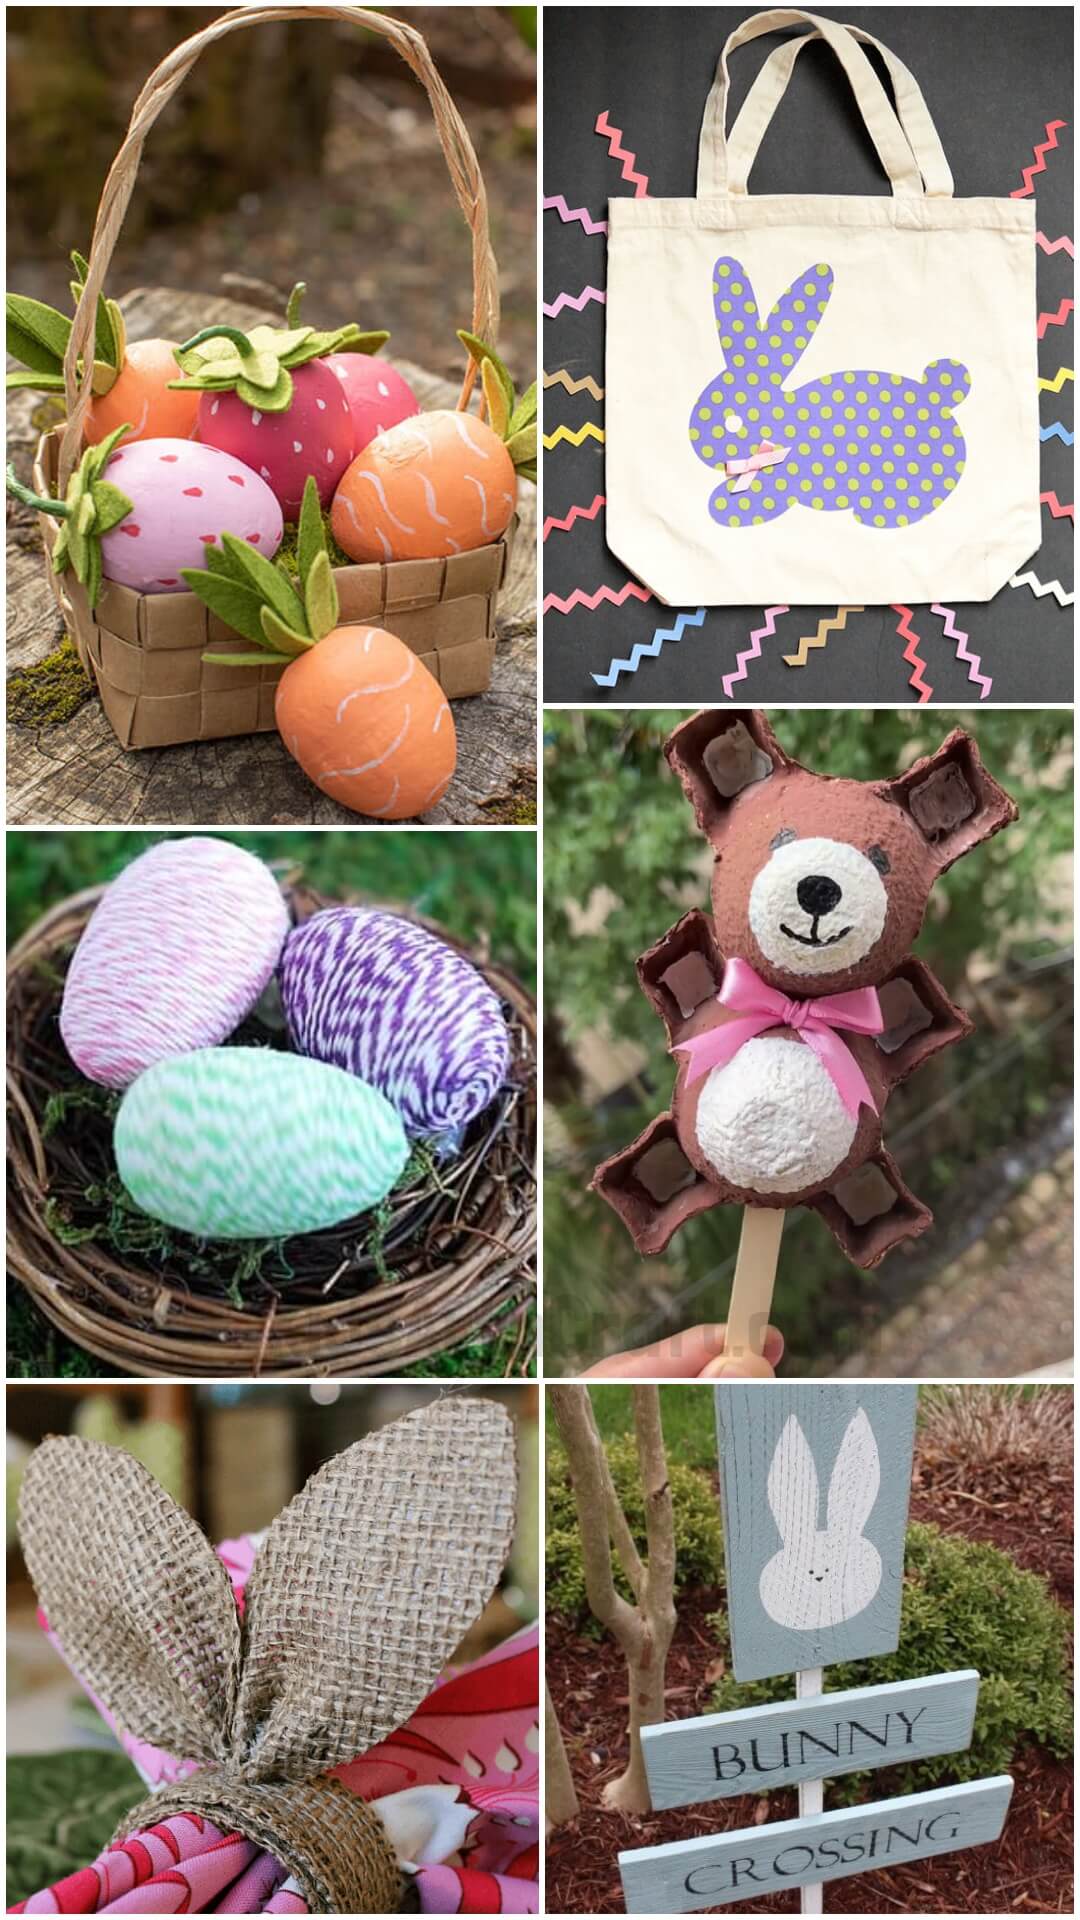
Easter Crafts for Adults

Looking for arts and crafts ideas for adults to do this Easter? Look no further! Here are some unique and crafty ideas for adults to make this Easter, from Easter egg decorating to creating homemade Easter cards. Get creative and get crafting this Easter!
Easter is a Christian festive day or a cultural holiday. It is followed by a 40-day fast, penance, and praying. Easter holds the following significance: it commemorates the resurrection of Jesus Christ after his crucifixion. The resurrection took place 3 days after his burial. People enthusiastically participate in the festivities following the day. To make the day grander, here are some of the easiest and best-handpicked ideas you can try this time on the eve of Easter.
Read More: DIY: Easy Easter Crafts Designs & Ideas for Kids
Easter Crafts for Adults
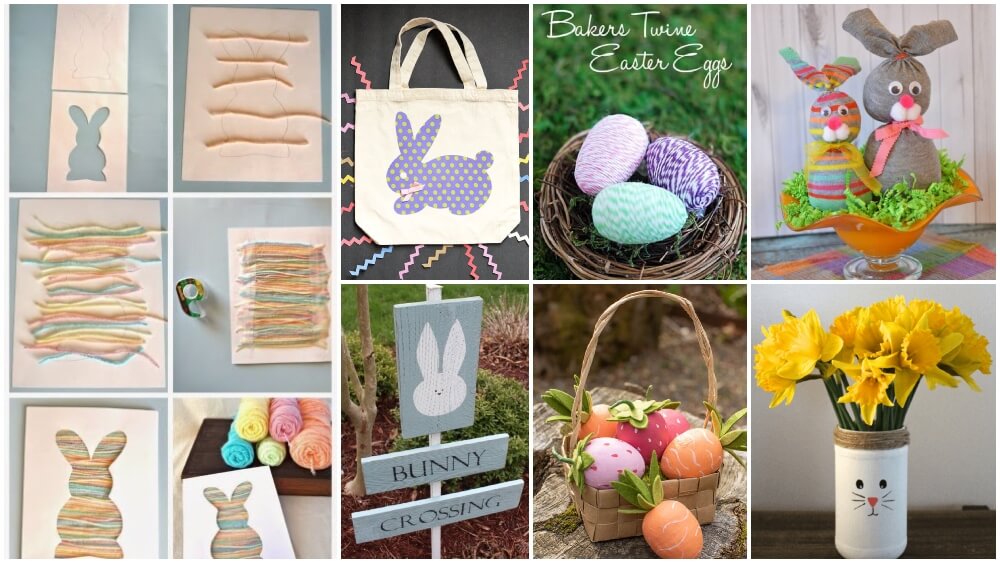
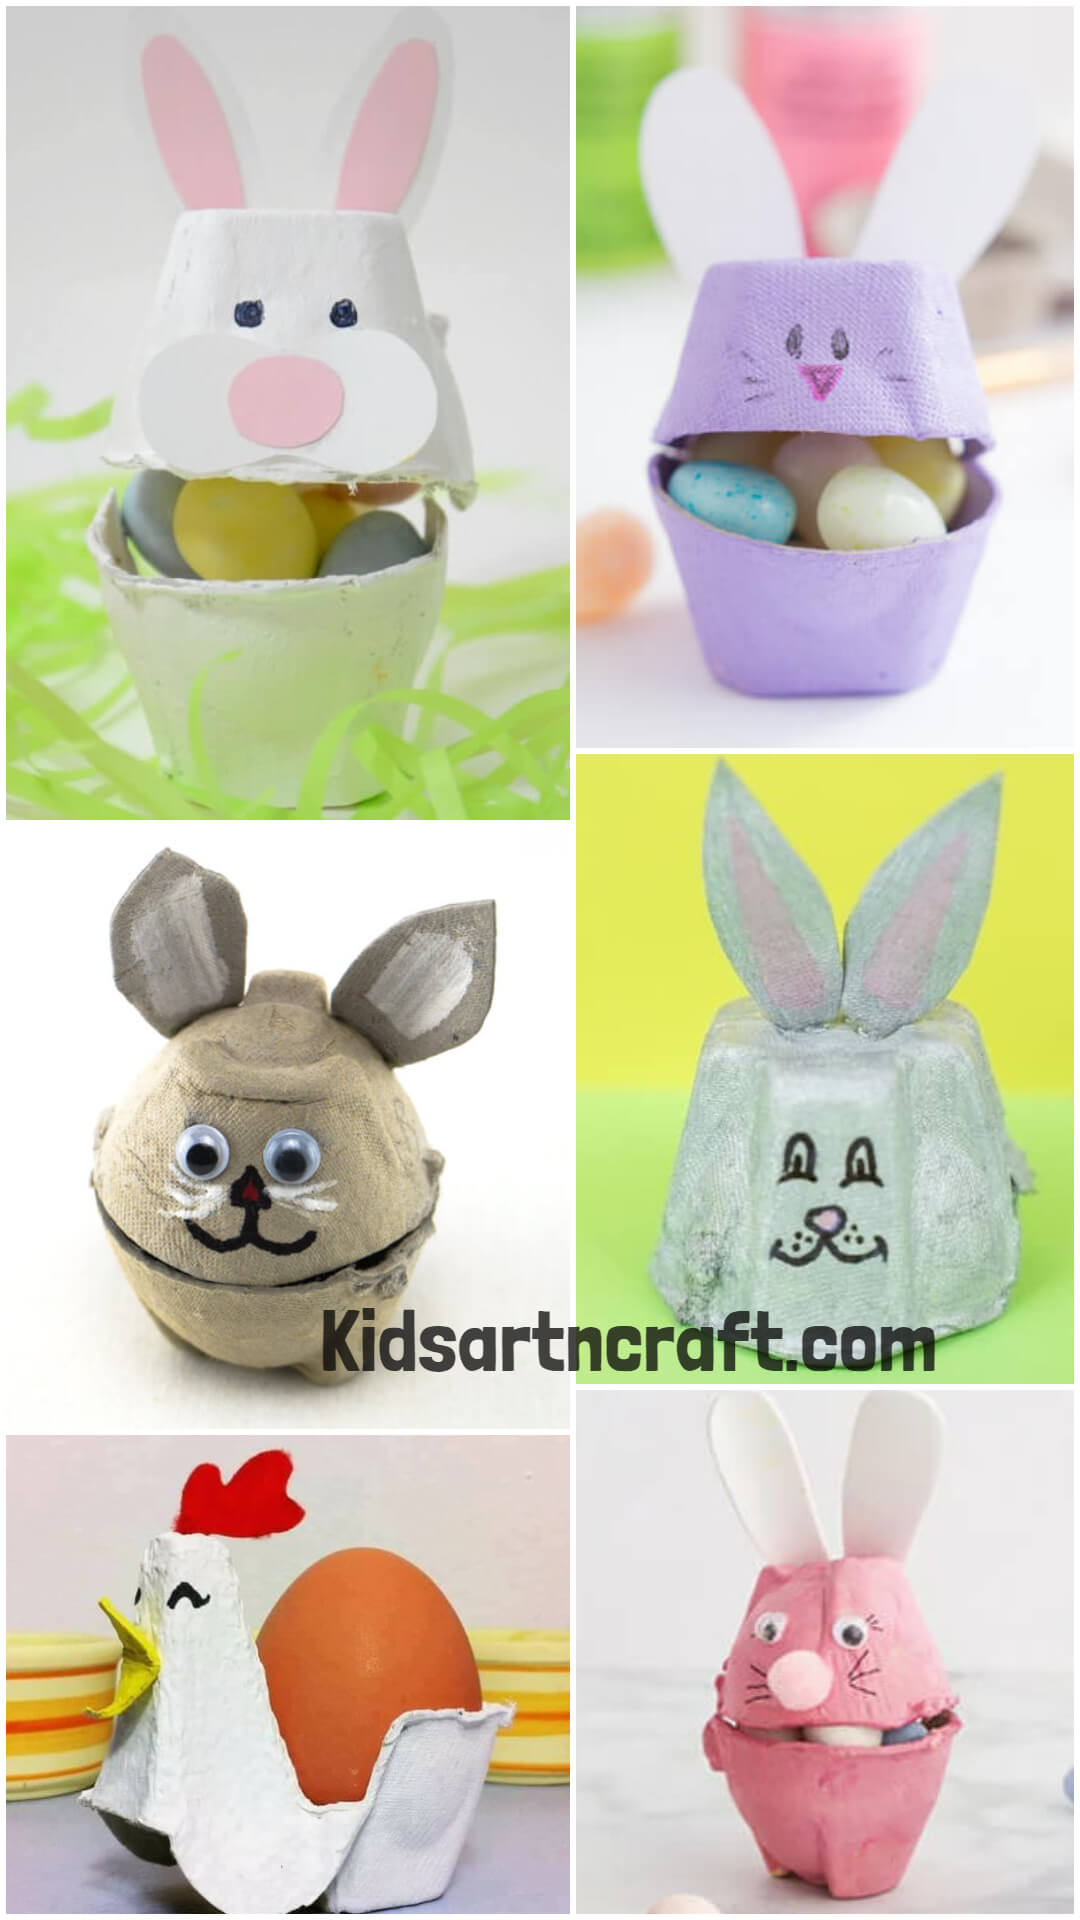
Bunny Artwork from an Egg Carton, a Little Bow, Paint & a Marker
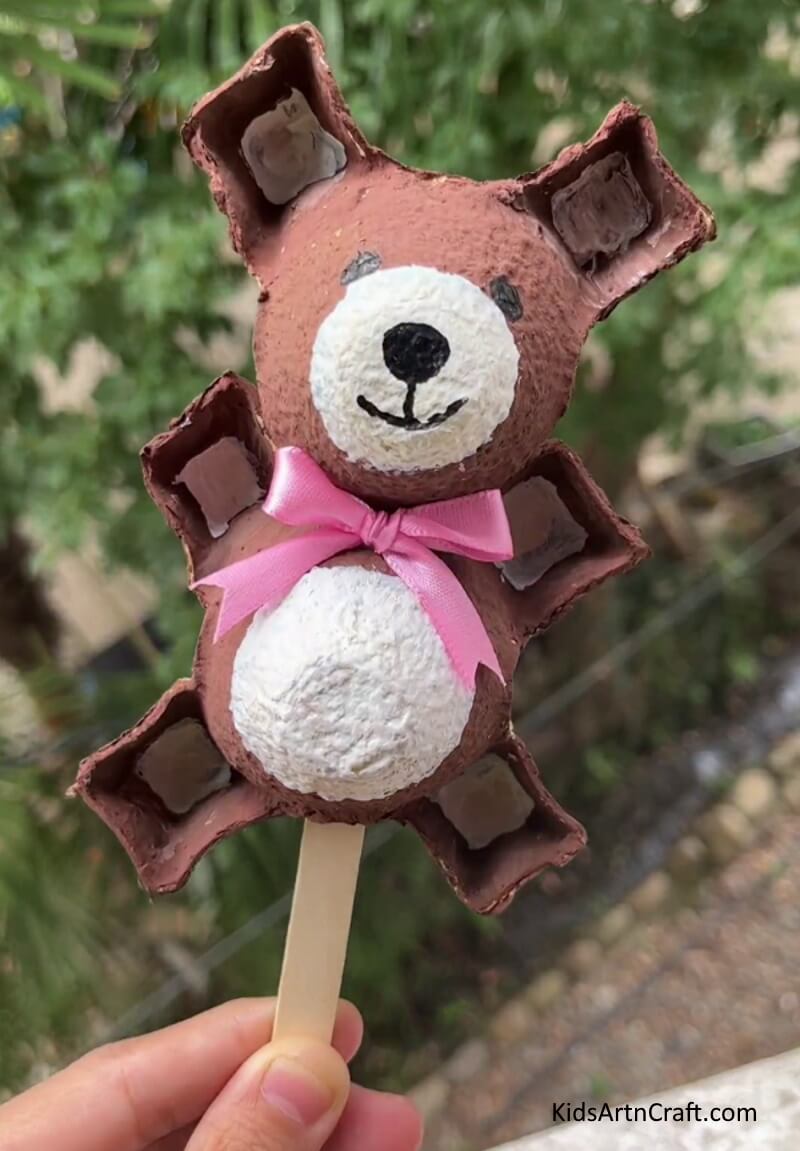
Image Source/Tutorial: Kids Art & Craft
This fun and creative DIY project is perfect for any age! Using an empty egg carton, some paint, a marker, and a little bow, you can create some beautiful bunny artwork. It’s an easy and affordable way to bring a little color into your home.
# An Art Of Buttons
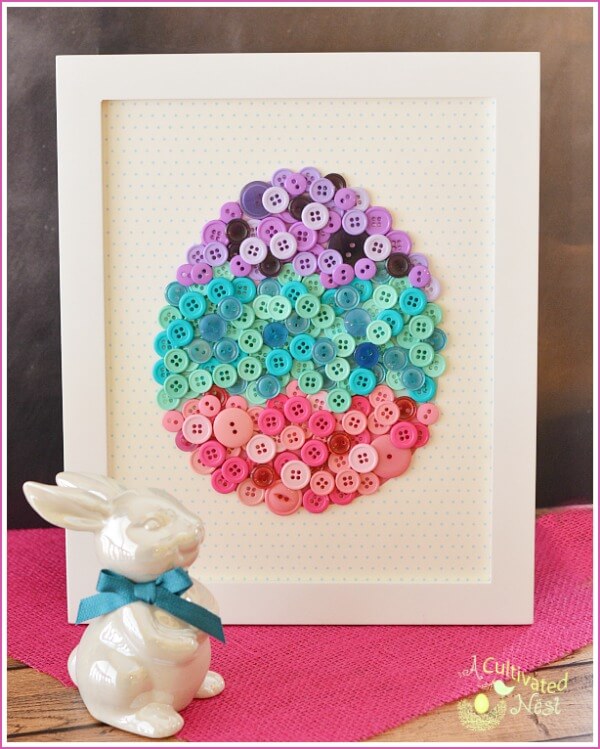
Image Source/Tutorial: A Cultivated Nest
Materials required:
- frame
- Handmade sheet
- Buttons
- Fevicol
Process:
- Take the handmade sheet and rough out the shape of an egg.
- Separate the buttons according to their colors.
- Start pasting them inside the shape, clamped to one another.
- After the layer is complete, start another layer to fill the voids.
- Fix the sheet inside the frame.
# Easter Bunny Vases
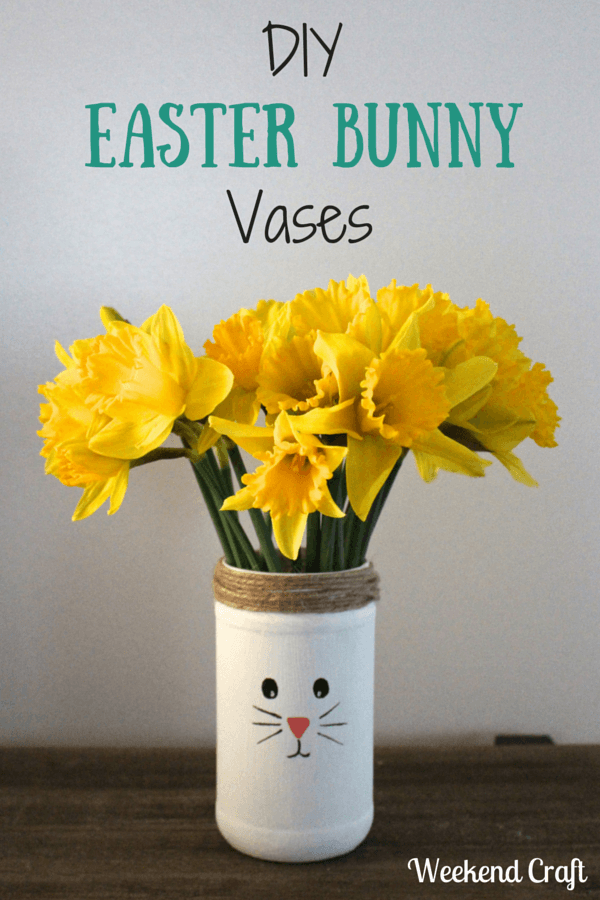
Materials required:
- Plastic bottle
- Scissors
- Acrylic paint
- Jute string
- Sketch pens
- Artificial flowers
Process:
- Start by cutting the bottle in 3/4th proportion.
- Paint white acrylic on it.
- Draw the face of a bunny on the surface using sketch pens.
- Pour some sand to provide firmness to your vase.
- Put a nice bunch of plastic flowers to finish.
# Bath Bomb Bunnies
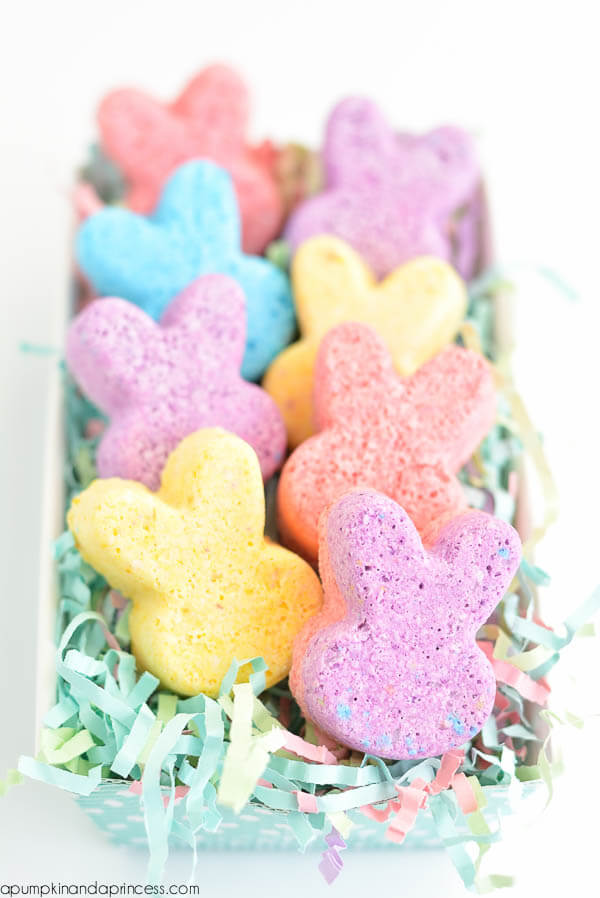
Image Source/Tutorial: A Pumpkin and a Prince
Materials required:
- Baking soda
- Epsom salt
- Liquid bath bomb dye
- Bunny molds
Process:
- Mix baking soda and Epsom salt in definite proportion.
- Divide the mixture equally into 9-10 parts.
- Put a few drops of dyes of different colors. Mix up evenly.
- Take the elastic bunny molds and pour the mixtures into them.
- Let them settle.
- Remove the bombs after they’re solidified.
- Put them in a container and use them for feasibility.
# Spring Sugar Scrub
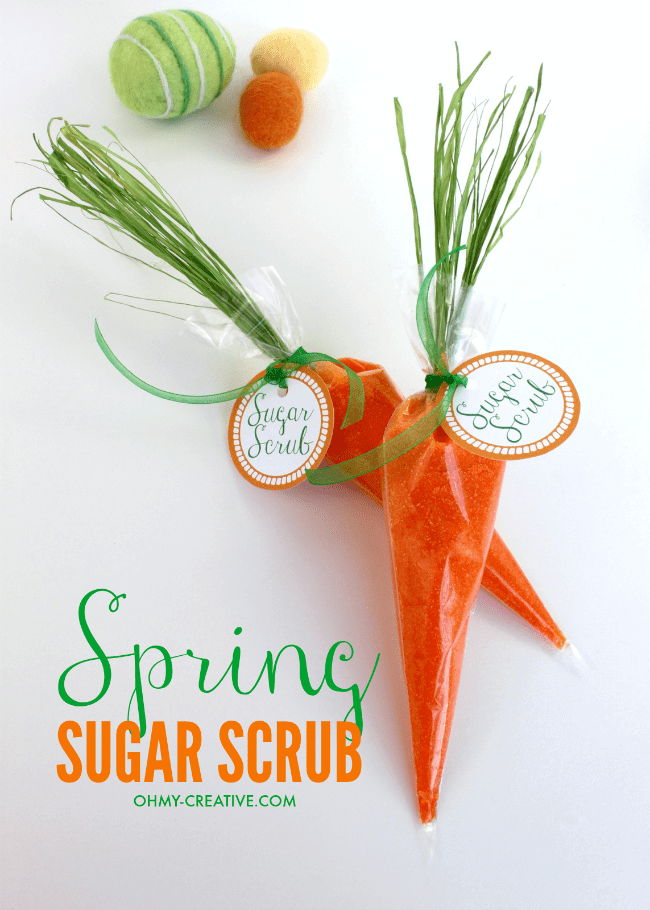
Image Source/Tutorial: by Oh My! Creative
Materials required:
- Plastic bags
- White ribbon
- Sugar
- Coconut oil
- Orange additive color
- Essential oils
- Scissors
Process:
- Take some coconut oil in a bowl.
- Add the required amount of sugar to it.
- Add the food coloring. Mix the ingredients uniformly and add color dropwise until you get the required color.
- Now add the essential oils and mix.
- Make cones out of plastic bags and tape them.
- Fill in the mixture. Tie the ends using a ribbon.
# Easter Eggs
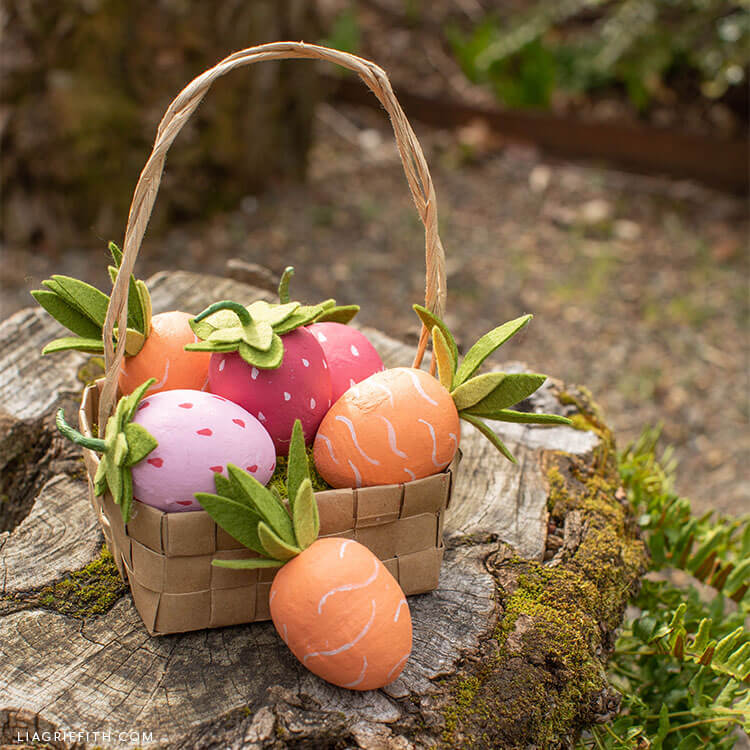
Image Source/Tutorial: Lia Griffith
Materials required:
- Eggs
- Acrylic paint
- Artificial leaves
- Basket
Process:
- Paint the eggs in different colors.
- Let them dry. Now design them using chalks of a different colors.
- Paste the artificial leaves on top.
- Stuff them up in a basket.
Read More: Creative Egg Carton Crafts For Kids
# Bakers Twine Easter Eggs
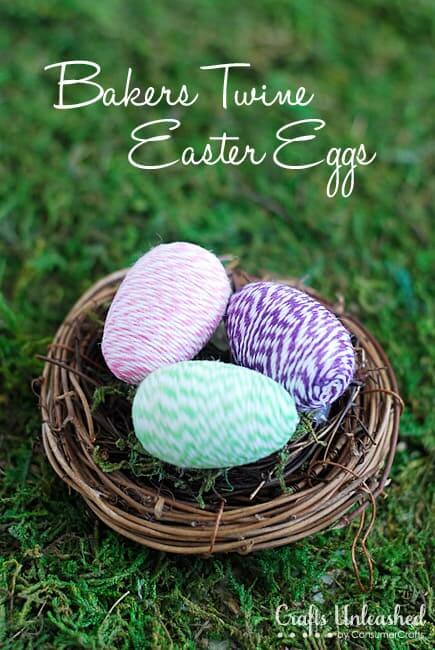
Materials required:
- Easter egg
- Baker’s twine
- Hot glue
Process:
- Pick an Easter egg and put some hot glue in the corner.
- Start wrapping the baker’s twine around the egg.
- Do the same with other eggs, covering them in different colors.
# Bunny Silhoutte Yarn

Image Source/Tutorial: Katie’s Crochet Goodies
Materials required:
- Colorful yarns
- Two pieces of paper
Process:
- Draw the outline of a bunny on both of the sheets.
- Cut one of them out.
- Now start pasting yarns along with the drawing. Paste randomly all the colors.
- After the drawing is fully covered, tape them up.
- Place the cutout sheet on the previous one. You are done with the yarn bunny silhouette.
# DIY Sock Bunny
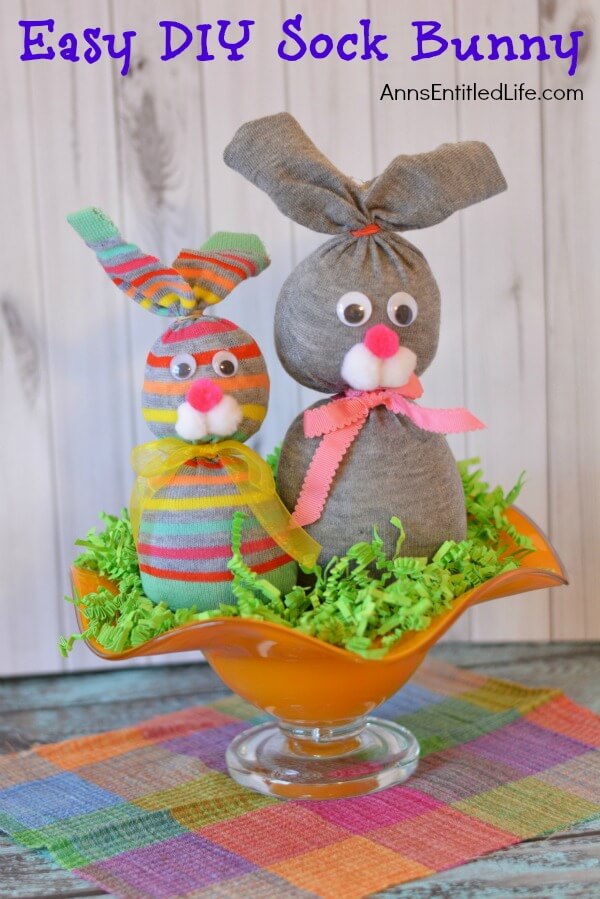
Image Source/Tutorial: Ann’s Entitled Life
Materials required:
- Colorful socks
- Plastic Shopping Bags
- Rubber Bands
- Satin ribbons
- White and pink colored pom-poms
- Googly eyes
Process:
- Make two balls each out of plastic bag stuffing.
- Push the larger ones deep inside the socks. Tie up with a rubber band.
- On it push the smaller ball and tie it the same way.
- Make the bunny’s face and whiskers using pom-poms, ribbons, and googly eyes.
# Bunny Banner
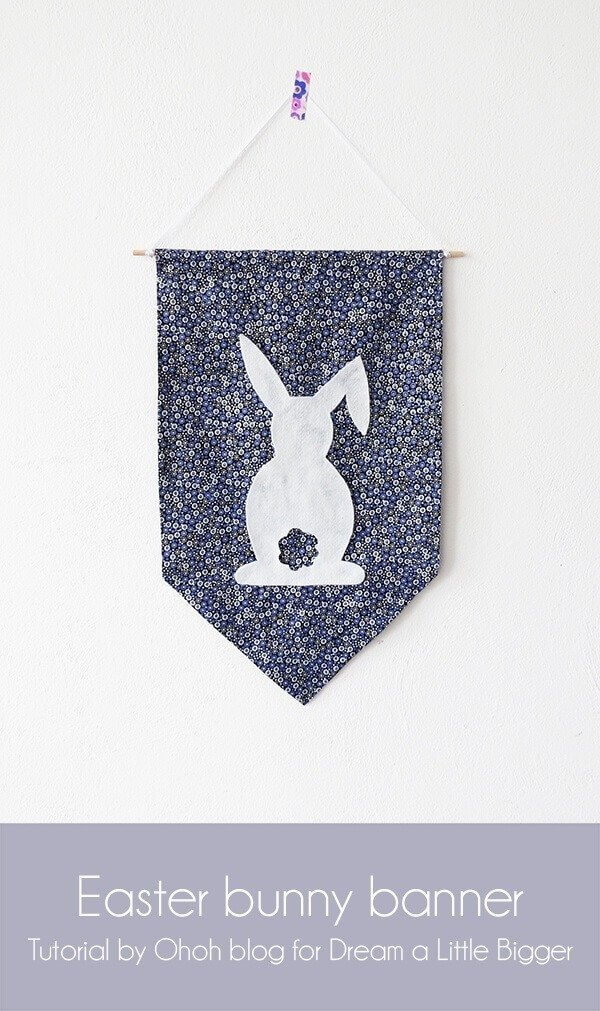
Image Source/Tutorial: Dream a Little Bigger
Materials required:
-
- A designer fabric
- Felt
- Scissors
- Ribbon
- Fabric glue
- Iron
Process:
- Fold the designer fabric in the shape of a banner. Iron the folds to yield creases.
- Cut the shape of a bunny from the felt. Paste it on the fabric using glue.
- Hand it over a thin stick and put across it a string. Paste it on the wall using a tape.
Read More: 30+ DIY Bunny Craft Ideas & Video Tutorials
# Burlap Bunny Ear
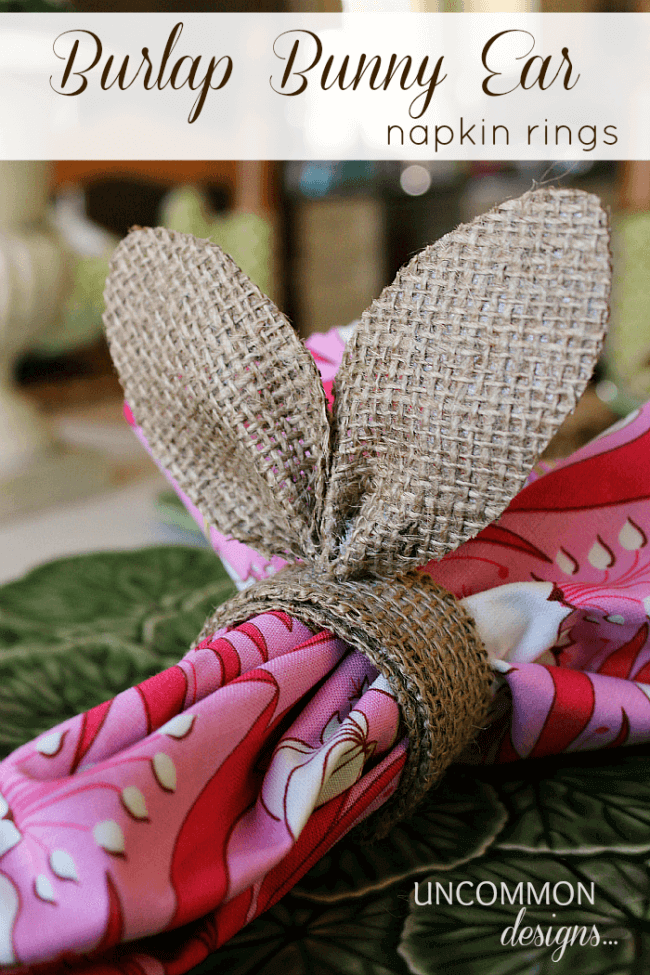
Image Source/Tutorial: Uncommon Designs
Materials required:
- Burlap
- Toilet paper roll
- Glue
- Scissors
Process:
- Fold the burlap in half and iron it, so that it doesn’t retain easily.
- Cut one part of the roll and cut it open.
- Cover it with burlap.
- Now cut two ear shapes from the original burlap portion and fold them slightly from the bottom to give a 3D version.
- Paste them on the round part using hot glue. Your burlap bunny ears are ready to flaunt!
Read More: Paper Bunny Easter Craft For Kids – Step by Step Tutorial
# Bunny Silverware Pocket
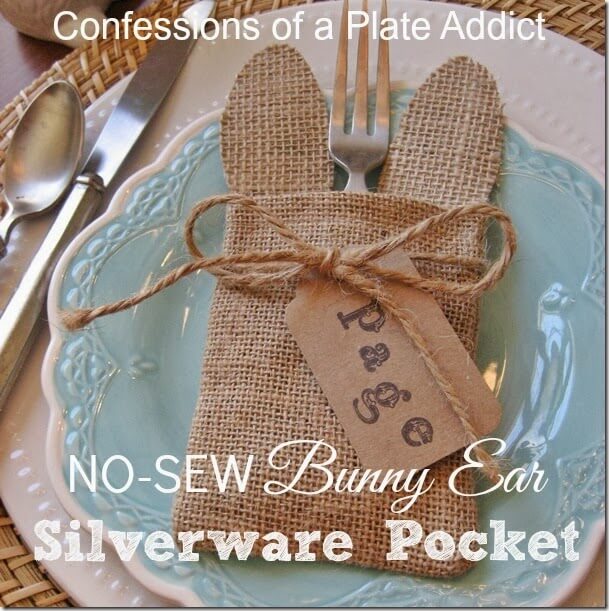
Image Source/Tutorial: Confessions of a Plate Addict
Materials required:
- Burlap
- Jute strings
- Scissors
- Hot glue
Process:
- Fold the burlap sideways into half and fix the ends together.
- Similarly, paste the lower portion of the folded burlap properly.
- After the glue is dried, pull the pocket inside out.
- Paste two bunny ears at the two ends from inside.
- Slip a piece of silverware or two inside the pocket and wrap around a jute string, making a bow.
- Put some random captions like ‘Good Morning’, ‘Happy Easter’ etc., and put it on the top.
# Burlap Tablerunner
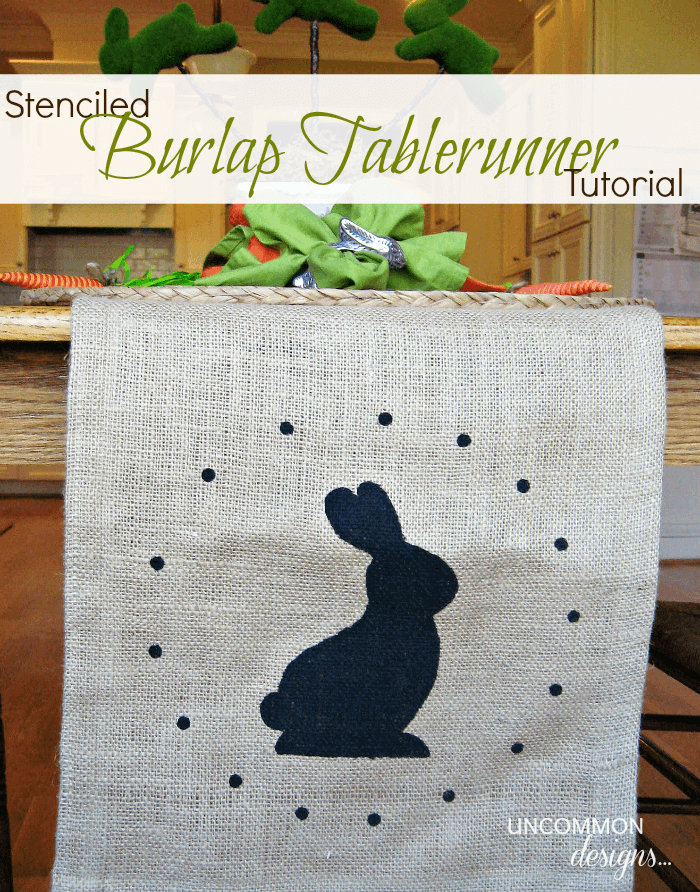
Image Source/Tutorial: Uncommon Designs
Materials required:
- A long and broad burlap, with its width size of your table.
- A thick sheet of paper
- Paint
- Pencil
- Scissors
Process:
- Fold inwards the ends of the burlap to prevent uneven border.
- Draw the shape of a bunny (or any design you want) on the thick sheet of paper. Get its cutout.
- Put the cutout aside and place the rest of the sheet on the burlap.
- Use the sheet as a stencil and start painting on the burlap. Make sure you don’t move the stencil if you aim for a perfect design.
- Remove the stencil and let the paint dry. Lay the runner on the table and let it run down it.
# Bunny Bags

Image Source/Tutorial: Craftaholics Anonymous
Materials required:
- Canvas bag
- Designer fabrics
- Scissors
- Fabric glue
- Embellishments
Process:
- Extract the cutout of a bunny from the fabric.
- Paste it in the center of one of the surfaces of the canvas bag. Avoid air bubbles.
- Complete the look using small embellishments like ribbons, sequins, googly eyes, etc.
# Burlap Bunny Pillows

Image Source/Tutorial: On Sutton Place
Materials required:
- Burlap
- Burlap ropes
- Hot glue
- Scissors
- Bunny templates
- Pillow cover(plain)
Process:
- From the bunny templates, cut out two bunny shapes from the burlap.
- Spread the pillow cover on a flat even surface and paste the cutouts, facing each other.
- Border the cover using a braided burlap rope.
- Iron the bunnies such that they fix firmly on their surface.
- Use embellishments in the end for the bunny’s tails.
Read More: How to Draw a Bunny for Kids – Easy Step by Step Tutorial
# Bunny Door Hanger
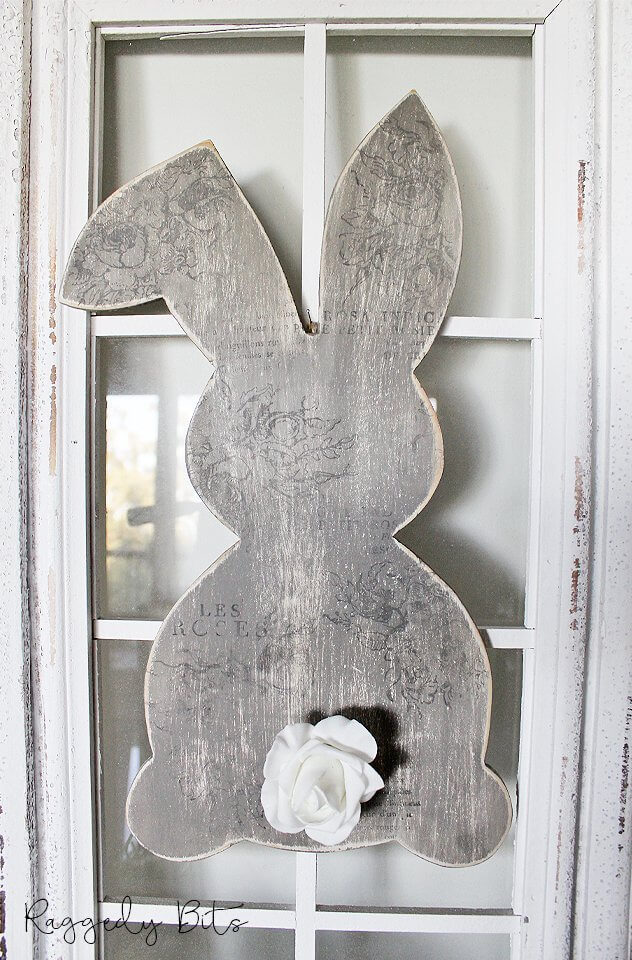
Image Source/Tutorial: Raggedy Bits
Materials required:
- Plywood
- Drilling machine
- Jigsaw
- Stamping tool
- Inks
- Pencil
- Paint
Process:
- Using a pencil draw the outline of a bunny on plywood.
- Now, drill holes at the corners and junctions of the drawing. This will enable the jigsaw to penetrate.
- Start cutting the plywood using the jigsaw.
- Once completed, paint the wood in the desired color.
- Fill ink inside the stamping tool and stamp the designs on the surface of the ply. Let it dry.
- Hang the bunny ply outside the door of your house.
# Bunny Crossings
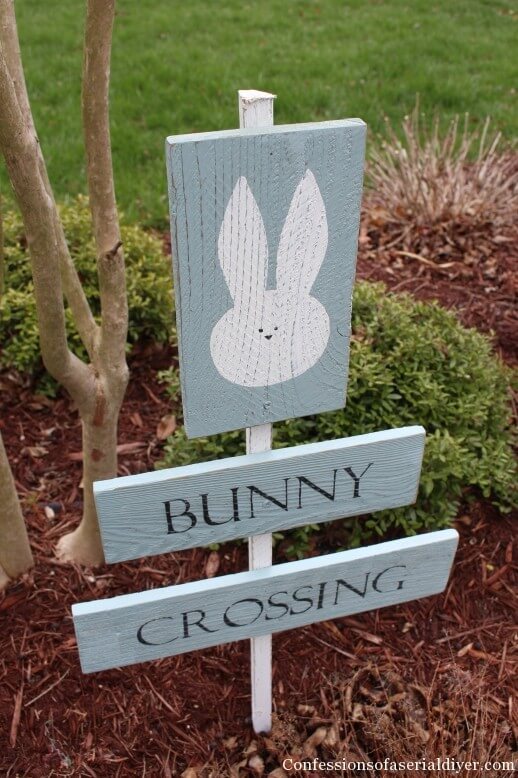
Image Source/Tutorial: Confessions of a Serial DIYer
Materials required:
- Old fencings
- Wood paint
- Inverted printed words
- Pencil
- Black paint
Process:
- Take two fences and paint them with the desired color.
- After the paint is dried up, place the printed word upside down and engrave the words on the fence by rubbing the pencil into the shapes.
- Once you start seeing the pencil marks, deepen them by painting them black. Install them in the required place.
# Burlap Easter Bunnies
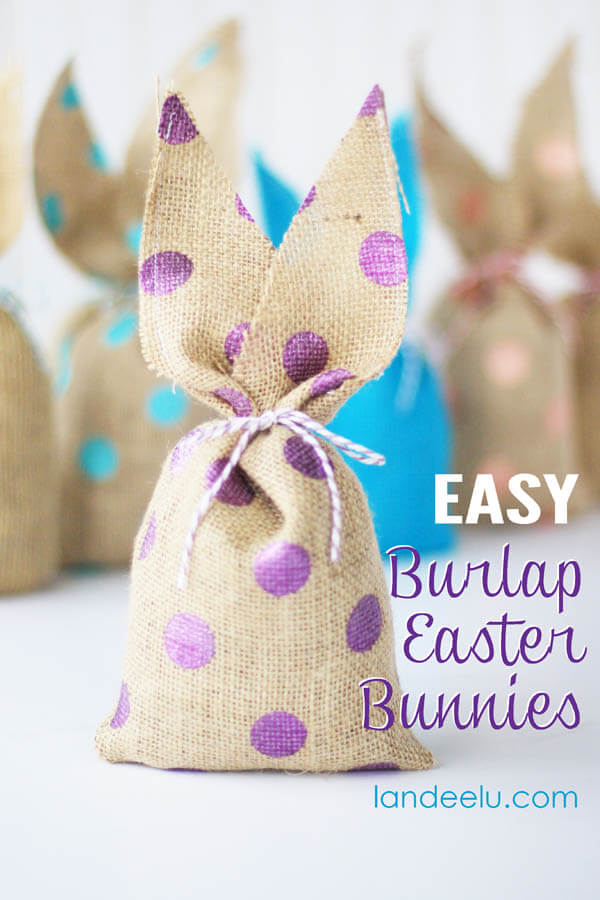
Image Source/Tutorial: Landeelu
Materials required:
- Burlap
- Stencil
- Paint
- String
- Scissors
- Hot glue
Process:
- Fold the burlap in half and fix the two ends using hot glue.
- Similarly fix the bottom as well and let the glue dry. Pull the burlap inside out.
- Use stencils to paint polka dots (or whatever designs you want) all over the surface.
- Cut two bunny ears from the remaining burlap and paste them on top of the little sack.
- Stuff it up with items and close it using a string. Your bunny burlap sacks are ready!
FAQs
1. What types of Easter crafts can adults make?
Answer: Adults can make a variety of Easter crafts, including wreaths, egg decorating, bunny-themed decorations, and paper-mâché projects.
2. What supplies are needed for Easter crafts?
Answer: Common supplies needed for Easter crafts include Easter eggs, foam, felt, hot glue, paint, construction paper, ribbon, glue dots, and scissors.
3. What is the best way to decorate Easter eggs?
Answer: Decorating Easter eggs can be done in a variety of ways, including gluing on sequins, using a wax crayon to create a resist technique, or using a combination of food coloring and shaving cream.
4. How can I create an Easter wreath?
Answer: To create an Easter wreath, start by selecting and purchasing a wreath form. Then, choose decorations and ribbon to decorate the wreath. Secure the decorations with hot glue and use wire to attach the ribbon.
5. What are some easy Easter decorations to make?
Answer: Easy Easter decorations to make include paper garlands, bunny ear headbands, paper flower bouquets, and egg shell succulents.
6. What type of paper should I use to make paper mâché Easter decorations?
Answer: Tissue paper is ideal for paper mâché Easter decorations, as it is lightweight and will take on the shape of the form.
7. How can I make a bunny cake for Easter?
Answer: To make a bunny cake for Easter, start by baking a round cake. Then, cover the cake in white frosting and place two jellybeans or chocolate chips to create the eyes. Cut a marshmallow in half to make the ears and use a black licorice string to create the whiskers.
8. Can I make Easter candy with my children?
Answer: Yes, making Easter candy with children is a fun and easy activity. Popular Easter candy to make with children include chocolate covered pretzels, Easter bark, and peanut butter eggs.
9. What types of Easter cookies can adults make?
Answer: Adults can make a variety of Easter cookies, including decorated sugar cookies, shortbread cookies, and bunny-shaped cookies.
10. What supplies do I need to make Easter cookies?
Answer: Common supplies needed to make Easter cookies include a rolling pin, cookie cutters, icing, food coloring, and sprinkles.
More Easter Craft Ideas from Kids Art & Craft
DIY Easter Paper Crafts for Kids: Easy Tutorials
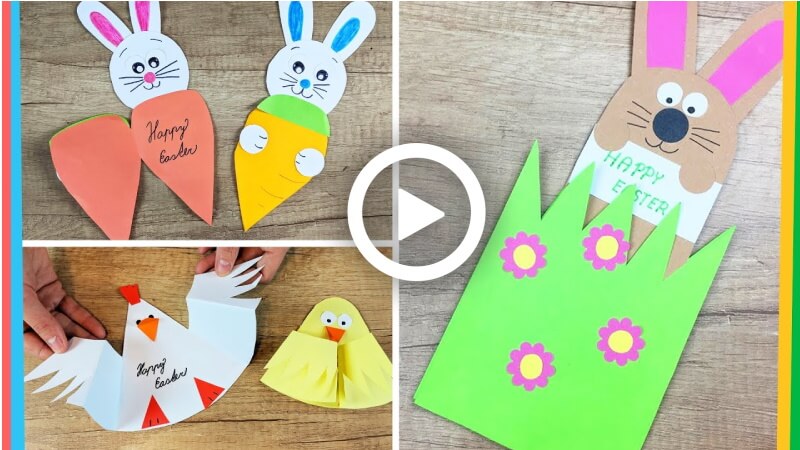
Explore easy tutorials for DIY Easter paper crafts for kids. These simple guides help children create fun paper projects like Easter bunnies, eggs, and chicks using colorful paper, making holiday crafting enjoyable and accessible.
Simple Easter Paper Wreath Craft Ideas for Kids
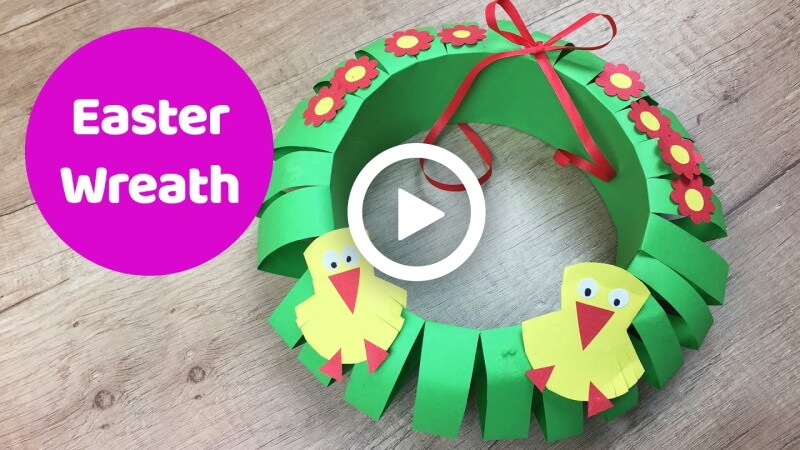
Create simple Easter paper wreaths with these easy craft ideas for kids. Using colorful paper, children can make beautiful wreaths featuring bunnies, eggs, or flowers, perfect for celebrating the holiday with creativity.
Creative DIY Easter Costume Ideas for Kids

Explore creative DIY Easter costume ideas for kids. From bunny ears to chick outfits, these fun and imaginative costume crafts help children dress up for Easter with handmade creations using simple materials.
Beginner-Friendly Easter Craft Video Tutorials
Explore beginner-friendly Easter craft video tutorials that guide you through simple, fun projects. Perfect for new crafters, these videos offer easy-to-follow steps to create colorful and festive Easter crafts.
DIY Easter Egg Carton Craft Ideas
Explore DIY Easter egg carton craft ideas that are easy and fun. Use egg cartons to make cute Easter-themed crafts, from colorful eggs to charming animal figures, perfect for kids and adults alike.


